Category Archives: active learning

Scrap Workshop:What do children learn from playing with boxes and scrap materials?

Scrap Workshop cover

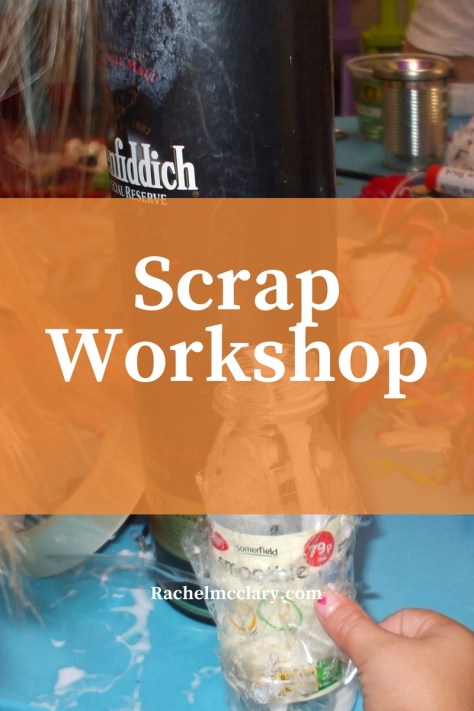
One of my favourite workshops to lead at a local play centre was scrap workshop.

I liked it because it was suitable for all ages, it was a natural extension to my heuristic play workshops with toddlers and it gave children the freedom to develop both creativity and skills.

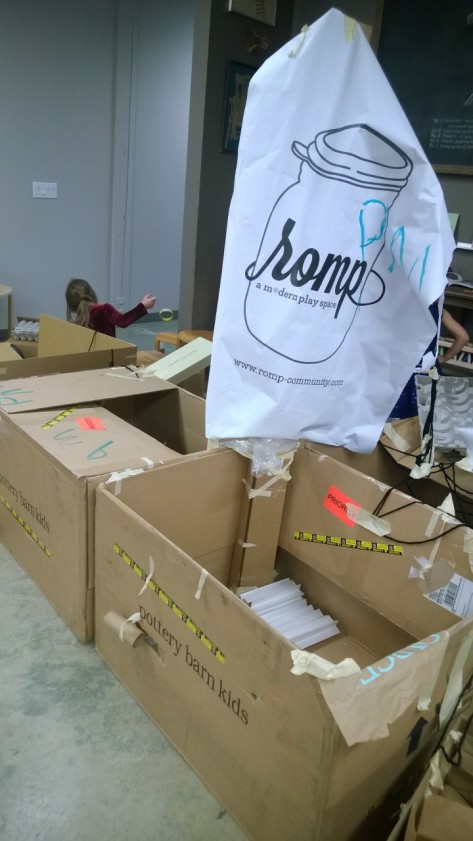
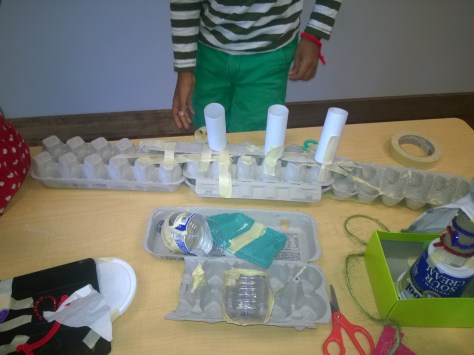
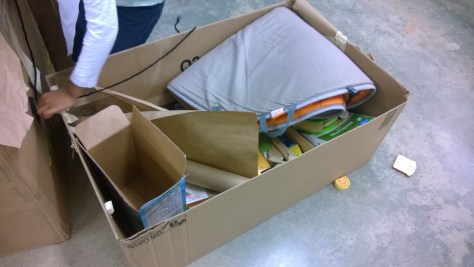
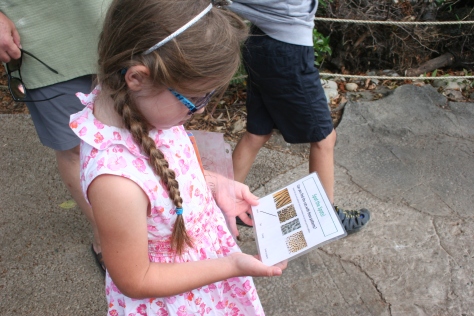
We collected all kinds of scrap materials, large and small and displayed them in separate containers.

Examples of materials

  • boxes
  • tubes
  • plastic containers
  • fabric
  • pipe cleaners
  • beads
  • shells
  • pinecones
  • bottle tops
  • straws
  • netting

Sometimes we would give the children a project

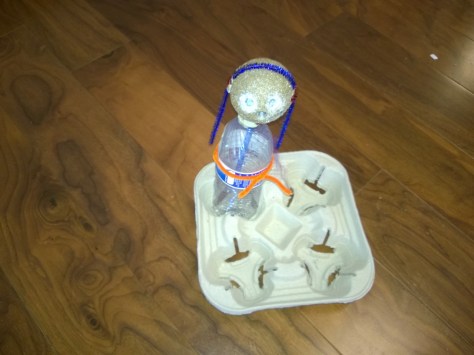
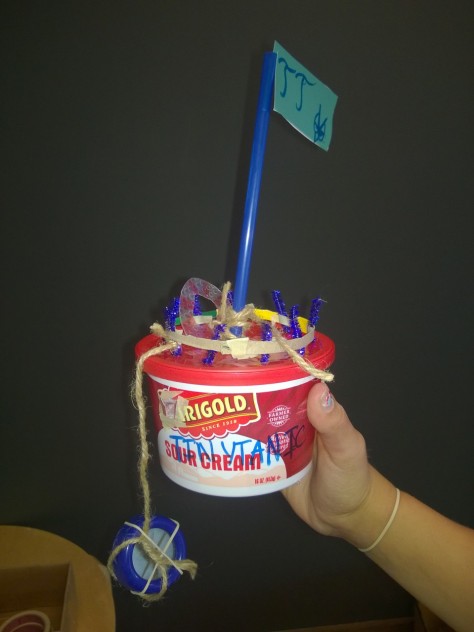
  • make something that moves
  • make something that makes a sound
  • build a replica of the Mayflower

junk boat

or a problem arising from a project or book

  • invent something to help Rapunzel get out of her tower
  • Can you build a house that can’t be blown down
  • How could you be rescued from a desert island?

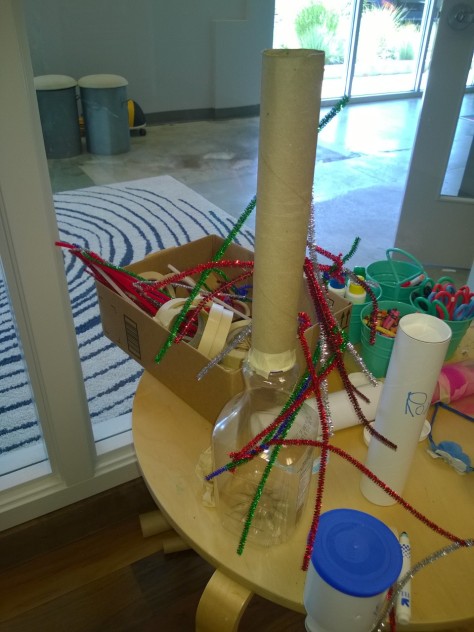
but best of all we would make sure there was plenty of tape, string, scissors and markers and let them create and explore.

Sometimes they worked on small projects

WP_20140730_012

a boat with an anchor

or larger group constructions

building a boat

they practised threading
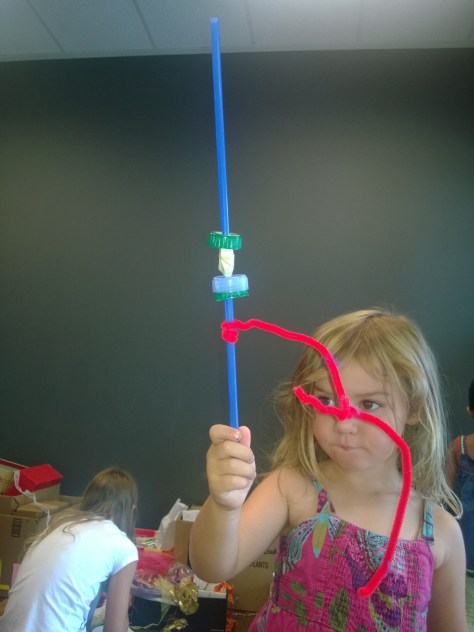
WP_20140820_002

and joining

scrap workshop

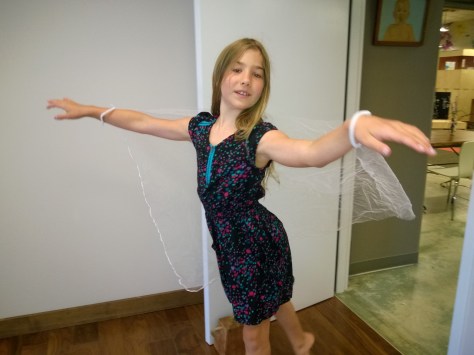
made things for dramatic play

wings

and problem solved

‘ When children engage with people, objects, ideas or events they test things out and solve problems.  They need adults to challenge and extend their thinking. (EYFS 2008 – Active Learning).


scrap workshop
How can you balance 3 boxes without them breaking?
They made choices

Provide flexible resources that can be used in many different ways to facilitate children’s play and exploration’  (EYFS 2008 – Supporting every child).


joining parts of the boat

and tested strategies

WP_20140730_009

they discovered how two different materials could work together

‘ Every child’s learning journey takes a personal path based on their own individual interests, experiences and the curriculum on offer.’ (EYFS 2008 – Supporting every child.)


WP_20140820_004

and nobody asked them “What is it?”

Active learners need to have some independence and control over their learning to keep their interest and to develop creativity.’ (EYFS 2008 – Active Learning).

WP_20140730_013

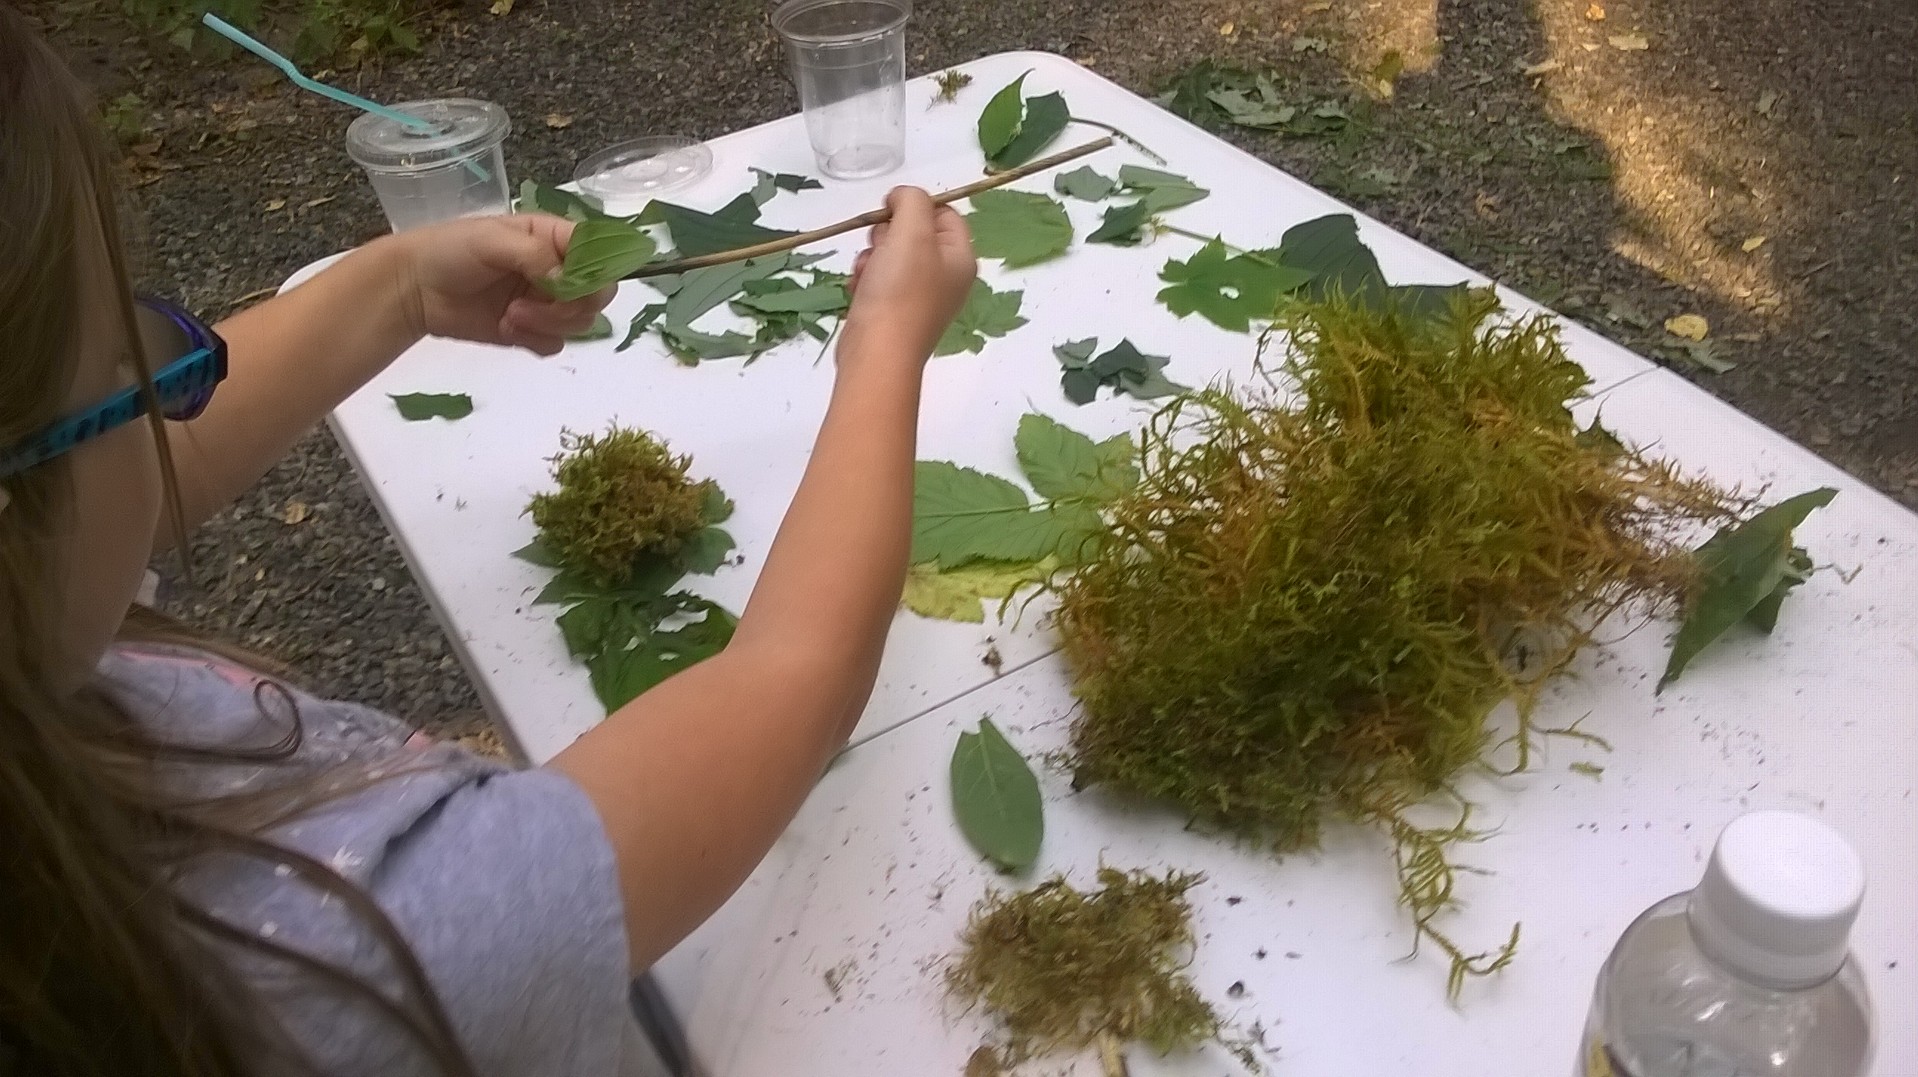
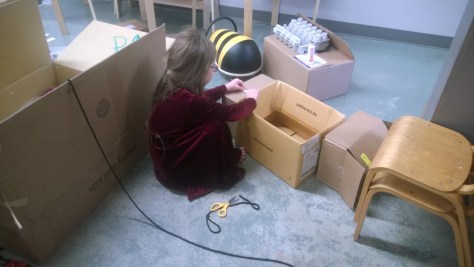
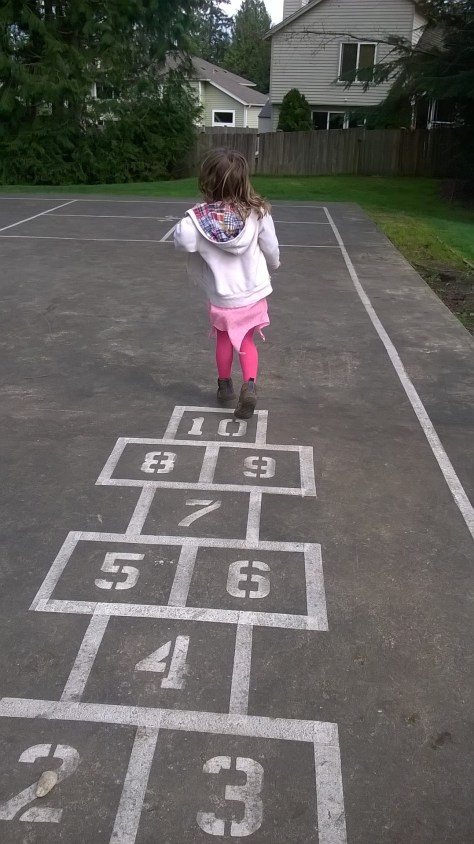
They worked at a table

WP_20140730_011

or on the floor

WP_20140730_006

and made discoveries using all of their senses.


An open-ended project like this gives plenty of opportunities to observe and work alongside children, guiding them towards their next steps and sharing ideas together.

’ When children have opportunities to play with ideas in different situations and with a variety of resources, they discover connections and come to new and better understandings and ways of doing things.  Adult support in this process enhances their ability to think critically and ask questions’  (EYFS 2008 – Creativity and critical thinking)


filling and emptying

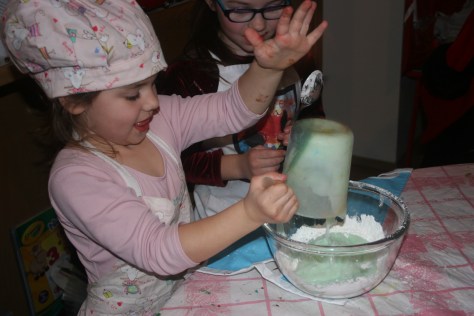
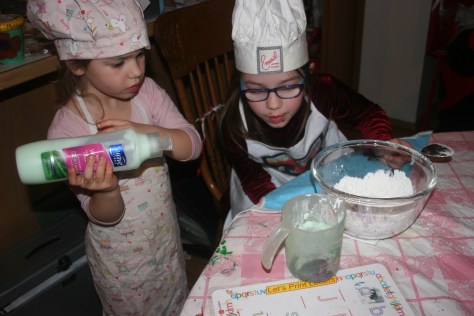
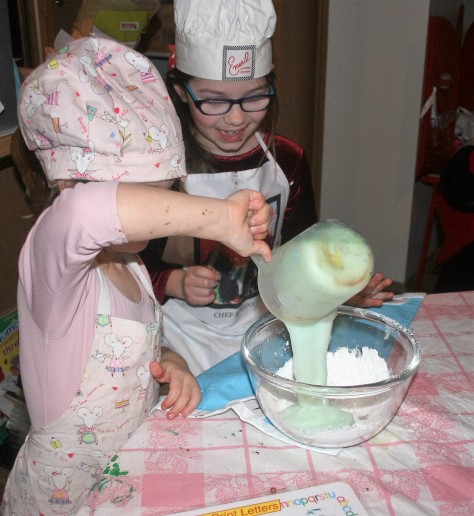
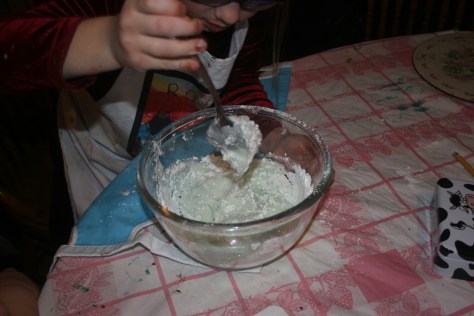
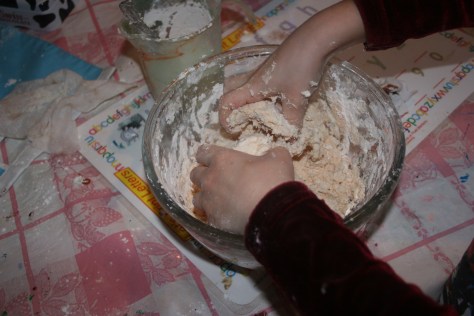
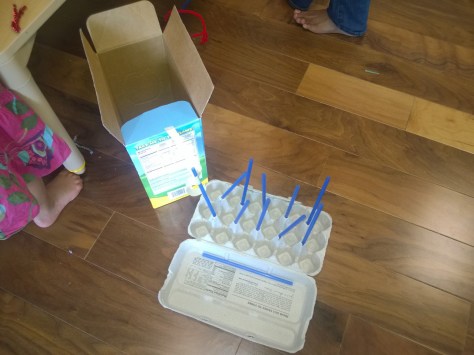
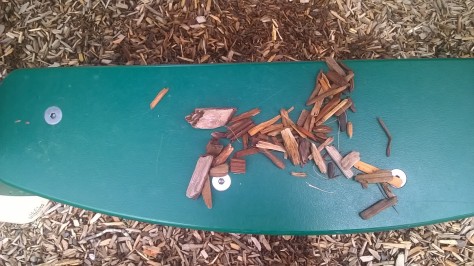
This child wasn’t interested in joining pieces or making anything. They explored filling and emptying.

scrap workshop

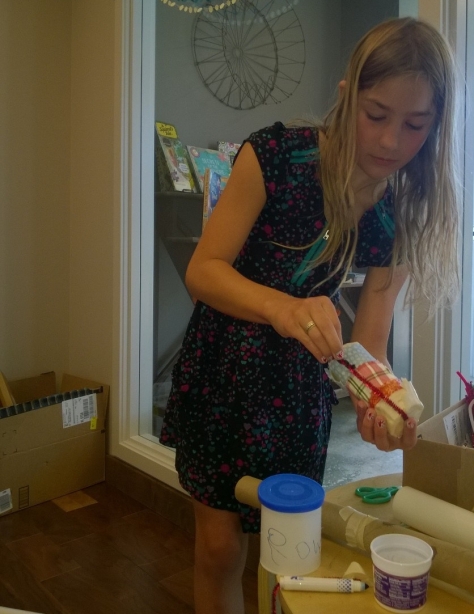
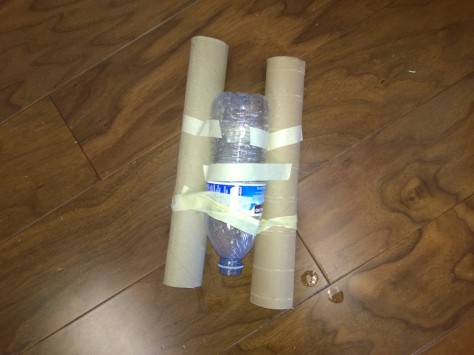
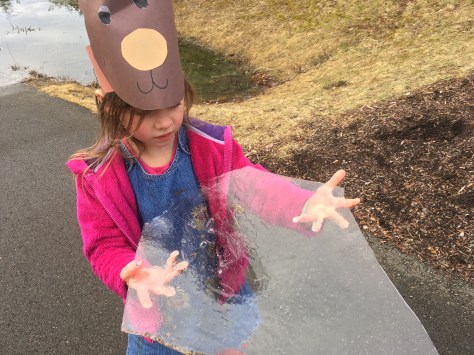
This child wrapped and wrapped their construction with tape.  They went on to wrap their hands with string. We provided them with materials they could explore wrapping in more depth – paper sheets, tape, string, ribbons , blankets, paper strips with tubes, poles, boxes, and table legs wrapped in string.

‘ Children need and will respond positively to challenges if they have a good relationship with the practitioner and feel confident to try things out.’ ( EYFS 2008 – Supporting learning).

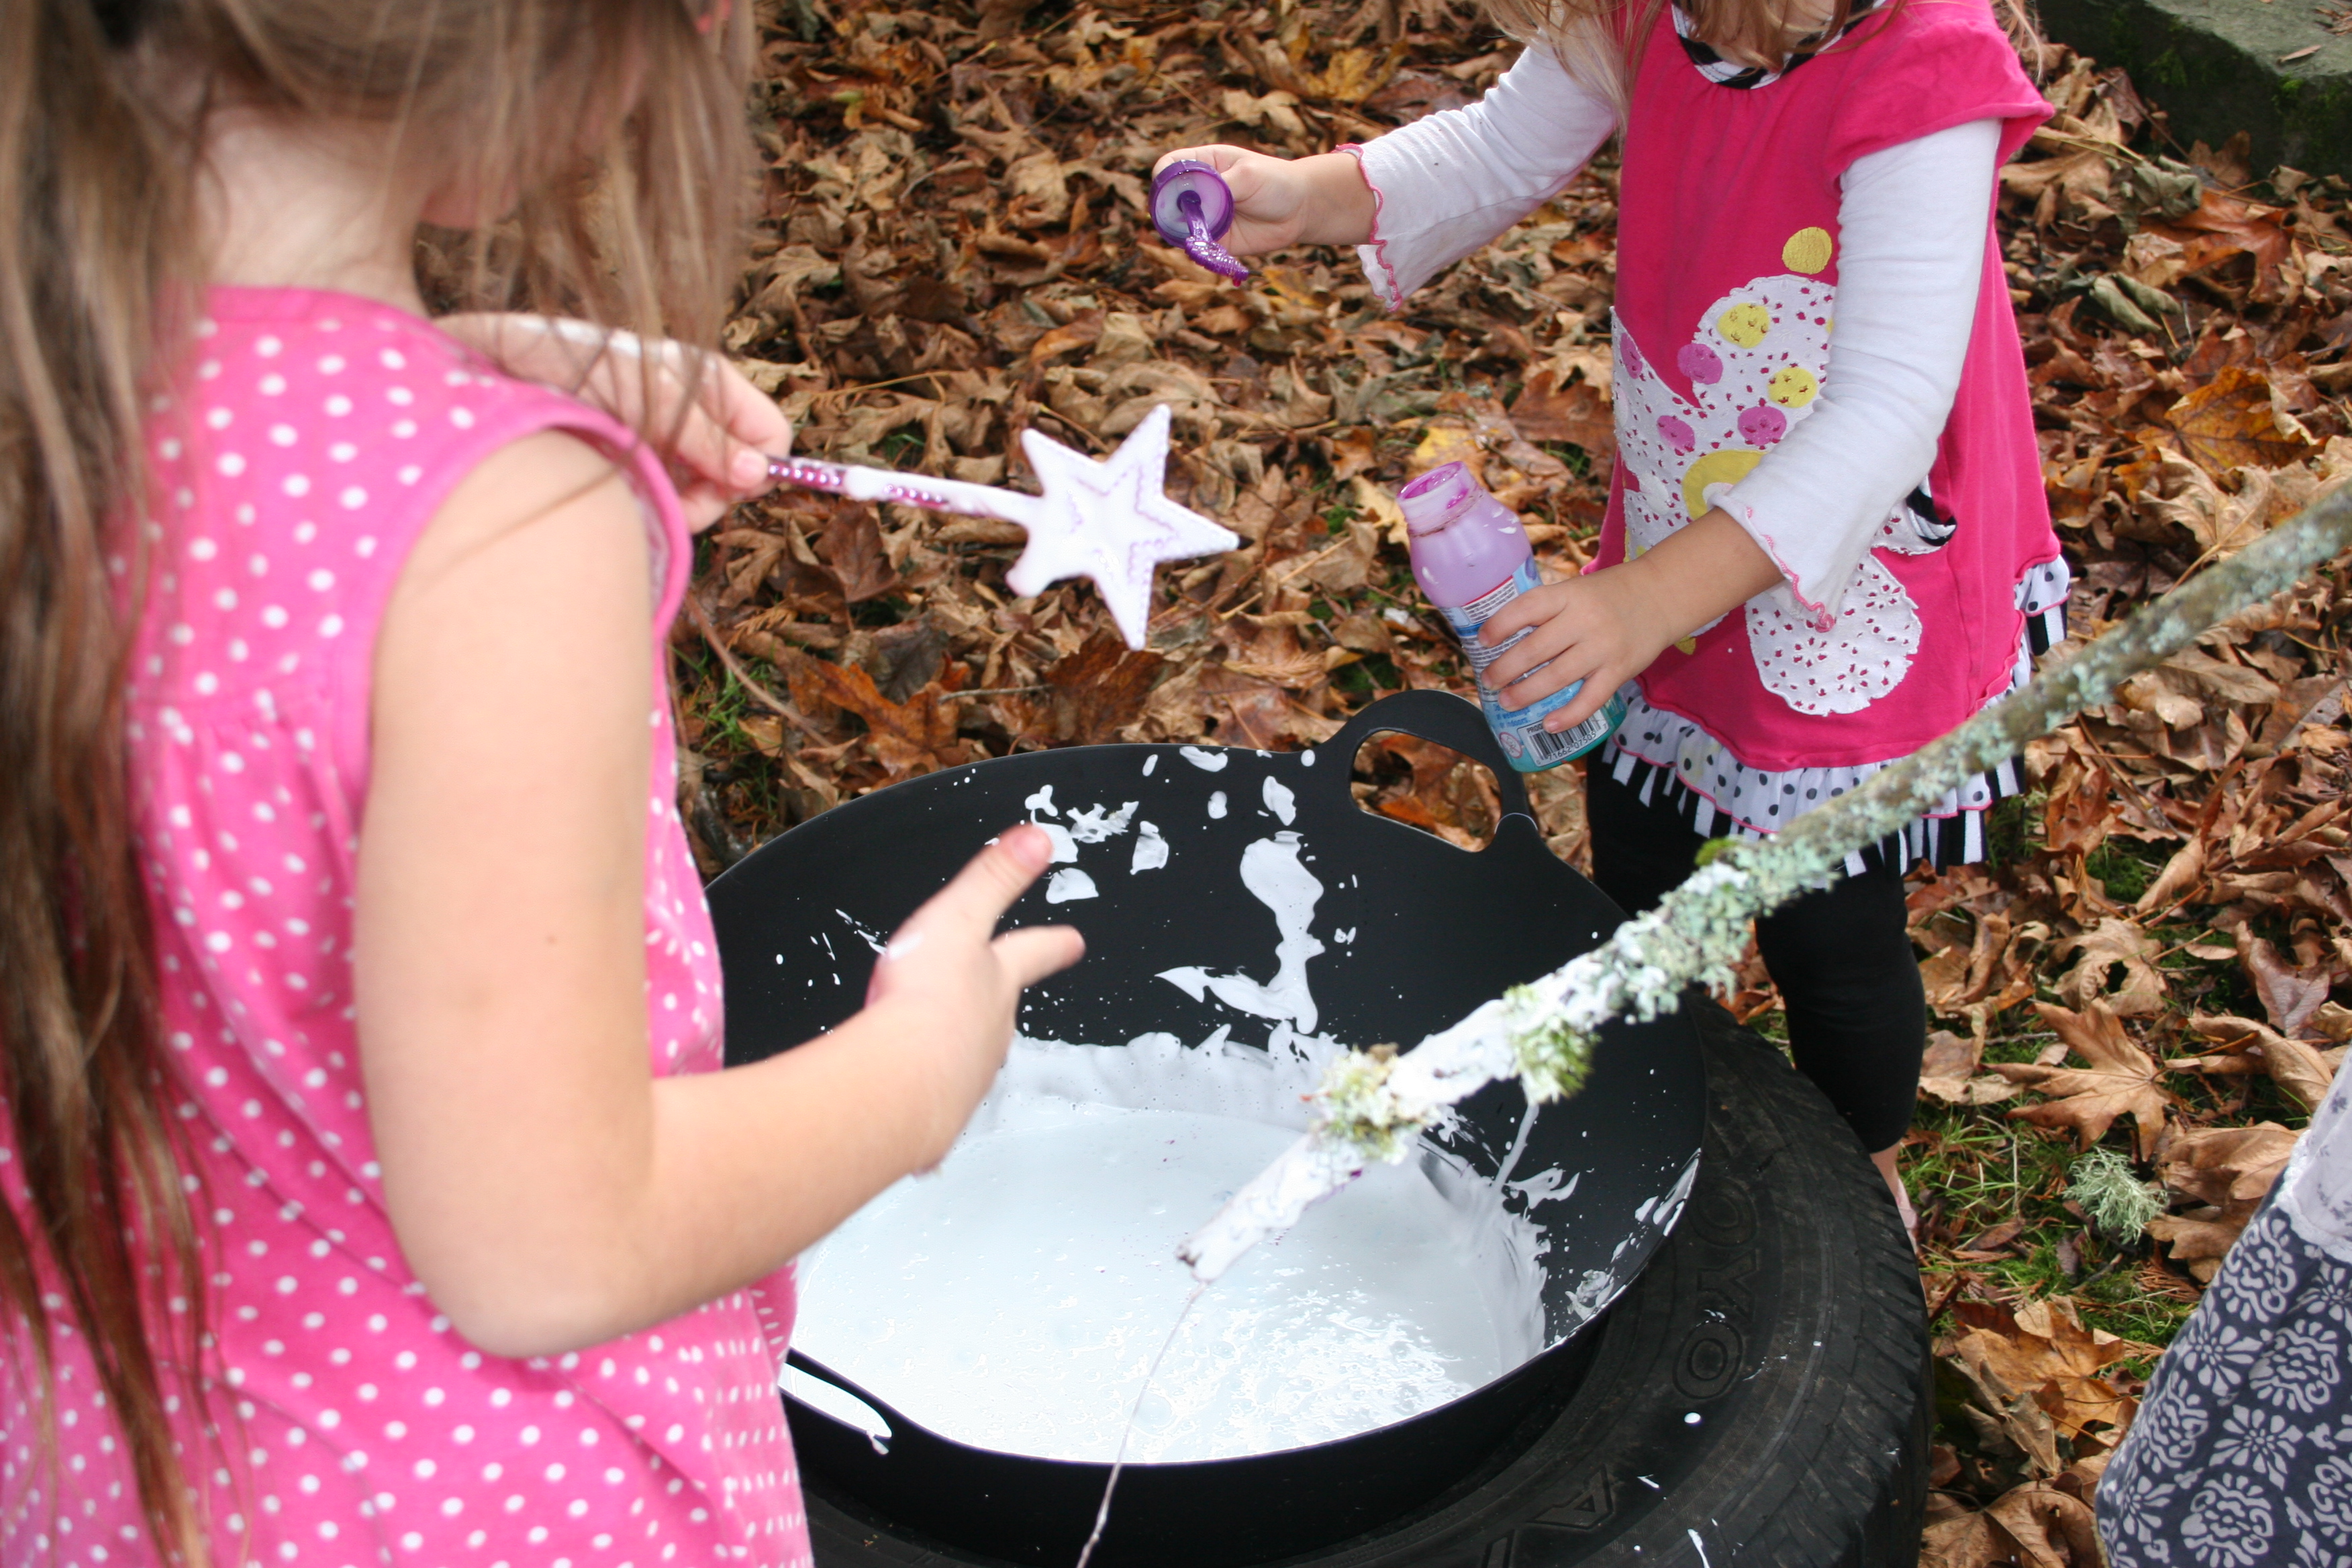
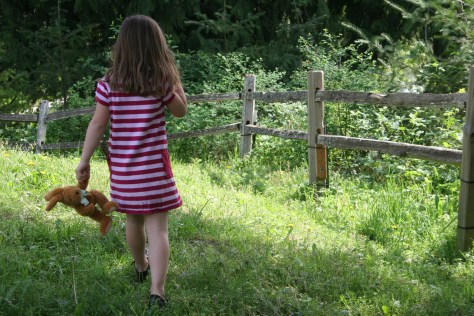
The children were able to work in mixed ages. The youngest children were 2 and the oldest 10. All the children enjoyed the workshops and learned from and supported one another.

‘ In their play children learn at their highest level’  (EYFS 2008 – Play and Exploration).


4 Ways to Inspire Kids to Go Outside and Be Active

Disclaimer: No payment was received for writing this post. I received a few small samples of Go Organically Fruit Snacks.

go organically outdoors

May is National Physical Fitness and Sports month and to inspire kids to get outside and be active this spring Go Organically have come up with 4 things to try. I don’t often share content from brands but I liked the ideas in this one and they align very closely to the ways I encourage my family to go outside.

My kids favourite outdoor activity is climbing trees. It’s the first thing they do when they get home from school and I love that it attracts them more than any other activity.It is important to me that my kids get independent playtime outside, but sometimes kids won’t go outside without a little push from an adult.  Here are some simple ideas from Go Organically fruit snacks  if your kids need a little encouragement.

reading in the tree

1.       Gear Up

Make sports equipment easily accessible so you’ll be more likely to use it. Park bicycles near the front of your garage, or keep scooters in the mudroom to inspire impromptu usage. Stash a Frisbee or soccer ball in your car for pick-up games, or “catch up” on the day while playing a quick game of catch in the evenings. The idea is to integrate activity into your everyday life so it becomes a part of your routine.

I love the advice about integrating it into everyday life. We use scooters to go to school everyday, often stop at the pond near school to explore the changing seasons and have skipping ropes near the door so they are easy to grab.

IMG_0513

2.       Play Nature Bingo

Which family member has an eagle eye for spotting things like squirrels, ant hills or pine cones? To find out, head to your local park—or simply your own backyard—and play an active yet educational game of Nature Bingo. Print out a free online template (we like these for their earthy feel) and try to find as many items as you can, marking off each square as you go.

Nature bingo is always fun. When my girls were younger and struggled to walk back from the park, I would pretend we were pirates and give them a list of “treasures” they had to find or collect .You can also try some of these  woodland activities we enjoyed. They would work equally well in a garden or park.

finding big cat markings

3.       Embrace Old School Games

When we were kids, it was all about classic backyard games like Freeze Tag, Simon Says and Hide-and-Seek. Our favorite? Red Light/Green Light. One child acts as the “stoplight” and stands with his or her back to the crowd across the yard from the other kids. When the stoplight shouts “green light,” the kids move forward and try to be the first to touch the stoplight. At any point, the stoplight may shout “red light!” and turn around. If any of the players are caught moving, they’re out.

Regular readers will know, I think it is really important to teach my kids games from my childhood and other simple games. It will not only preserve these games and rhymes for future generations but it is also an opportunity to play together outside. I recently taught them how to play elastics (French skipping) and we had great fun.

Try out some of my families favourites here.

hopscotch

4.       Take a Walk

It sounds so simple, but sometimes it’s nice to get back to basics with regular family walks. Take the dog out together in the morning instead of making it a one-man job. Or work off dinner by hitting the pavement as a family for a sunset stroll. It’s a great way to discover your surroundings, get to know your neighbors, and enjoy quality time as a family while burning off energy. When my youngest was small she hated to walk but loved to see things in our neighbourhood. I bought her a scooter and she used that and never complained.

IMG_1414 - Copy

Before my youngest started school, she would ask me everyday if we could go for a walk.  We wouldn’t go far, a quick circuit around the neighbourhood was often enough for her, but she loved to discover things you can only find on foot.  We identified flowers and plants, rescued worms and snails, found caterpillars, ducklings, birds, frogs and salamanders, caught blossom, collected leaves and carried sheets of ice.  My daughter didn’t like to walk far when she was younger but once I bought her a scooter we could go on long walks together.

carrying a sheet of ice

What are your favourite ways of getting outside?

If you like these ideas, and you would like to explore more, below are some of my many outdoor play posts.

Activities with leaves

Inspiration for a low cost outdoor playspace

Ideas for encouraging children to enjoy their natural environment

Water Gun activities

Build a Fairy Garden

 Ideas for playing outside in the Spring

Ideas for playing outside in the rain

Ideas for playing outside in the dark

Ideas for playing in the snow

Children connecting with Nature (discussing the findings of a 3 year study into how connected to nature the UK’s children are)

Loose Parts

Why mud Play is good for children

Finding the alphabet in nature

To find more resources, click on the outdoor play tab above.

Art Project for Kids: Oil Pastel Still Life Inspired by Georgia O’Keefe

img_0664
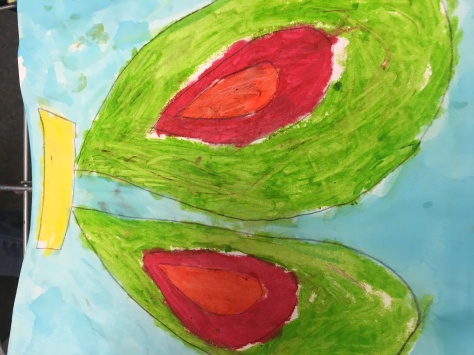
December’s Art project with Kindergarten and 2nd Grade was a still life Poinsettia using oil pastel.  The Kindergarteners had only used chalk pastel up until now, so our first lesson introduced them to oil pastel techniques.

The children were given a selection of oil pastels and a piece of paper and asked to try them out and think about how they might be different to the chalk pastels we used in the previous session.

Here are some of their observations.

The colours are brighter and you can press harder.

When you press hard it gets softer and easier to mix

They are like crayons

It didn’t blend across the colours like the chalk pastels but it worked when you put one colour on top of another.

You can blend chalk pastel with your finger. You can still blend with oil pastel but it is harder.

I can add white to blue to make light blue.

I showed them how to blend the pastels using baby oil and a Q-tip/cotton bud. the children practised making pictures using the blending technique.

I can colour just a little bit with oil pastel  and then use the oil on my Q tip to fill in the rest – it makes a lighter color.

It looks like paint when we add oil to the pastels, it makes it smoother

 You can use the Q tip like a paint brush

If you use too much oil it rubs the color away.  You need just a little bit to blend.

I gave them another piece of paper and they drew around their hand using pencil.  They then coloured the hand in stripes using the oil pastels.  The colours were blended using oil. We painted the background with liquid water-colour. They thought it was very cool that the pastels repelled the paint.

oil-pastel-hand

Still Life

img_0644

For the follow-up session and with the 2nd Graders who are familiar with oil pastels, I chose a still life drawing of a Poinsettia.  The Kindergartners haven’t followed a project inspired by an artist, so I asked for suggestions of still life oil pastel artists on a Reggio-inspired Facebook group. After a bit of research, I decided upon Georgia O’Keefe.  I liked the way that O’Keefe draws flowers but doesn’t always focus on the whole plant. I felt that if we looked at examples of her work as inspiration, the children could choose to zoom in on one part of the flower,if they didn’t feel confident enough to tackle the whole thing.

I limited the  oil pastel colours to shades of red and green, black for shade and yellow and white for highlights.  The children drew the picture with the pastels and then blended using oil.  The final touch was painting the background with liquid watercolour.

Since the children hadn’t done anything like this before, I was aware that they may find it challenging.  To start the lesson we read ‘Ish’ by Peter Reynolds. This is the story of a boy who gives up drawing in frustration because his pictures do not look like the real thing.  His sister persuades him to look at his pictures in a new light, as tree-ish, afternoon-ish and vase-ish .  I wanted the children to understand that this was not an exercise in replicating exactly the plant in front of them because each of us view it differently.  My aim was for the children to study the plant and replicate it in their own way.  I think we achieved that aim perfectly.

Kindergarten Class


Interestingly the Kindergartners were less anxious about the task than the 2nd graders, who found it hard to decide which part to draw and spent a lot of time considering how to make the shapes. A few children needed a lot of encouragement and support to make their own marks on the paper.

2nd Grade Class

I love how different they all are. The Kindergartners really focused on the shapes of the leaves and the 2nd graders paid more attention to the details in the leaves and petals and were more abstract with their use of colour. I’m really impressed with the finished results and it was a really valuable exercise to see how differently we all see things.


Jerome Bruner and Early Education


Jerome Bruner

Photo credit Poughkeepsie Day School

This week one of the most influential psychologists of the 20th century, Jerome Bruner, died at age 100. If you have studied psychology or education you will most likely have come across his teachings. It’s easy to forget what we have been taught once college days are over, so I have been reminding myself of his teachings and their importance to early childhood educators.

  1.  Scaffolding   

Bruner proposed the concept of scaffolding. Scaffolding is the action that an adult performs to assist the child in learning something that would otherwise be beyond them. Examples of scaffolding include modelling, making suggestions,or structuring learning into manageable parts. As the metaphor suggests, the scaffold supports the child as they build skills so that it can eventually be reduced and removed completely.

The following video illustrates a number of points about scaffolding. Notice how the amount of scaffolding from the adult is minimal or non-existent for the eldest child (aged eight). Some scaffolding is offered to the three-year old in the form of suggestion and answering questions but lots of scaffolding is required by the one-year old.  The children themselves also offer scaffolding to each other, as they watch what the others do and  try things for themselves.

2. Bruner believed that learning was an active process and that children could discover complex concepts at any age.

“Any subject can be taught effectively in some intellectually honest form to any child,” he wrote in “The Process of Education,” “providing attention is paid to the psychological development of the child.”

This concept heavily influenced the view of the capable child in the schools of Reggio Emilia.  Bruner was a regular visitor to the schools even into his 90’s.


3. His work was fundamental in raising the profile of early education and his ideas contributed  heavily to the development of Head Start.

4.  Spiral curriculum

This method focuses on revisiting learned content at set intervals and re-teaching it at a more refined and difficult level. Eventually, learned content from one subject informs more in-depth discussion of content in another subject. Learning through play allows us the luxury of visiting concepts multiple times in different contexts.

Studies are not isolated but intrinsically linked with a common thread running through them all. Bruner believed that learners should go beyond the information given and understand the process in order to generate ideas of their own.

With over 70 years of research, this list only scratches the surface.  I found this video useful for understanding his key contributions.


Do We Over Complicate Loose Parts?


WP_20160324_006
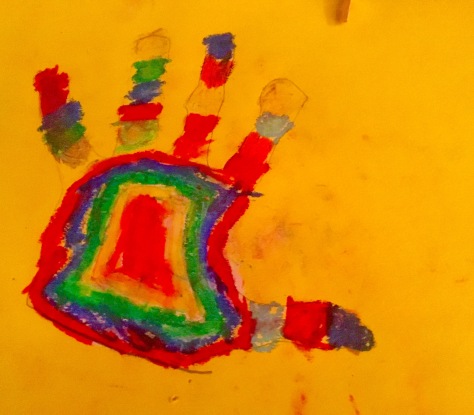
For those of you who aren’t familiar with the term loose parts, check out my post on the theory of loose parts. In simple terms, loose parts are moveable objects that can be used to create, explore and discover.

Educators often collect loose parts for their environments.  Collections include buttons, feathers, beads, coins, shells and seeds. Loose parts are added to clay and dough, left in baskets around the room, used for weighing and measuring, to create art, on light and mirror tables and added to block play. I think though, that sometimes educators over-complicate loose parts. We get so excited about the different things we can provide for the children and the beautiful ways we can present them, that it is easy to forget the true essence of the theory of loose parts.

I was reminded as I played with my daughter at the park, that loose parts are everywhere.  If we as educators don’t provide loose parts, the children will find them.  A brick will become a piece of food, a calculator  is a telephone, a sheet will become a cloak or torn paper will be money. Playing with loose parts is the way I played as a child, playing shops with empty boxes or filling empty bottles with leaves, petals, dirt and water.  For the child, loose parts are everywhere, they probably don’t call them loose parts but they will find them.

For me the theory of loose parts is an attitude to how children play.  It is an acceptance that children may use what is in their environment and make their own choices about what to do with it.  Materials do not have to be displayed or stored beautifully, they simply need to be there.  The following video illustrates children’s natural ability to find and use loose parts creatively.


Art Lessons: Abstract Painting to Music


WP_20160318_003
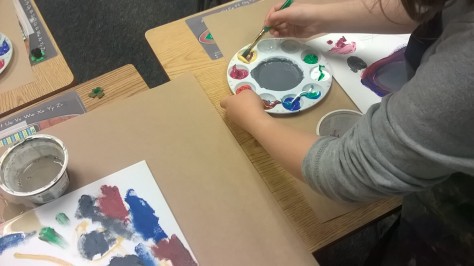
One way to ensure that you don’t end up with a wall of identical paintings is to introduce children to abstract art.  We used the book The Noisy Paint Box: The Colors and Sounds of Kandinsky’s Abstract Art as a starting point.  The book tells the story of Kandinsky’s ability to ‘see music’ and ‘hear paintings’.

I explained that abstract art is not about creating a particular thing but is about expressing how you feel.

Each child had a pallet of acrylic paints, 2 different sized paintbrushes, a canvas, a pot of water and paper towel to wash and dry  the brushes.  I showed them how to clean their brushes by washing it in the water and drying it with the paper towel.

WP_20160318_002

The children began when I played the music – I chose a quiet piece to add focus, Dvorak’s Largo from Symphony no. 9.

Some children were engrossed in colour mixing, while others enjoyed layering colours one on top of the other.  Some concentrated on texture and others focused on shape and colour.

WP_20160324_004

The strong focus on process lead to an interesting discussion with the teacher after class.  We lamented the lack of time children in Kindergarten and beyond, to experiment with paint and the impact this has on their motor development. I always feel my lessons should be in at least 2 parts, one for discovery and process and the another to create a product. I wish there was time for the children to practice skills and develop.  My eldest daughter attends a school where the whole curriculum is taught through the medium of visual and performing arts – are there any creative elementary teachers out there doing the same?

WP_20160324_001

WP_20160324_003

I Finally Made Play Dough that Isn’t Sticky

IMG_1356

I am terrible at making play dough.  For years I have experimented with all kinds of recipes, cold, cooked and microwaved but all of them turn out in a sticky mess within 24 hours.  That is until a pre school teacher shared this simple formula with me.  Mix 2 cups of corn starch/ corn flour with 1 cup of hair conditioner. Finally a recipe that works!

IMG_1353

IMG_1355

IMG_1357

IMG_1359
Feel your skin, it’s really nice and smooth.


The texture is slightly less firm and more crumbly than standard play dough but it has a lovely silky texture and led to some interesting creations.

IMG_1362
I made a face


IMG_1361
Me too
IMG_1363
The first time I made a snowman, it was really good and then I noticed that it kept going down all the time. It’s like a melting snowman.


IMG_1364
I added some silly putty to it to make this design

What Toys Should I Provide for Babies and Toddlers?

Toy shop shelves are laden with toys claiming to be educational. For toddlers and babies, this usually means something noisy, requiring batteries.  I have always held that there is little educational value in such toys. In my experience children play with them for a short period of time before moving on to something else.

Alison Gopnik discusses the manner in which children experiment with toys in her book the Philosophical Baby.   A toy that  worked by moving levers was presented to a group of 4-year-olds.  The adults demonstrated to the first group, how it worked, while  the second group were left to work it out for themselves.  The second group spent significantly more time playing with the toy than the first, who quickly abandoned it once they understood its function.

Another recent study led by Professor Anna Sosa of Northern Arizona University  focused on children between the ages of 10 and 16 months old. She gave families three different kinds of toys to play with; books, traditional toys like stacking blocks and electronic toys. The toys that stimulated most conversation were books, closely followed by blocks. The families playing with the electronic toy shared very little conversation, allowing the toy to do the talking for them.

If you are considering which toys to buy for a young child, these points may help.

  • The most important resource we can give to babies and toddlers is ourselves. Spend time playing tickling games, singing to them, playing rhyming games, blowing bubbles or rolling a ball.
  • Other suitable toys for babies and early toddlers include small musical instruments for exploring sound ( saucepans, spoons and homemade shakers work equally well), a treasure basket or board and cloth books.
  • Think about toys that they will play with for a long time.   The best  toy investments for our family include magnatiles, wooden blocks, paper and pencil, a magnetic drawing board and play food.
  • Toys do not need to be expensive. Children can have hours of fun with a balloon, pot of bubbles, home-made play dough or  a cardboard box.

The infographic below has many more developmentally appropriate ideas for play.

Helping Your Child Develop Through Play
Helping Your Child Develop Through Play by Wooden Toy Shop

Hallowe’en Activities: Spells and Witches Brew

spells and witches brew

One of my favourite Hallowe’en activities as a teacher was creating spells and dancing around the cauldron. The children were transfixed by the iron cauldron that emerged from the kitchen and wondered if it might belong to a real witch. Dressed in witches hats and cloaks, we would imagine fantastical ingredients and create spells that would transform us into dragons, frogs or birds, that would make us fly, shrink or become invisible. It was a fun way to explore rhyme, share ideas and use our imaginations. We left ‘spell books’ in the mark making area and the home corner became a witches cave complete with potion bottles, spell books and jars of bugs, bats and frogs.

My girls love to make potions, so when I told them about it, they loved the idea but wanted to make a real witches brew.

tin foil wand


To start, we made wands from tin foil and chose witches hats and capes. Tin foil wands are simple to make if you have limited time; wrap tin foil around a pencil or simply roll and scrunch the foil into your desired shape.   If you are more ambitious, make wands from sticks by stripping off the bark, adding ribbons or painting them in special colours. I also like these Harry Potter wands from Red Ted Art

With wands in hand, they chose ingredients to go into the brew.  They didn’t think witches and wizards used shaving foam or cornflour to make a spell, so they chose gruesome alternatives.  Flour became giant’s dandruff, hair gel was ogre snot and fuzzy balls became warts.

spell

The girls wrote down their ingredients so they could remember the order in which to add them .

quill writing

It didn’t matter that my youngest is only just beginning to write, she found her own way.

potion recipe

spell ingredients

Armed with spells, wands and witches hats, they made their way outside to the cauldron at our potion station. One by one, they tossed the ingredients into the cauldron, stirring it and modifying the quantities until they were satisfied. Then it was time for the spell.

Wibbly wobbly wibbly wog

See the little jumpy frog

Wibbly wobbly wibbly wagon

Turn the frog into a dragon

We looked for the dragon but decided it was hiding amongst the clouds.

witches brew

The dance around the cauldron resumed with another spell.

Wibbly wobbly wibbly wog

See the little jumpy frog

Wibbly wobbly wibbly wat

Turn my mum into a bat


Thanks girls, I’m not sure  I want to hang upside down from a tree.


witches brew
The potion remained in the cauldron for sometime and became the central point of their witch and wizarding school.

Suggested ingredients for a witches brew

  • Jello/jelly powder (makes it smell great)
  • mud
  • hair gel
  • shaving foam
  • flour
  • glitter
  • coffee grounds
  • leaves and petals
  • plastic bugs
  • coloured water
  • baking powder-

Further Ideas

  • Give the children collection bags and a card with ingredients for a spell, in picture and written format.  Ask the children to find the objects they need and place them in the bag.
  • Give the children a group of objects and ask them one at a time to add a specific number into the brew.
  • Chant around the caldron and make spells that require the children to make specific movements e.g make us slither like a snake, make us jump or stretch up tall.


What Can We Do with All These Leaves? Leaf and play activities for kids.

This time of the year my garden is covered in a blanket of leaves.  The girls enjoy helping to rake them up but it is a never-ending task. When leaves are plentiful there are many activities that you could take advantage of. Here are a few of our favourites.

Leaf Man

Leaf Man by Lois Ehlert is illustrated with photocopies of leaves that have been arranged to make pictures.  We studied the way Ehlert uses coloured paper to create a layered background and  leaves and natural materials for the main body of the picture.

leaf bird rowena

We created our own pictures, starting with the background and adding leaves.  The leaves work better if they are pressed beforehand using a flower press or a heavy book.  Preserve them by laminating before the leaves dry out.

leaf man

Painting

Young children enjoy printing with leaves or painting on larger leaves. You could also try  painting with different types of leaves or dipping the stalks into paint to make marks.  Dried leaves crumbled into paint could also make an interesting texture.

WP_20150924_006

Leaves are perfect for investigating colour mixing.  Give each child a leaf and ask them to try to mix the matching colour.  Younger children could paint the colour onto their leaf, print it on paper or paint around the outline, older children may like to try an observational painting of their leaf. Small square canvases or watercolour paper would make them extra special.

Leaf Rubbing

leaf rubbing

Sometimes young children  find this difficult so experiment with different colours and materials, like crayon, pencil, chalk, pastels or charcoal to decide which makes the most effective rubbing.

Leaf Mosaics, Patterns and Sculptures

Use leaves to create mosaic patterns and pictures. These could be individual or large group projects.

leaf face

The girls collected leaves on a camping trip and used them to thread onto sticks to create clothes for their stick people.

stick men

Clay

clay and leaves

Leaves  make interesting imprints in clay or they can be used  as a template to cut around. Clay leaves make great bowls, tiles or mobiles.


Sensory Play and Loose Parts

Collect leaves and put them in a sensory bin – investigate what happens to them over time. Add interesting objects hidden amongst the leaves or toy woodland animals and bugs for small world play.

If you have leaves outside how do the children use them as loose parts?

My children built a bonfire……


building a bonfireBuried their feet….

Oct 07 045

and added them to a potion.

potion making


Use them as a Filler

Last Halloween we made spiders to hang on the bushes outside.  The bodies were made from black bags stuffed full with leaves.  You could also use leaves to stuff scarecrows or guys for bonfire night.

Laminate them

laminated leaves

Over a period of time we collected interesting leaves and laminated them.  They looked great on the window and I challenged the girls to find out which trees they belonged to. I think they would also make an eye-catching mobile.    This year we are using the laminated leaves to see if they can find matching leaves in the neighbourhood. Laminated leaves could be used for all kind of things. We have used them as gift tags, to play matching pairs and they look great on the light table.

Leaf Rainbows

If you collect leaves gradually from the same tree or bush as they change colour you can make a leaf rainbow.

leaf rainbow

Before you  decide to rake all the leaves away, take a look at this face, I think it says it all.
autumn leaves