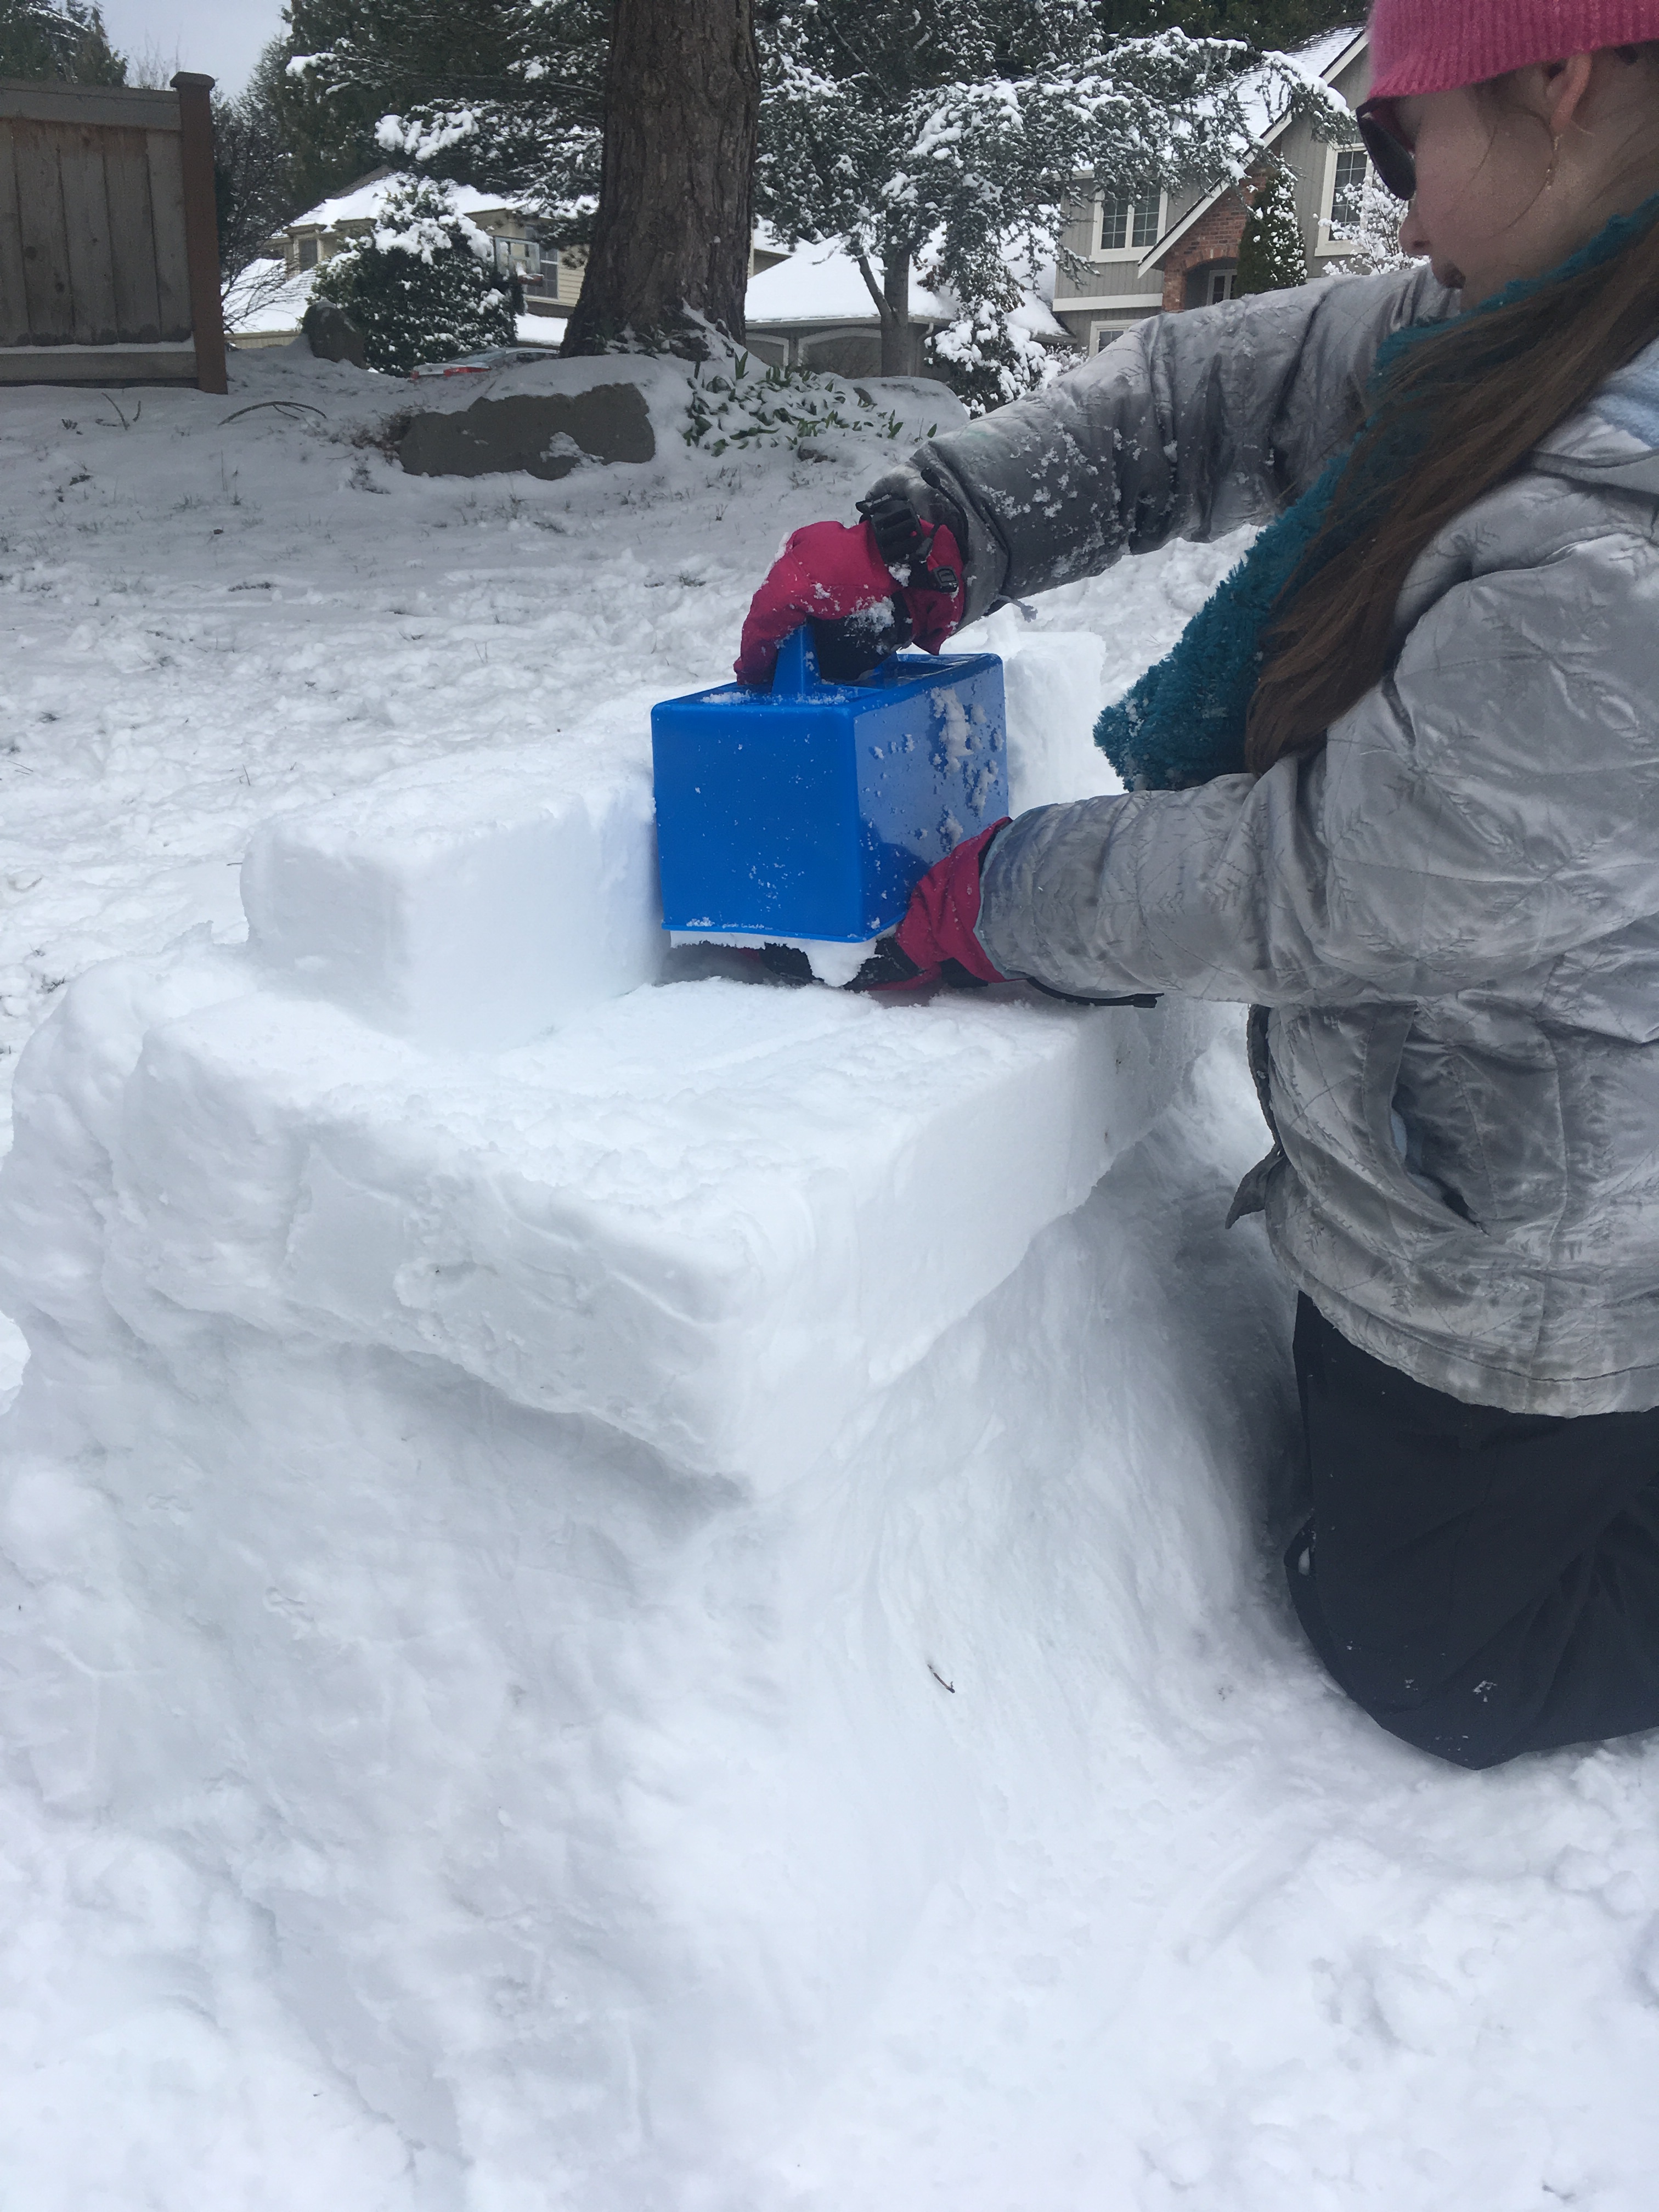
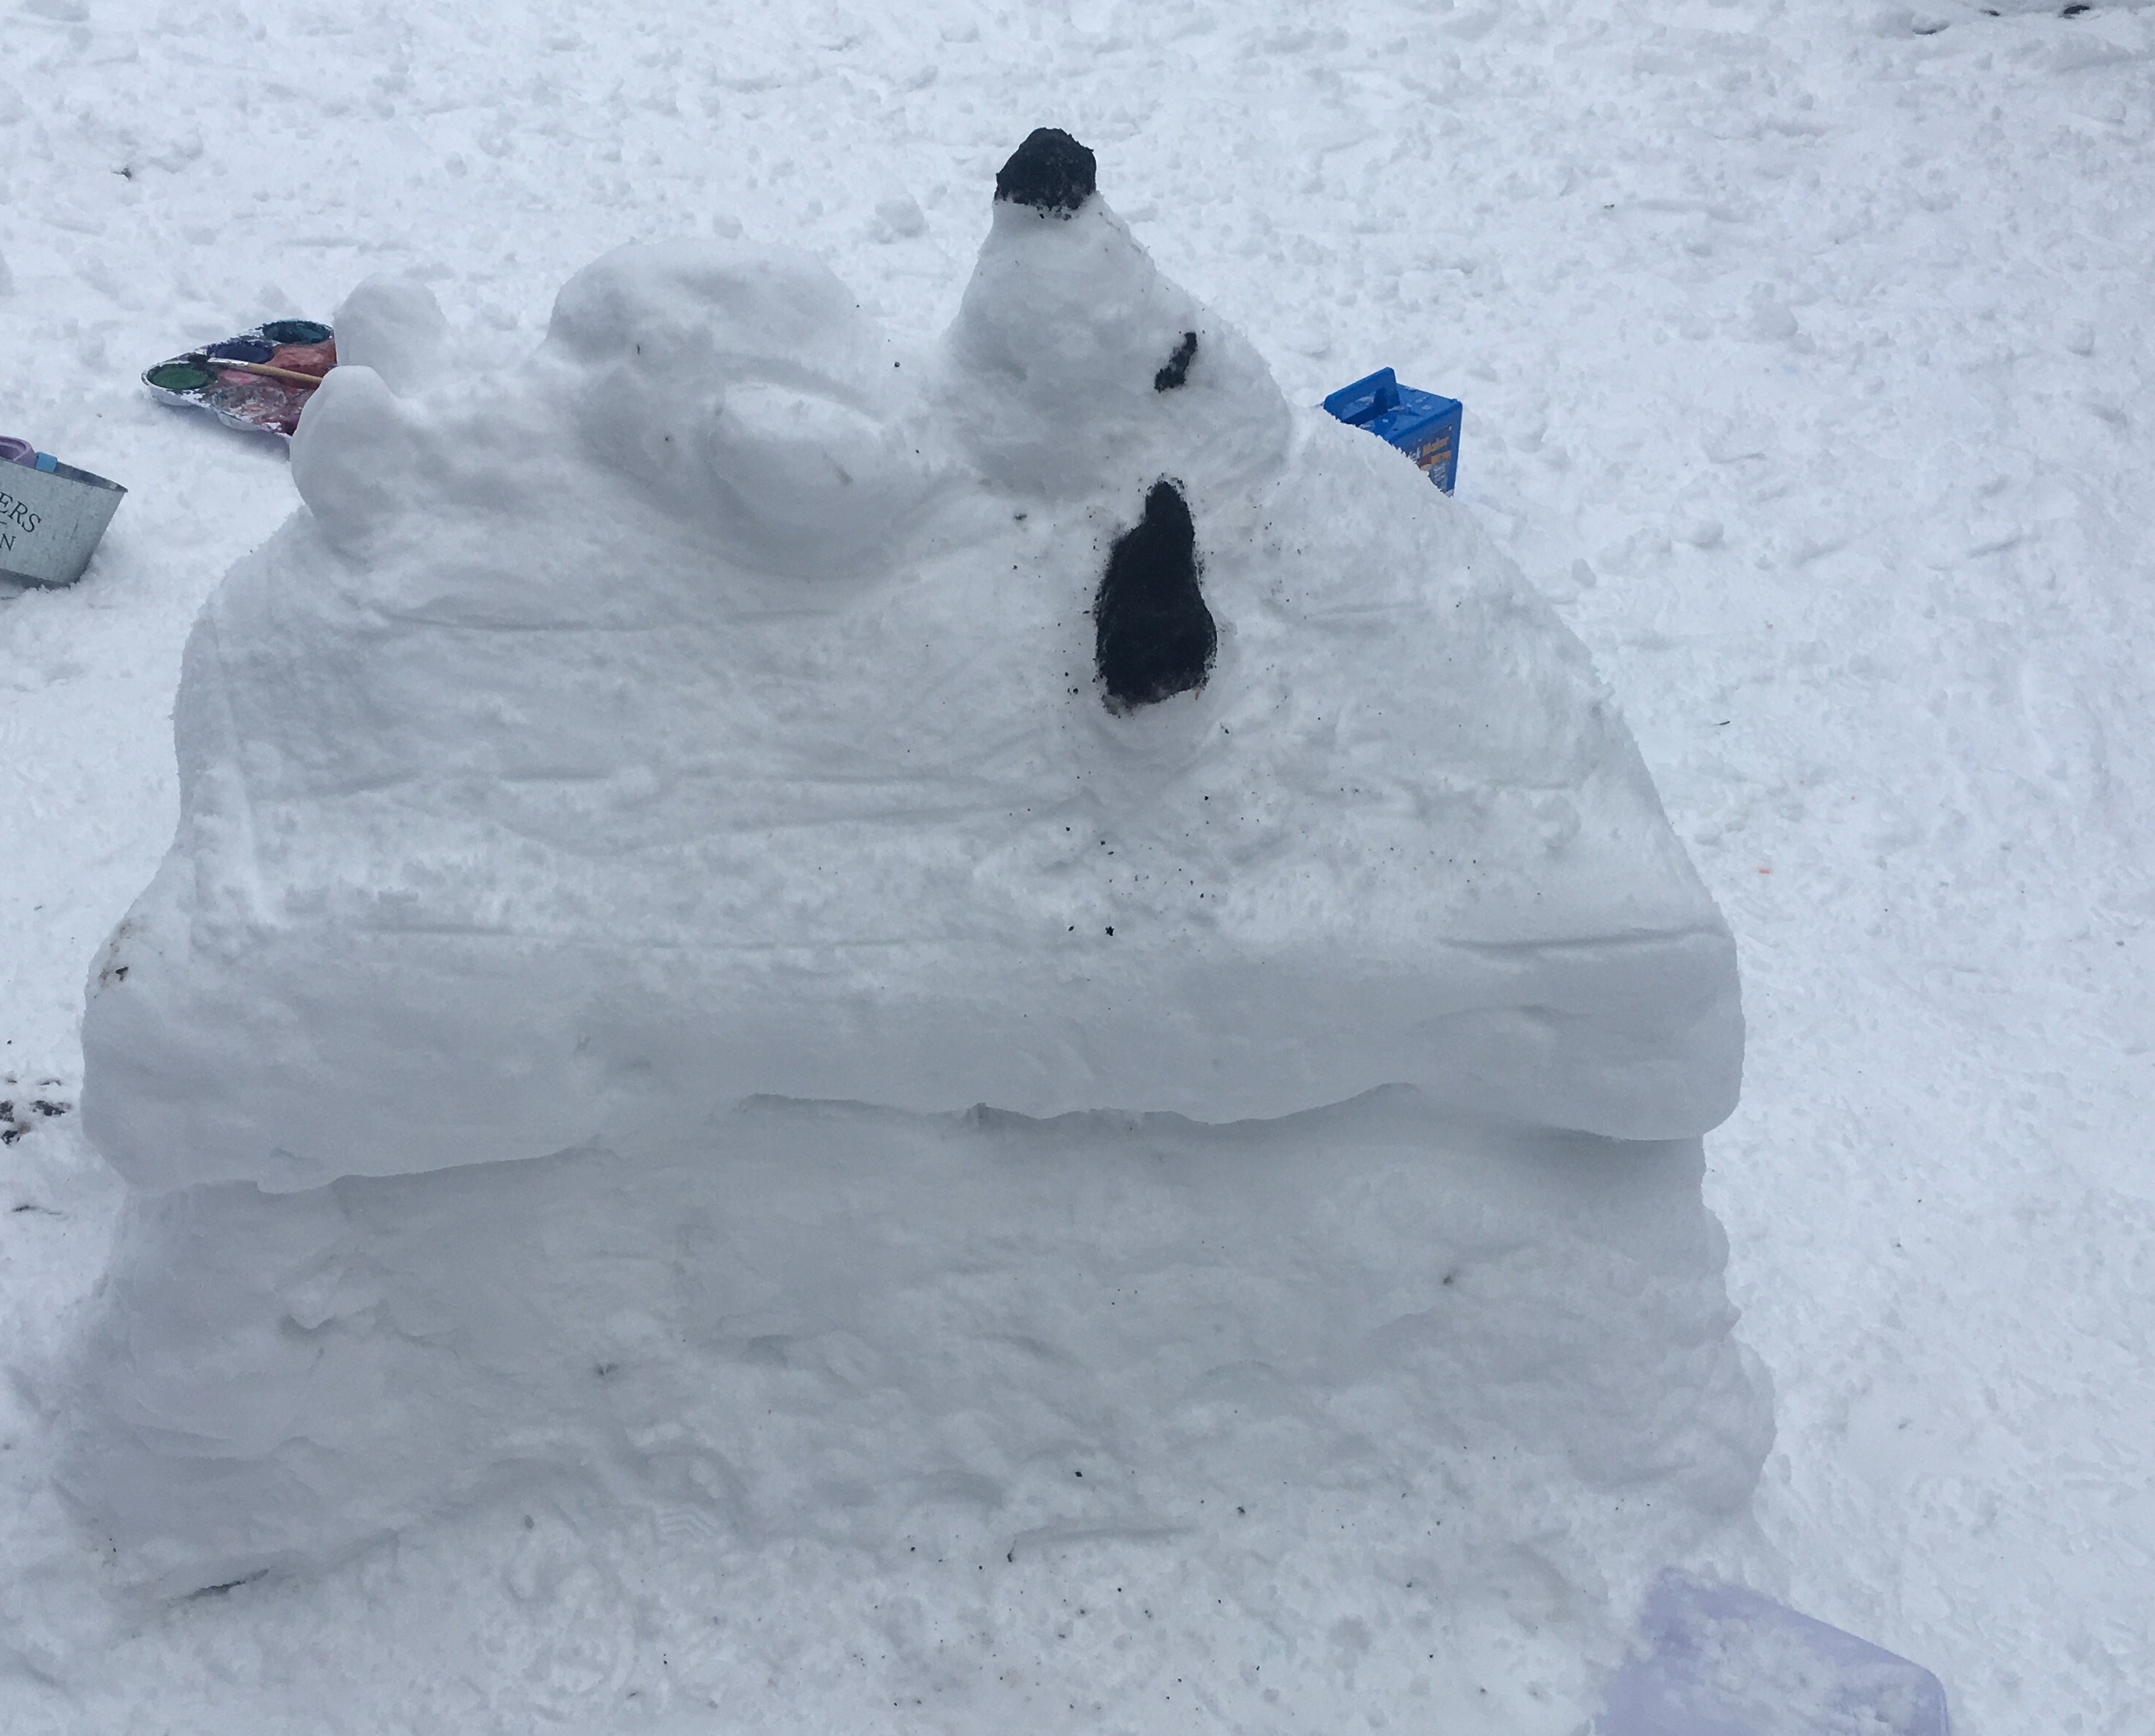
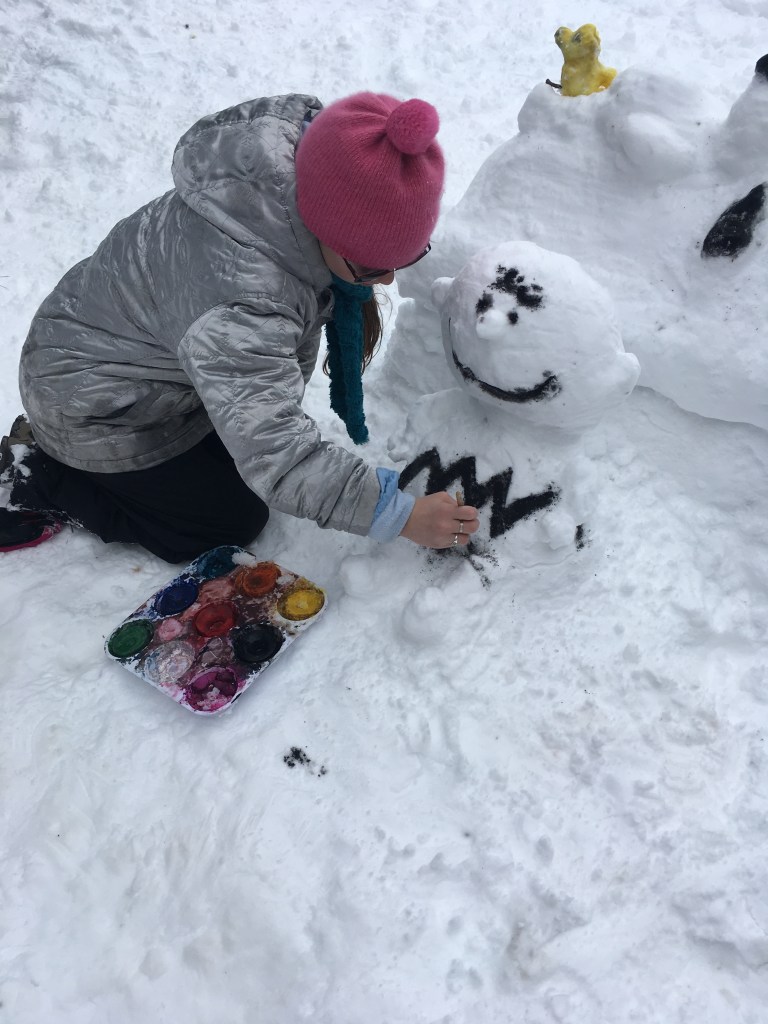
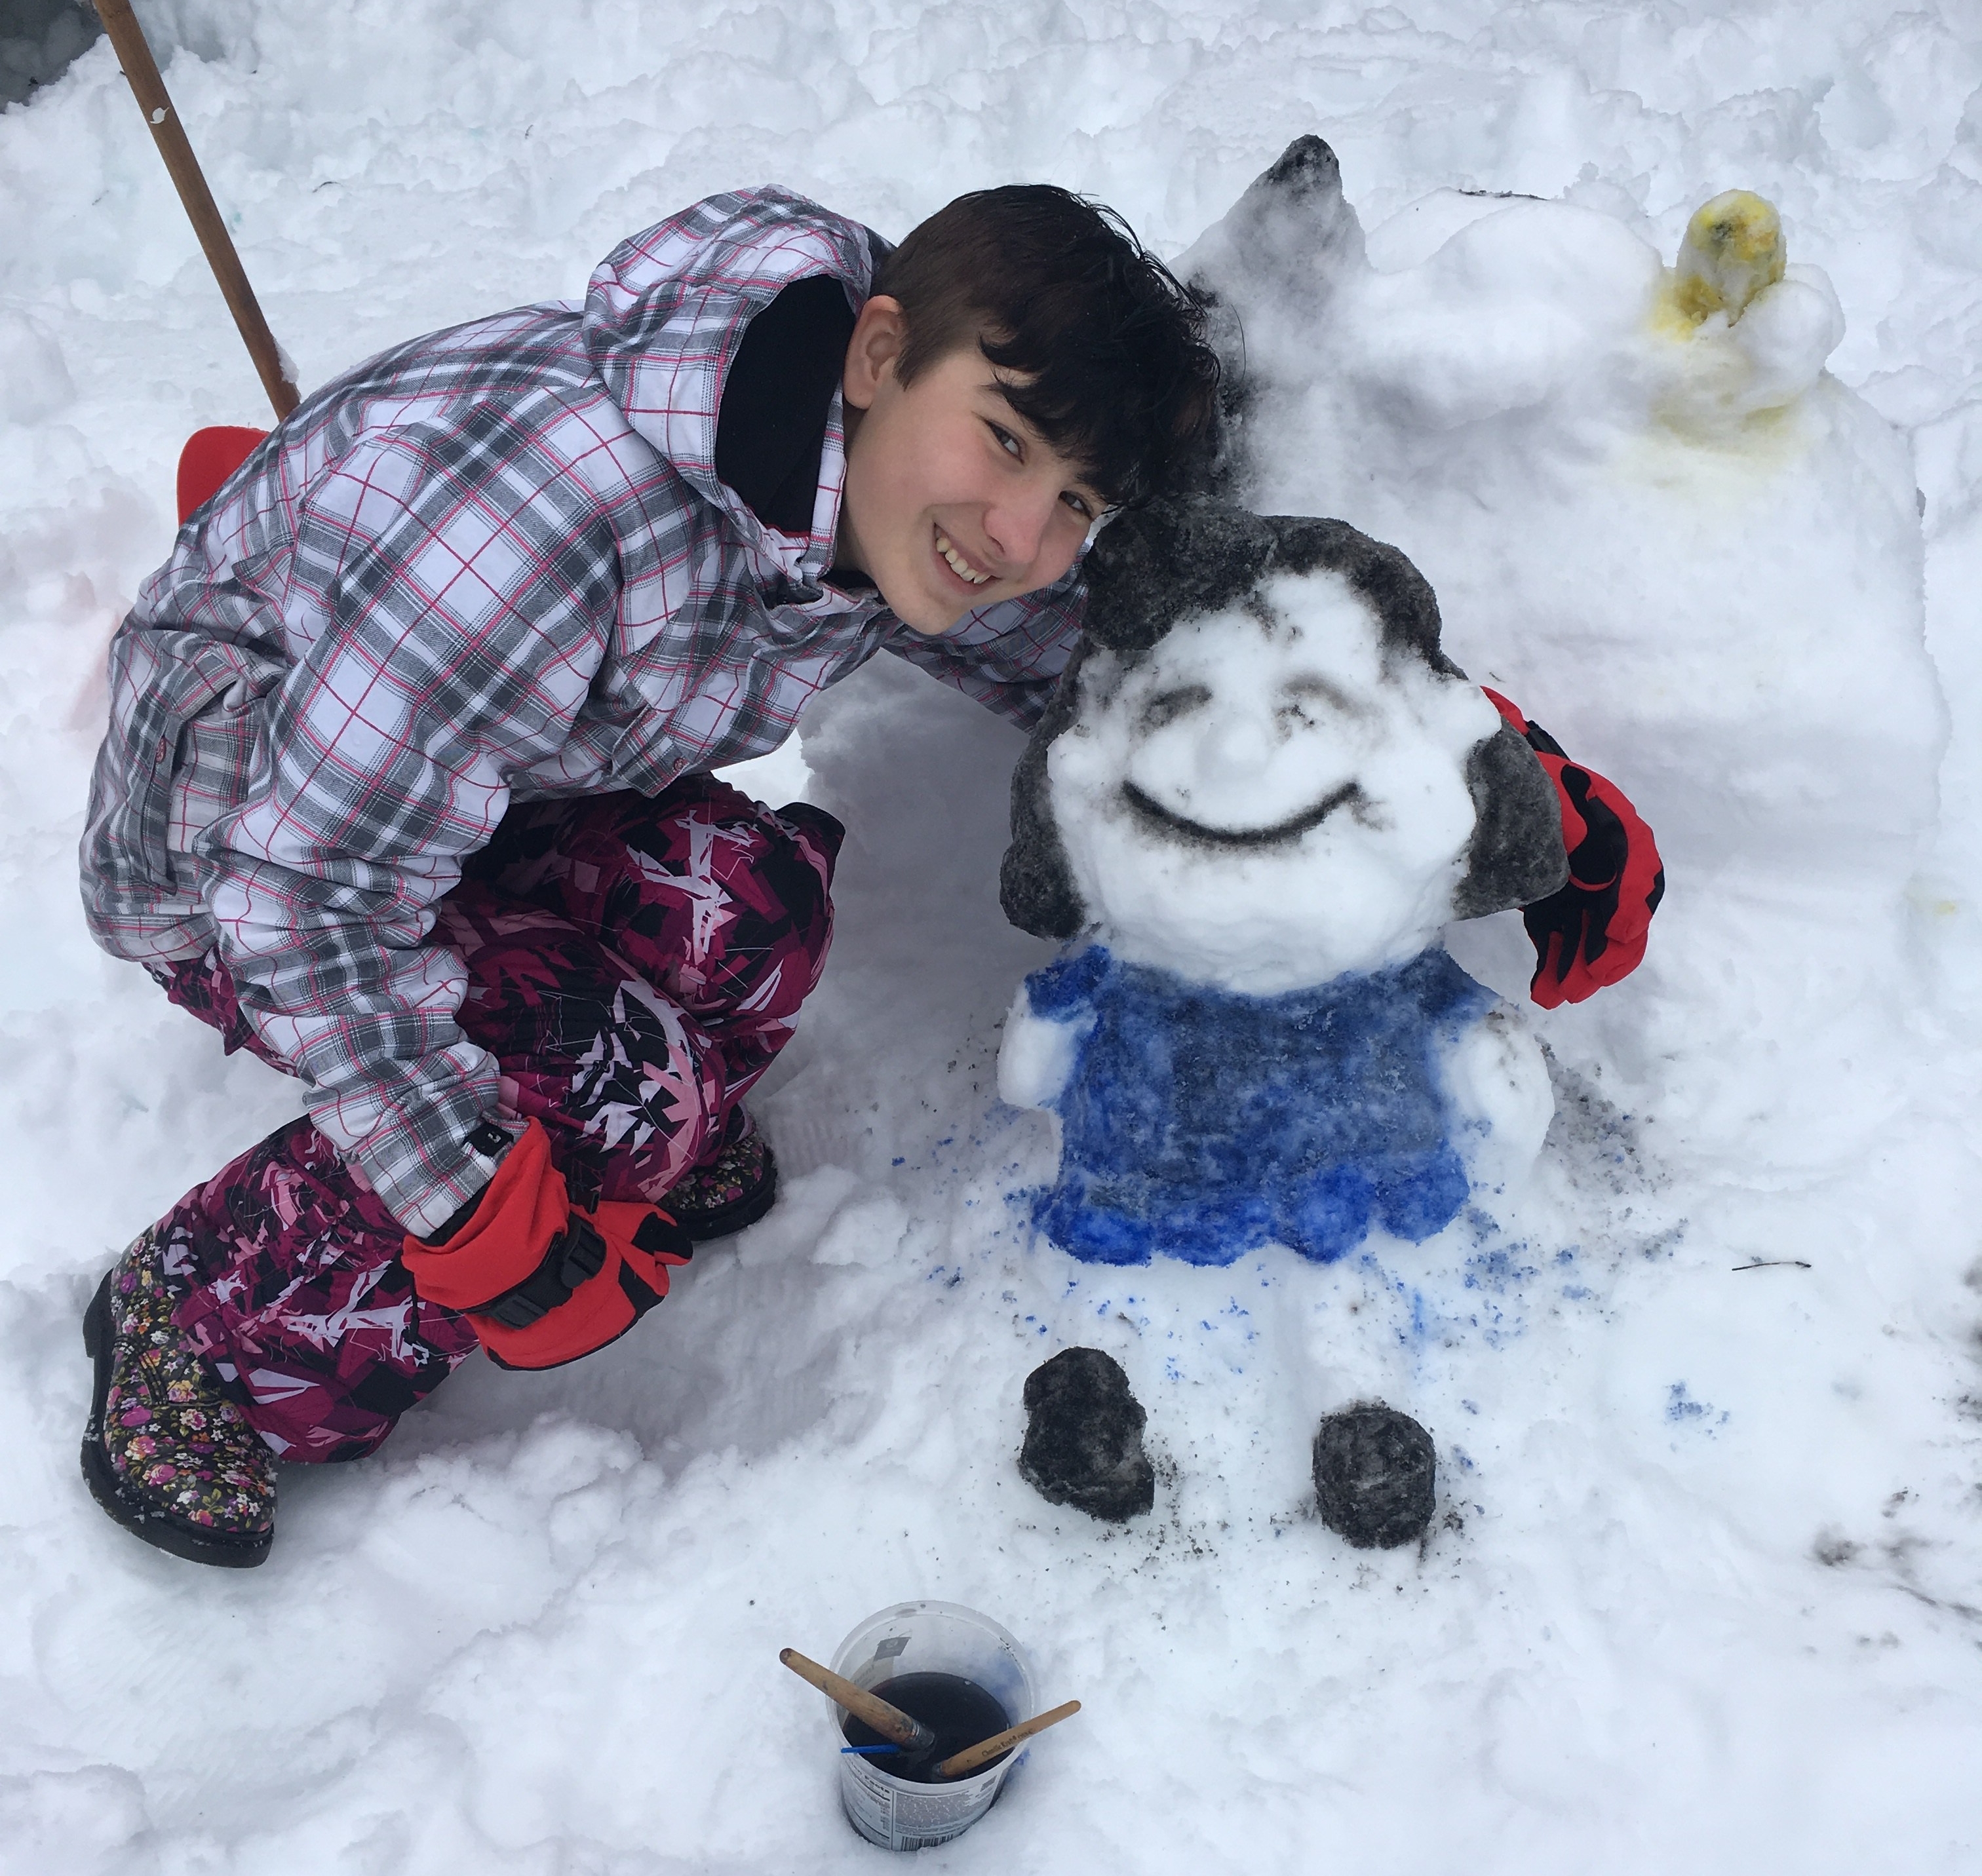
After almost a week of snow in the Seattle area, many have had enough of snow and can’t wait to get back to normality. Personally, snow makes me smile. I love having my kids home and playing in the snow, because we can try out some really cool projects. As Peanuts fans, on our first snow day this week, we built a snow sculpture of Snoopy lying on his kennel.
We used a brick mould to build the structure of the kennel and smoothed the sides to make the sloping roof. Then, sculpted snoopy lying down on top.
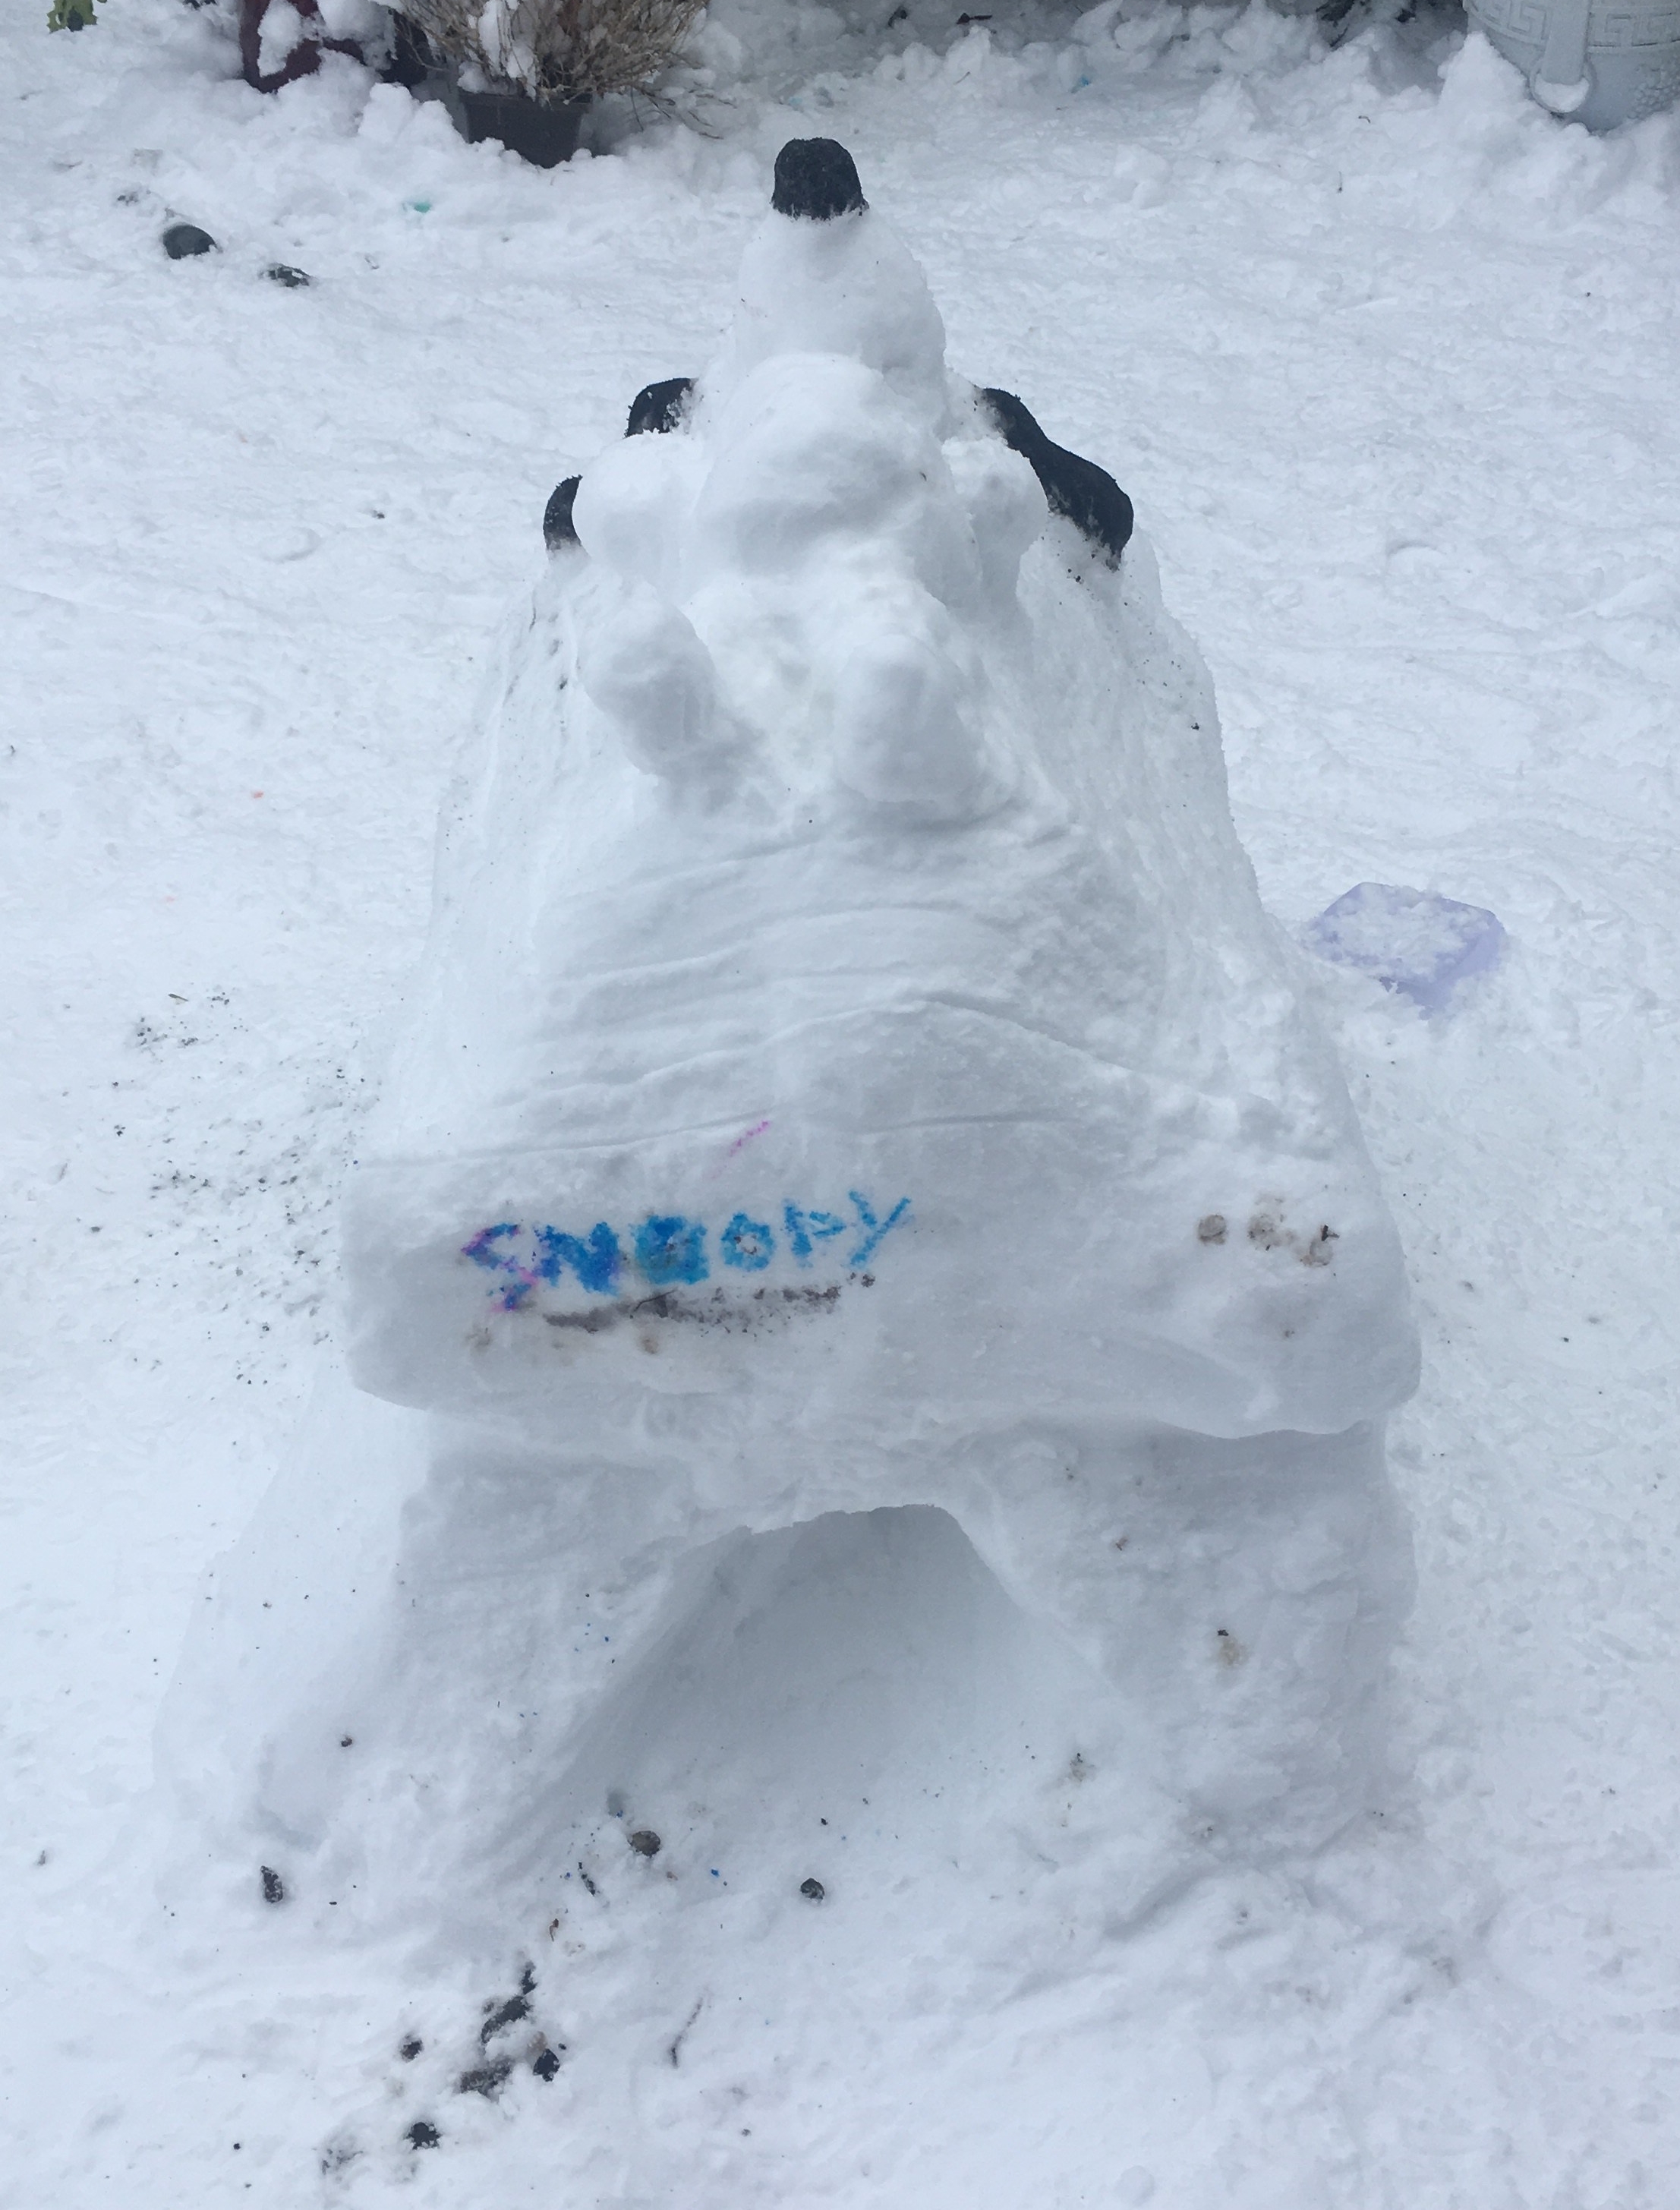
His nose and ears were painted with watercolour block paint and we painted his name on the entrance to the kennel.
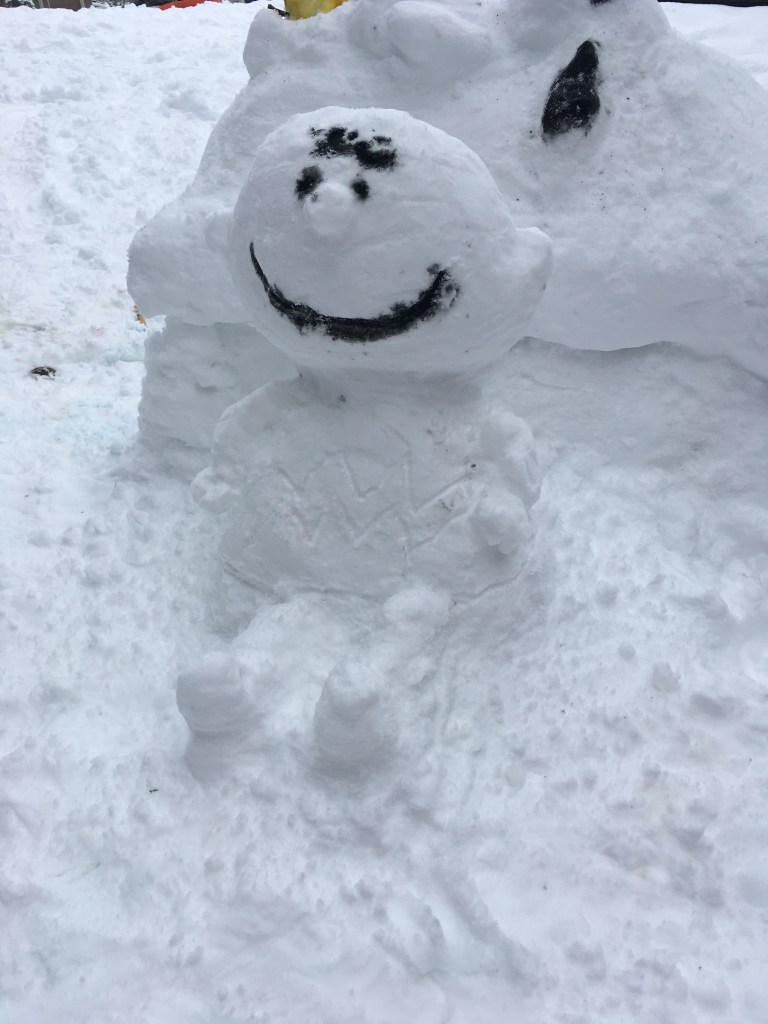
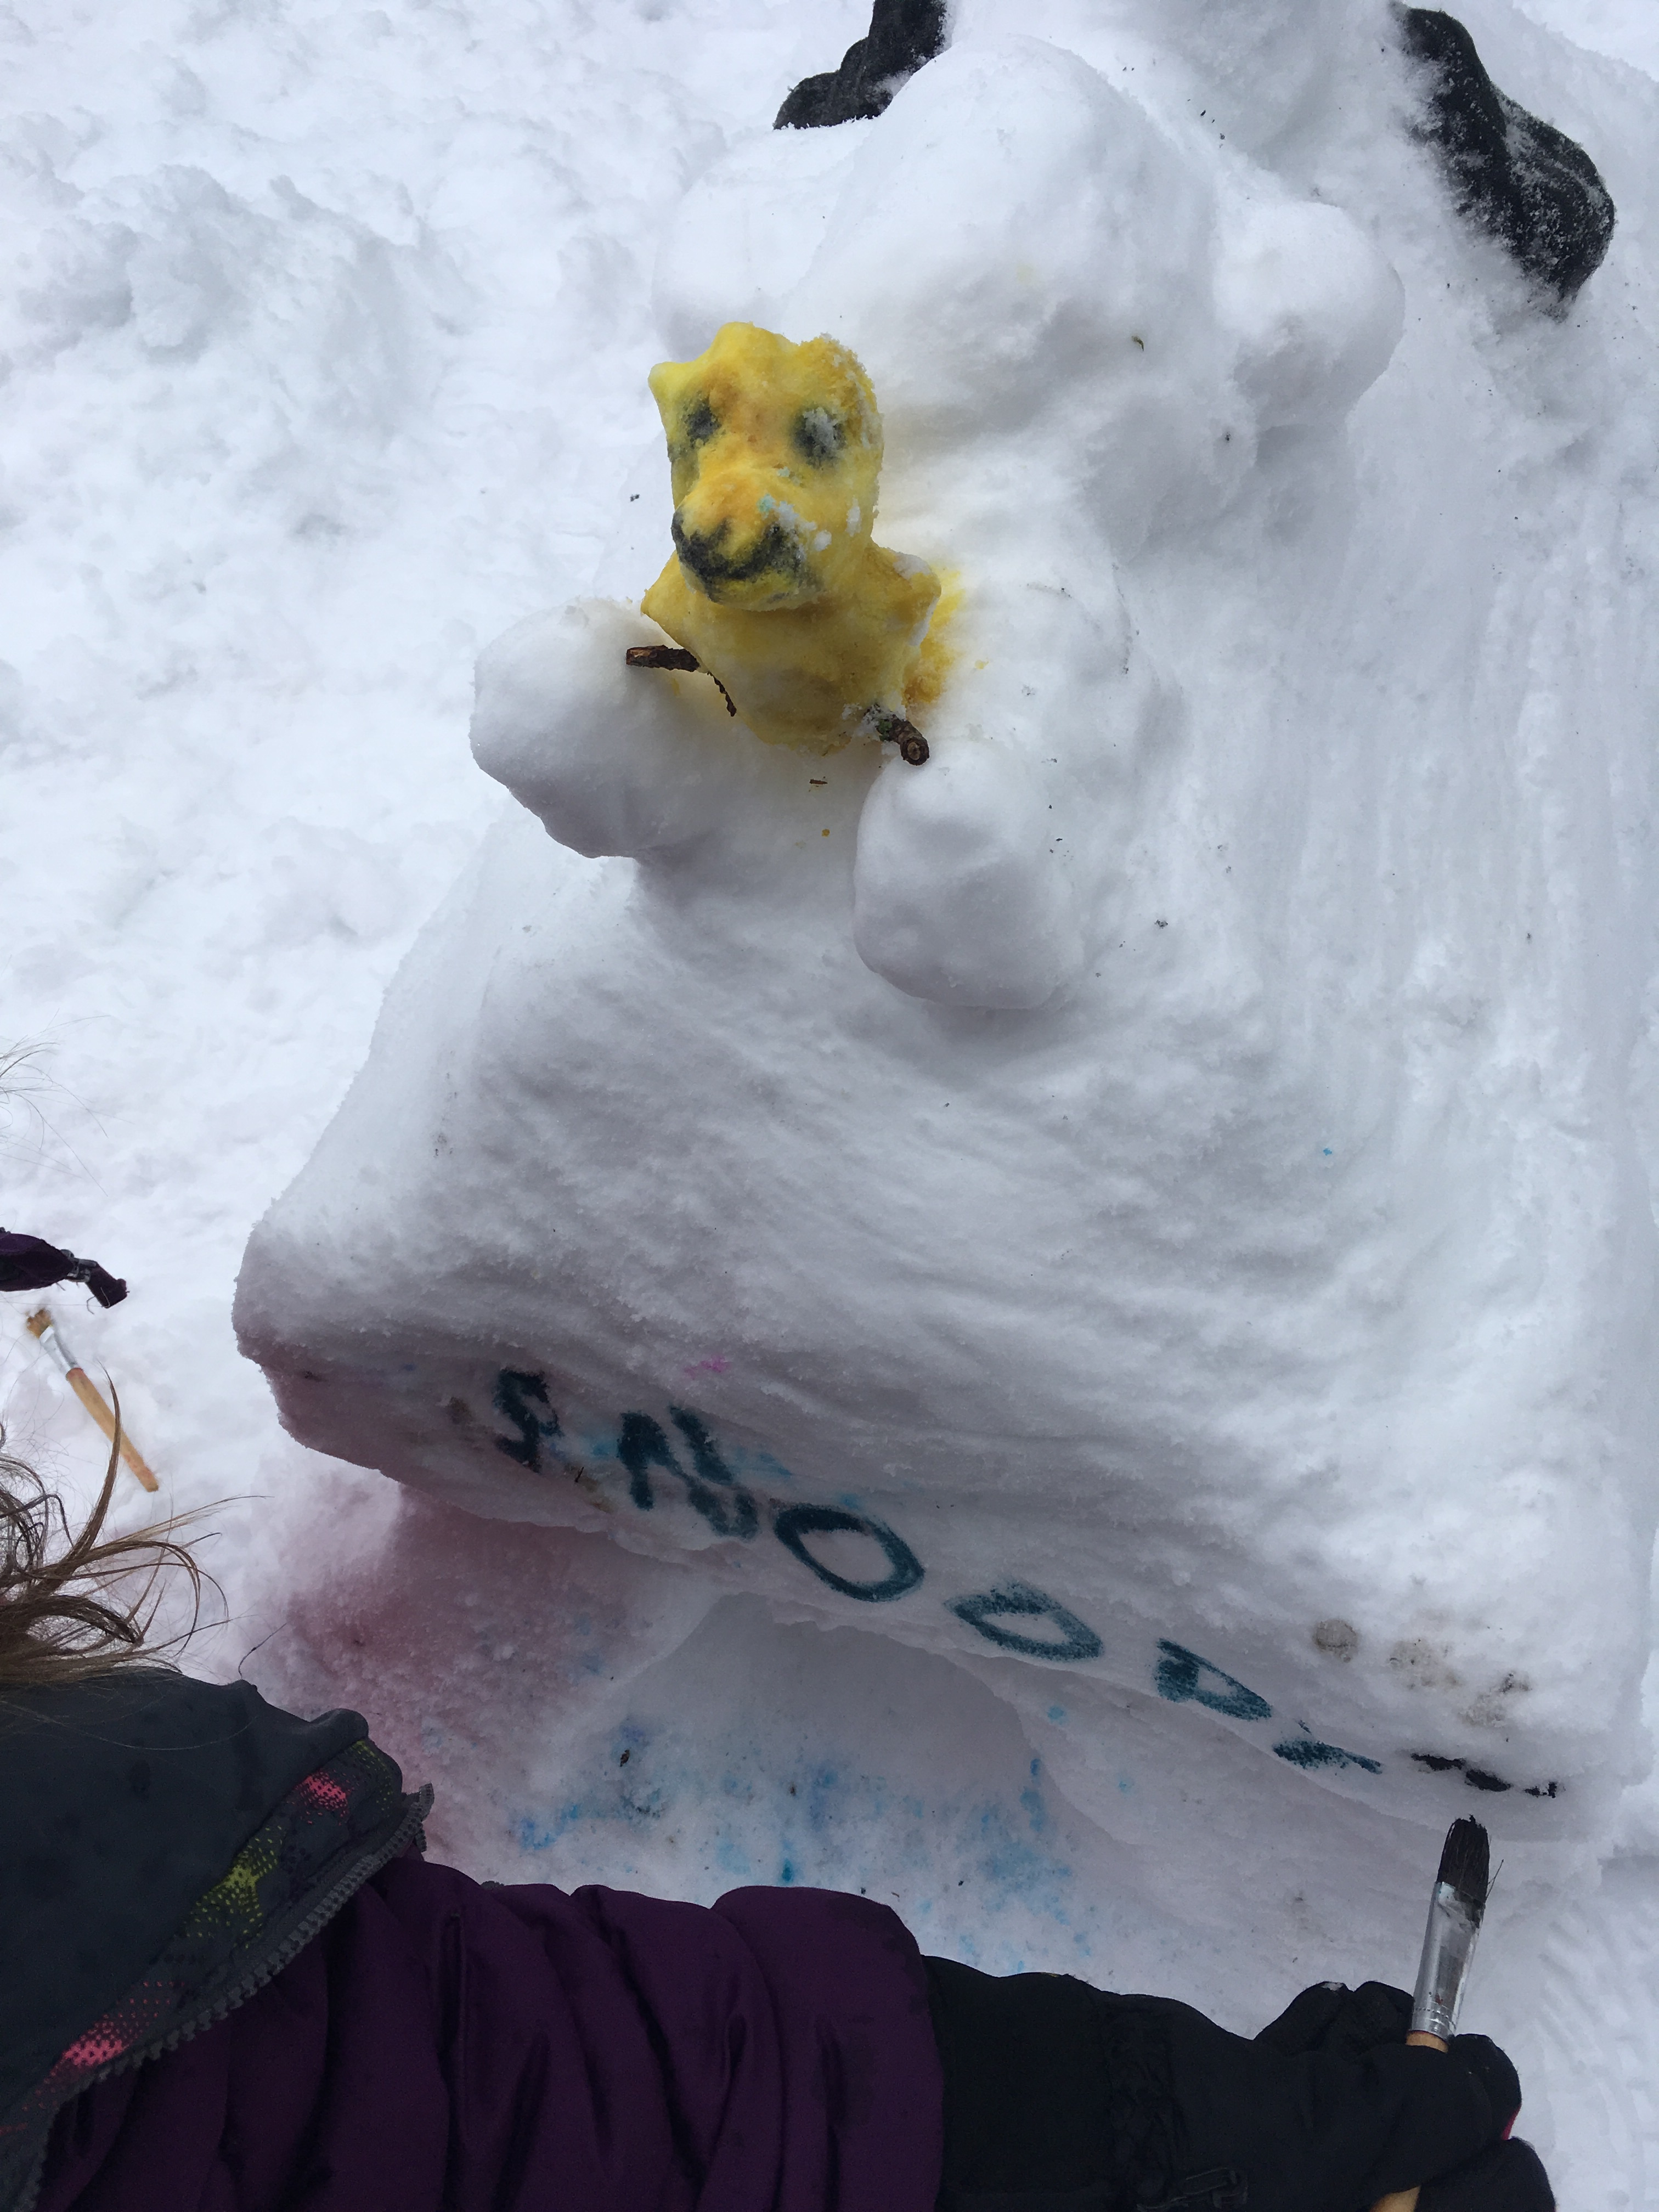
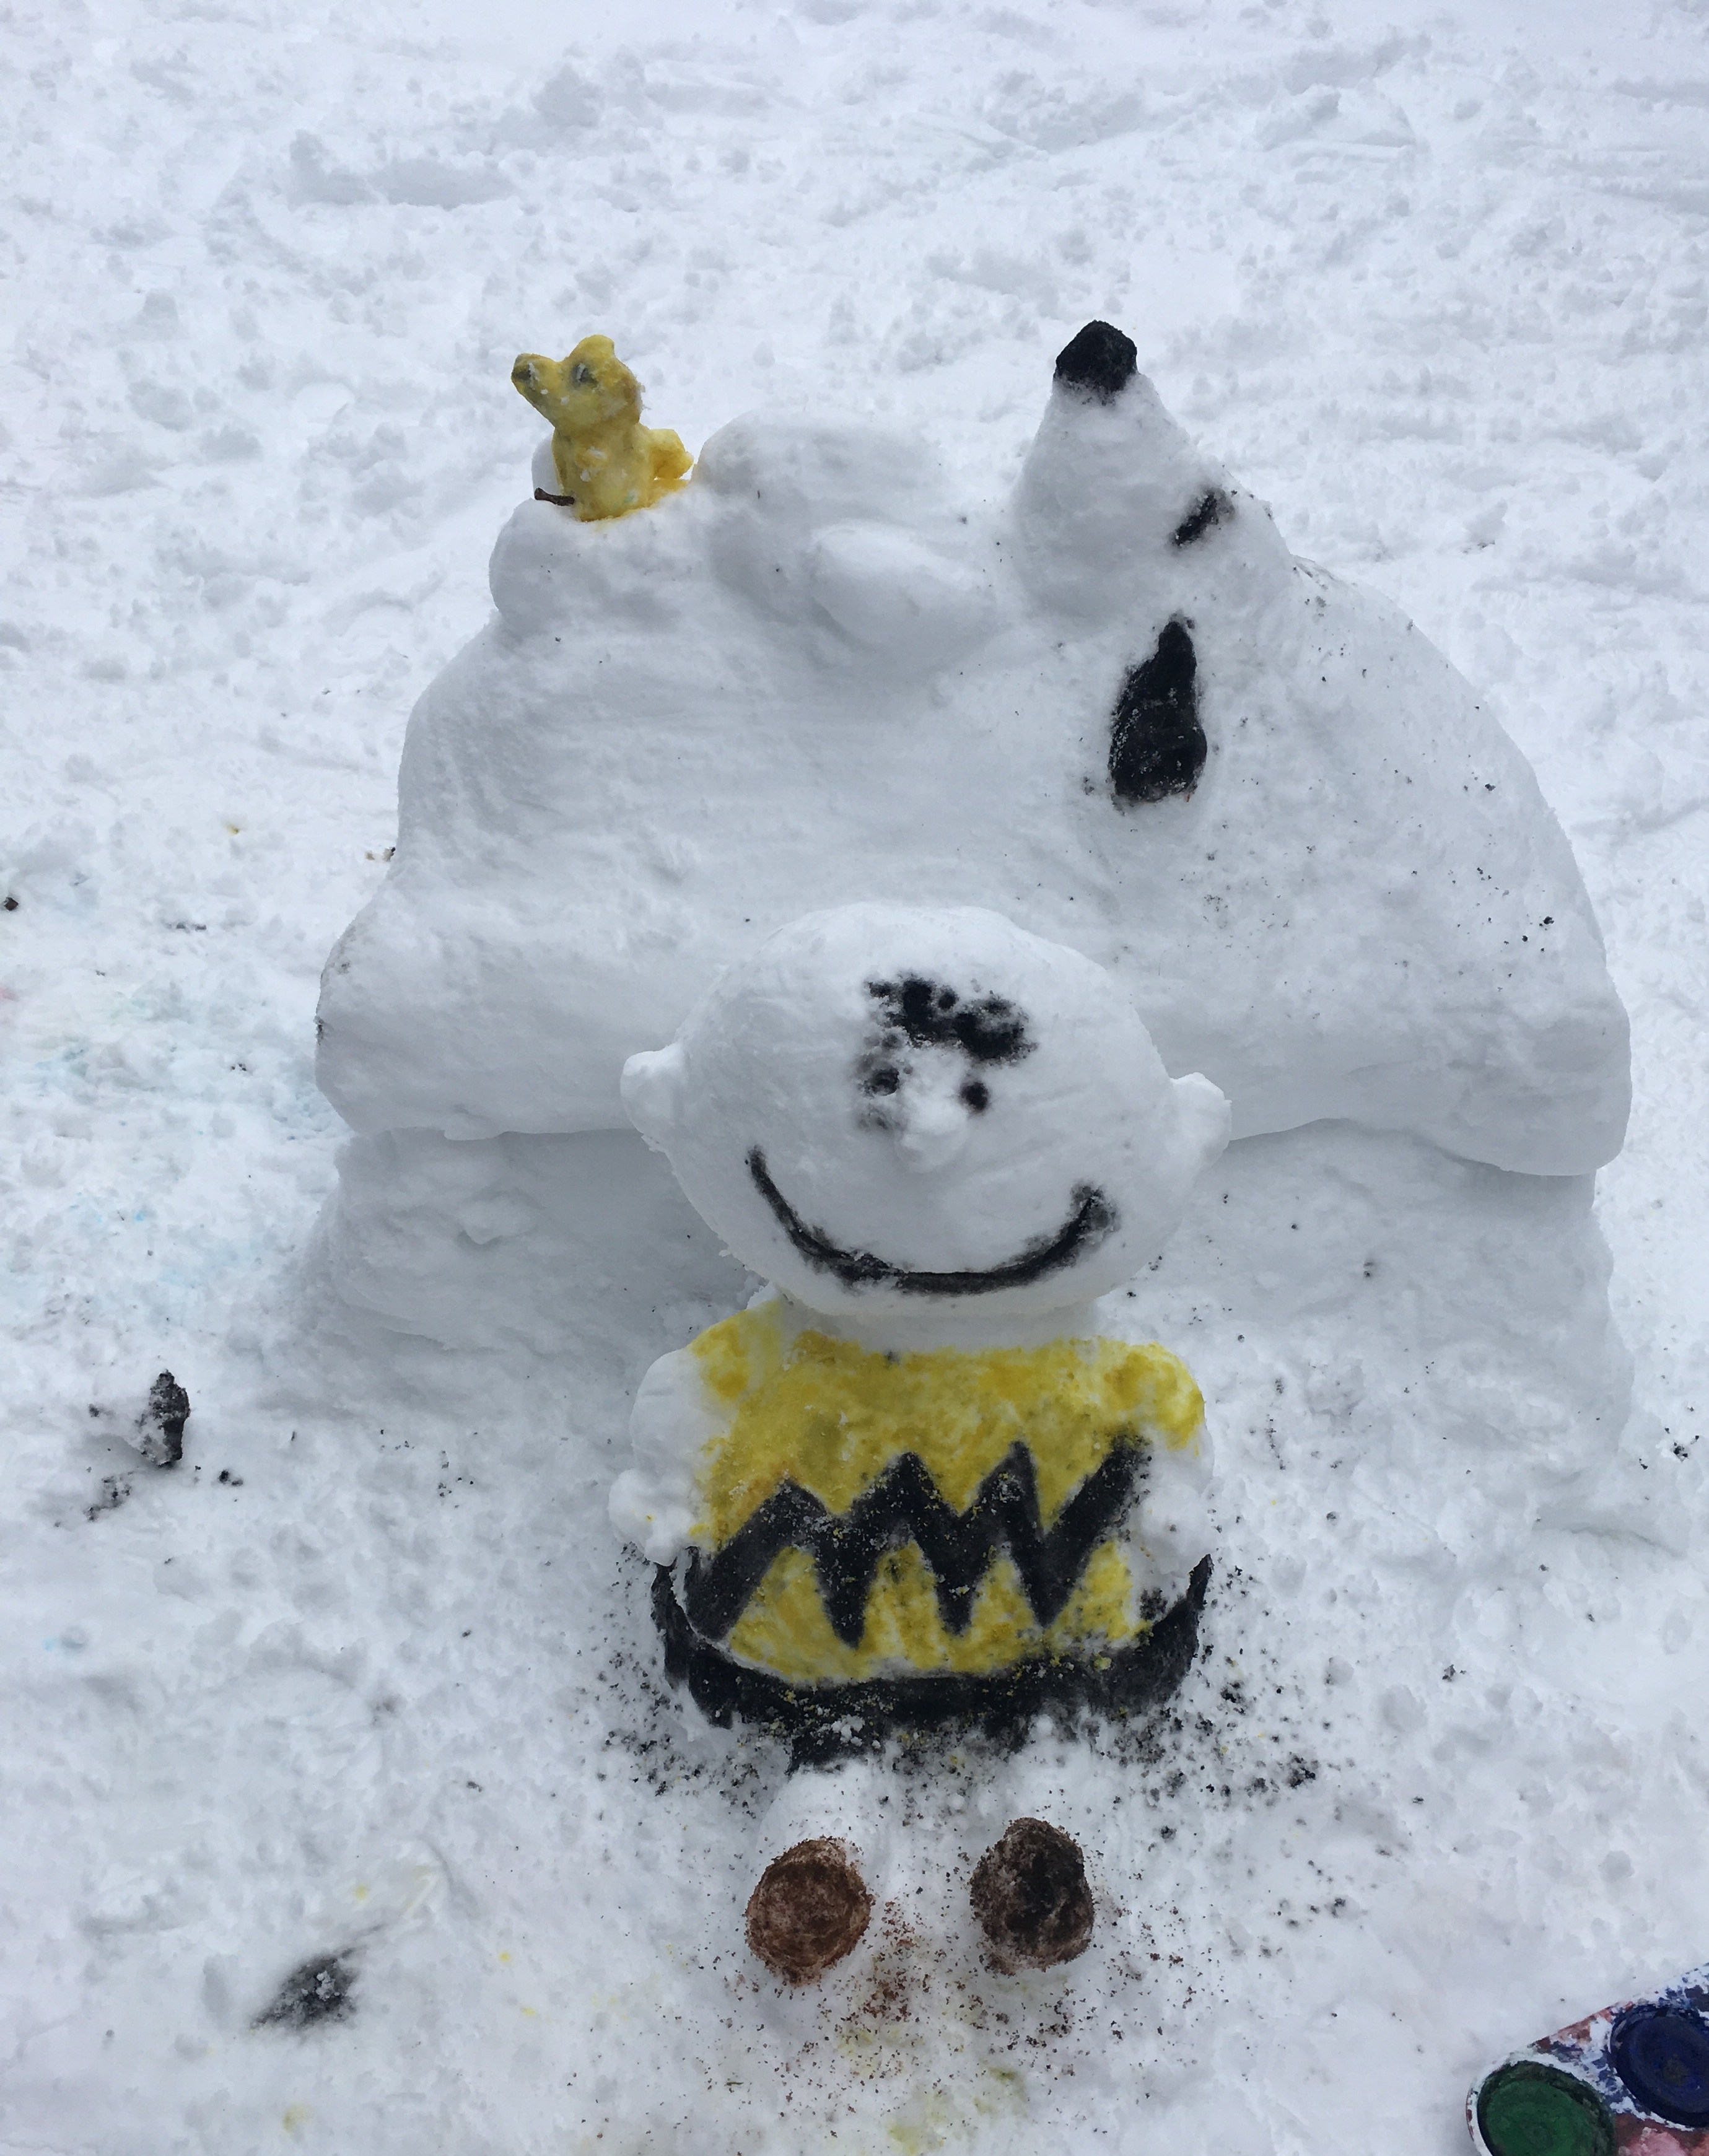
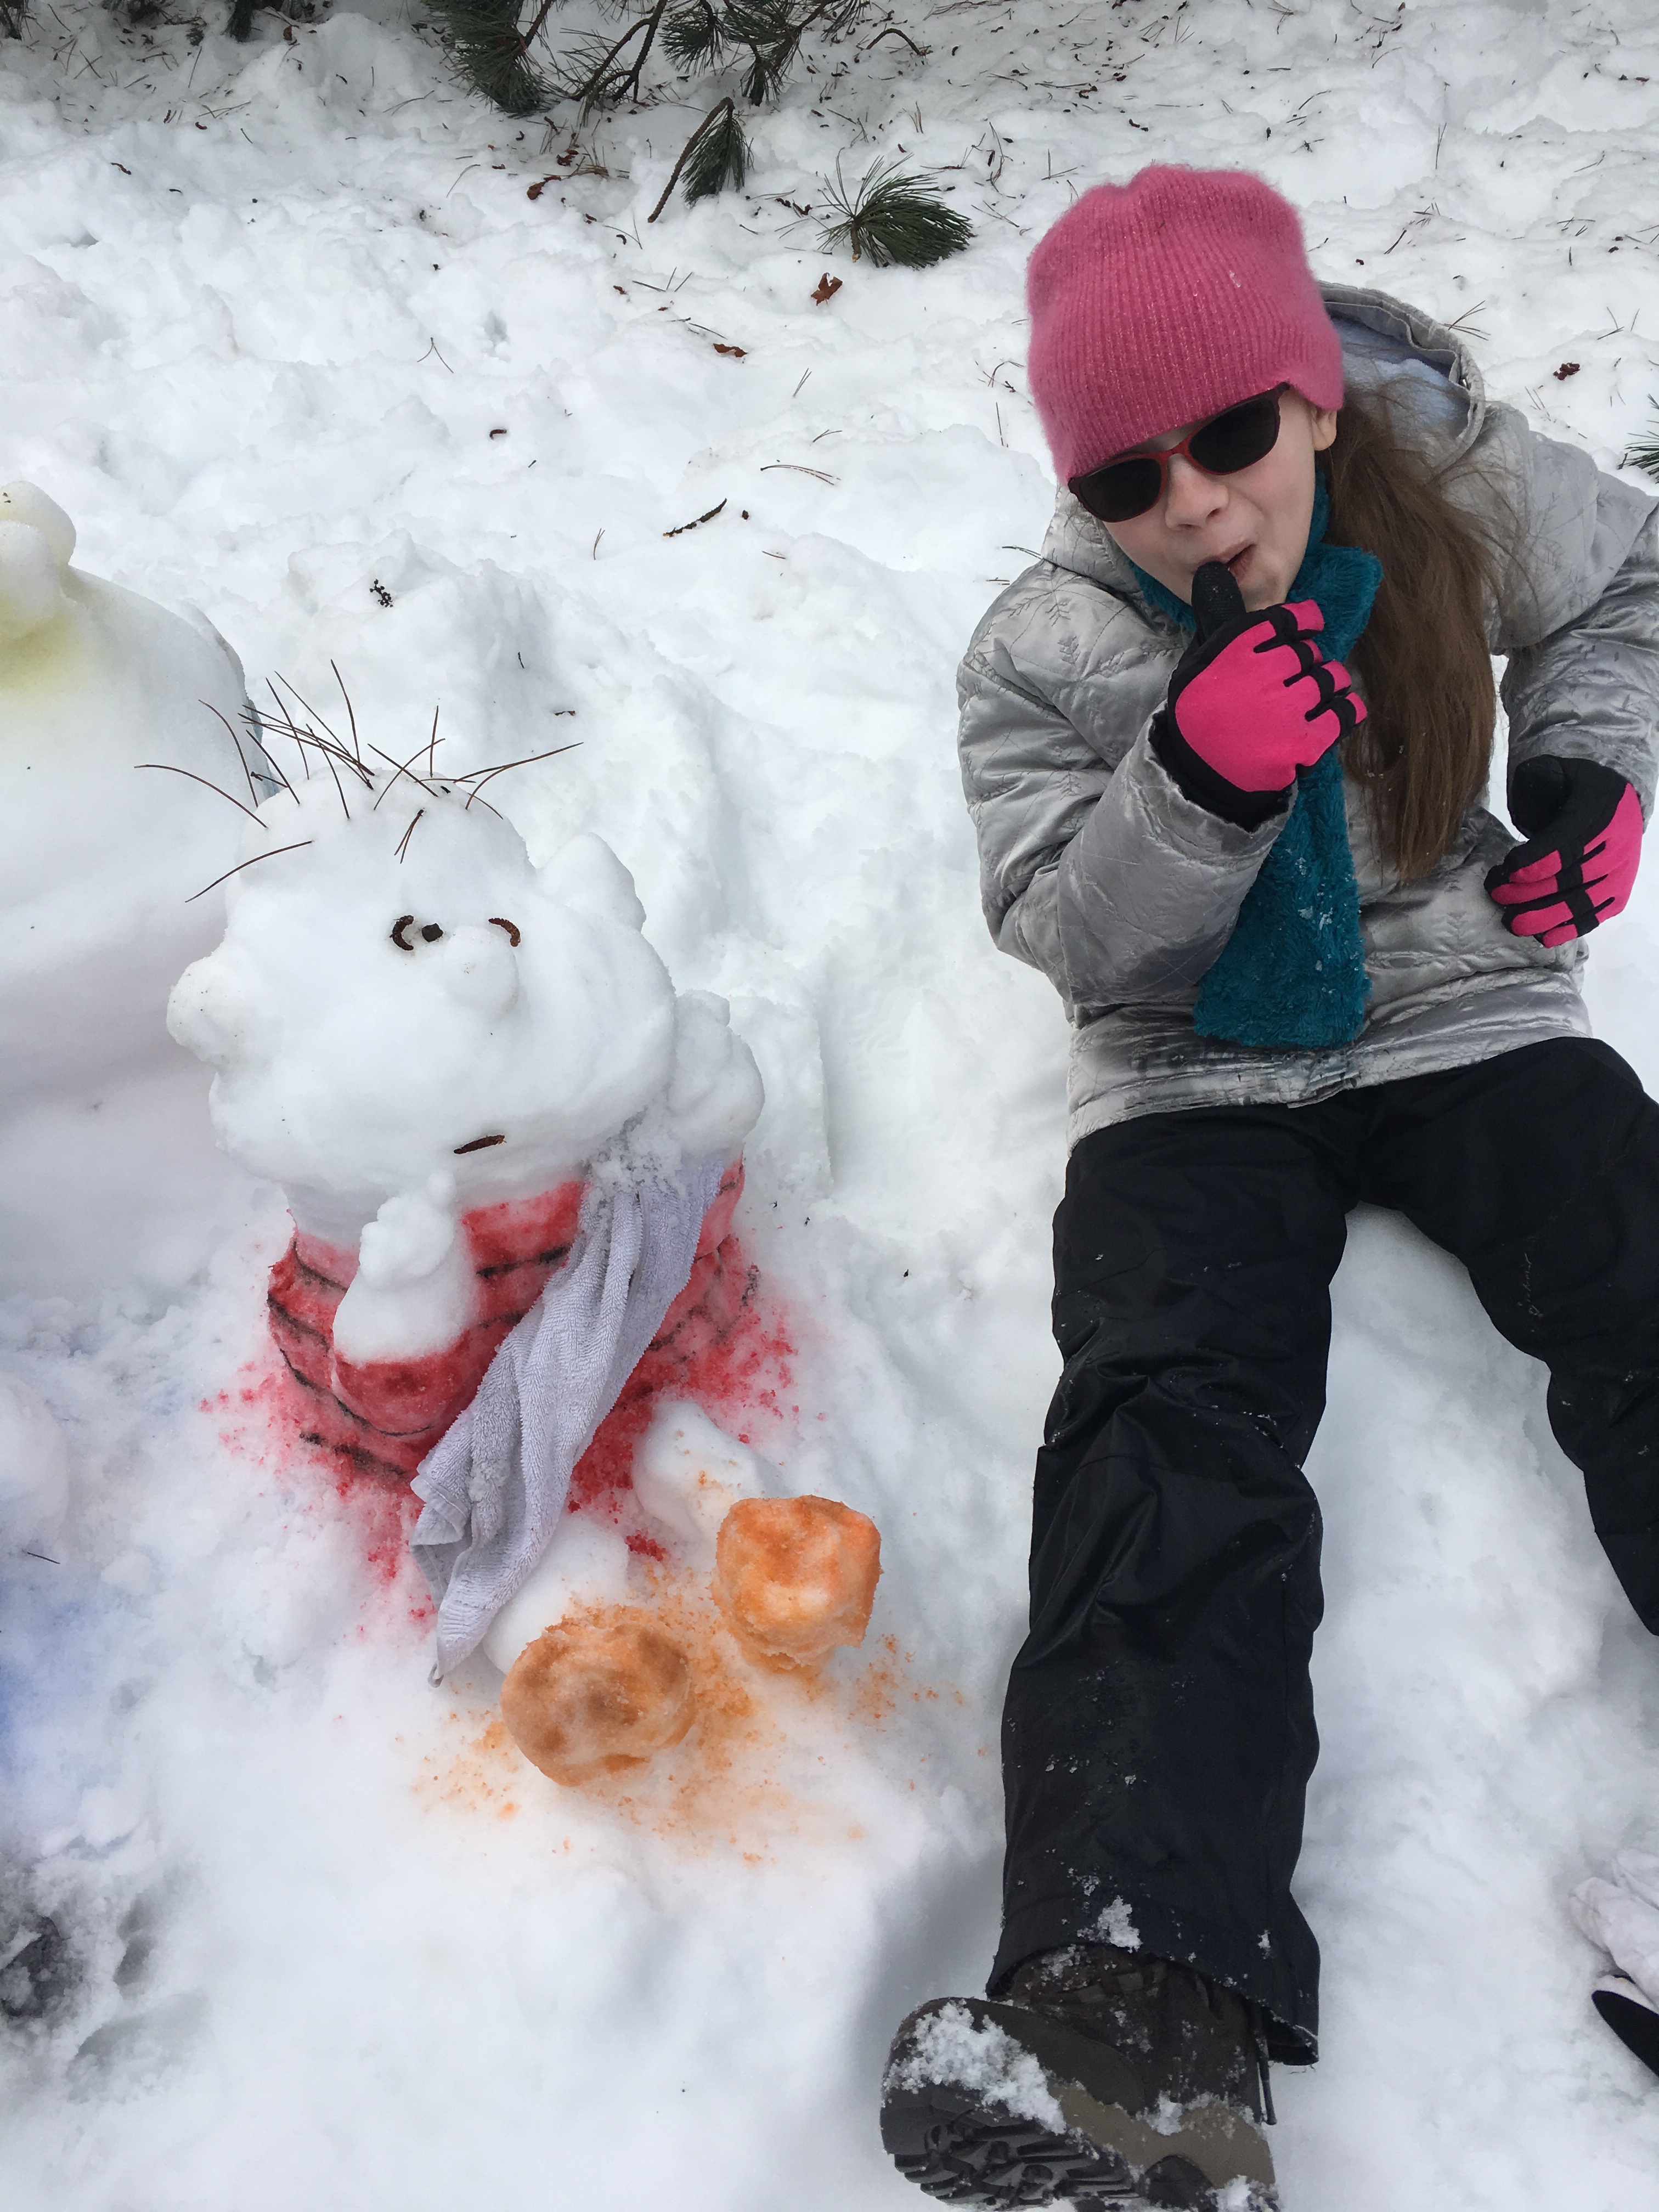
Each day we have added a new Peanuts character.
Day 2 – Charlie Brown and Woodstock
The following night we had a lot of snowfall, so in the morning it was as if a Snoopy cartoon had come to life.
Thankfully the snow was soft and powdery so brushed off with little damage, other than some paint smudging and a slightly less defined Woodstock.
Day 3 – Lucy
Day 4 – Linus
This is my personal favourite. There had been some thawing overnight so there were a lot of pine needles in the snow; perfect for Linus’ hair.
For as long as the snow remains, we’re going to add a different character each day. I’ll be updating this post and my Instagram and Facebook page with pictures of the new additions. Who is your favourite Peanuts character?
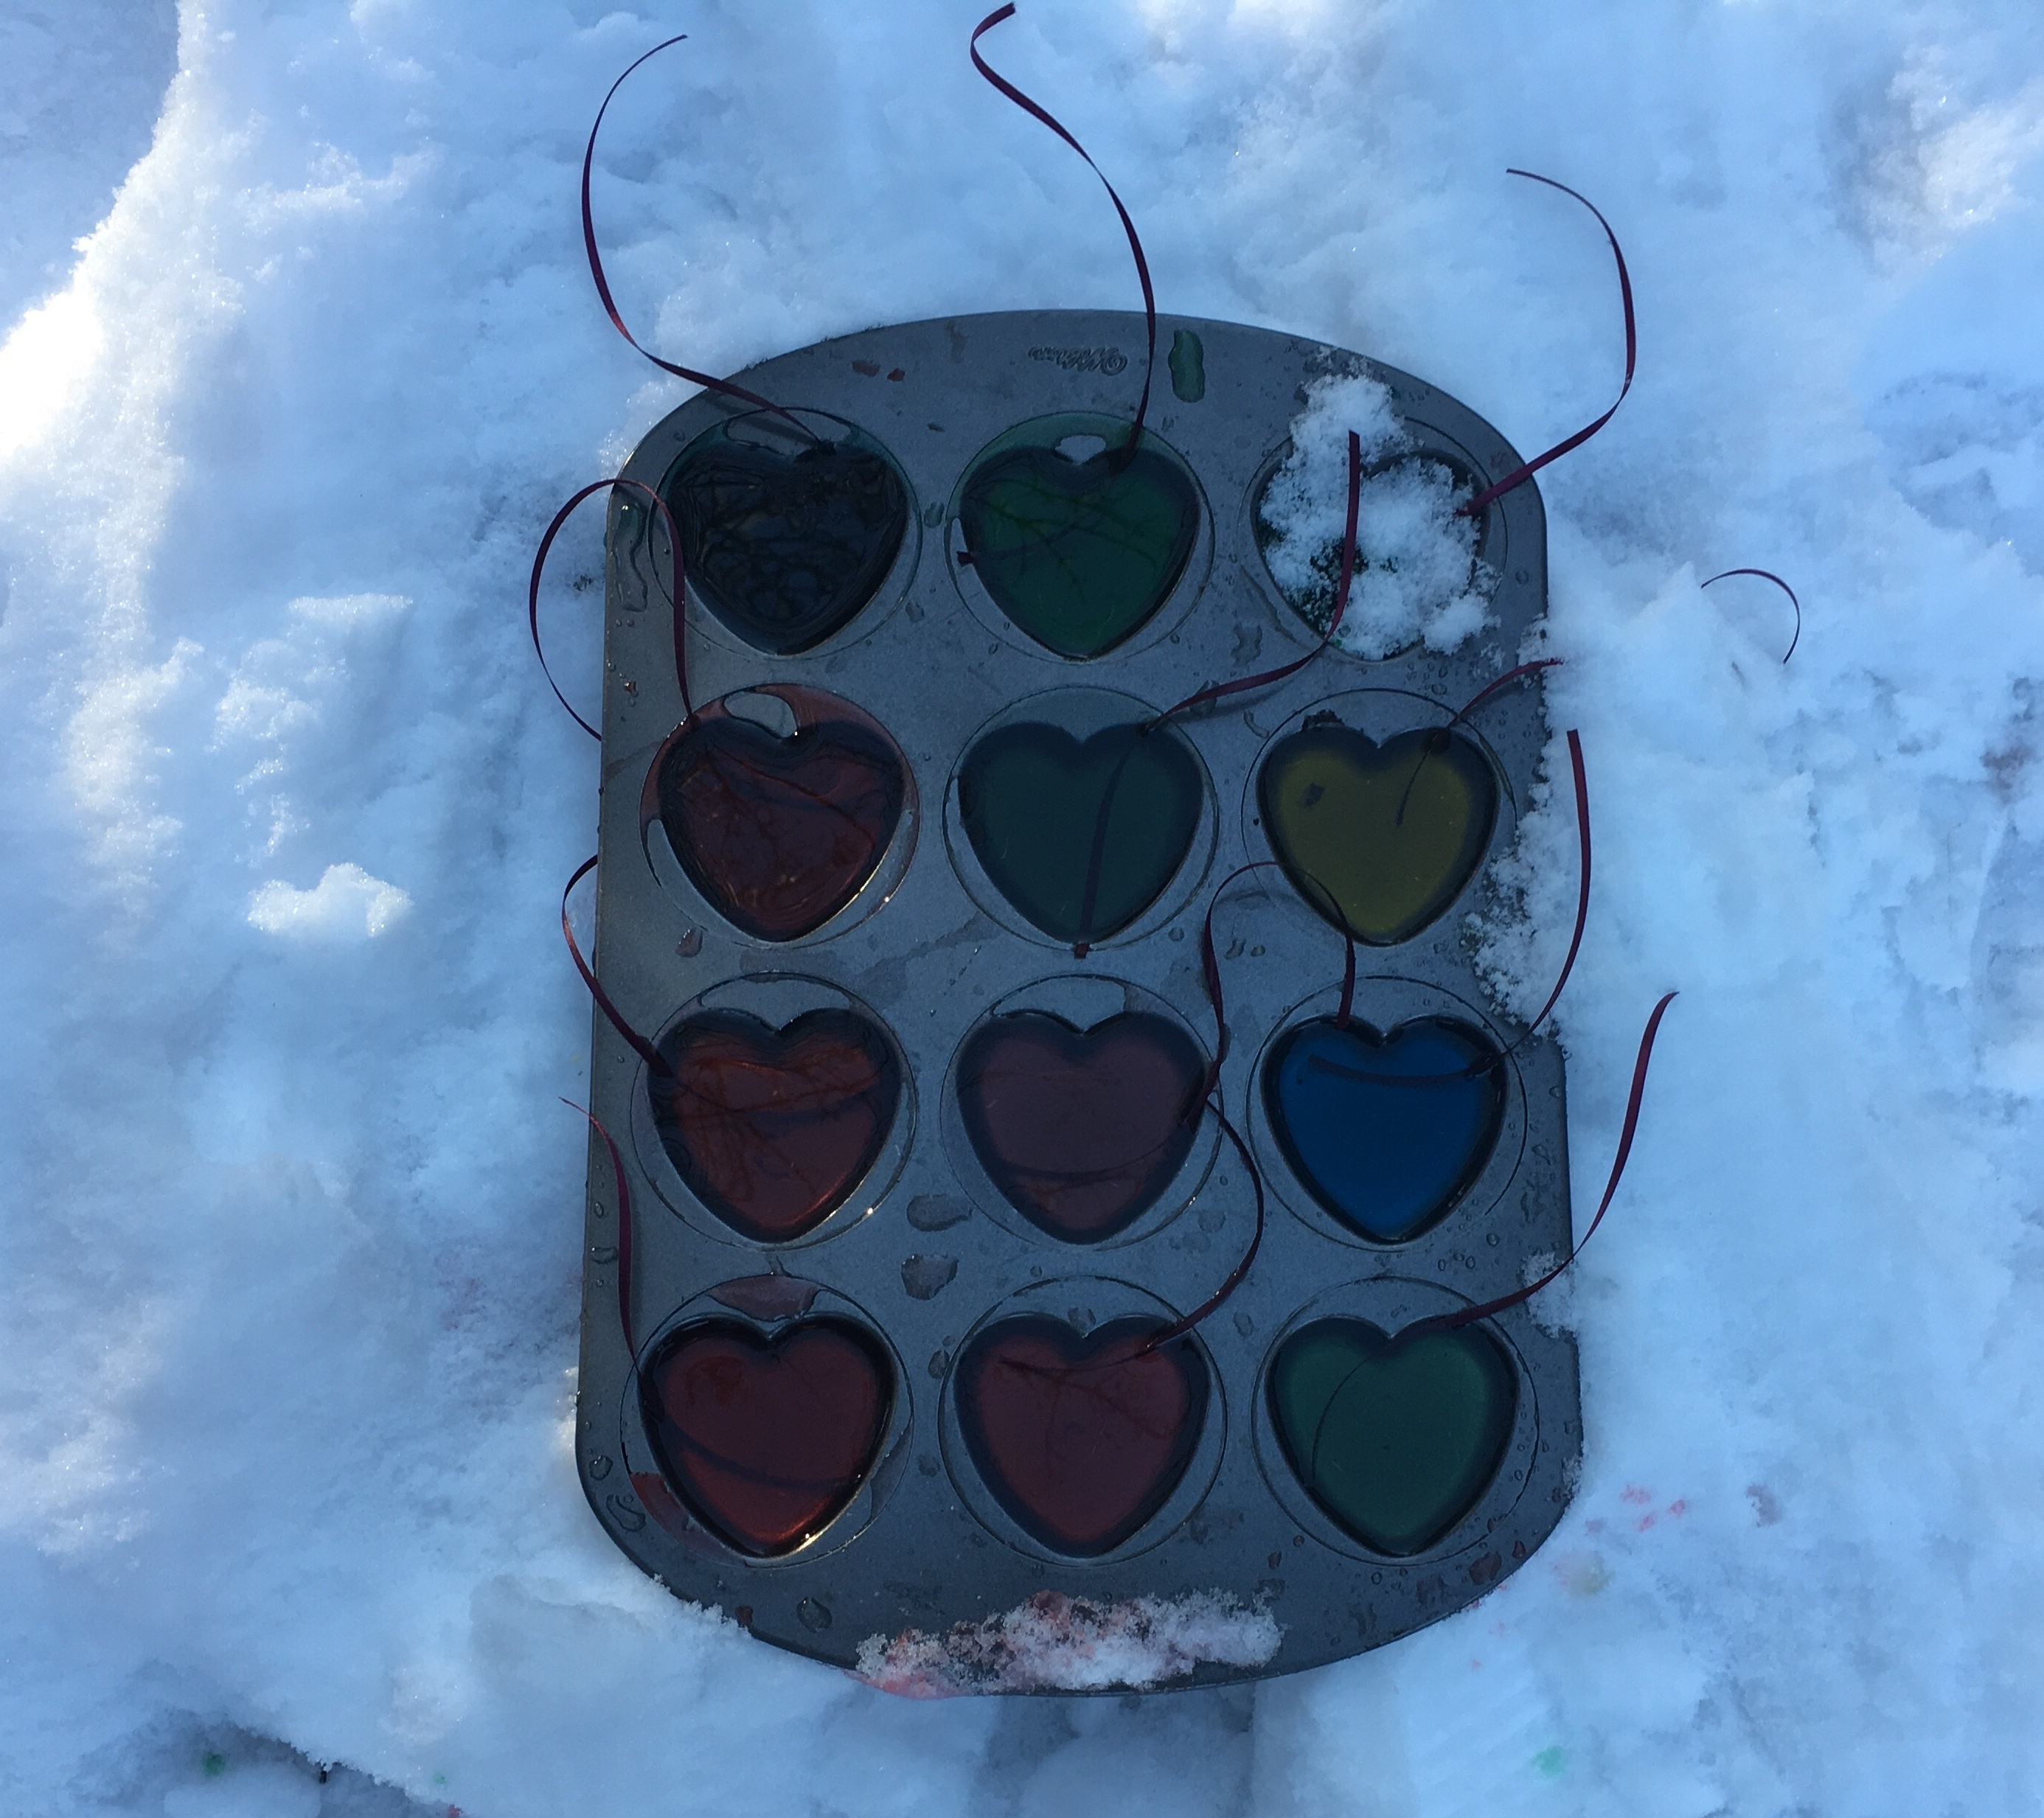
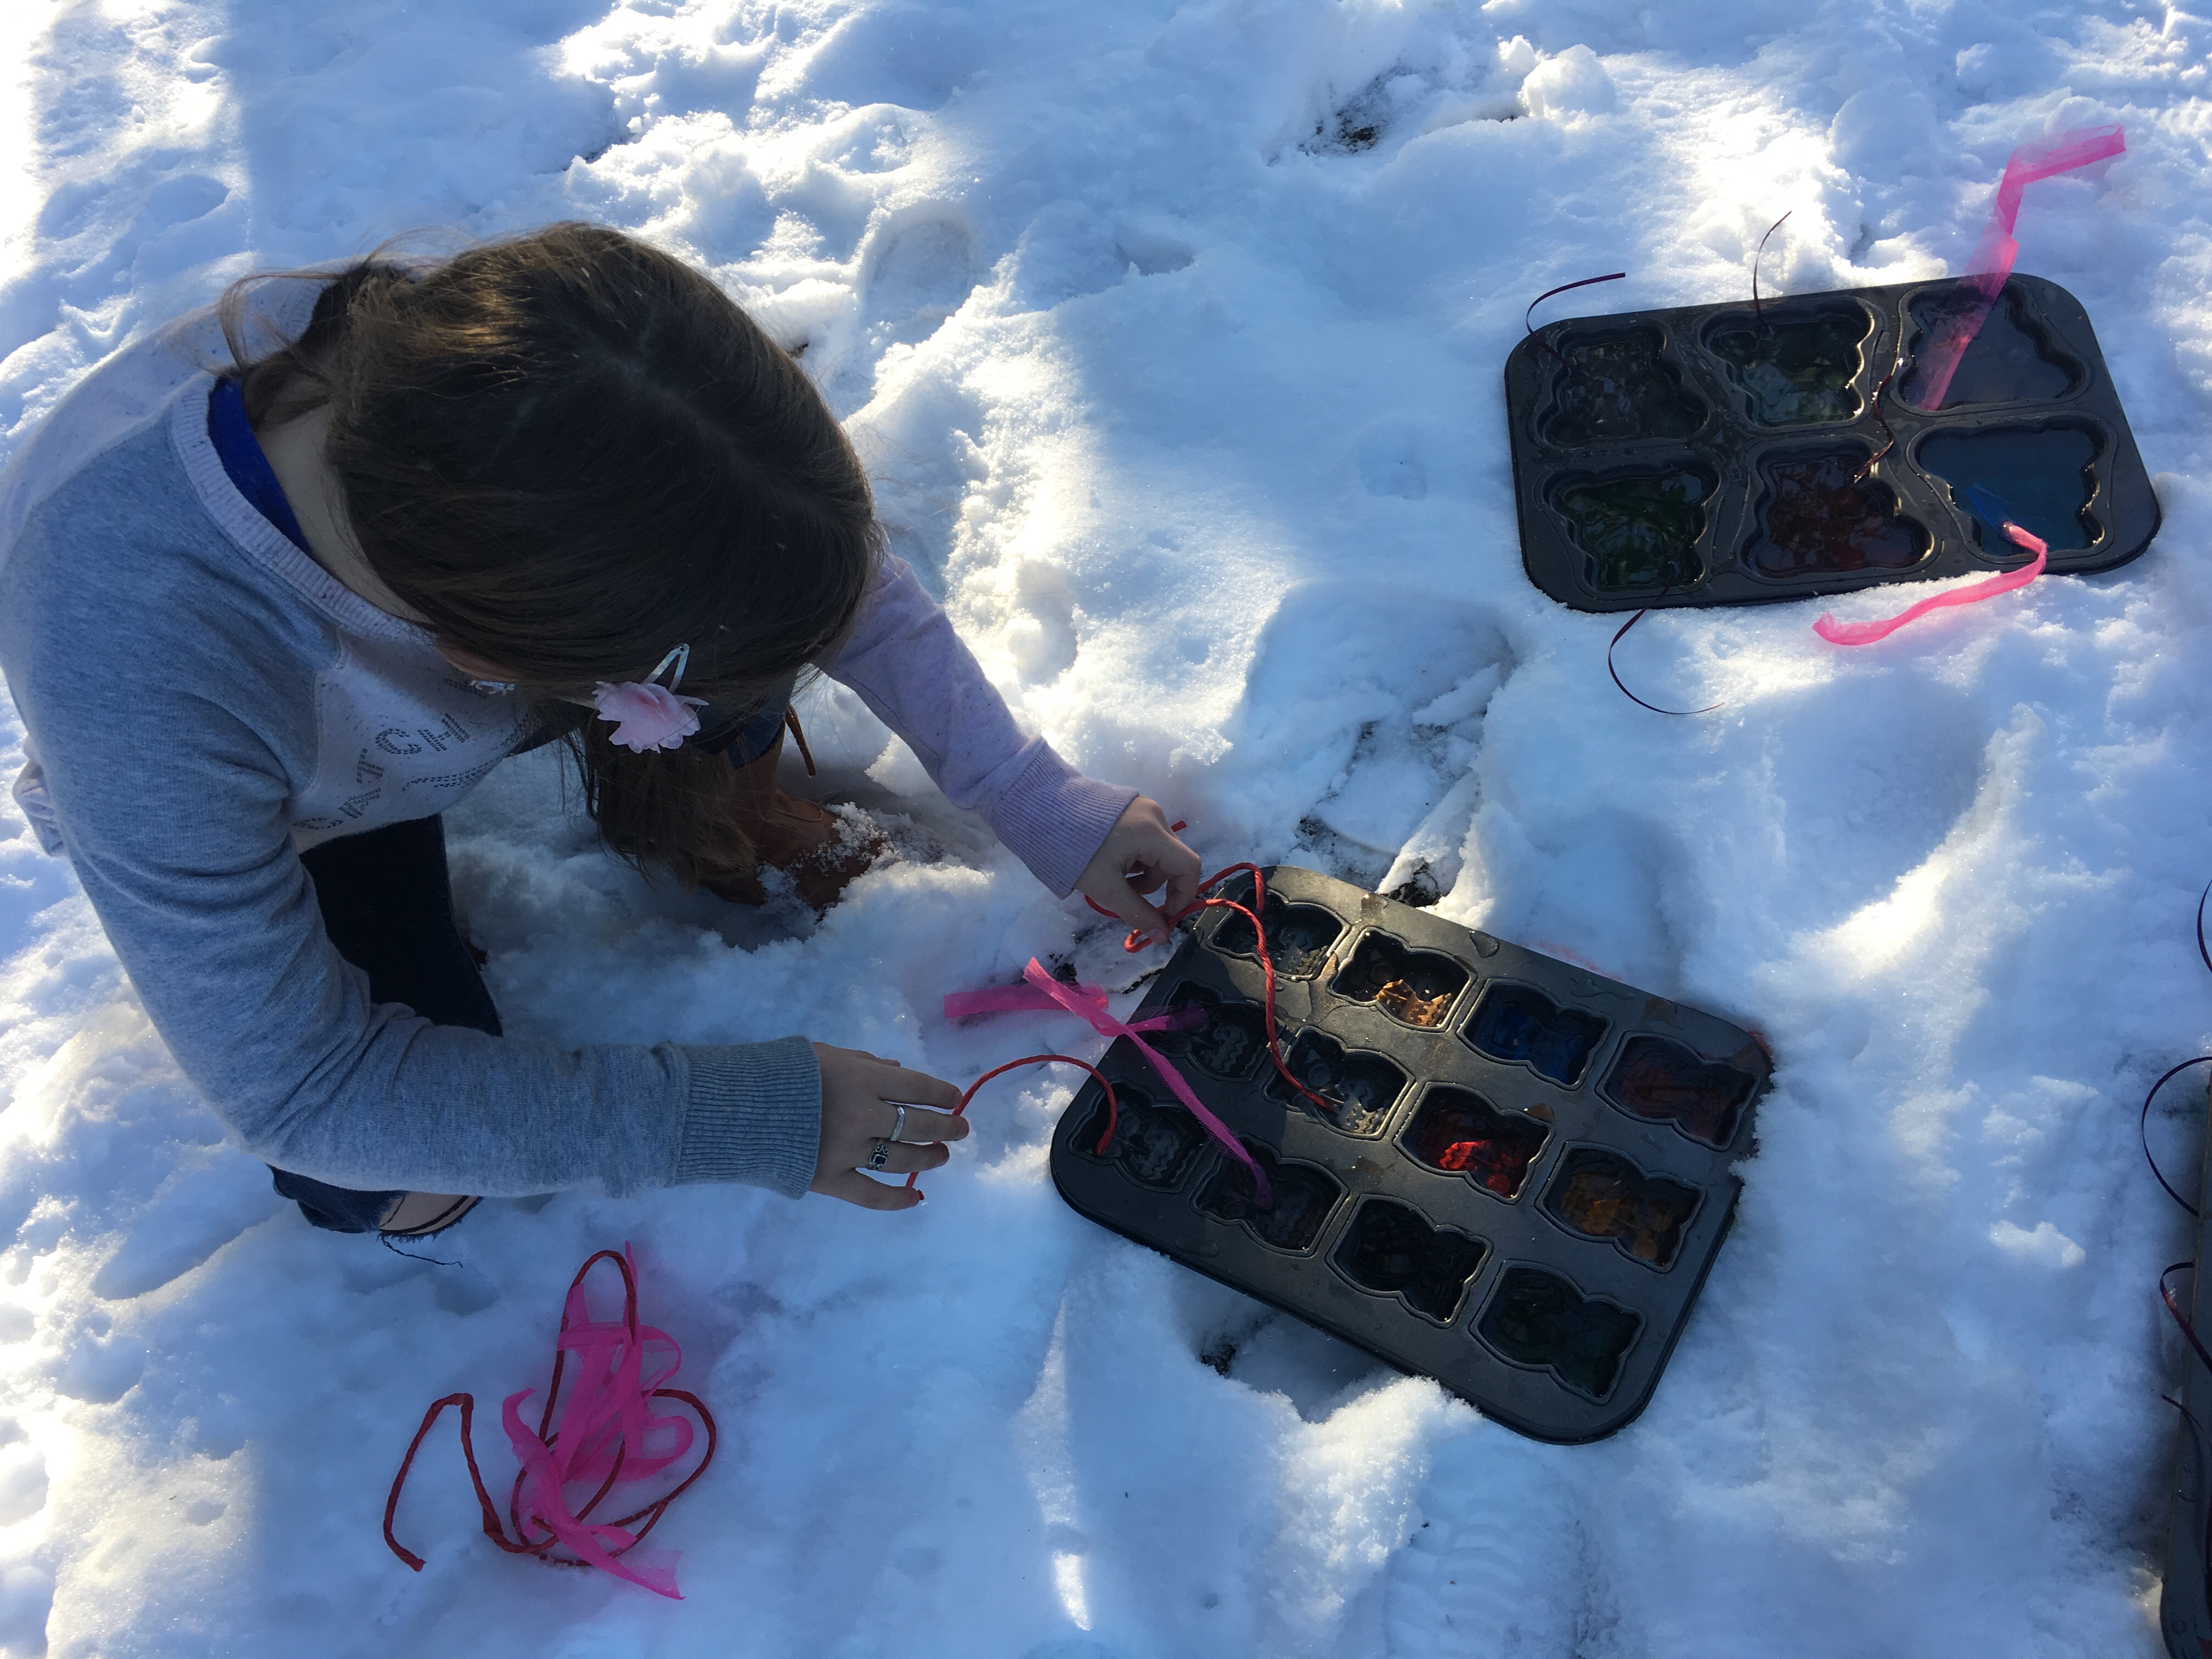
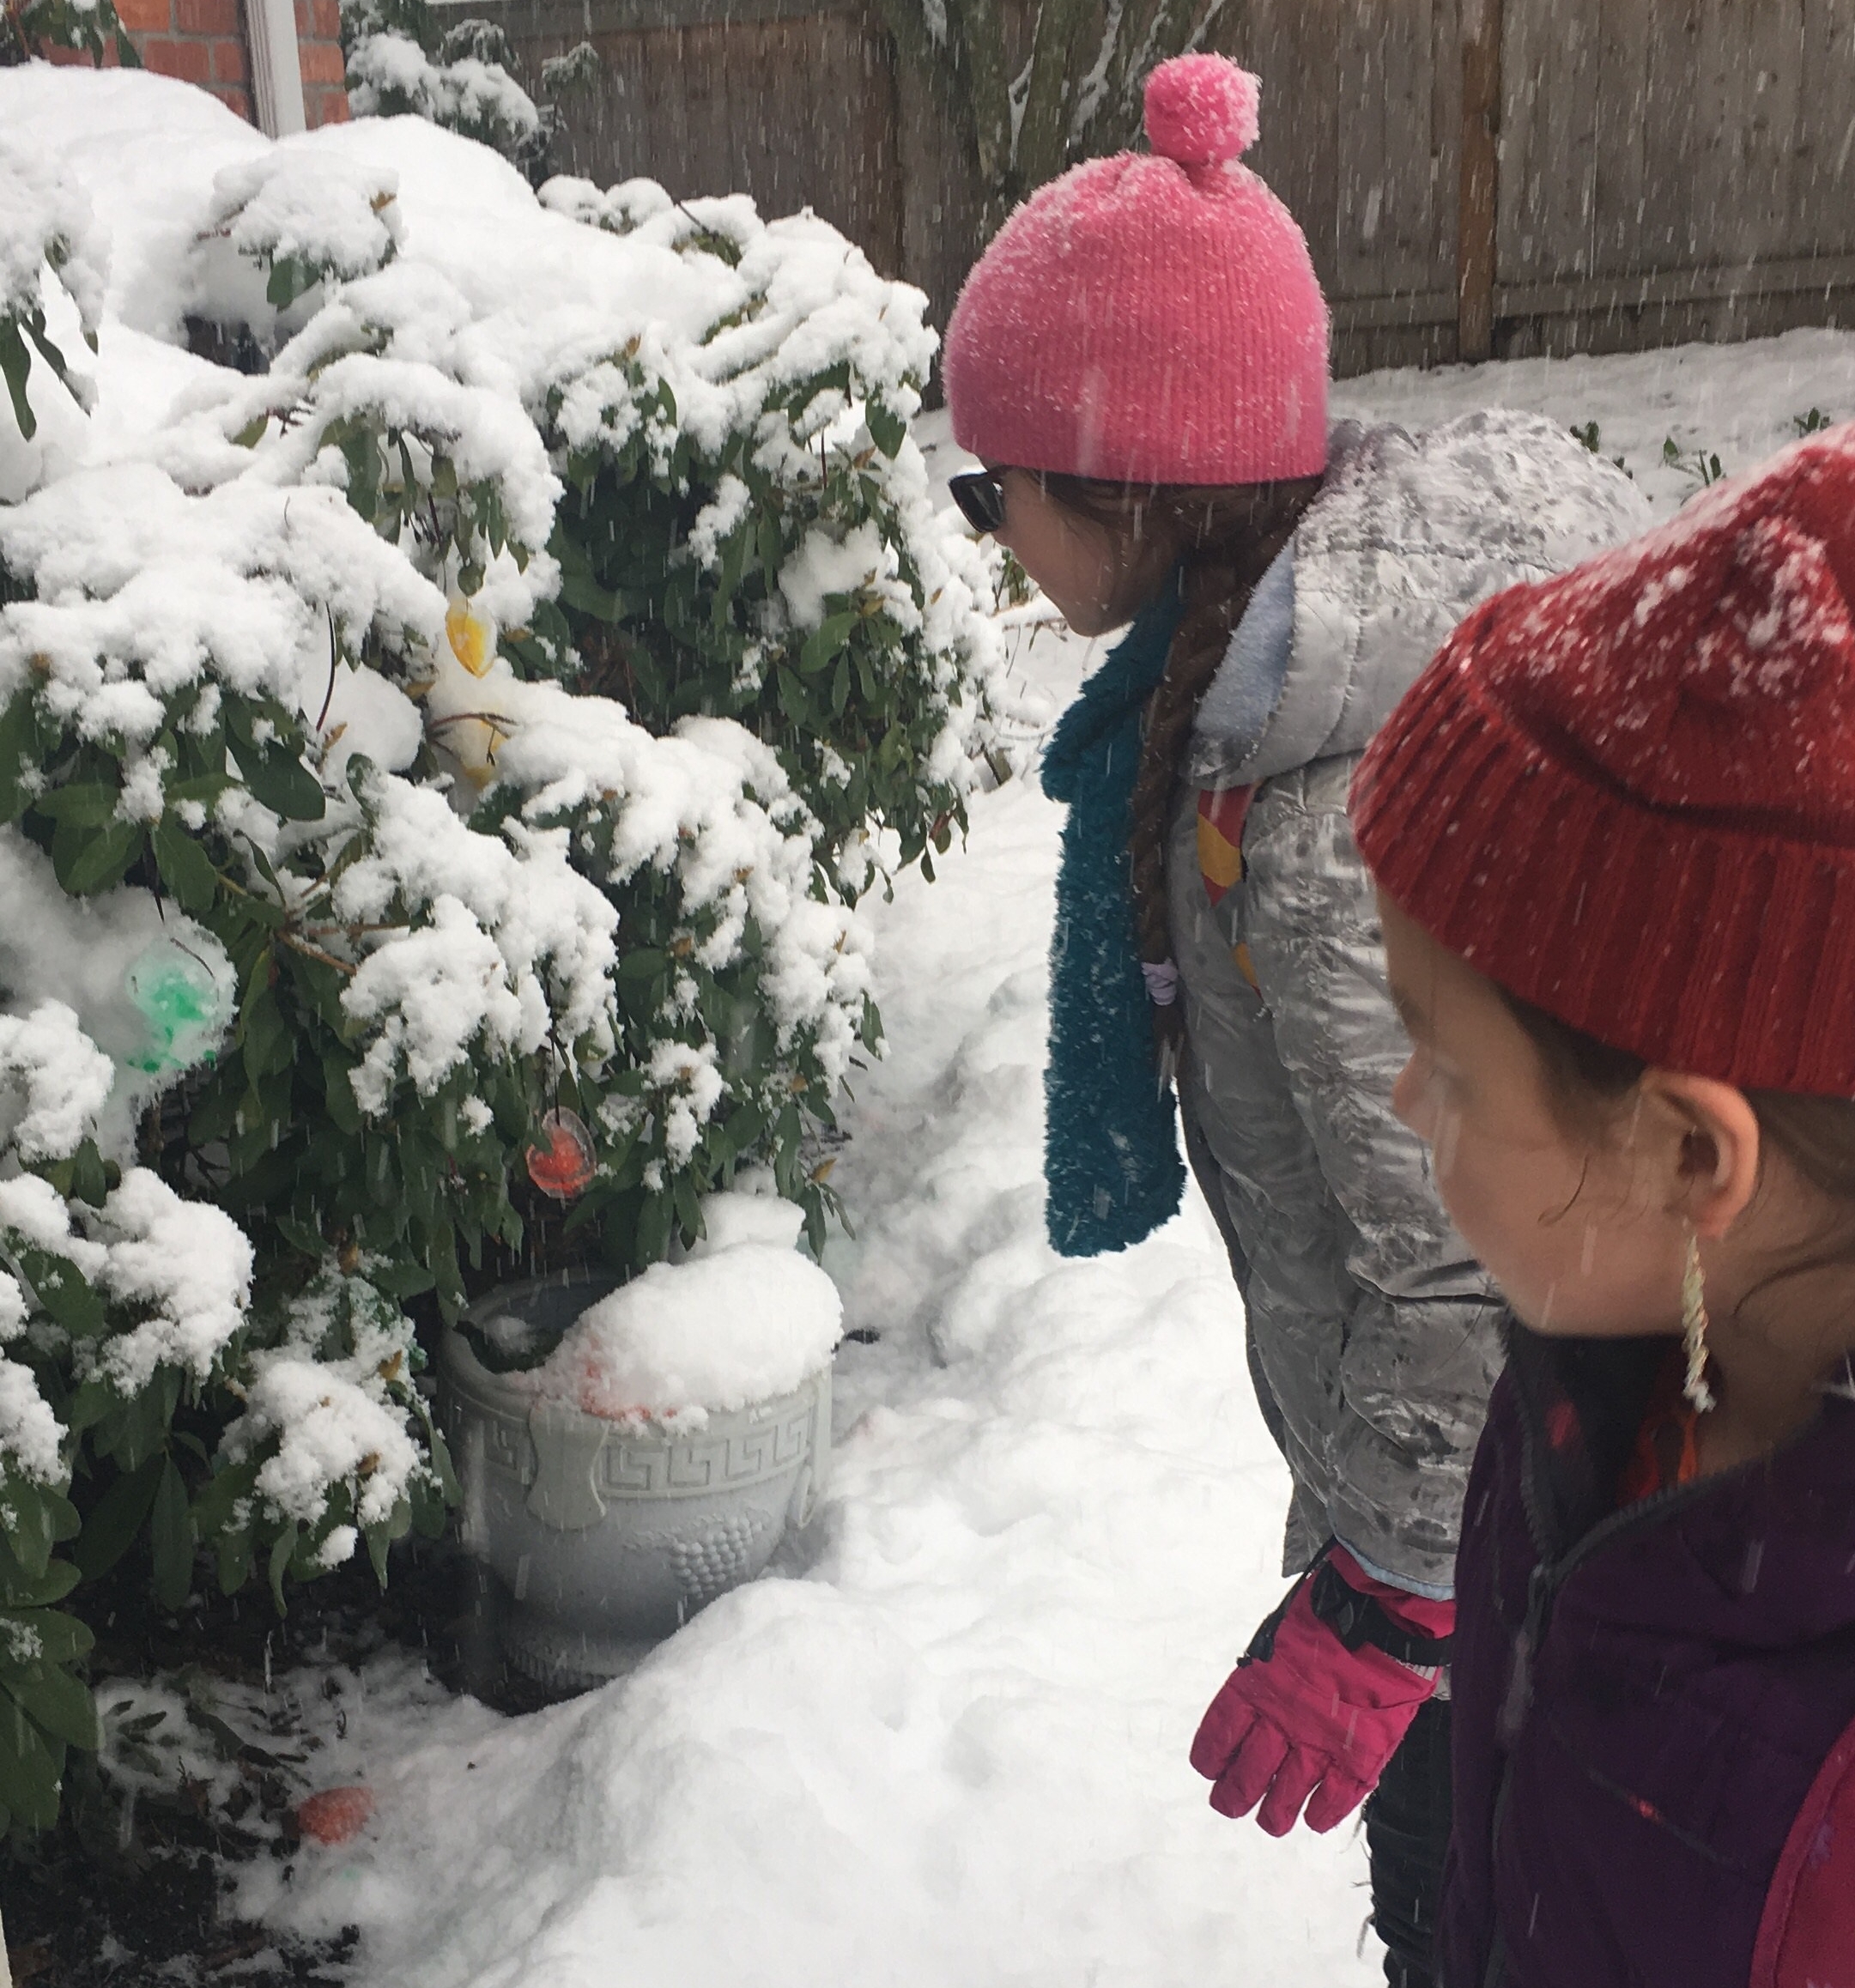
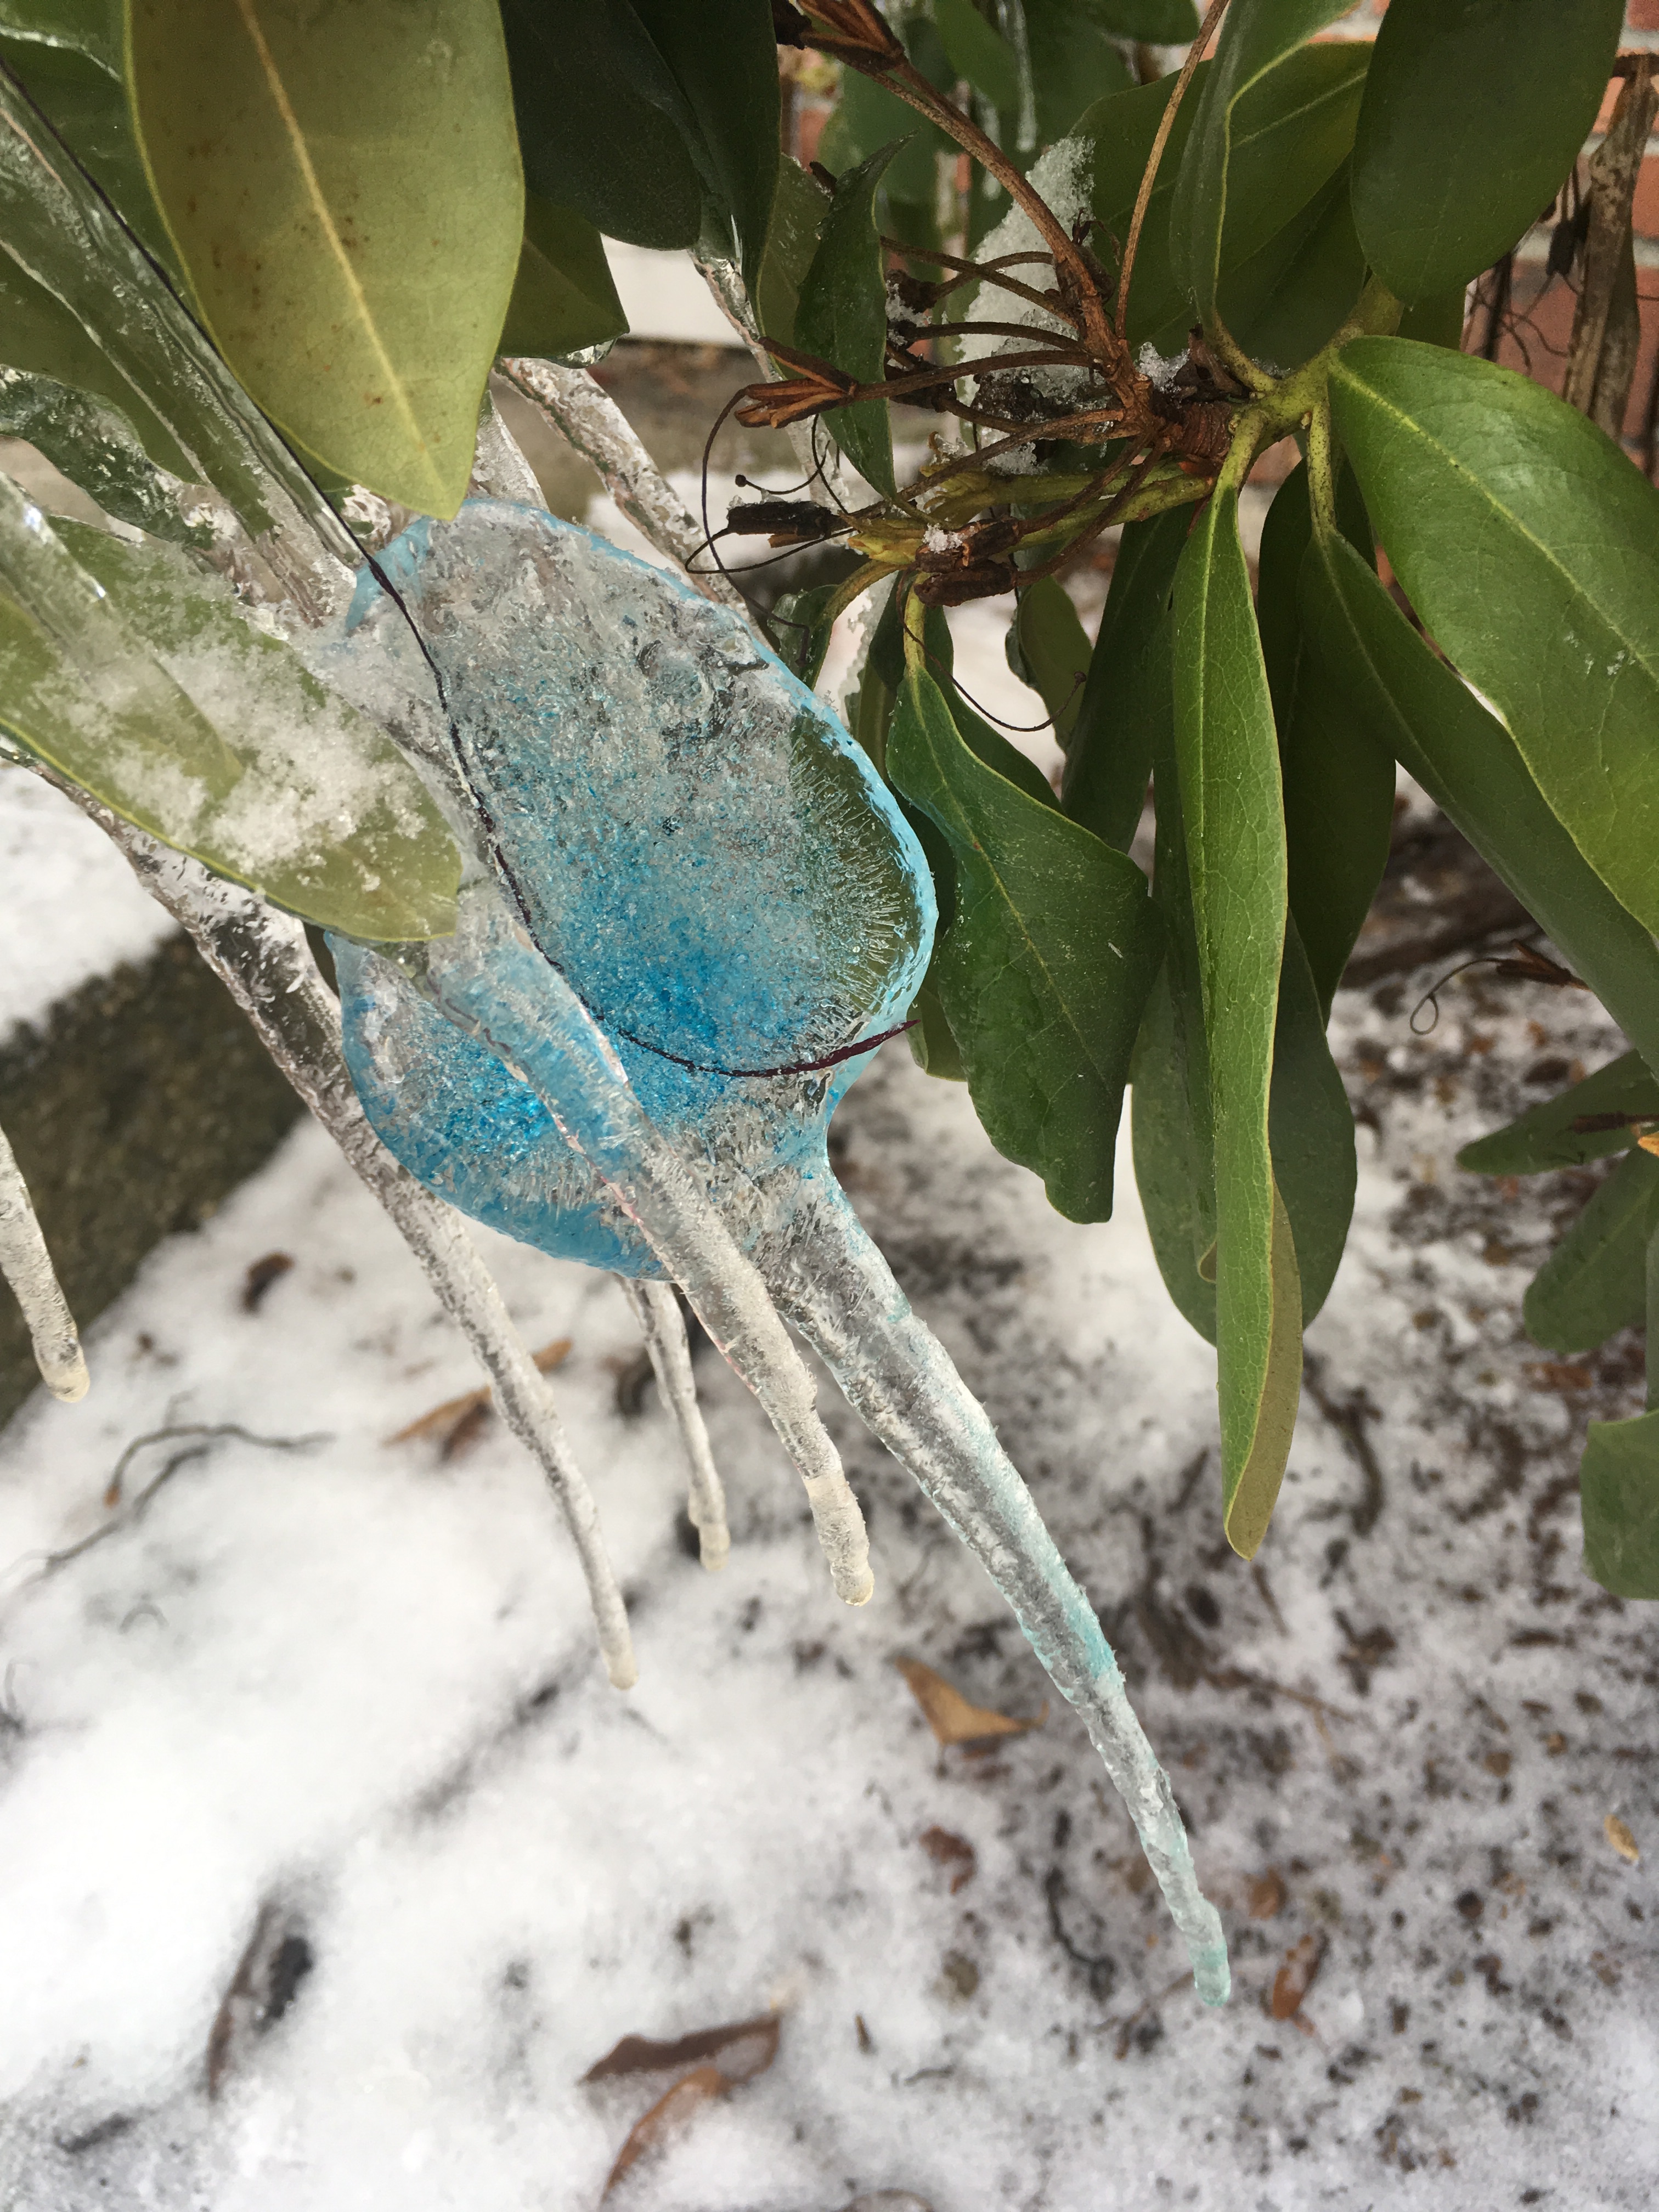
It isn’t often we get a cold spell long enough to make ice ornaments, but with freezing temperatures set to last, we made a few batches to hang on our bushes. They look really beautiful, but also provide lots of opportunity to learn about ice, freezing and melting. A few years ago we made some and shared our learning story, as we watched them melt and freeze.
How to Make an Ice Ornament
You will need
Baking trays
Ribbon or string
Food colouring (optional)
Step 1.
Choose a baking /cup cake tray and fill each hole with cold water.
Step 2
Add a drop of food colouring – mix or leave to mix itself which can leave a marbled effect.
Step 3
Snip pieces of ribbon or string and submerge one end in the water, making sure the other end is free. You could loop the string but I prefer to leave it as it makes it easier to tie to larger branches. I usually do this part outside to avoid spilling when you move them to freeze.
Step 4
Leave outside overnight to freeze (or put the tray in your freezer).
Step 5
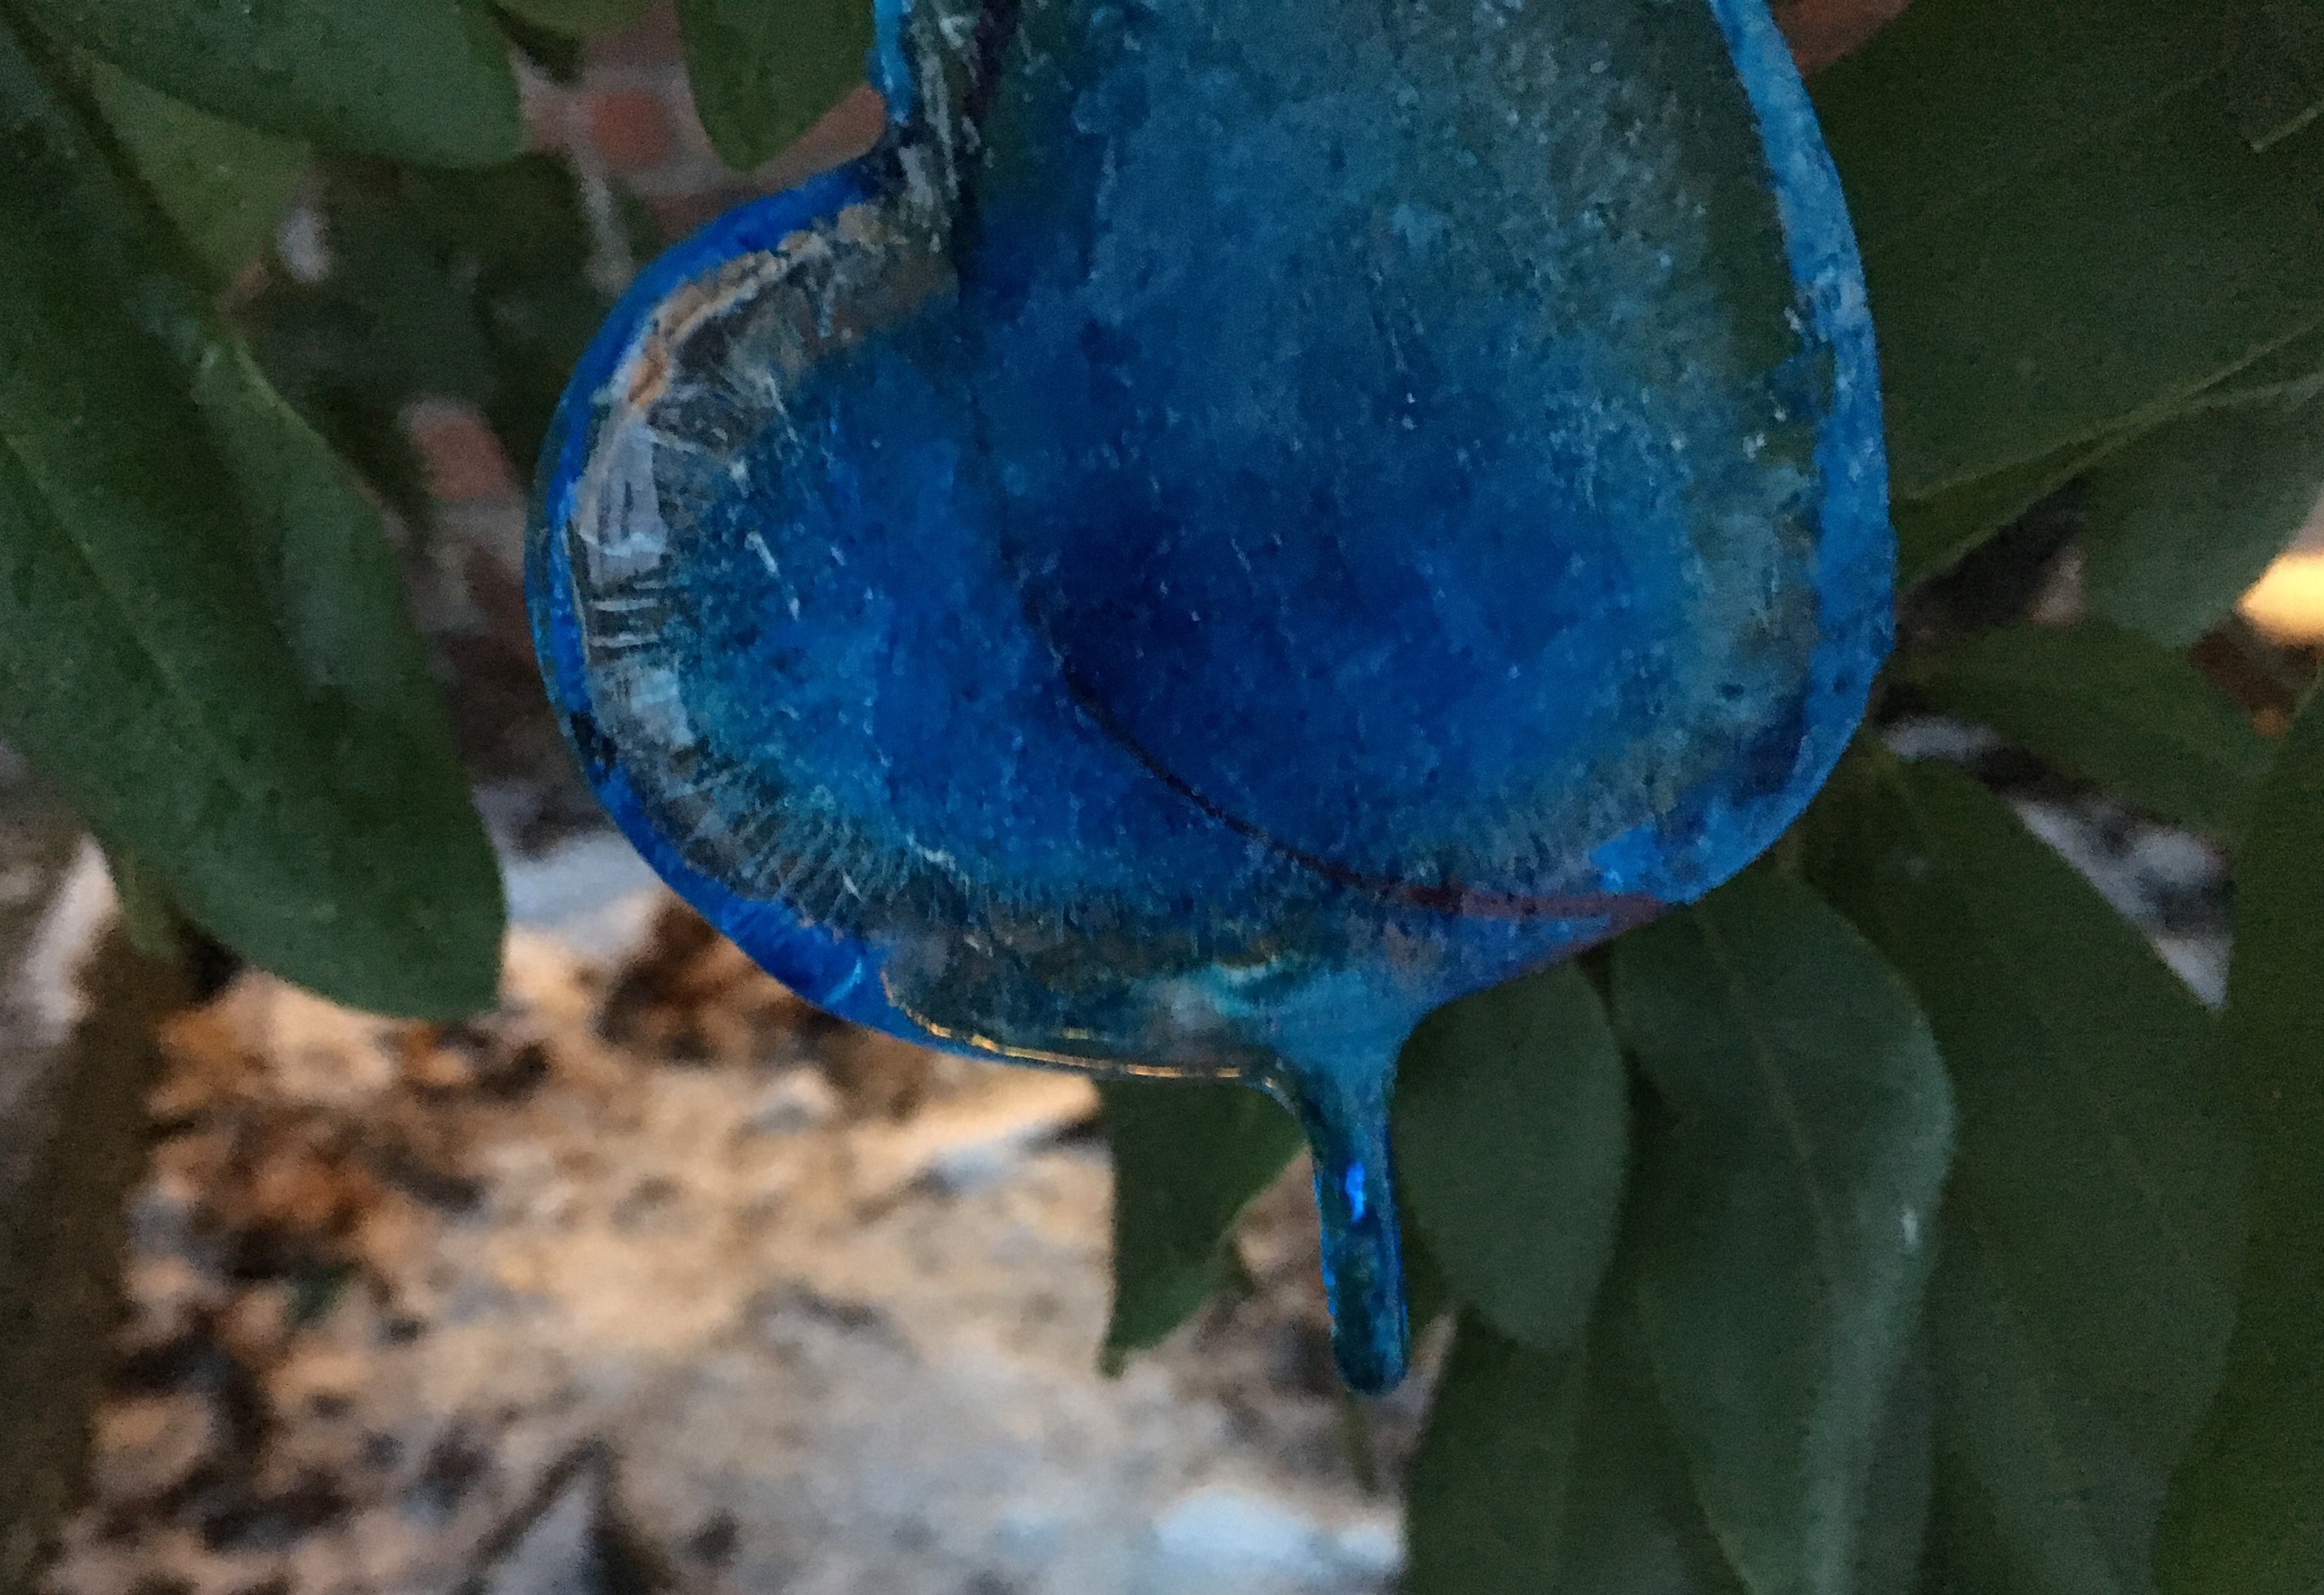
Hang on a bush or tree. If there is snow on the ground the food colouring will drip onto the snow as they melt. If there are prolonged freezing temperatures the ornaments will melt slightly and form icicles as they re-freeze.
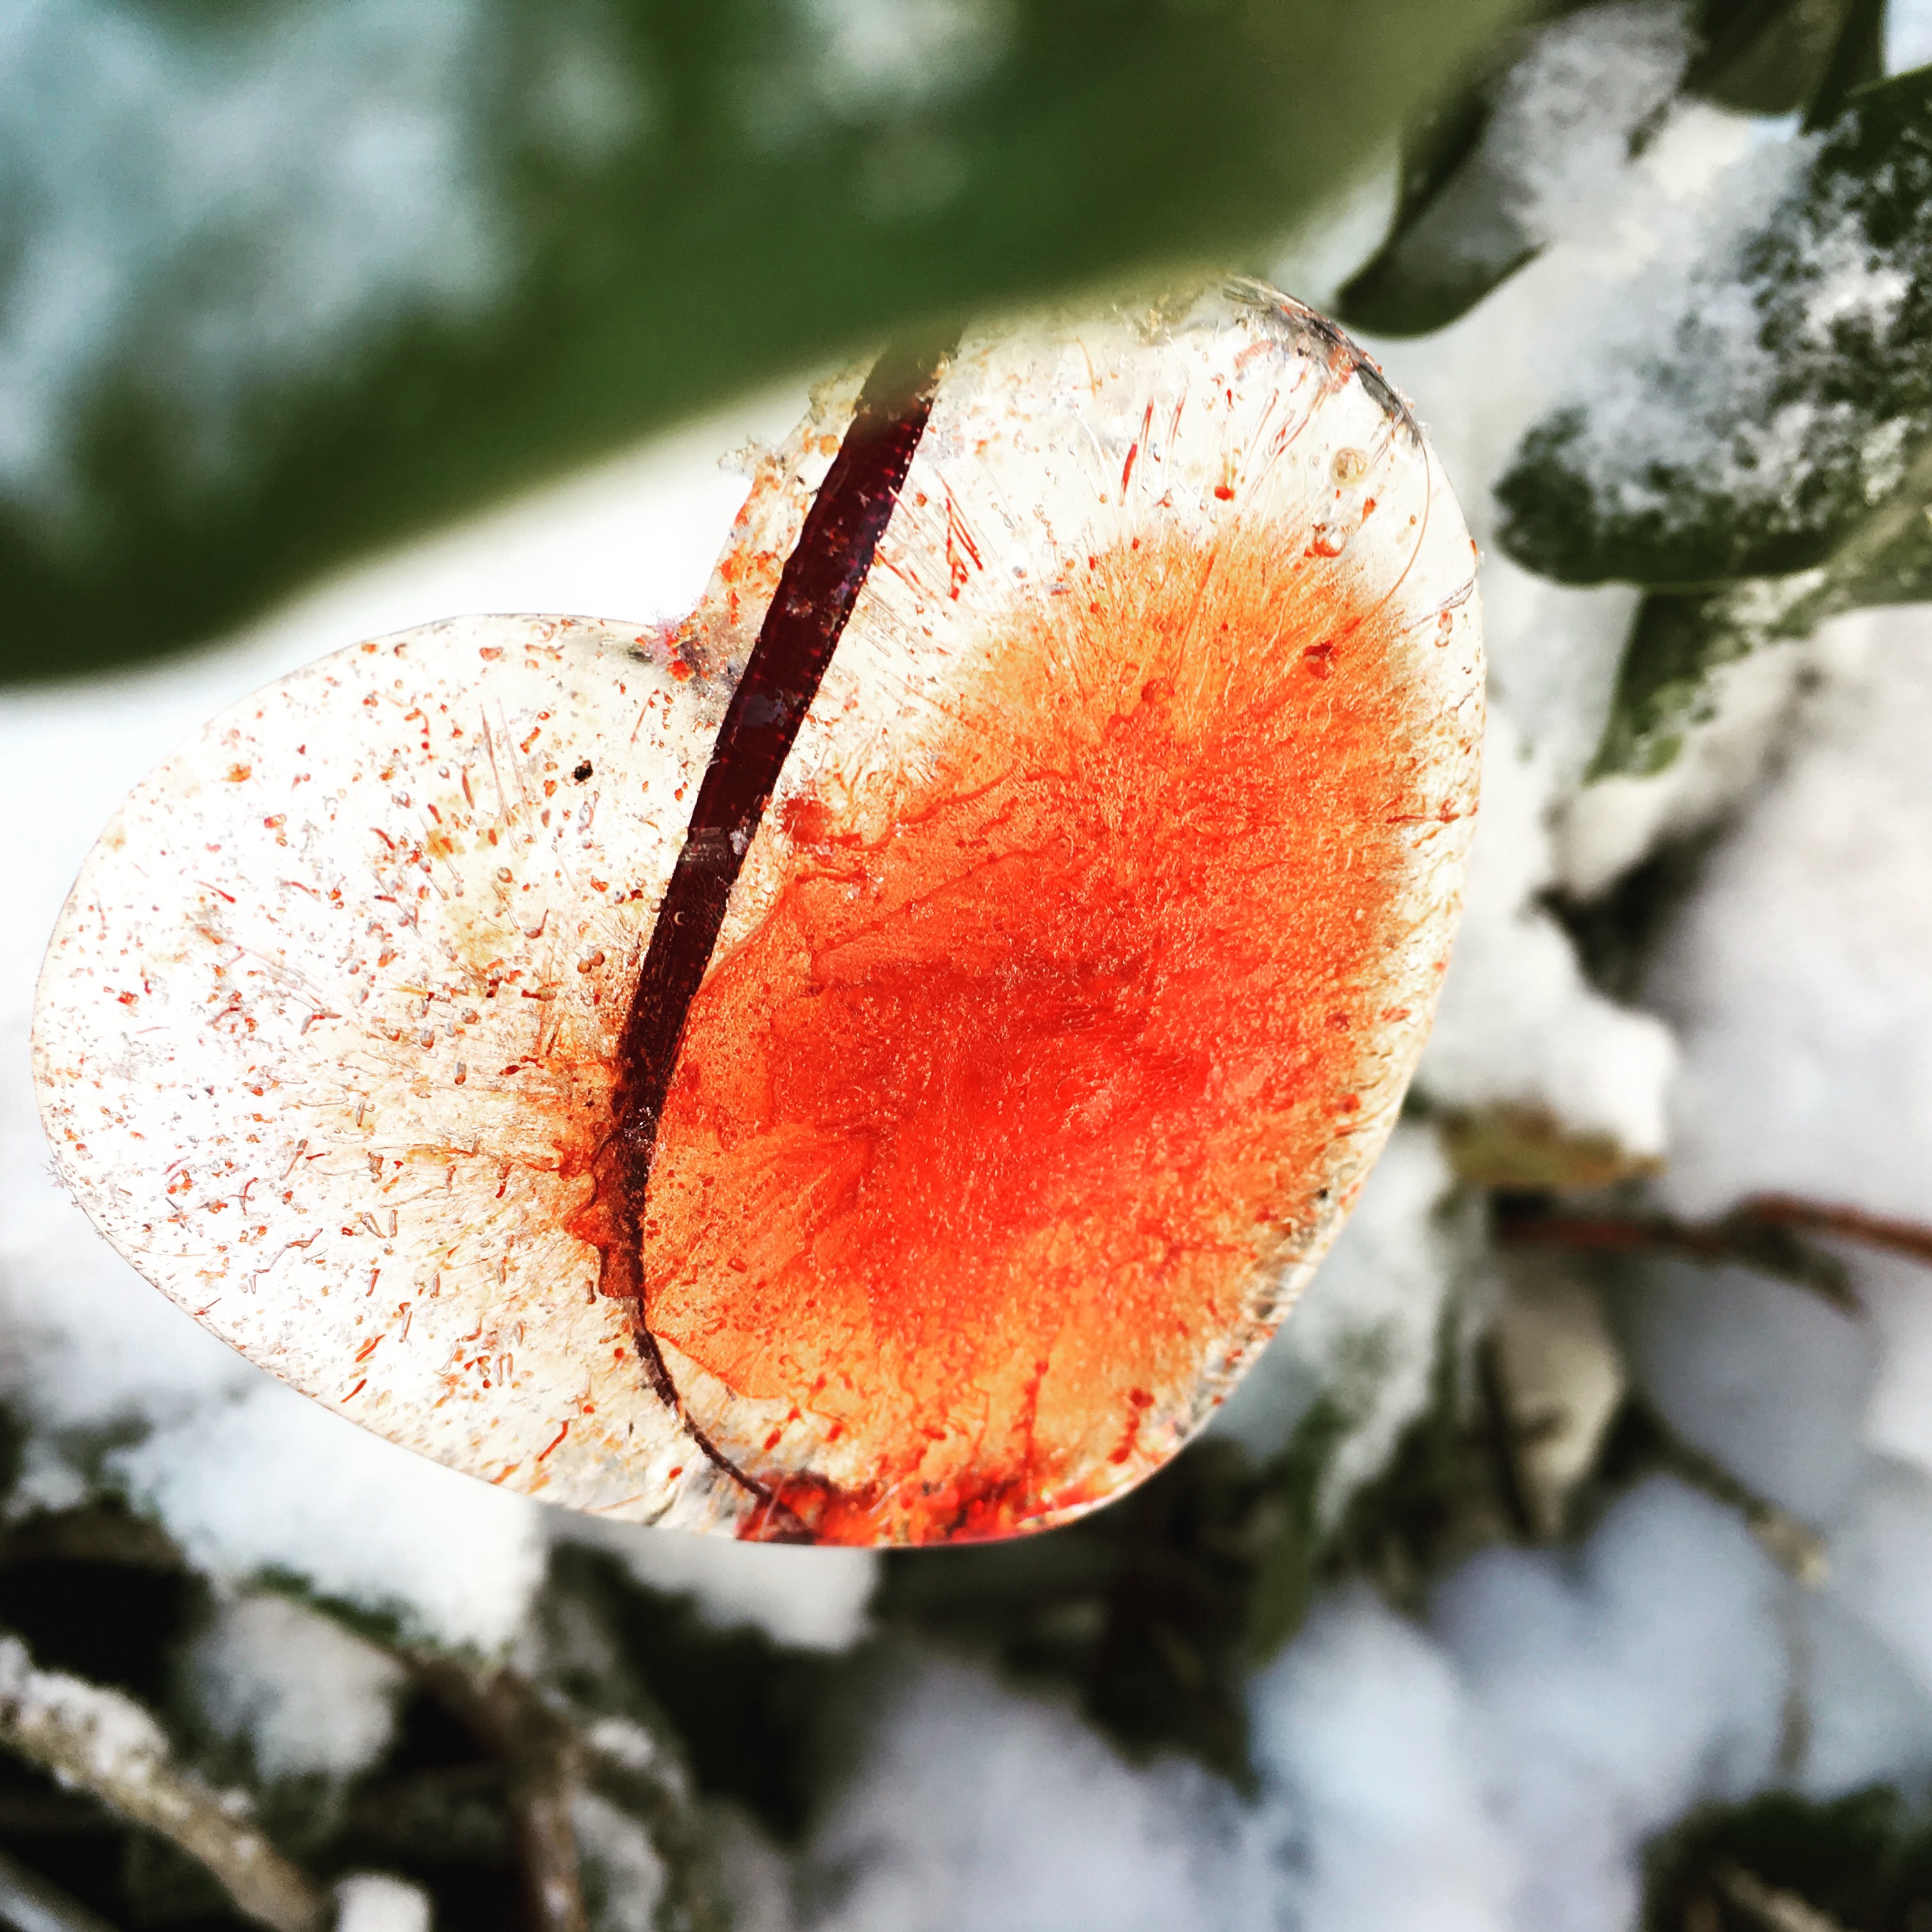
I wasn’t sure how easily the hearts come out of the tins but they came out without any trouble. If they need a little help, bring them inside for a few minutes or run some warm water on the base of the tin. Alternatively, you could use a silicone mould.
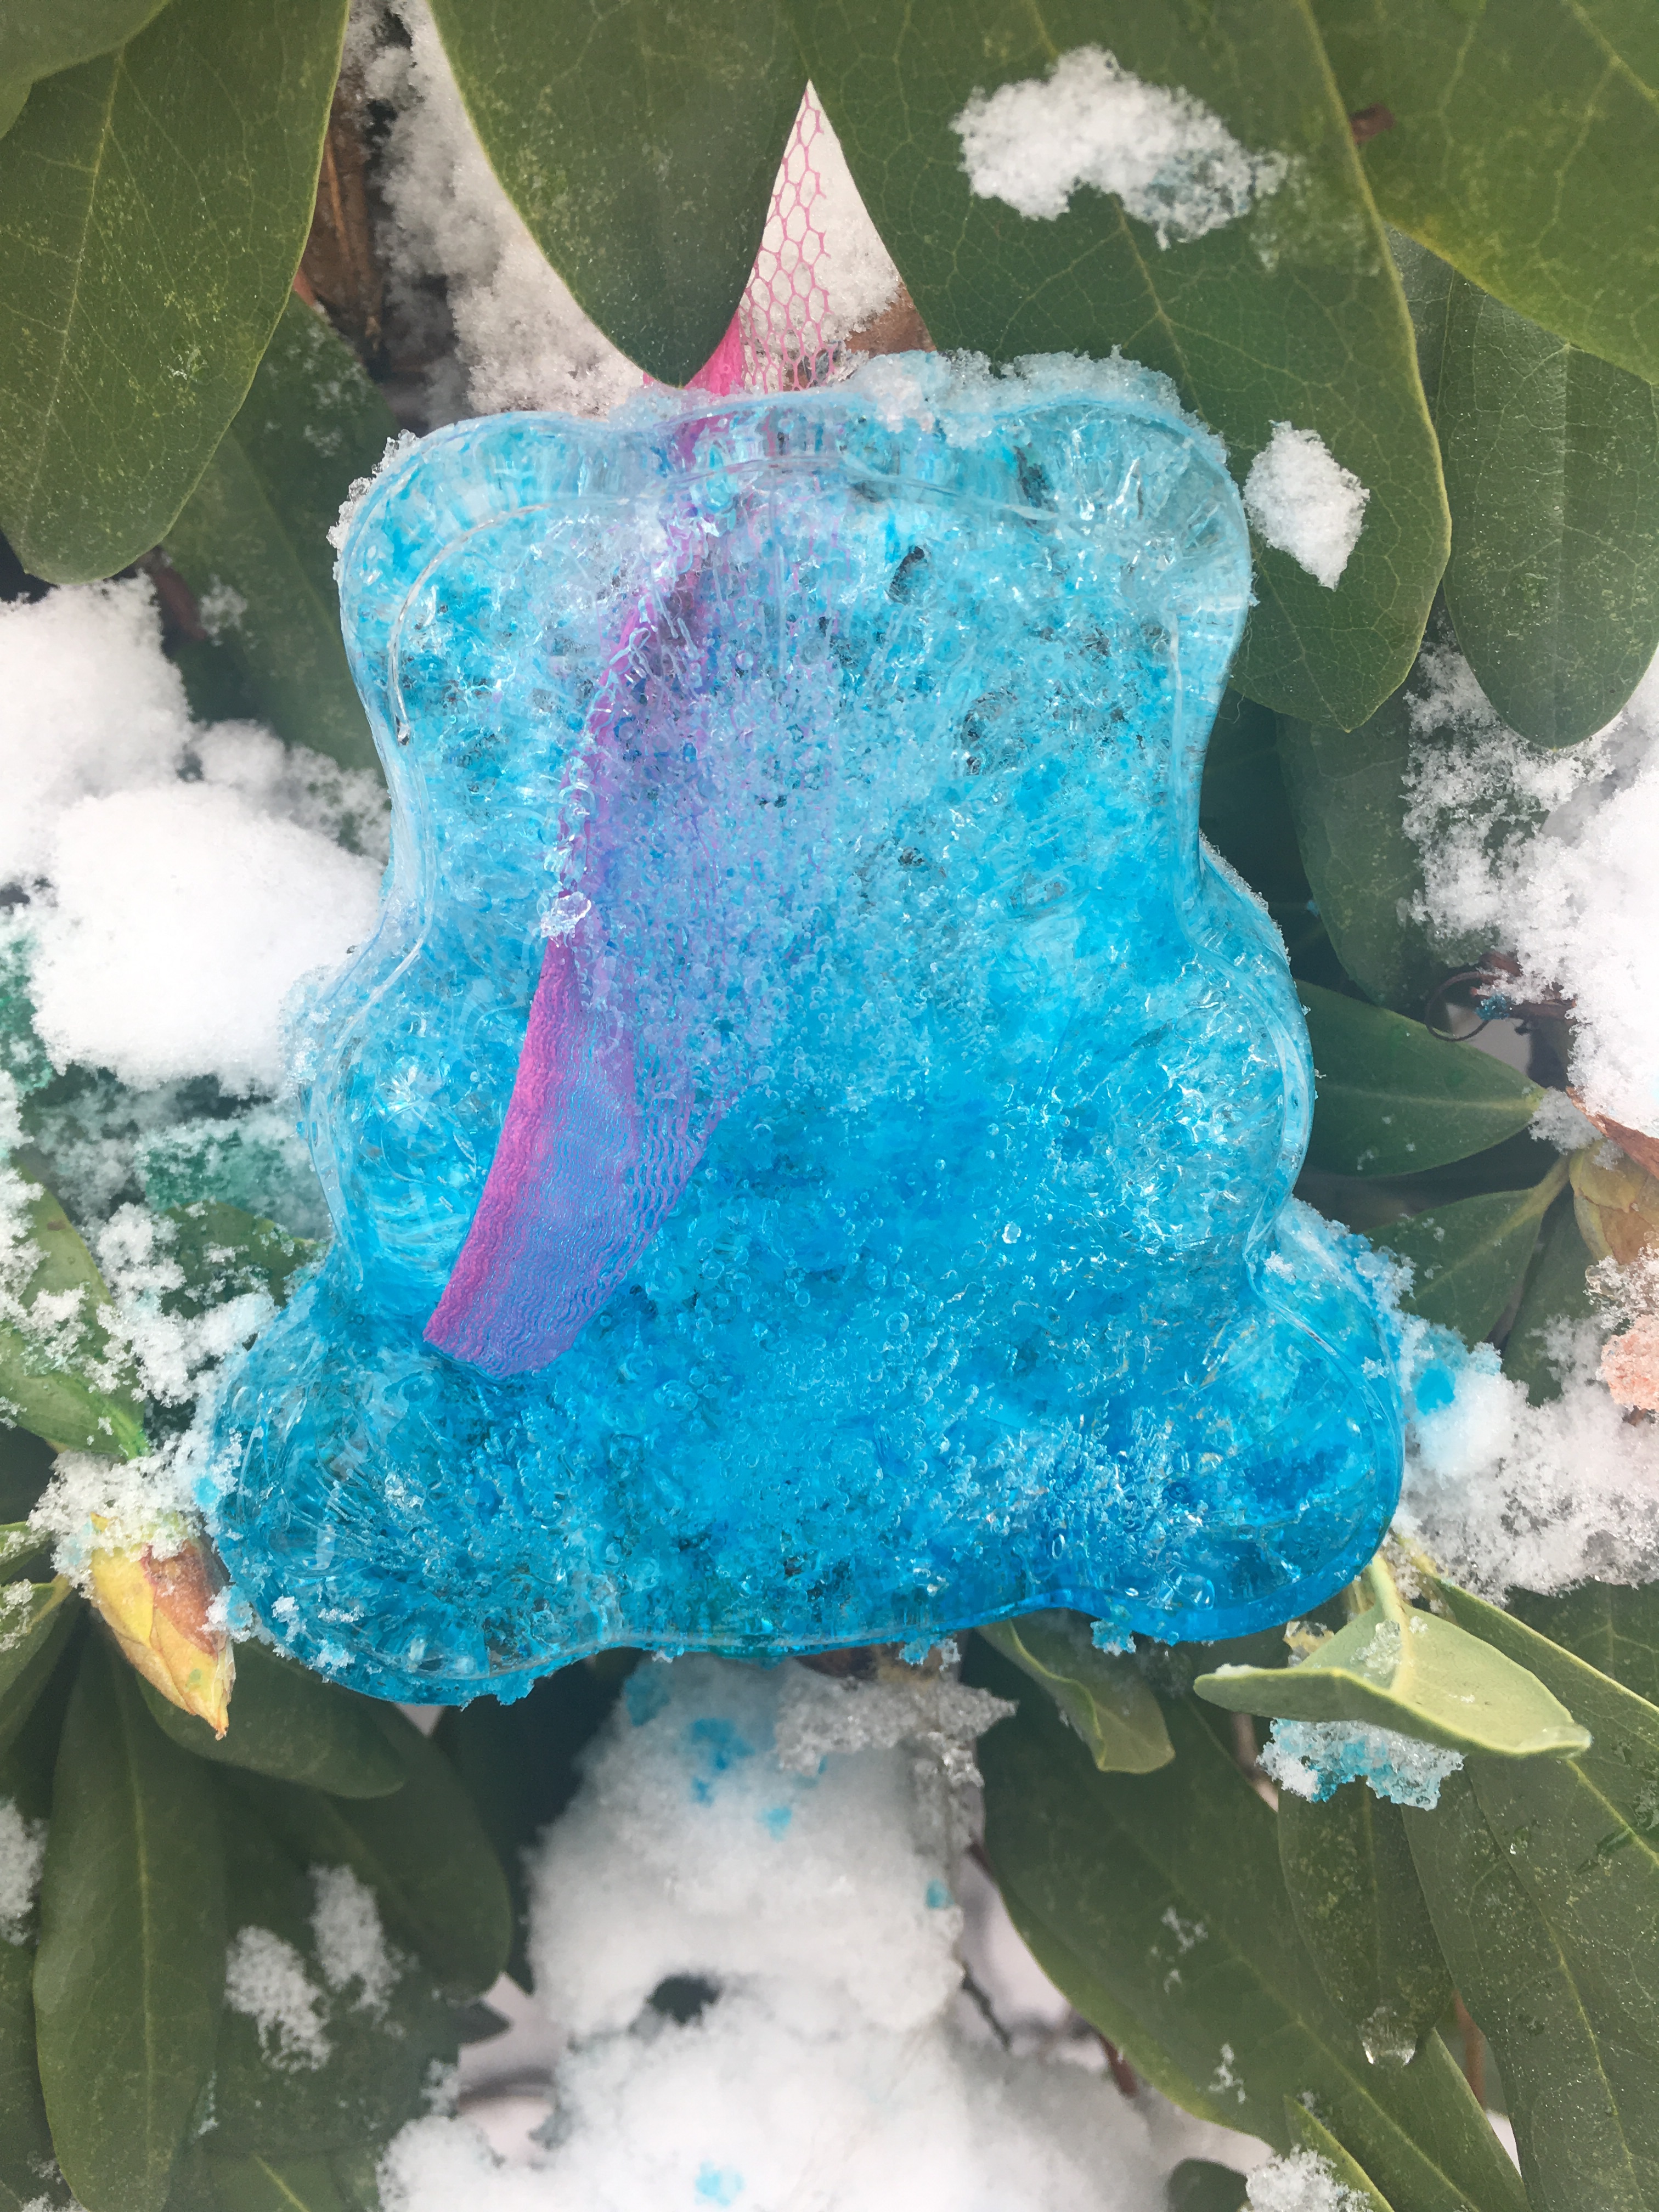
The second batch also included owls and bears. We made half of the owls clear, to see how they would look without colour, but kept the colour in the bears, because my daughter thought they would look like gummy bears.
We have had fun with bubble painting in previous summers, but usually use straws. To try something a little different, we made bubble blowers using plastic bottles and netting.
How to make a bubble blower
Cut the bottom off a plastic bottle
Tape on mesh or netting,
We used 3 different types to investigate how the bubbles would differ.
Christmas tree netting with large holes
Netting from a bag of oranges
Tulle
We made 3 with tulle, 1 layer, 2 layers and 3 layers
For the paint, we mixed bubble mixture with a table-spoon of powder paint.
We tested the blowers to see which one we liked the best.
The Christmas netting made three or 4 large bubbles.
The orange netting made lots of clear bubbles
The tulle made a foamy snake of bubbles and the more layers there were, the better the effect.
The best paint effects were made if we blew the bubbles away as soon as they hit the paper, otherwise they melted into a splodge and you couldn’t see the bubble shape.
We made another discovery. A plastic straw makes a perfect bubble wand.
I wonder what else we will discover about bubbles over the summer?
Every year, sparrows nest in our bird box. We watch the mother and father fly in and out, building the nest. We hear the chicks when they are born and see the parents feeding them. When the nest is empty, sometimes we watch the chicks in the trees as they learn to fly.
As I was sitting in the garden, a few days after observing this chick in the tree, one of the chicks flew into the house. I followed it in and opened doors and windows to entice it out.
Shortly after the mother entered the house looking for her baby. Her distinctive clicking cheep sounded desperate as she tried to get the chick to respond to her.
After some time the mother left. We thought we saw the parents flying around with the chick outside. I could still hear the chick’s squeaky chirp, but assumed it was coming for the garden. We left the house, as we needed to go out. Some hours later, on our return the children came running, saying the chick was still flying around inside the house. It settled on a high window ledge and we could see the parents flying around outside and frantically calling. I opened windows and doors again and the mother came in and out, searching and calling. The baby flew to above the front door but didn’t work out how to get down.
Eventually, after hours inside the house, the bird flew to the ground and hopped outside to be reunited with his parents.
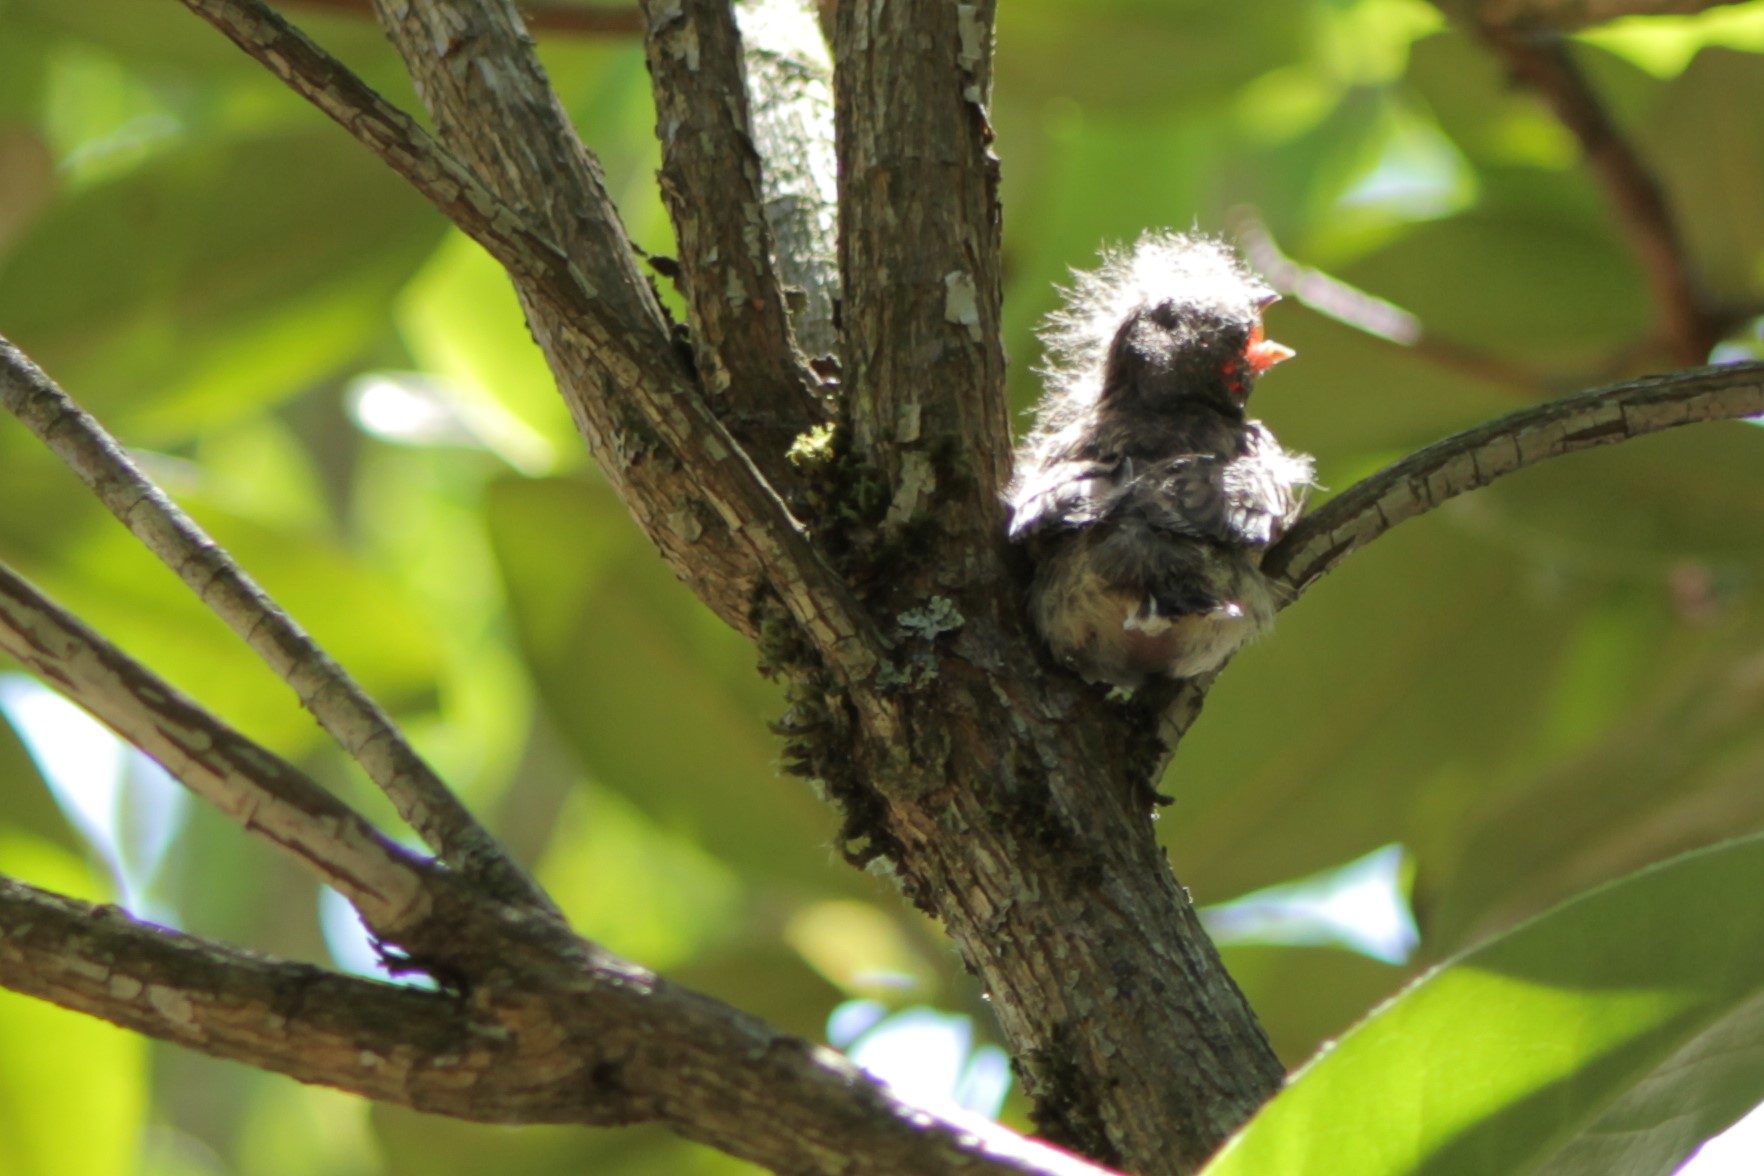
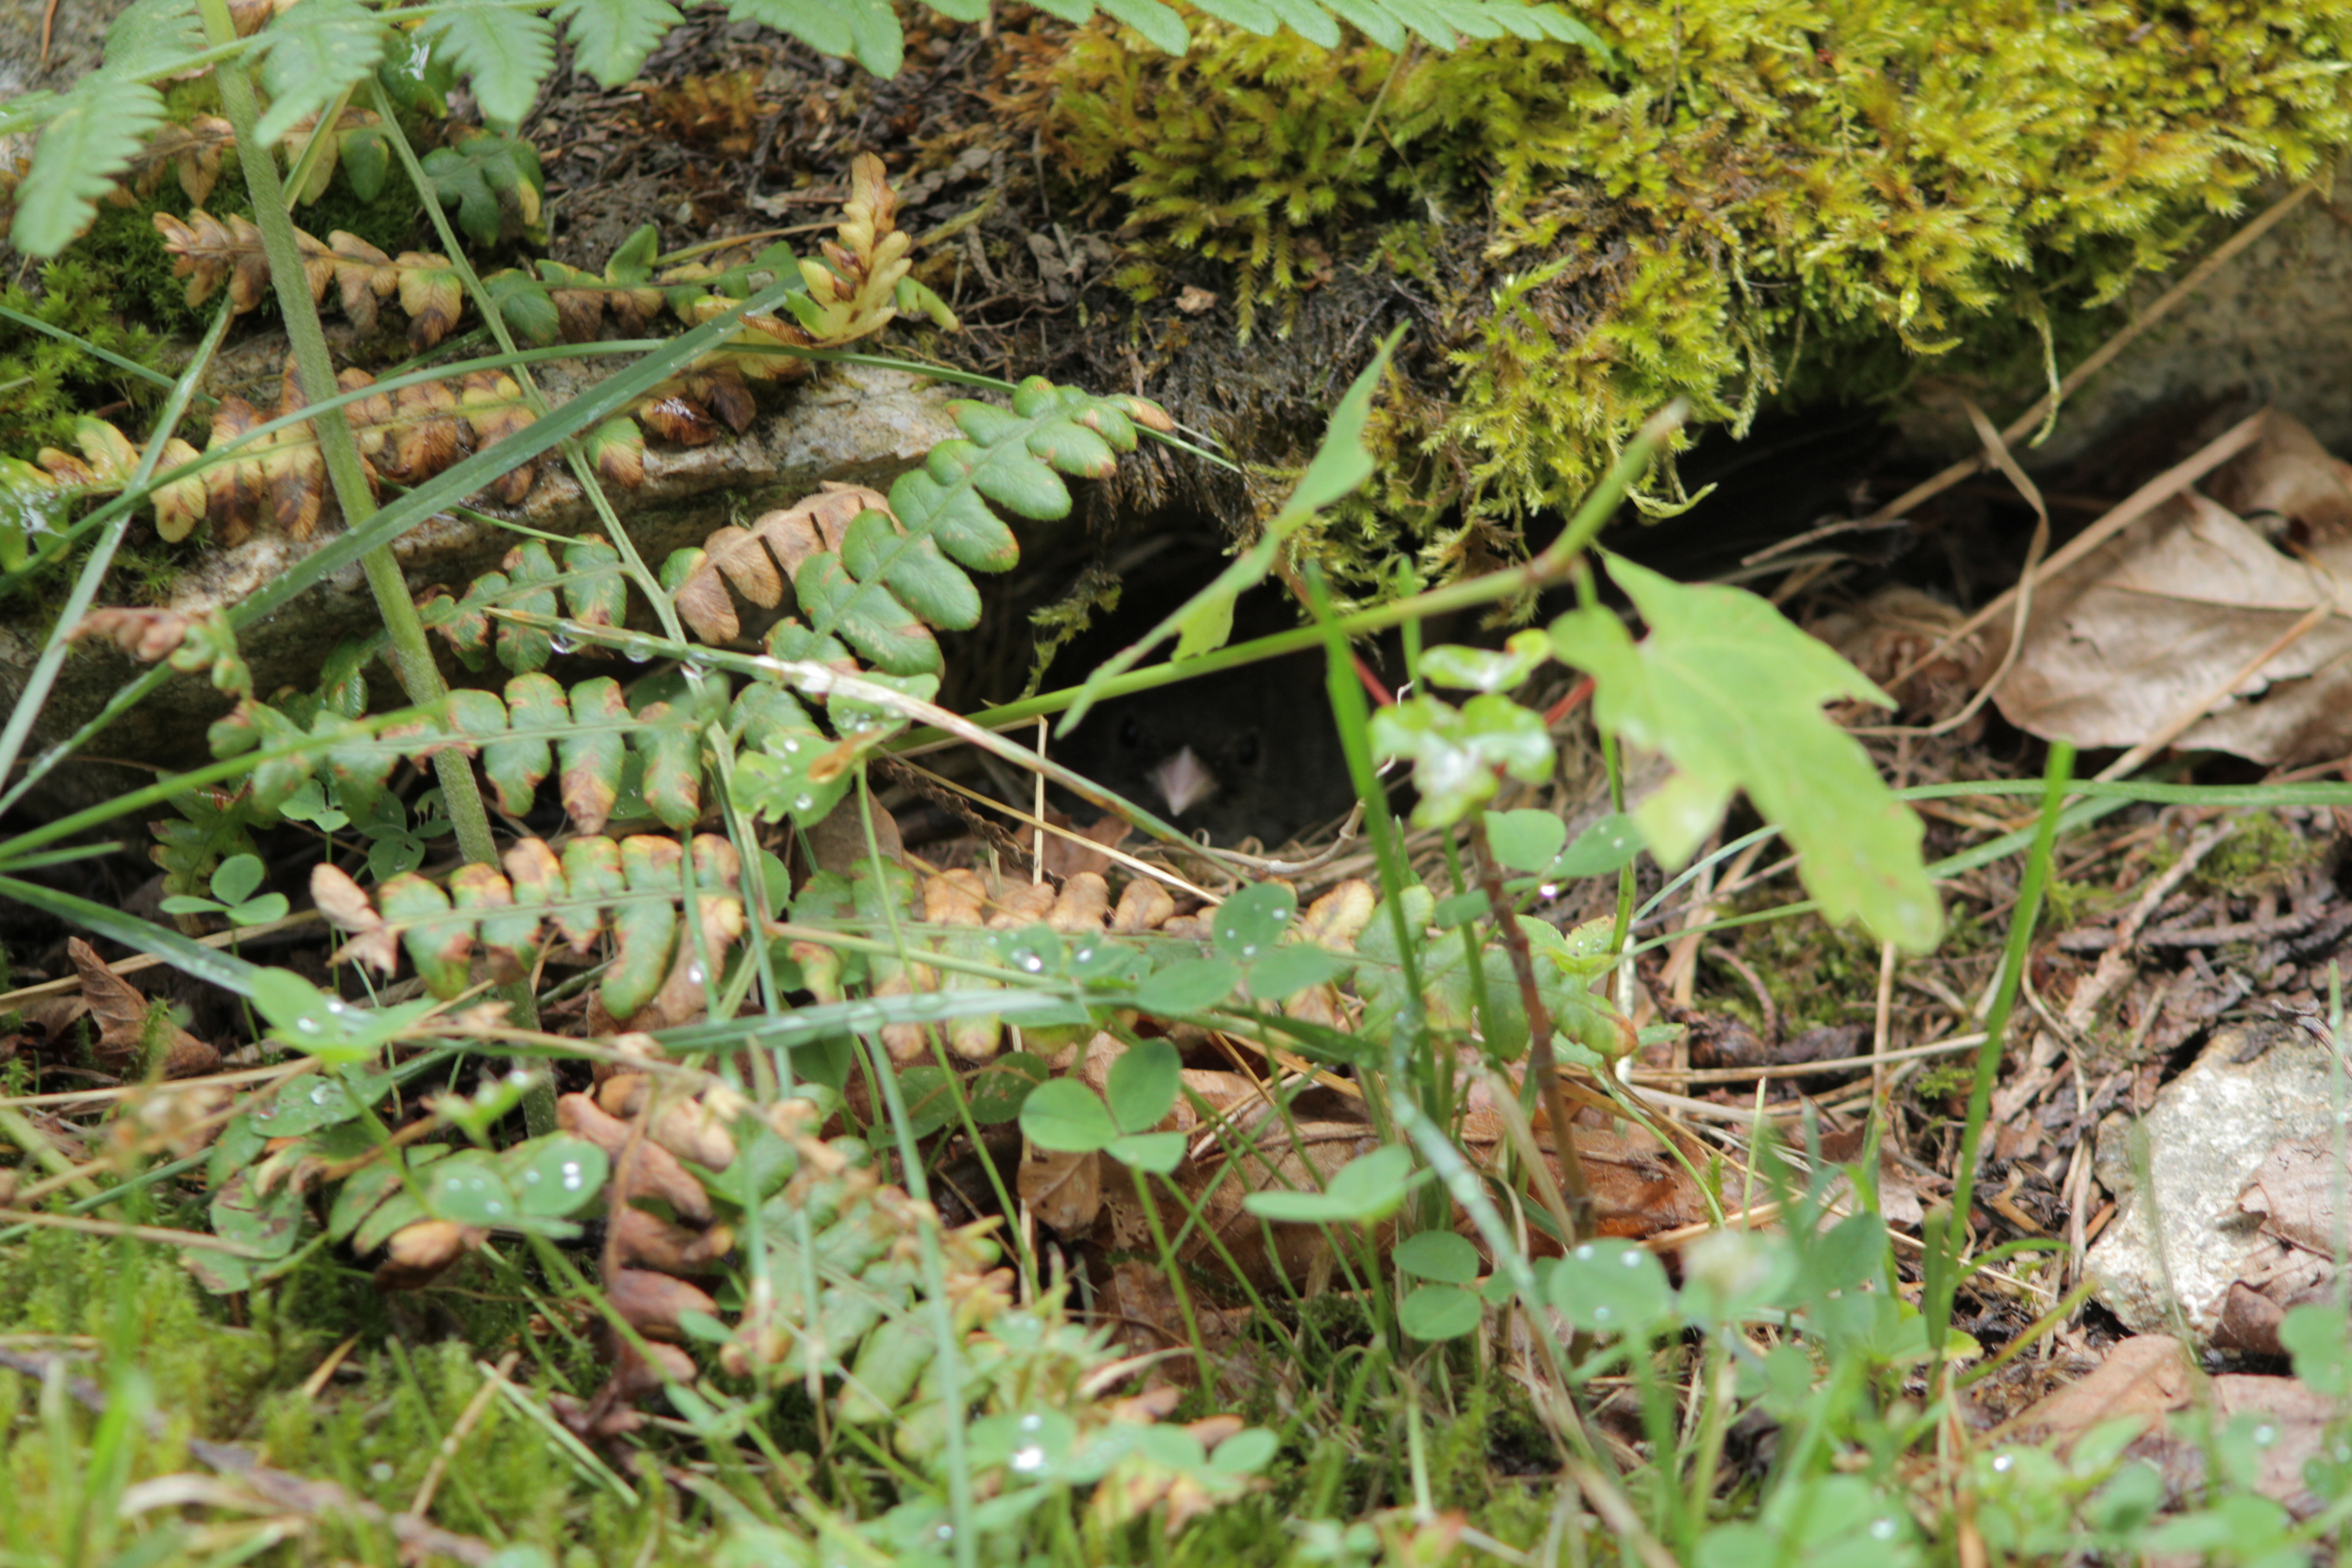
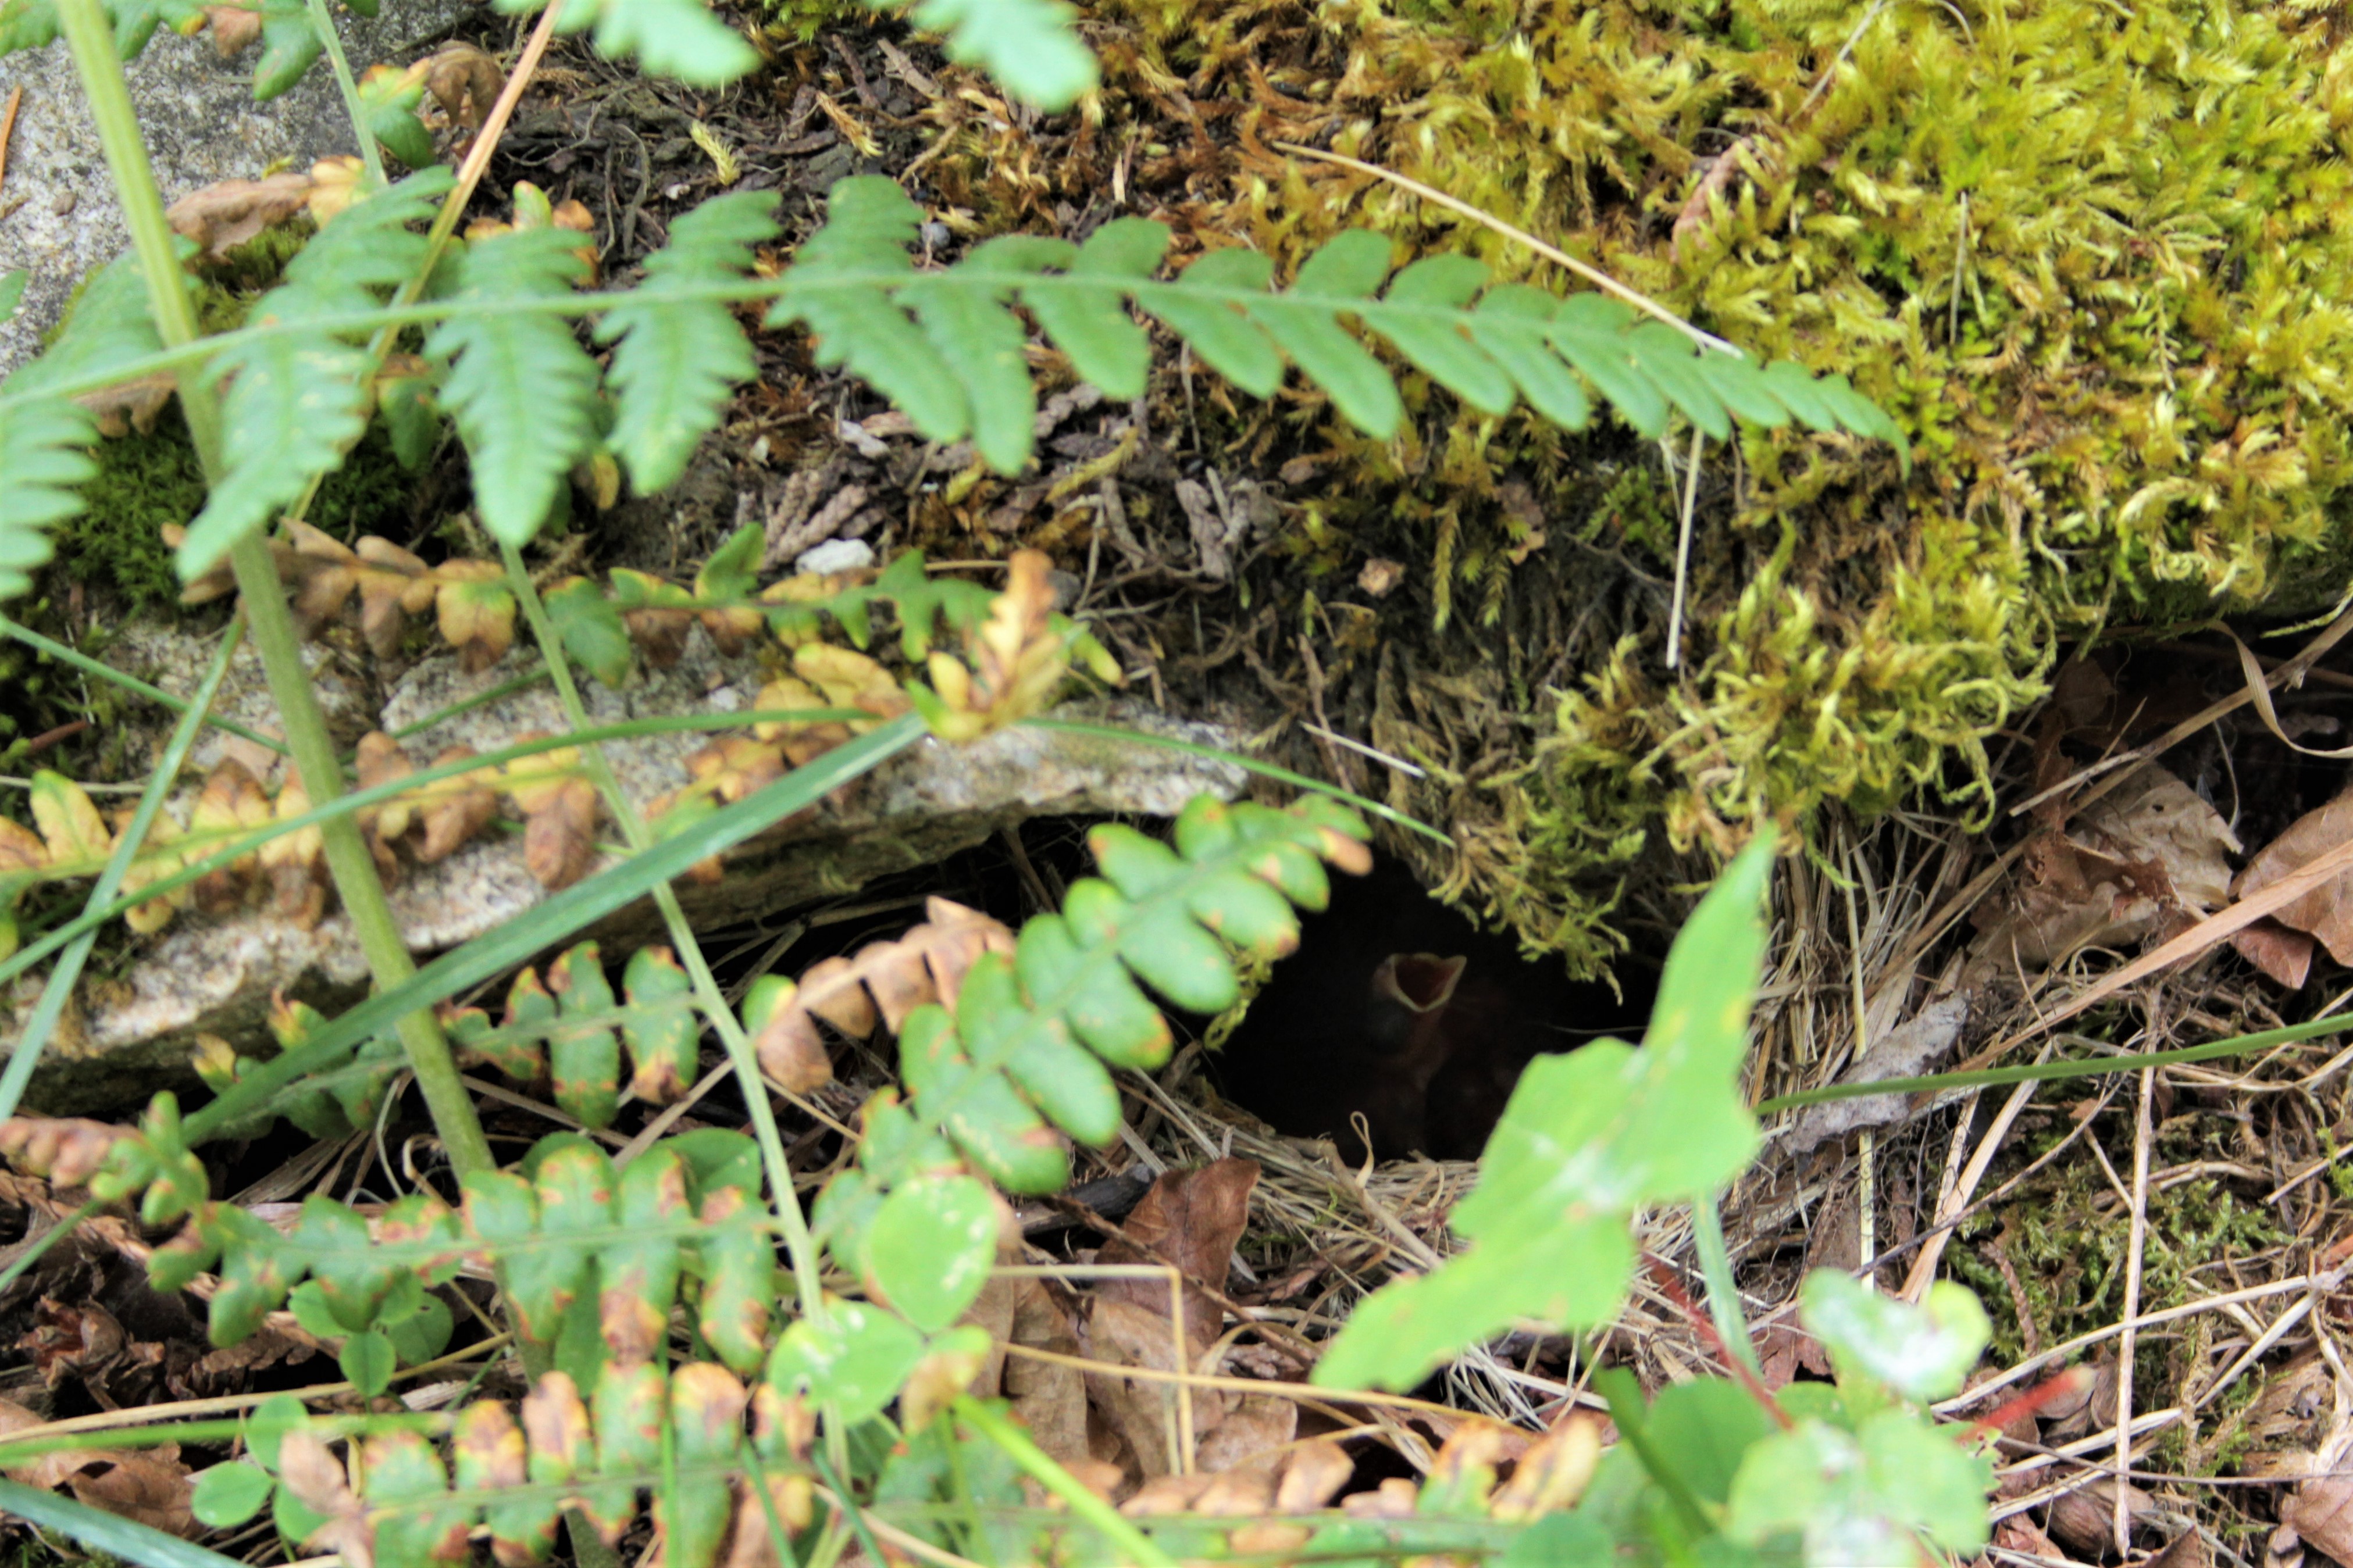
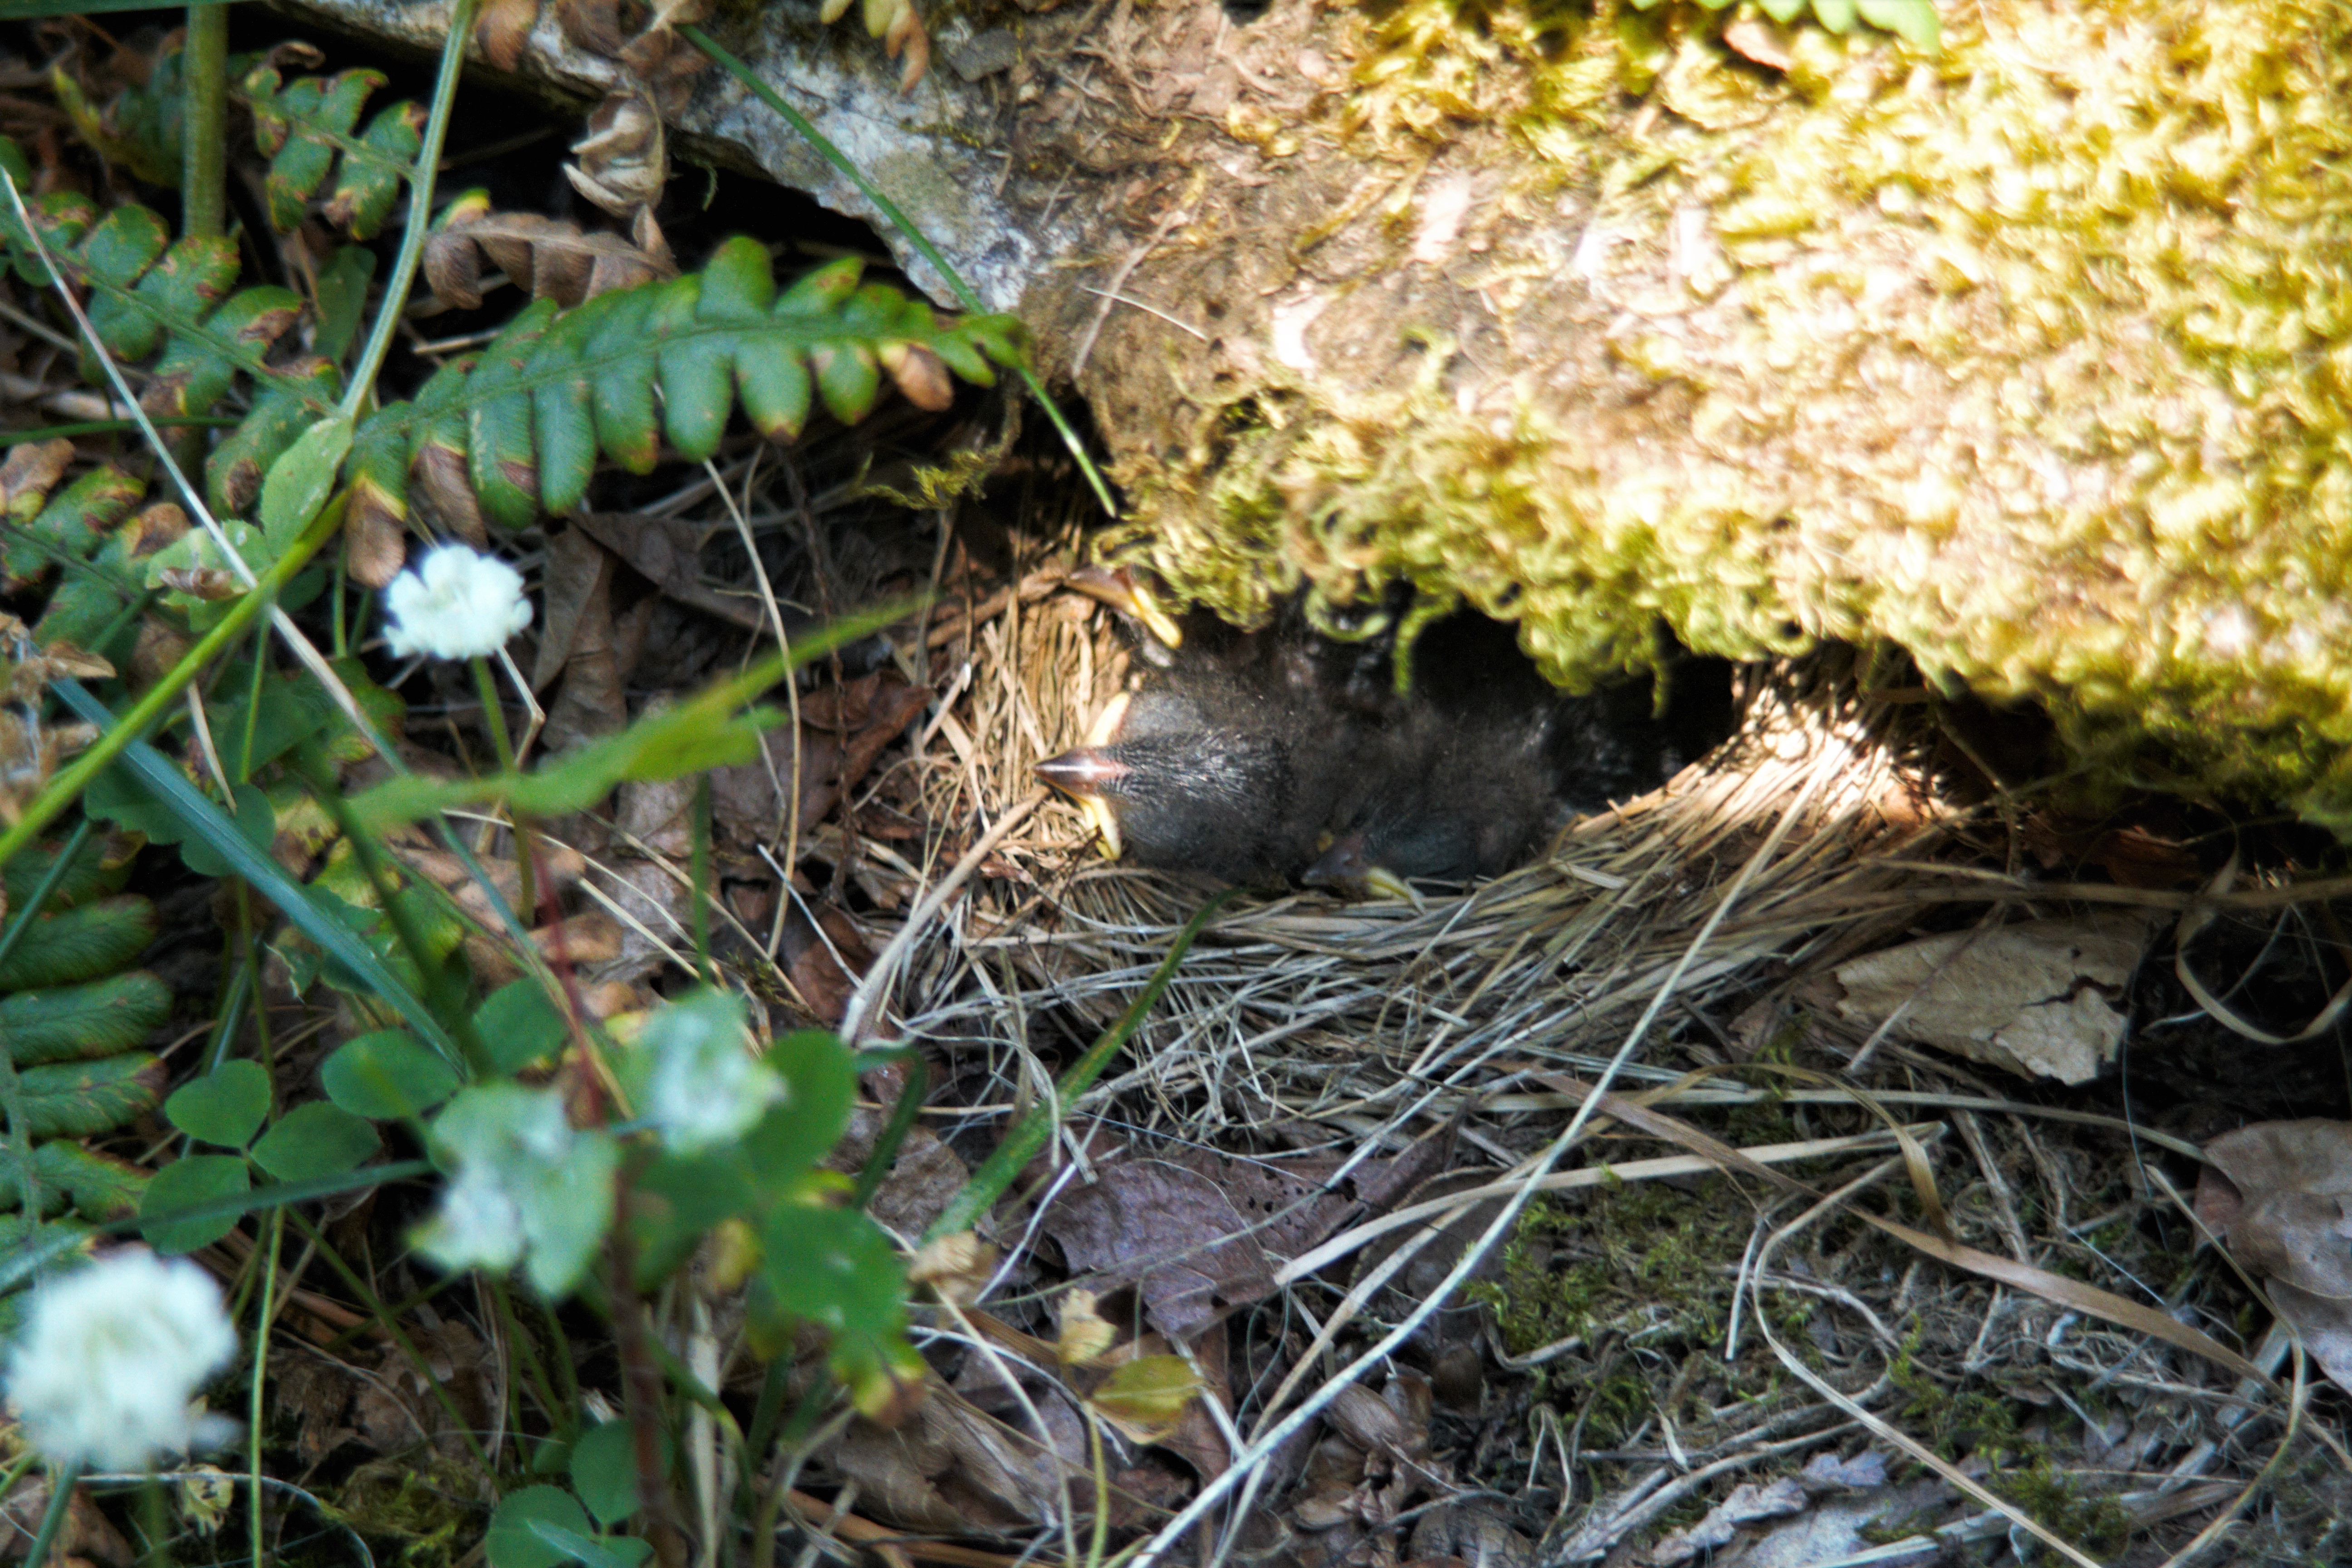
A few weeks later, the girls were playing football in the garden and discovered a nest near a rock, shaded by fern. Inside were 3 tiny eggs. A few days passed and the girls ran in to tell me the eggs had hatched. We watched them for the next few days. Sometimes the mother sat on them and sometimes they were left while she searched for food. She was never far away and a number of times we saw her swoop down to scare off an inquisitive baby bunny.
We watched as the strange bald creatures with huge eyes grew into fluffy chicks.
Day 1
Day 2
Day 4
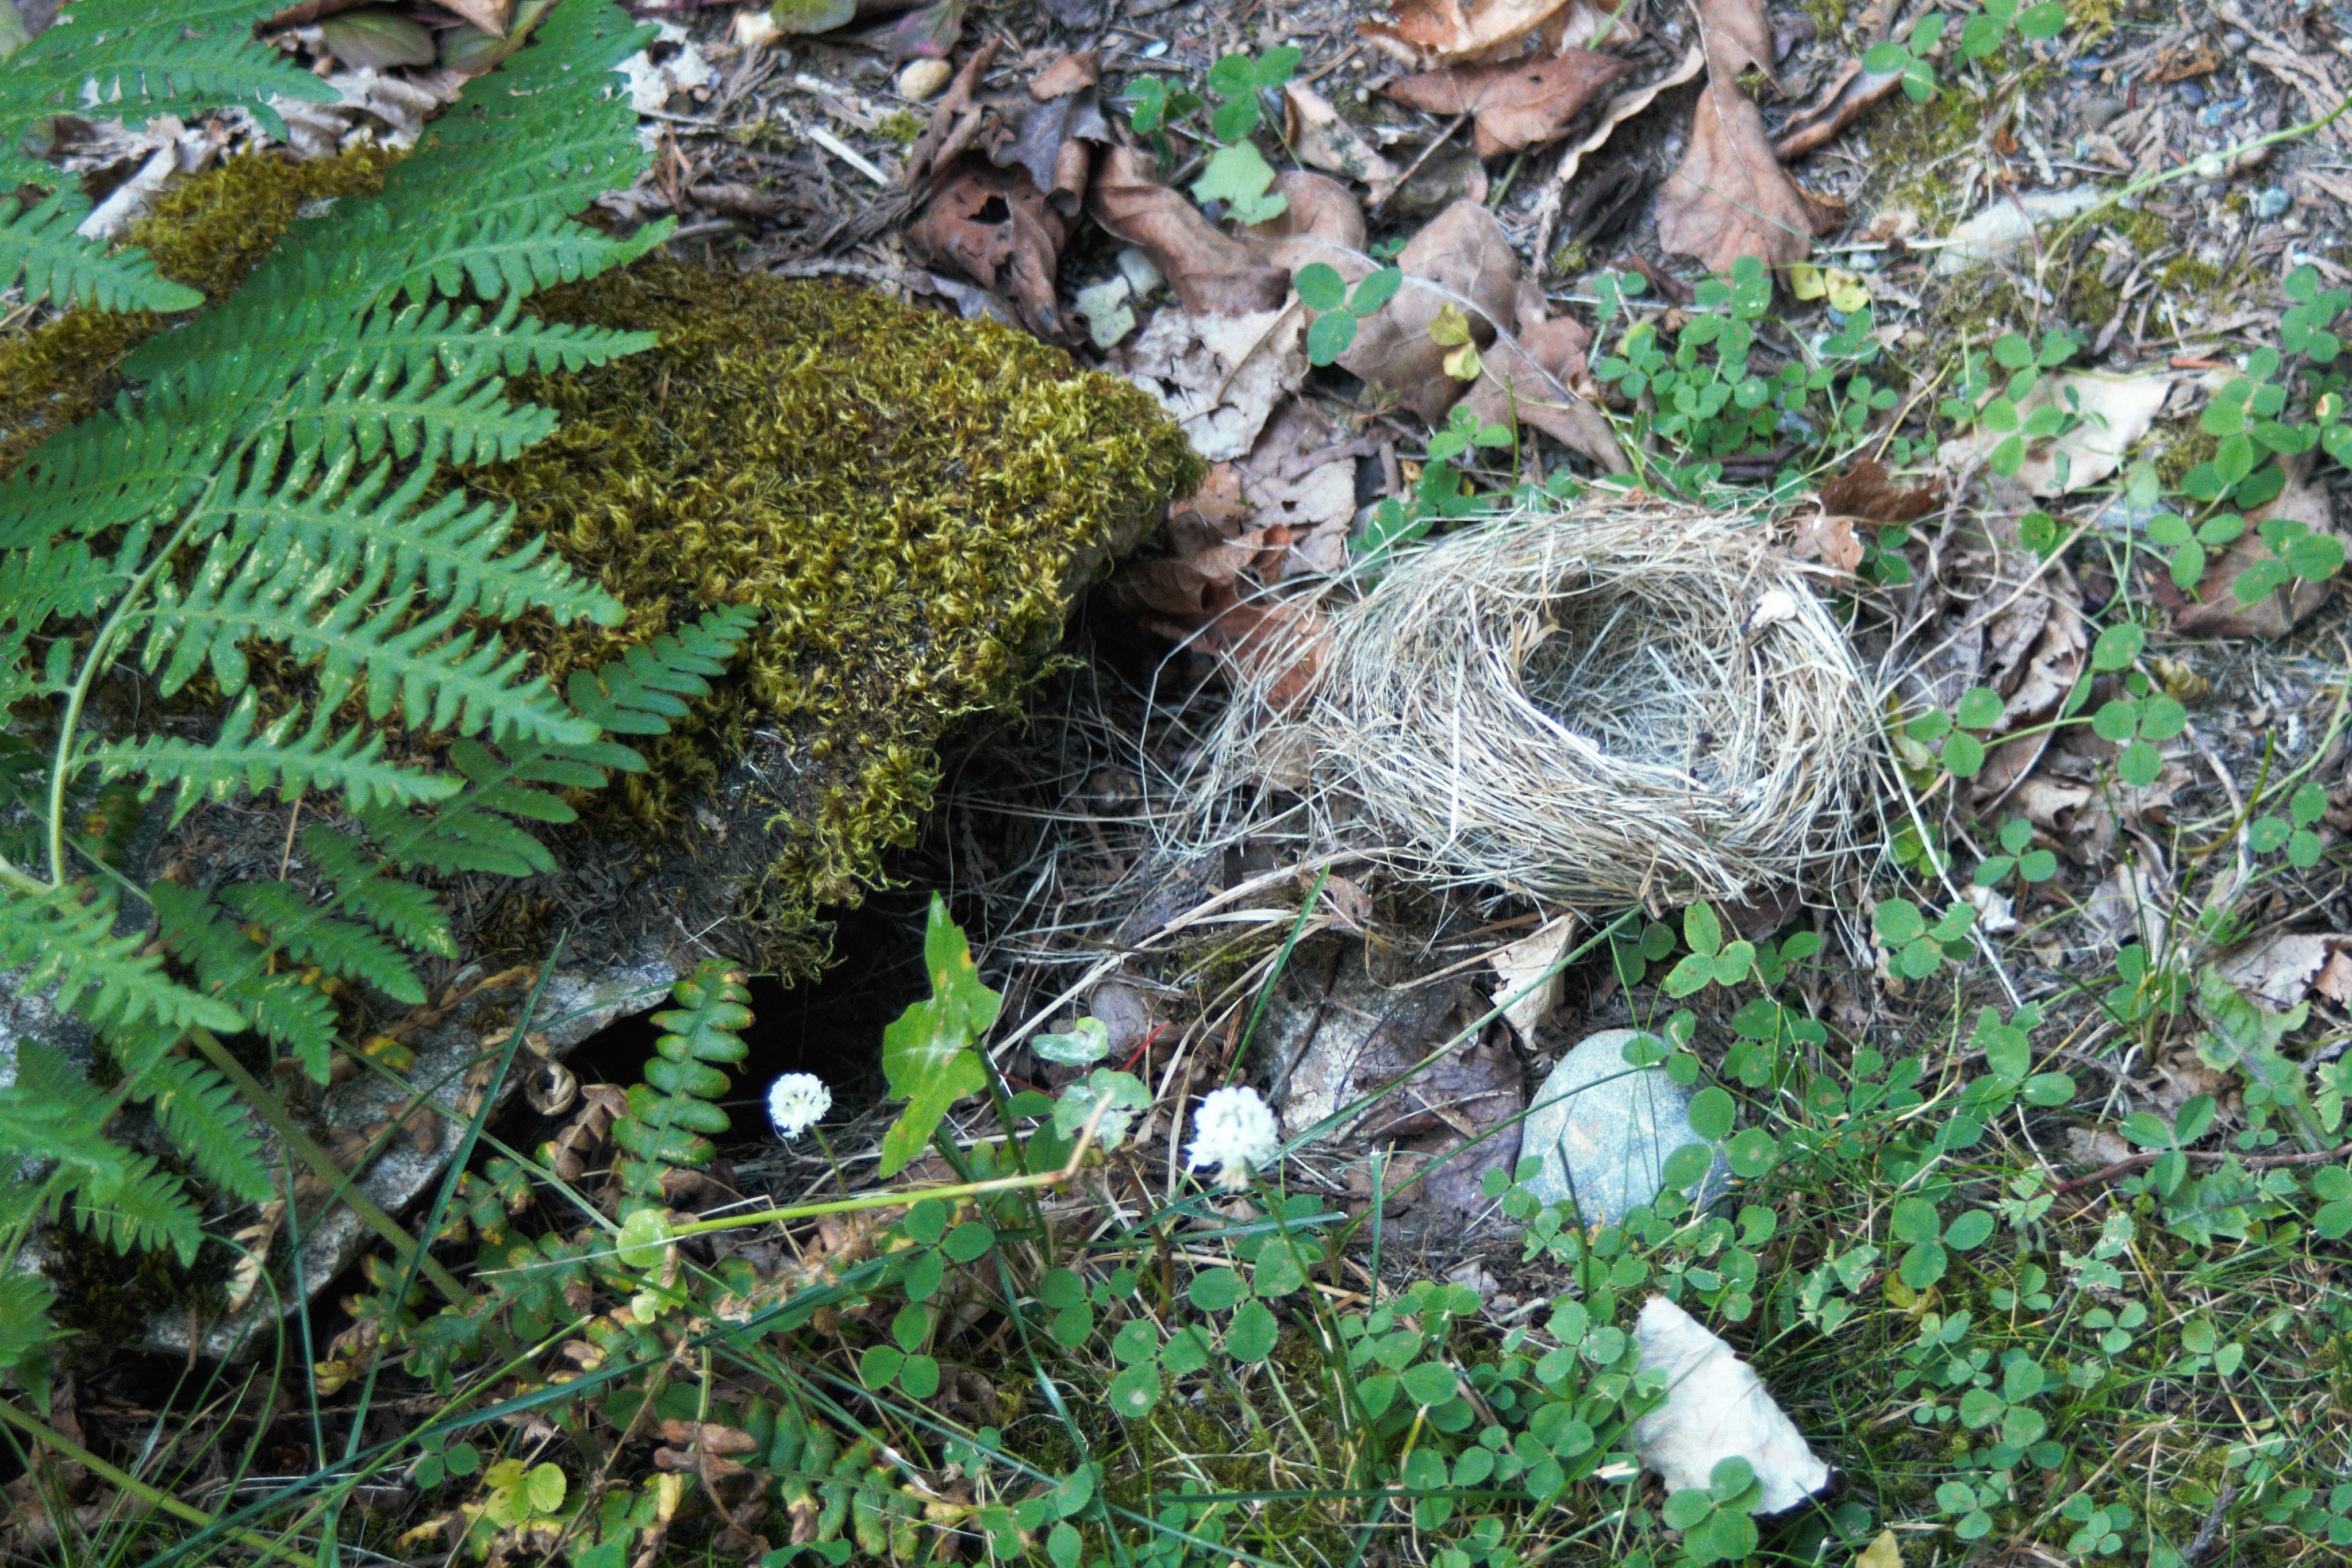
Then one morning my daughter ran to tell me to come and look at the nest. The nest had been pulled from its hiding place and was on the lawn. The birds were nowhere to be seen. Had an animal discovered them, or was it time to fly the nest?
We soon discovered the latter was true. Carefully camouflaged by brown leaves, one of the chicks was hopping around the ground and waiting for the parents to come and feed it. We could hear the other chicks too but we think perhaps they had gone into next door’s garden as we couldn’t see them.
After 24 hours the chick had gone, probably learning to fly. We heard them for a few days and then no more as they moved on to discover the world.
I love that we have learned so much about birds simply from sitting in the garden on a summer day.
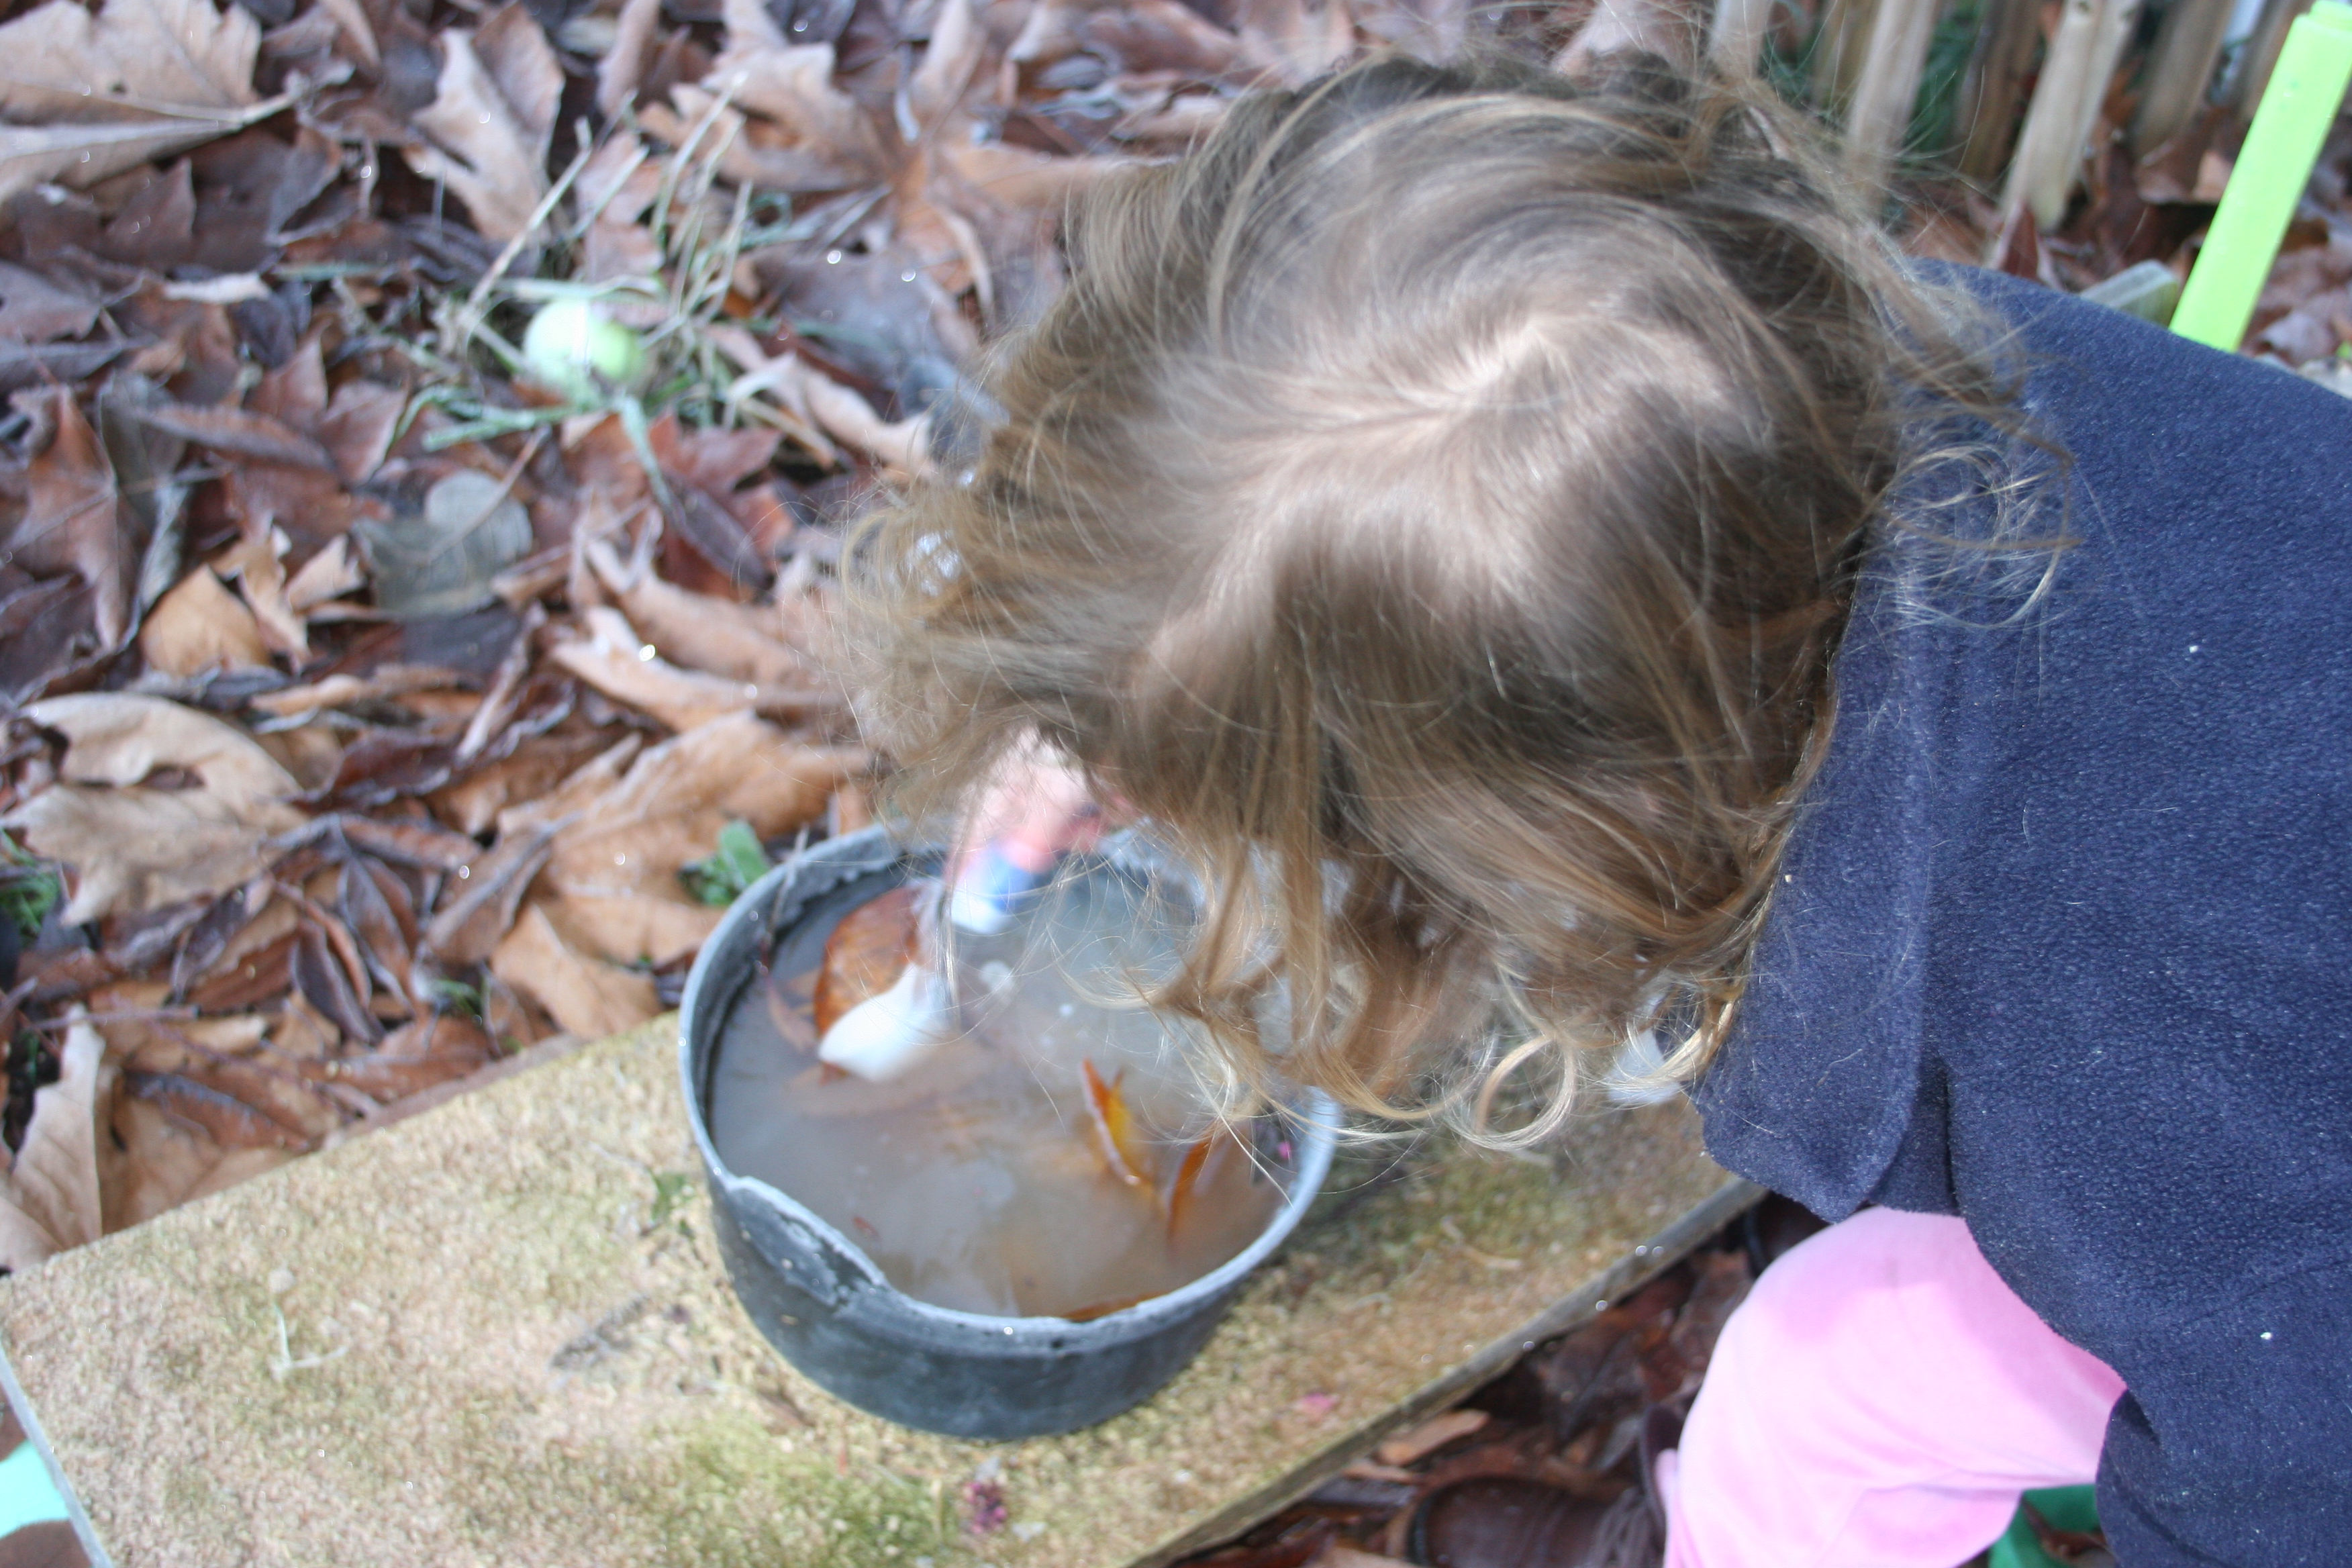
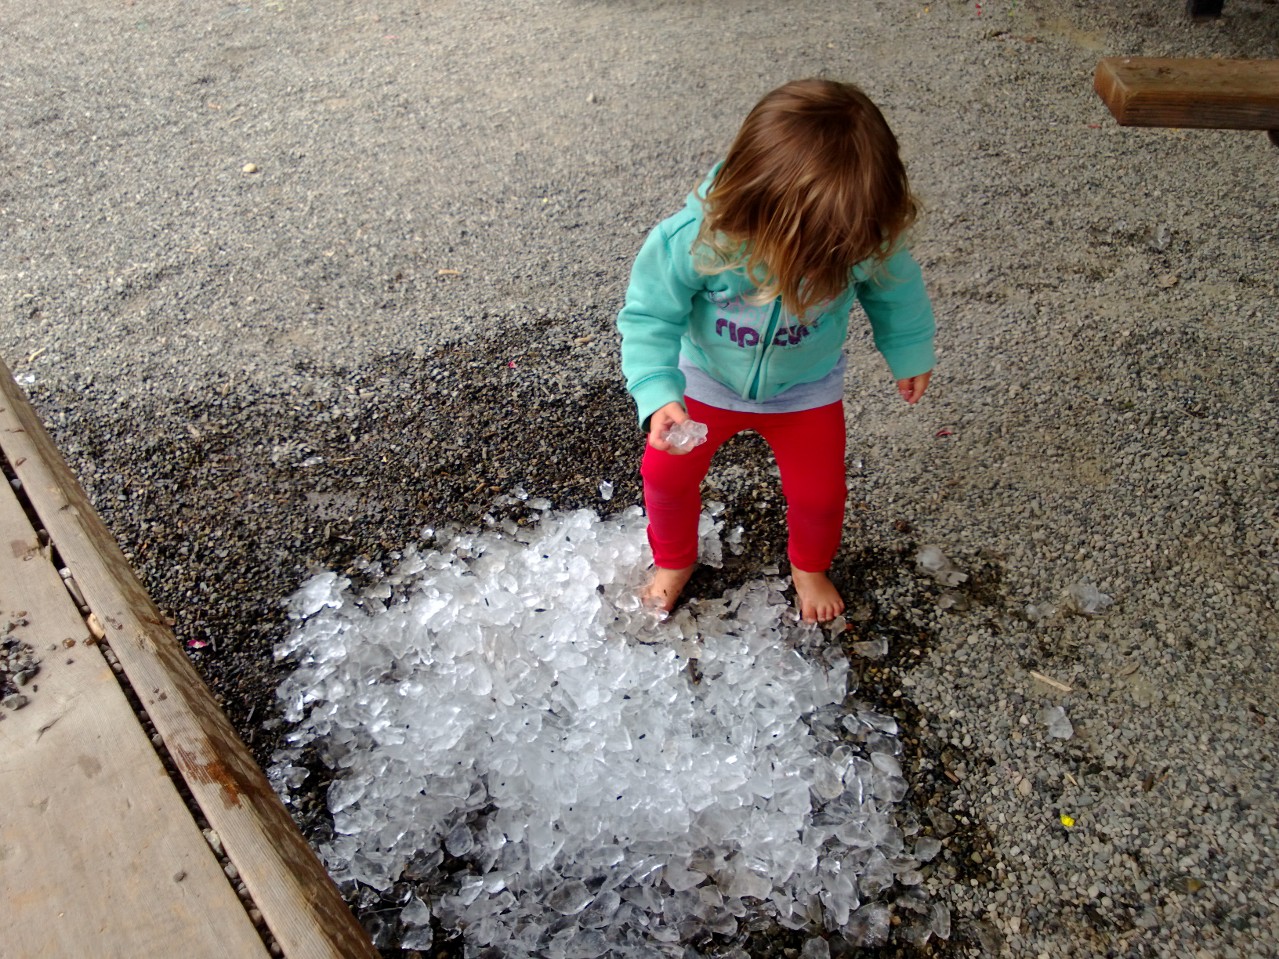
My children are fascinated by ice. I’ve added loose parts to ice before, but never considered that ice could in itself be a loose part.
When the cold weather comes, the first thing my kids do is to check if their water table has frozen and any other containers they have left around the garden.
the cauldron has loads of ice in, not like yesterday. How can we break it?
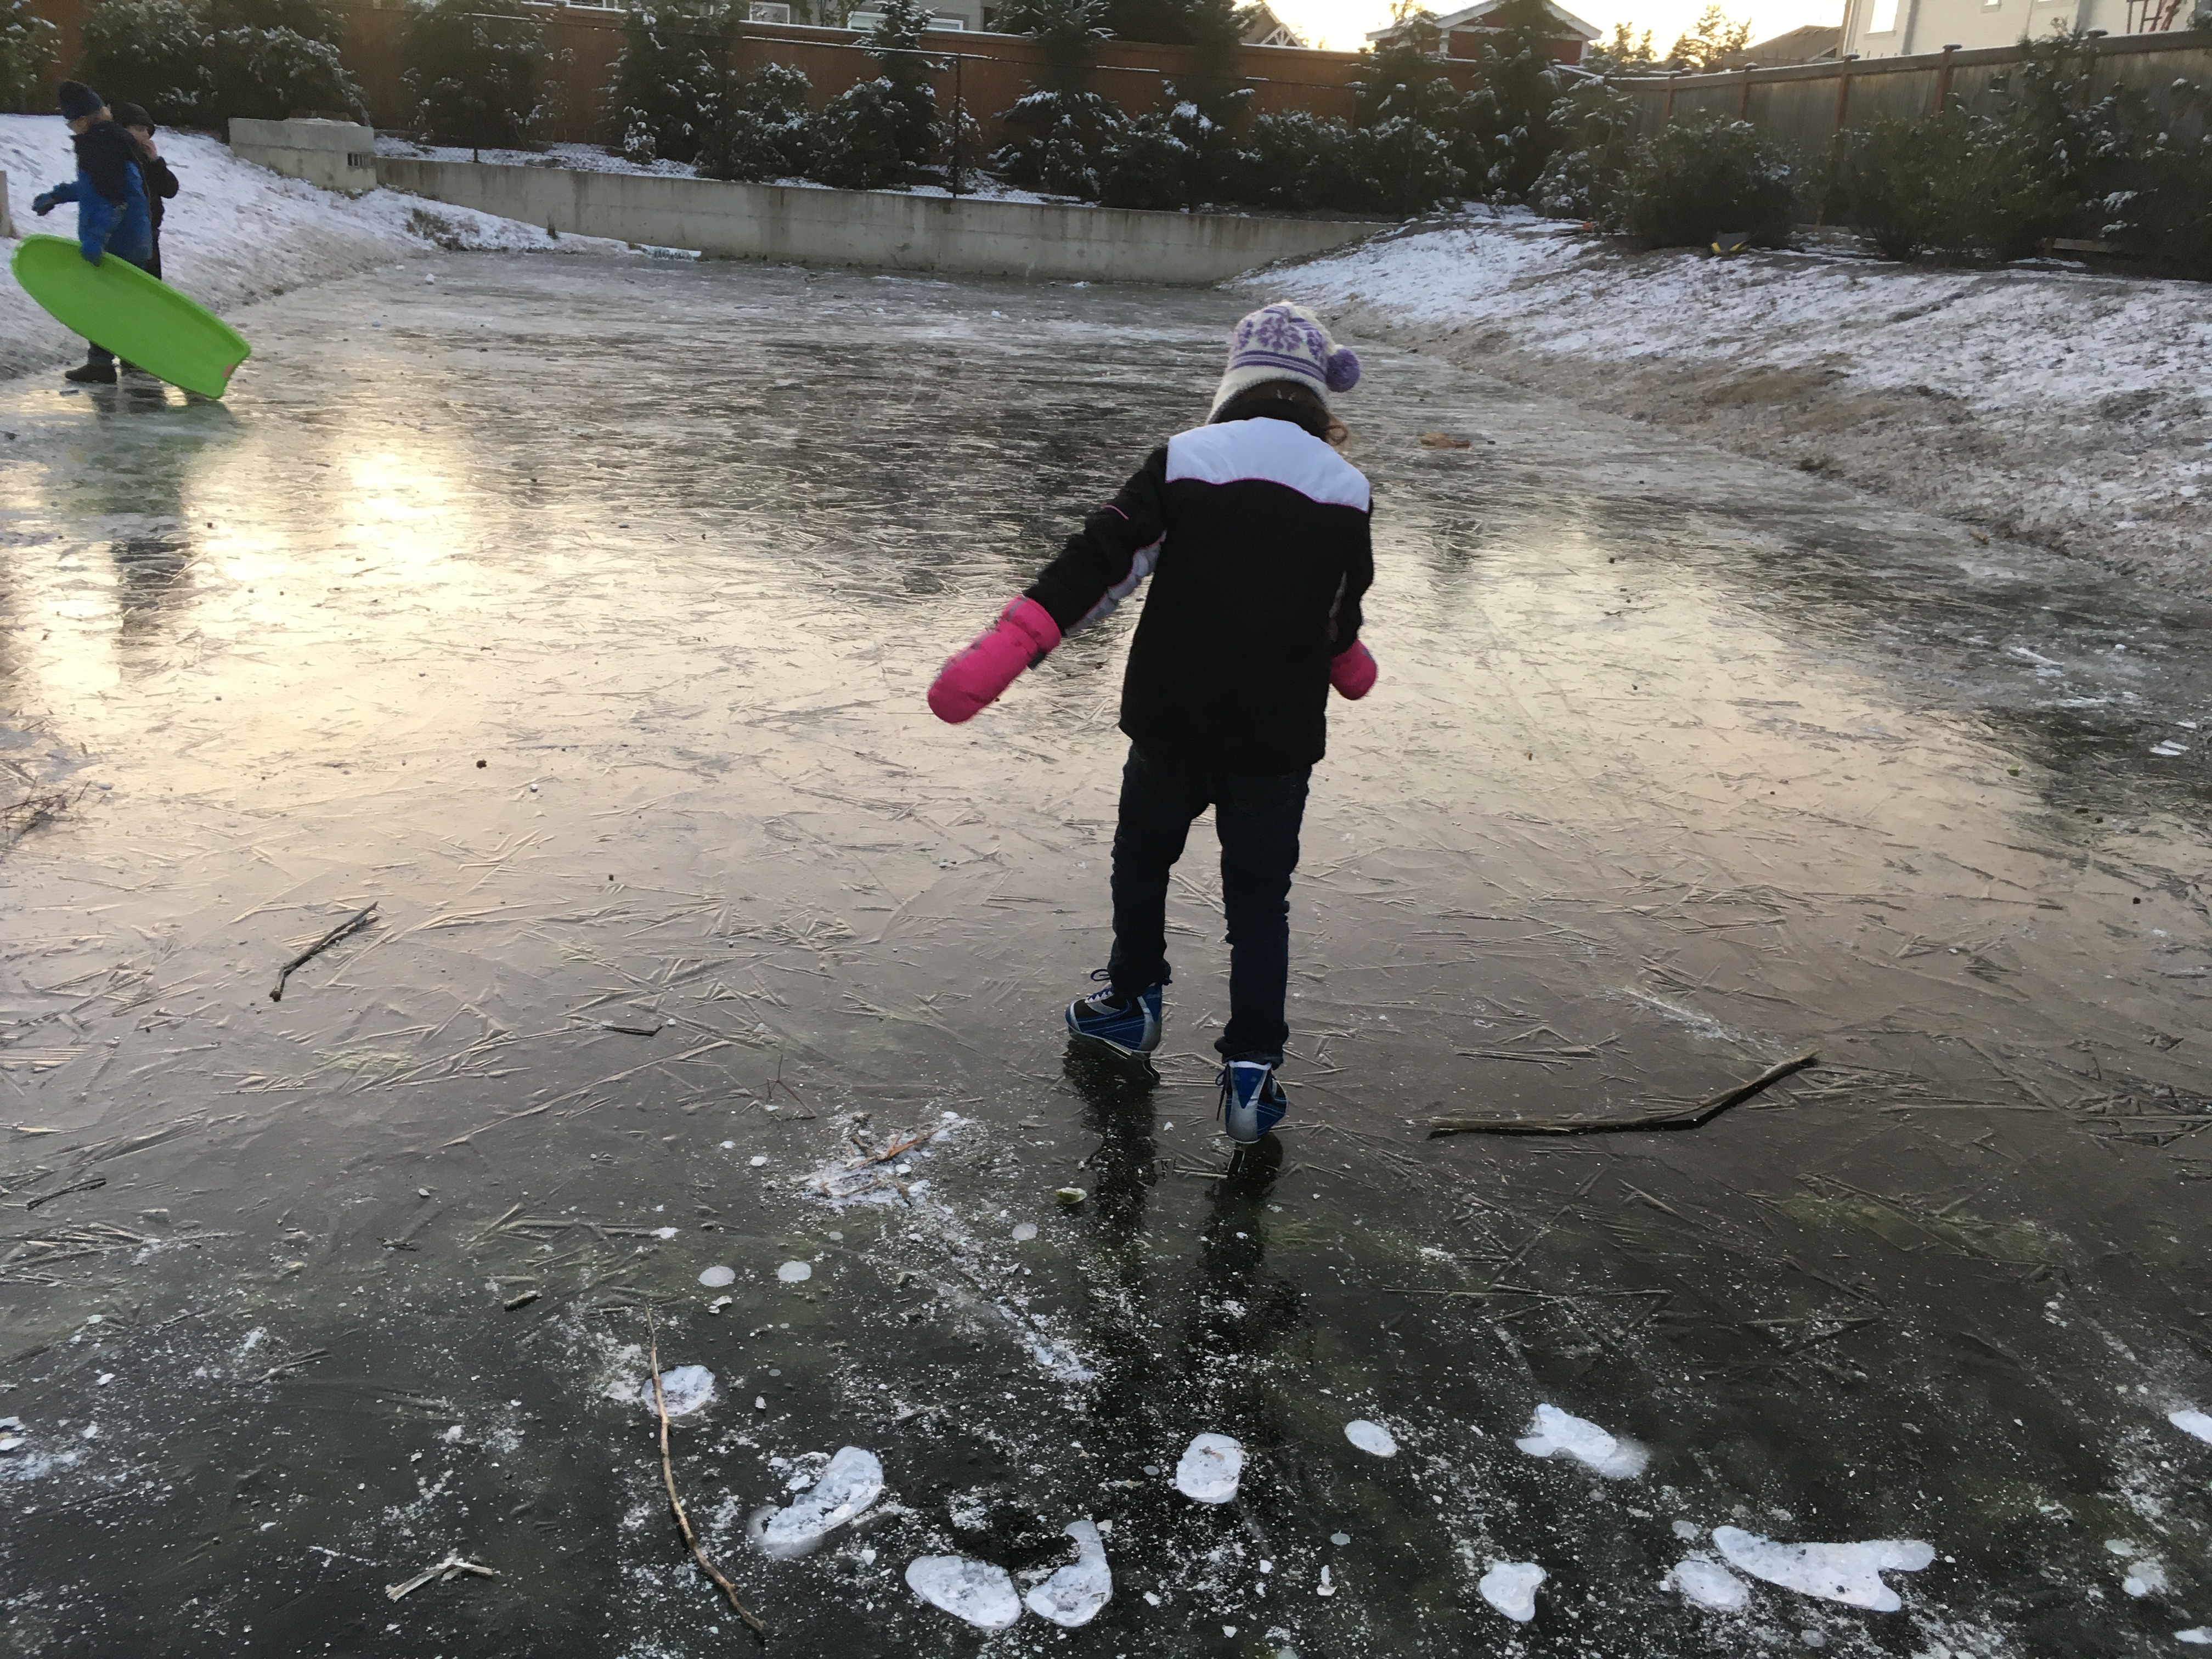
The next thing they like to do is to go to the storm pond near their friends house to see if it has frozen.
Last year it froze solid for the first time. The kids loved throwing sticks to try to break it and even ice skated on it.
When the ice wasn’t solid enough to walk on, it was just as fascinating.
The children broke off the surface, ice sheets very carefully and had competitions to see who could break the largest piece.
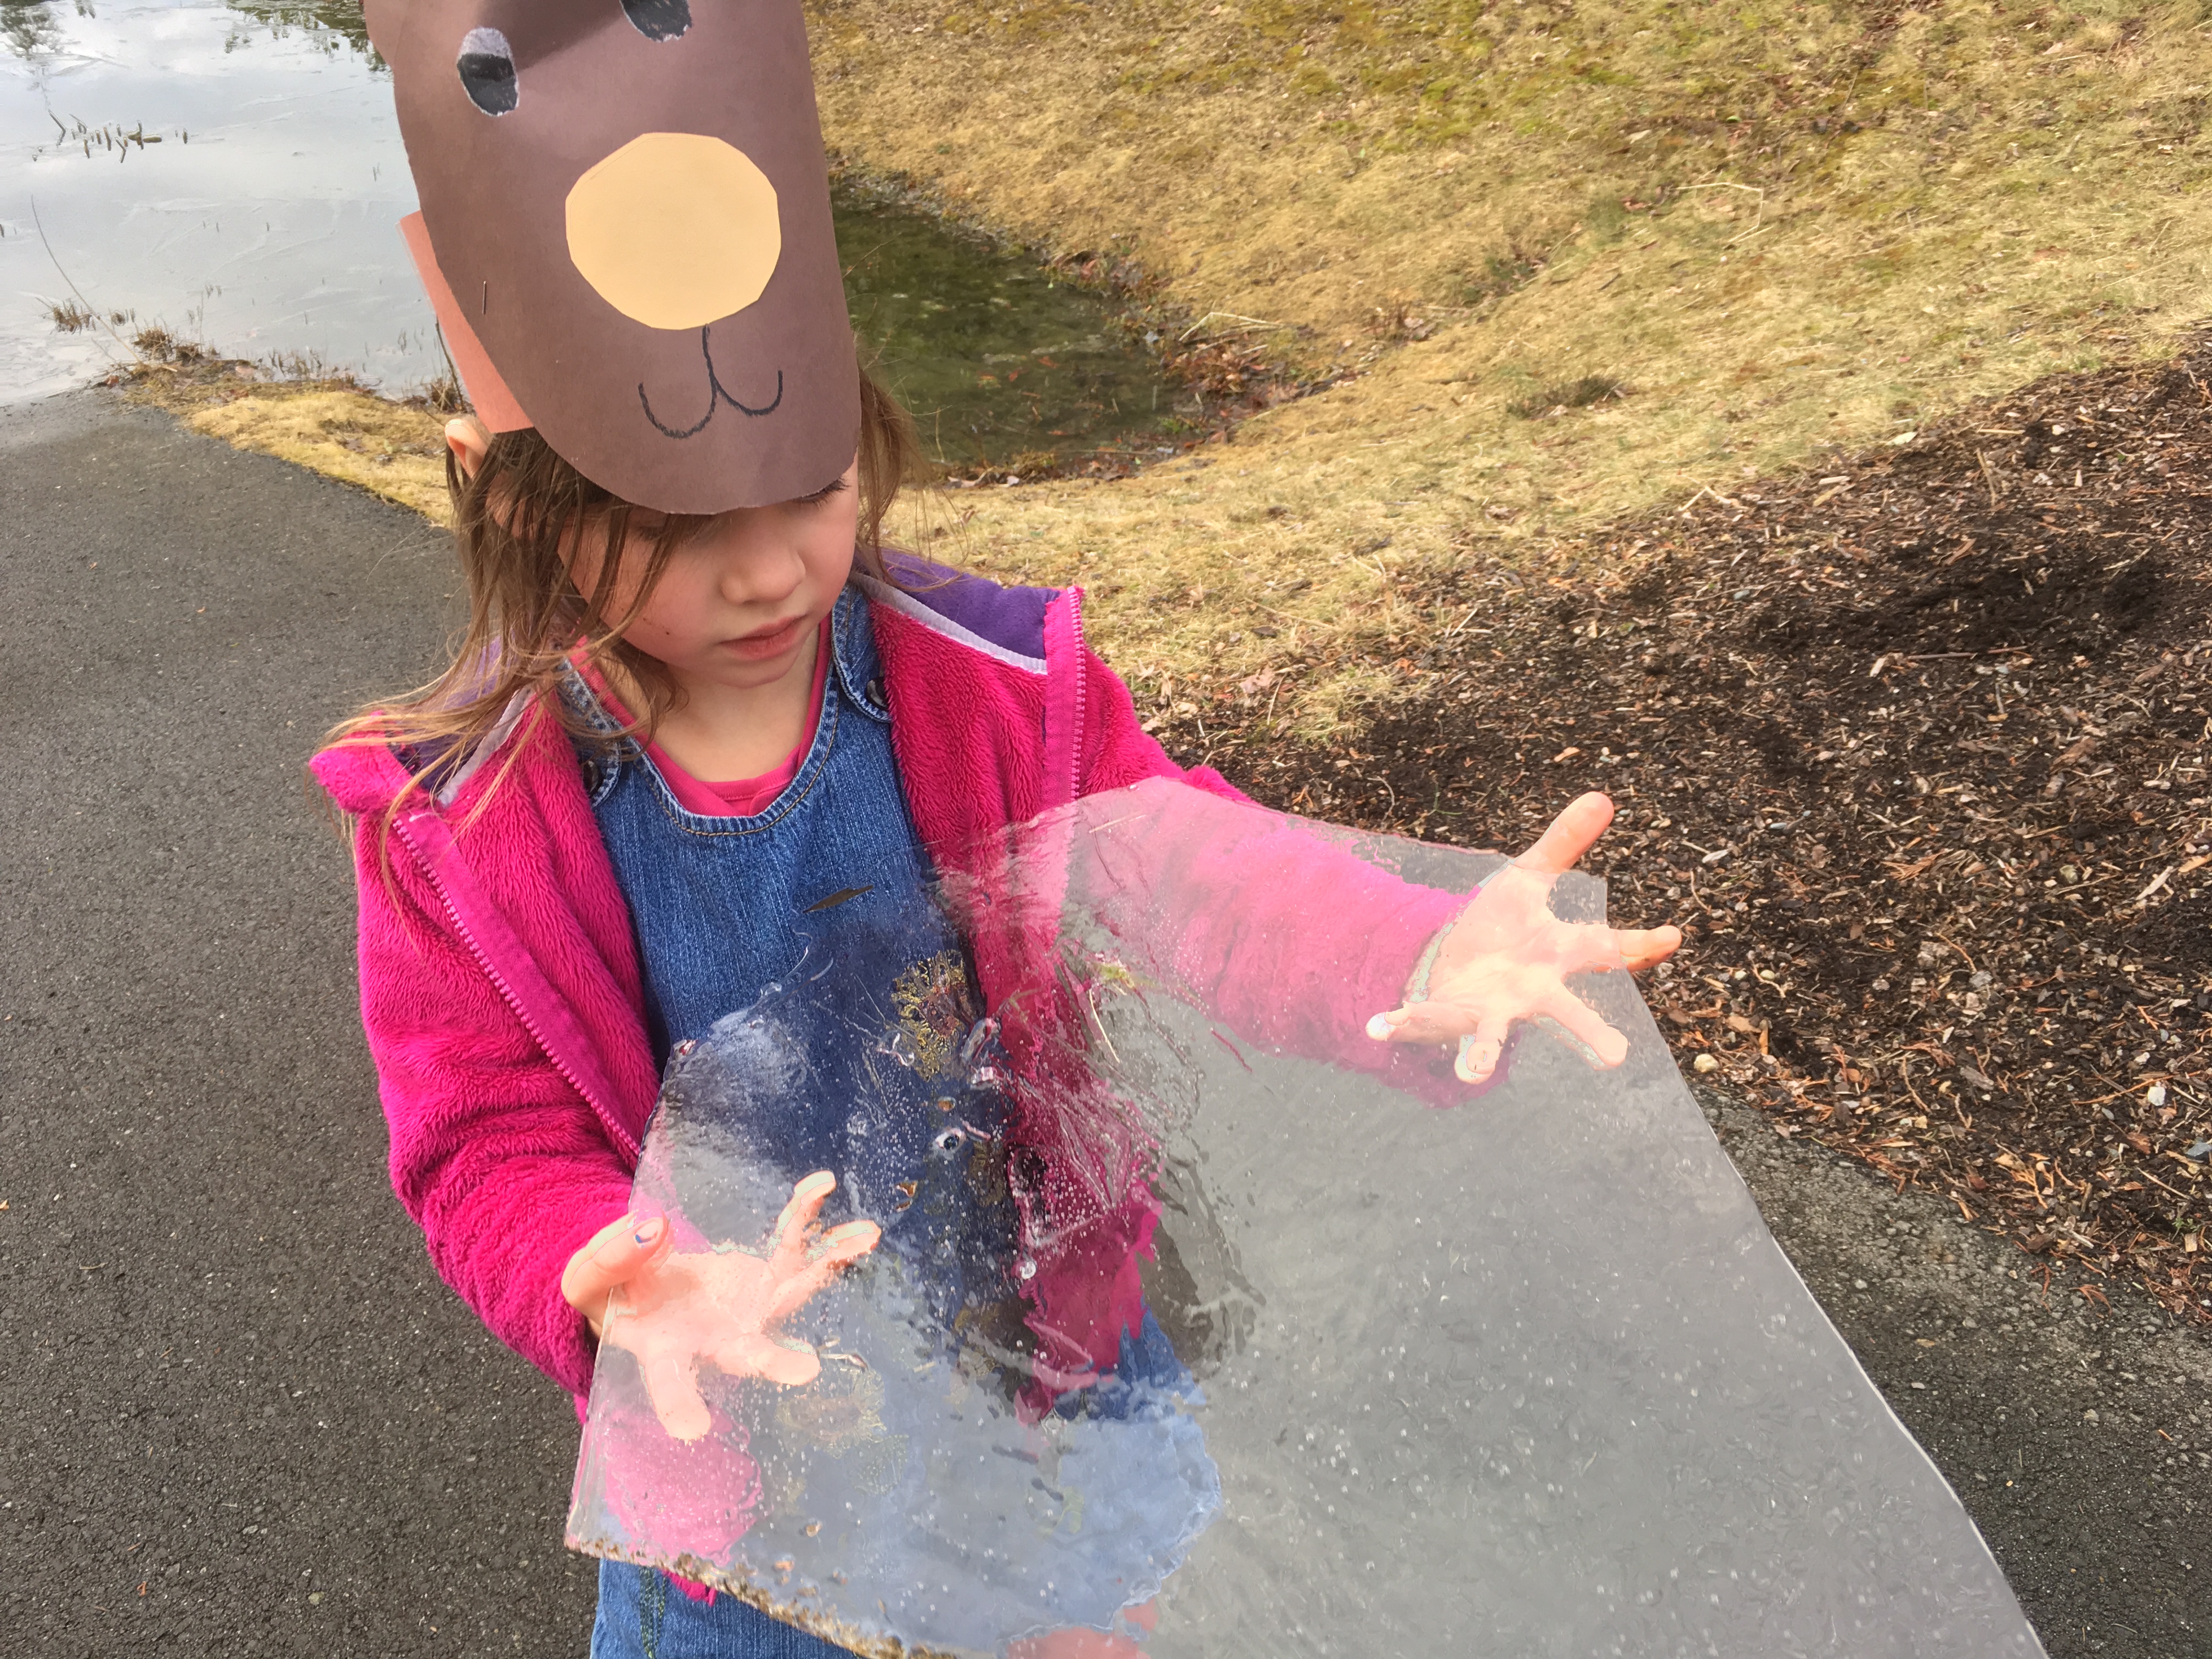
My youngest insisted on carrying pieces home, even though her fingers were numb and left them on the doorstep to see how long they would remain frozen.
When the pieces broke, they used them to make these pictures.
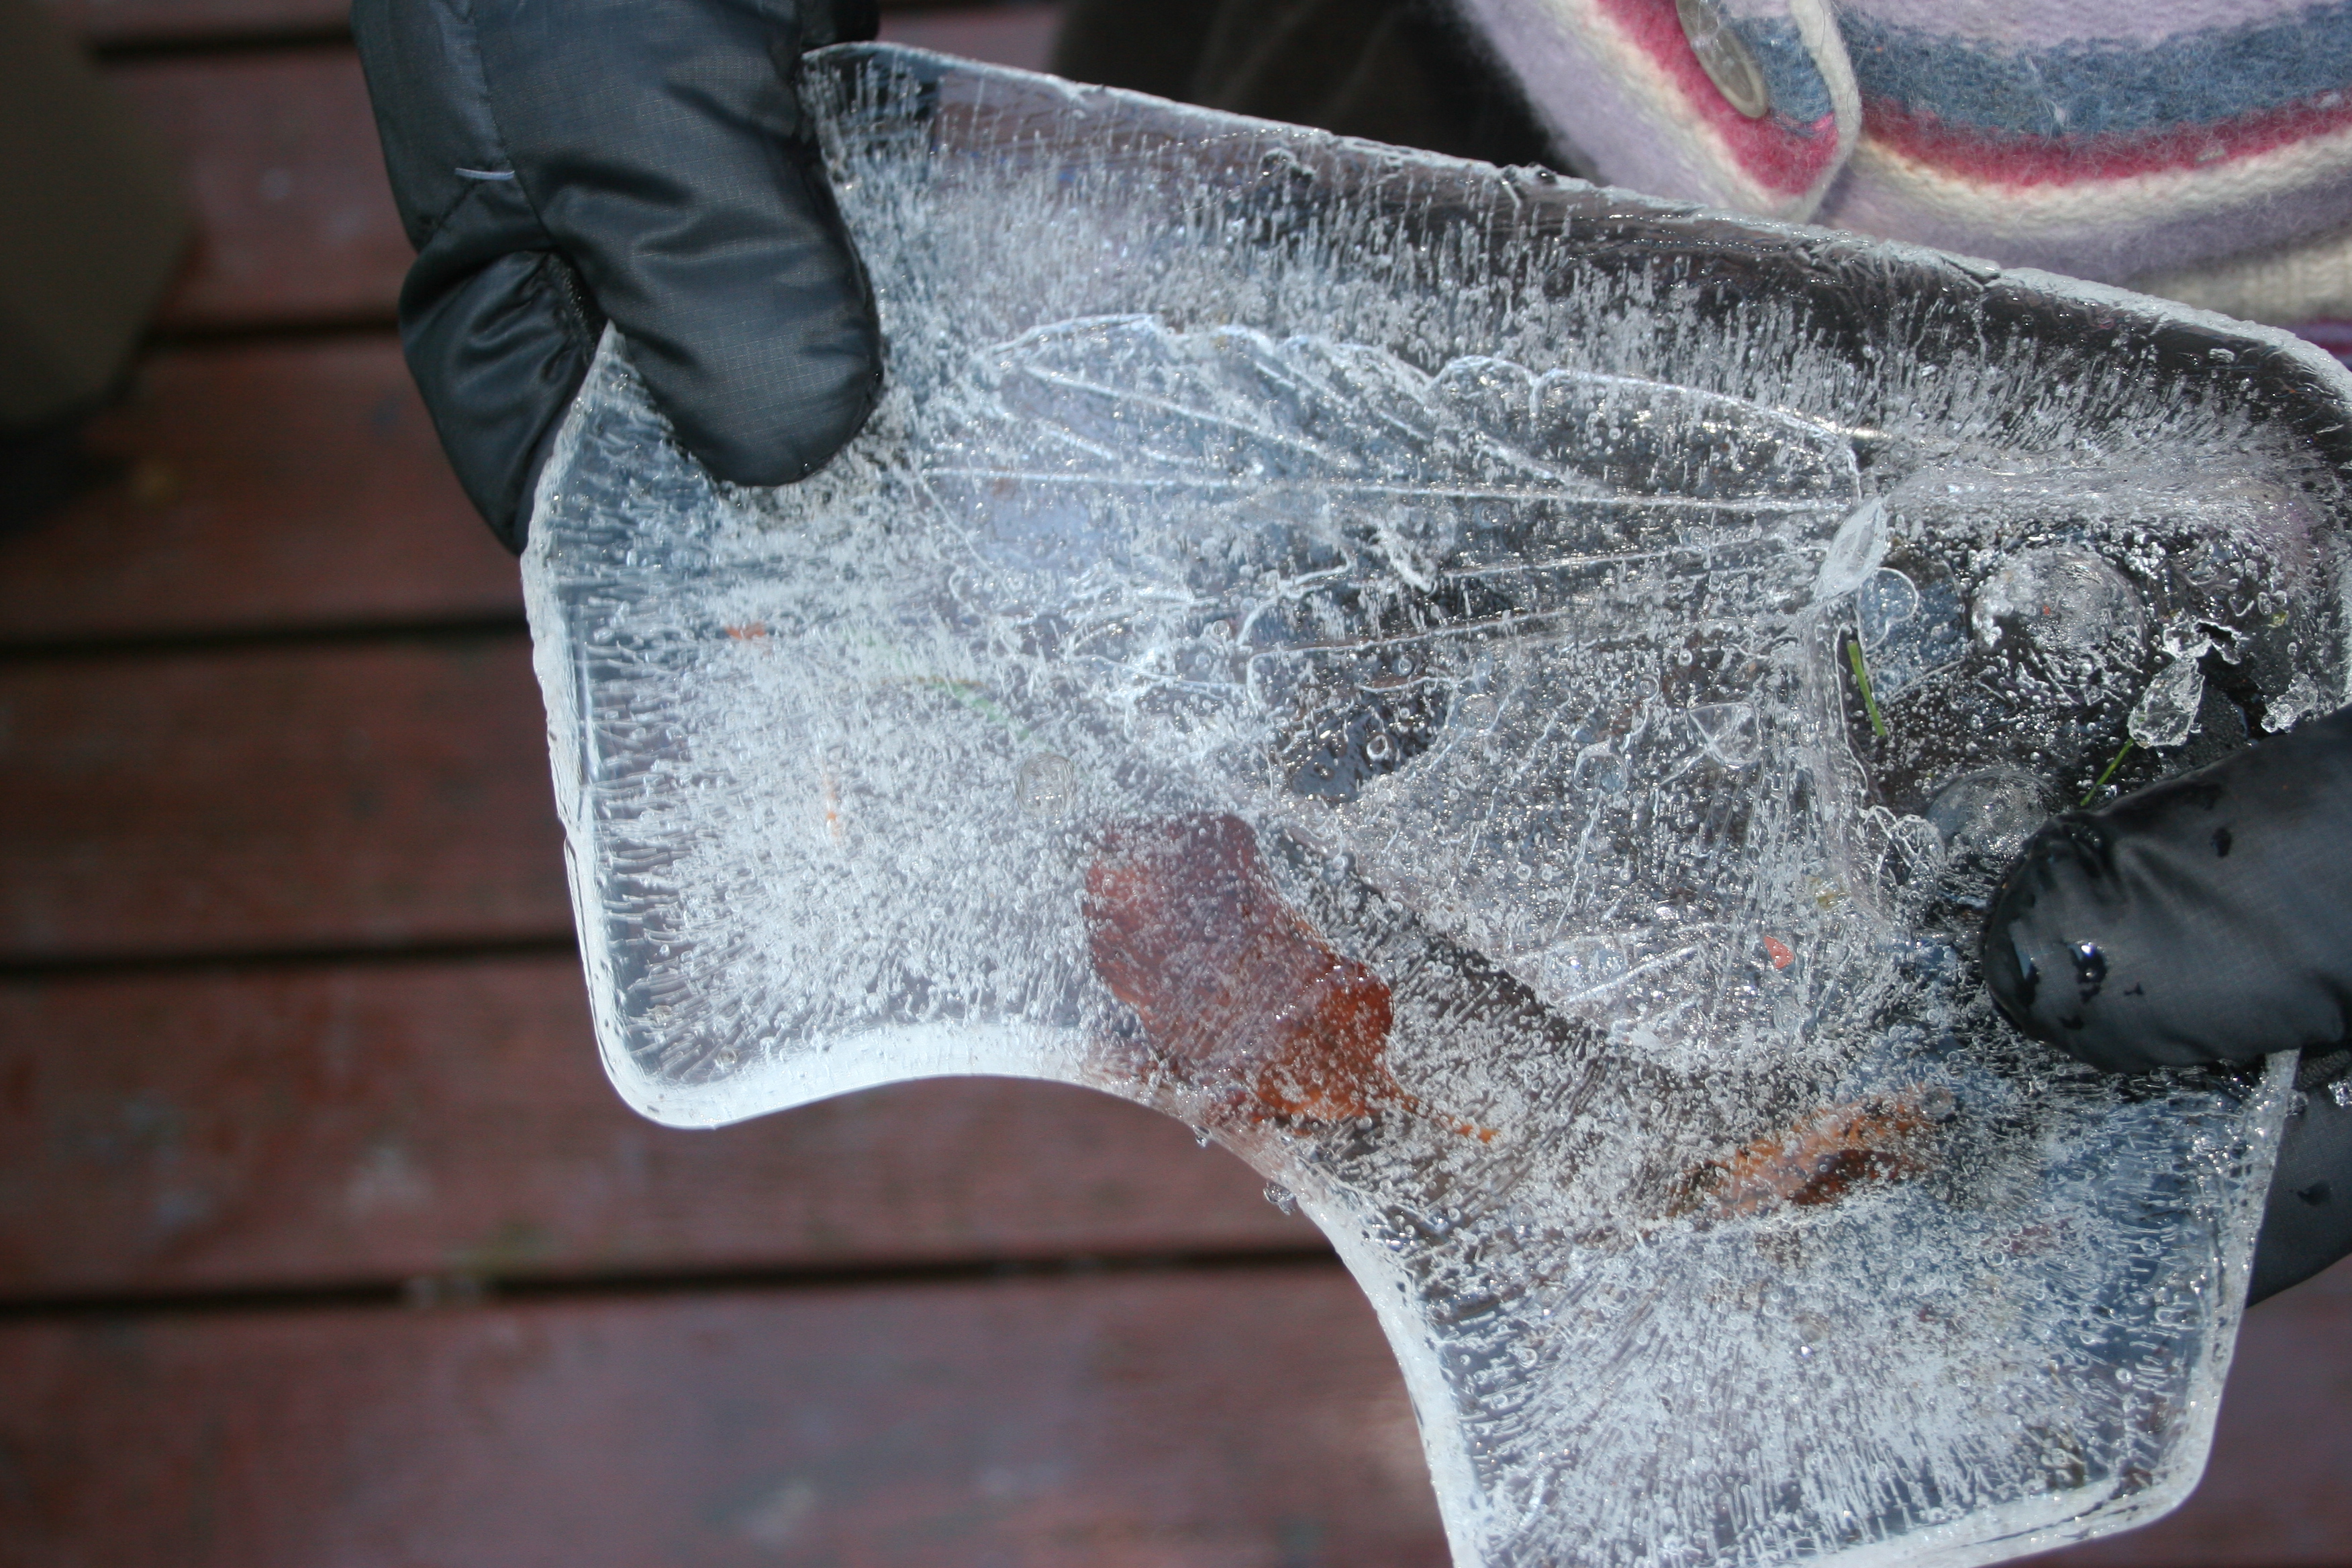
The children can help create it in different shapes and forms
And is fascinatingly beautiful
I broke this piece – look at all the lovely patterns.
If you don’t live in a cold climate you could make your own in moulds in the freezer or place a few bags of ice outside and see how the children explore.
This piece looks like a magnifier. I can look through it – see.
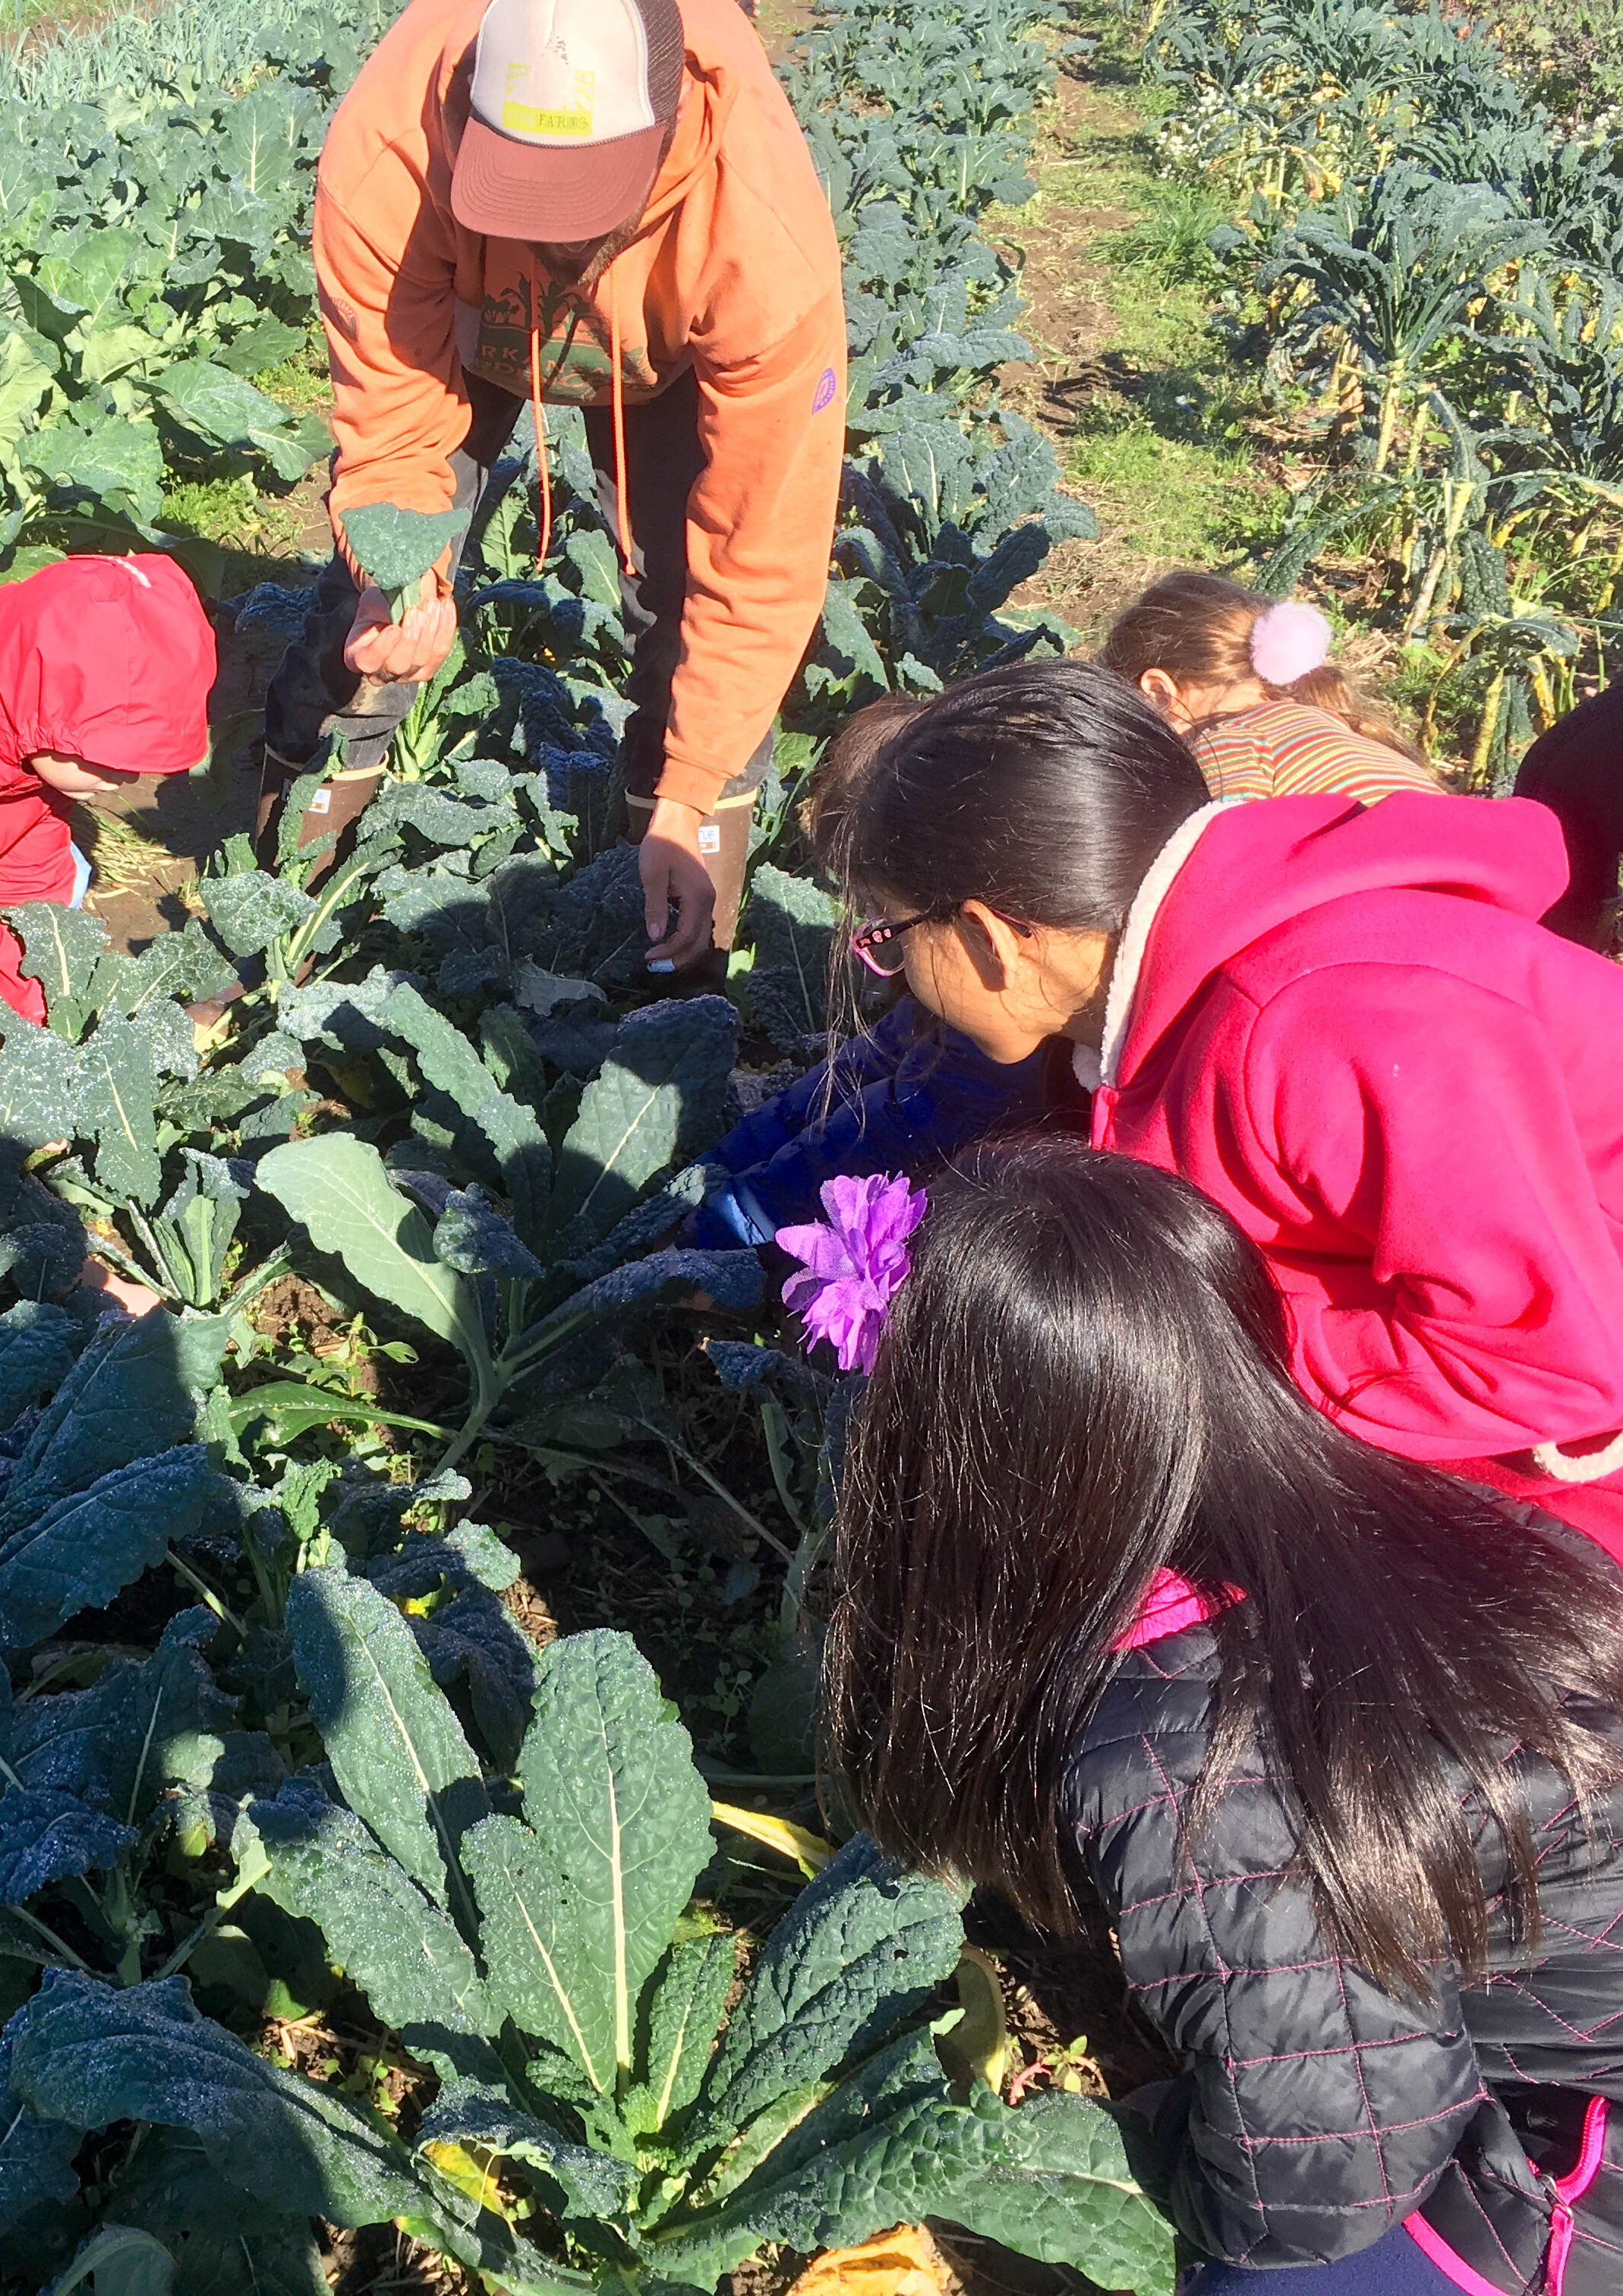
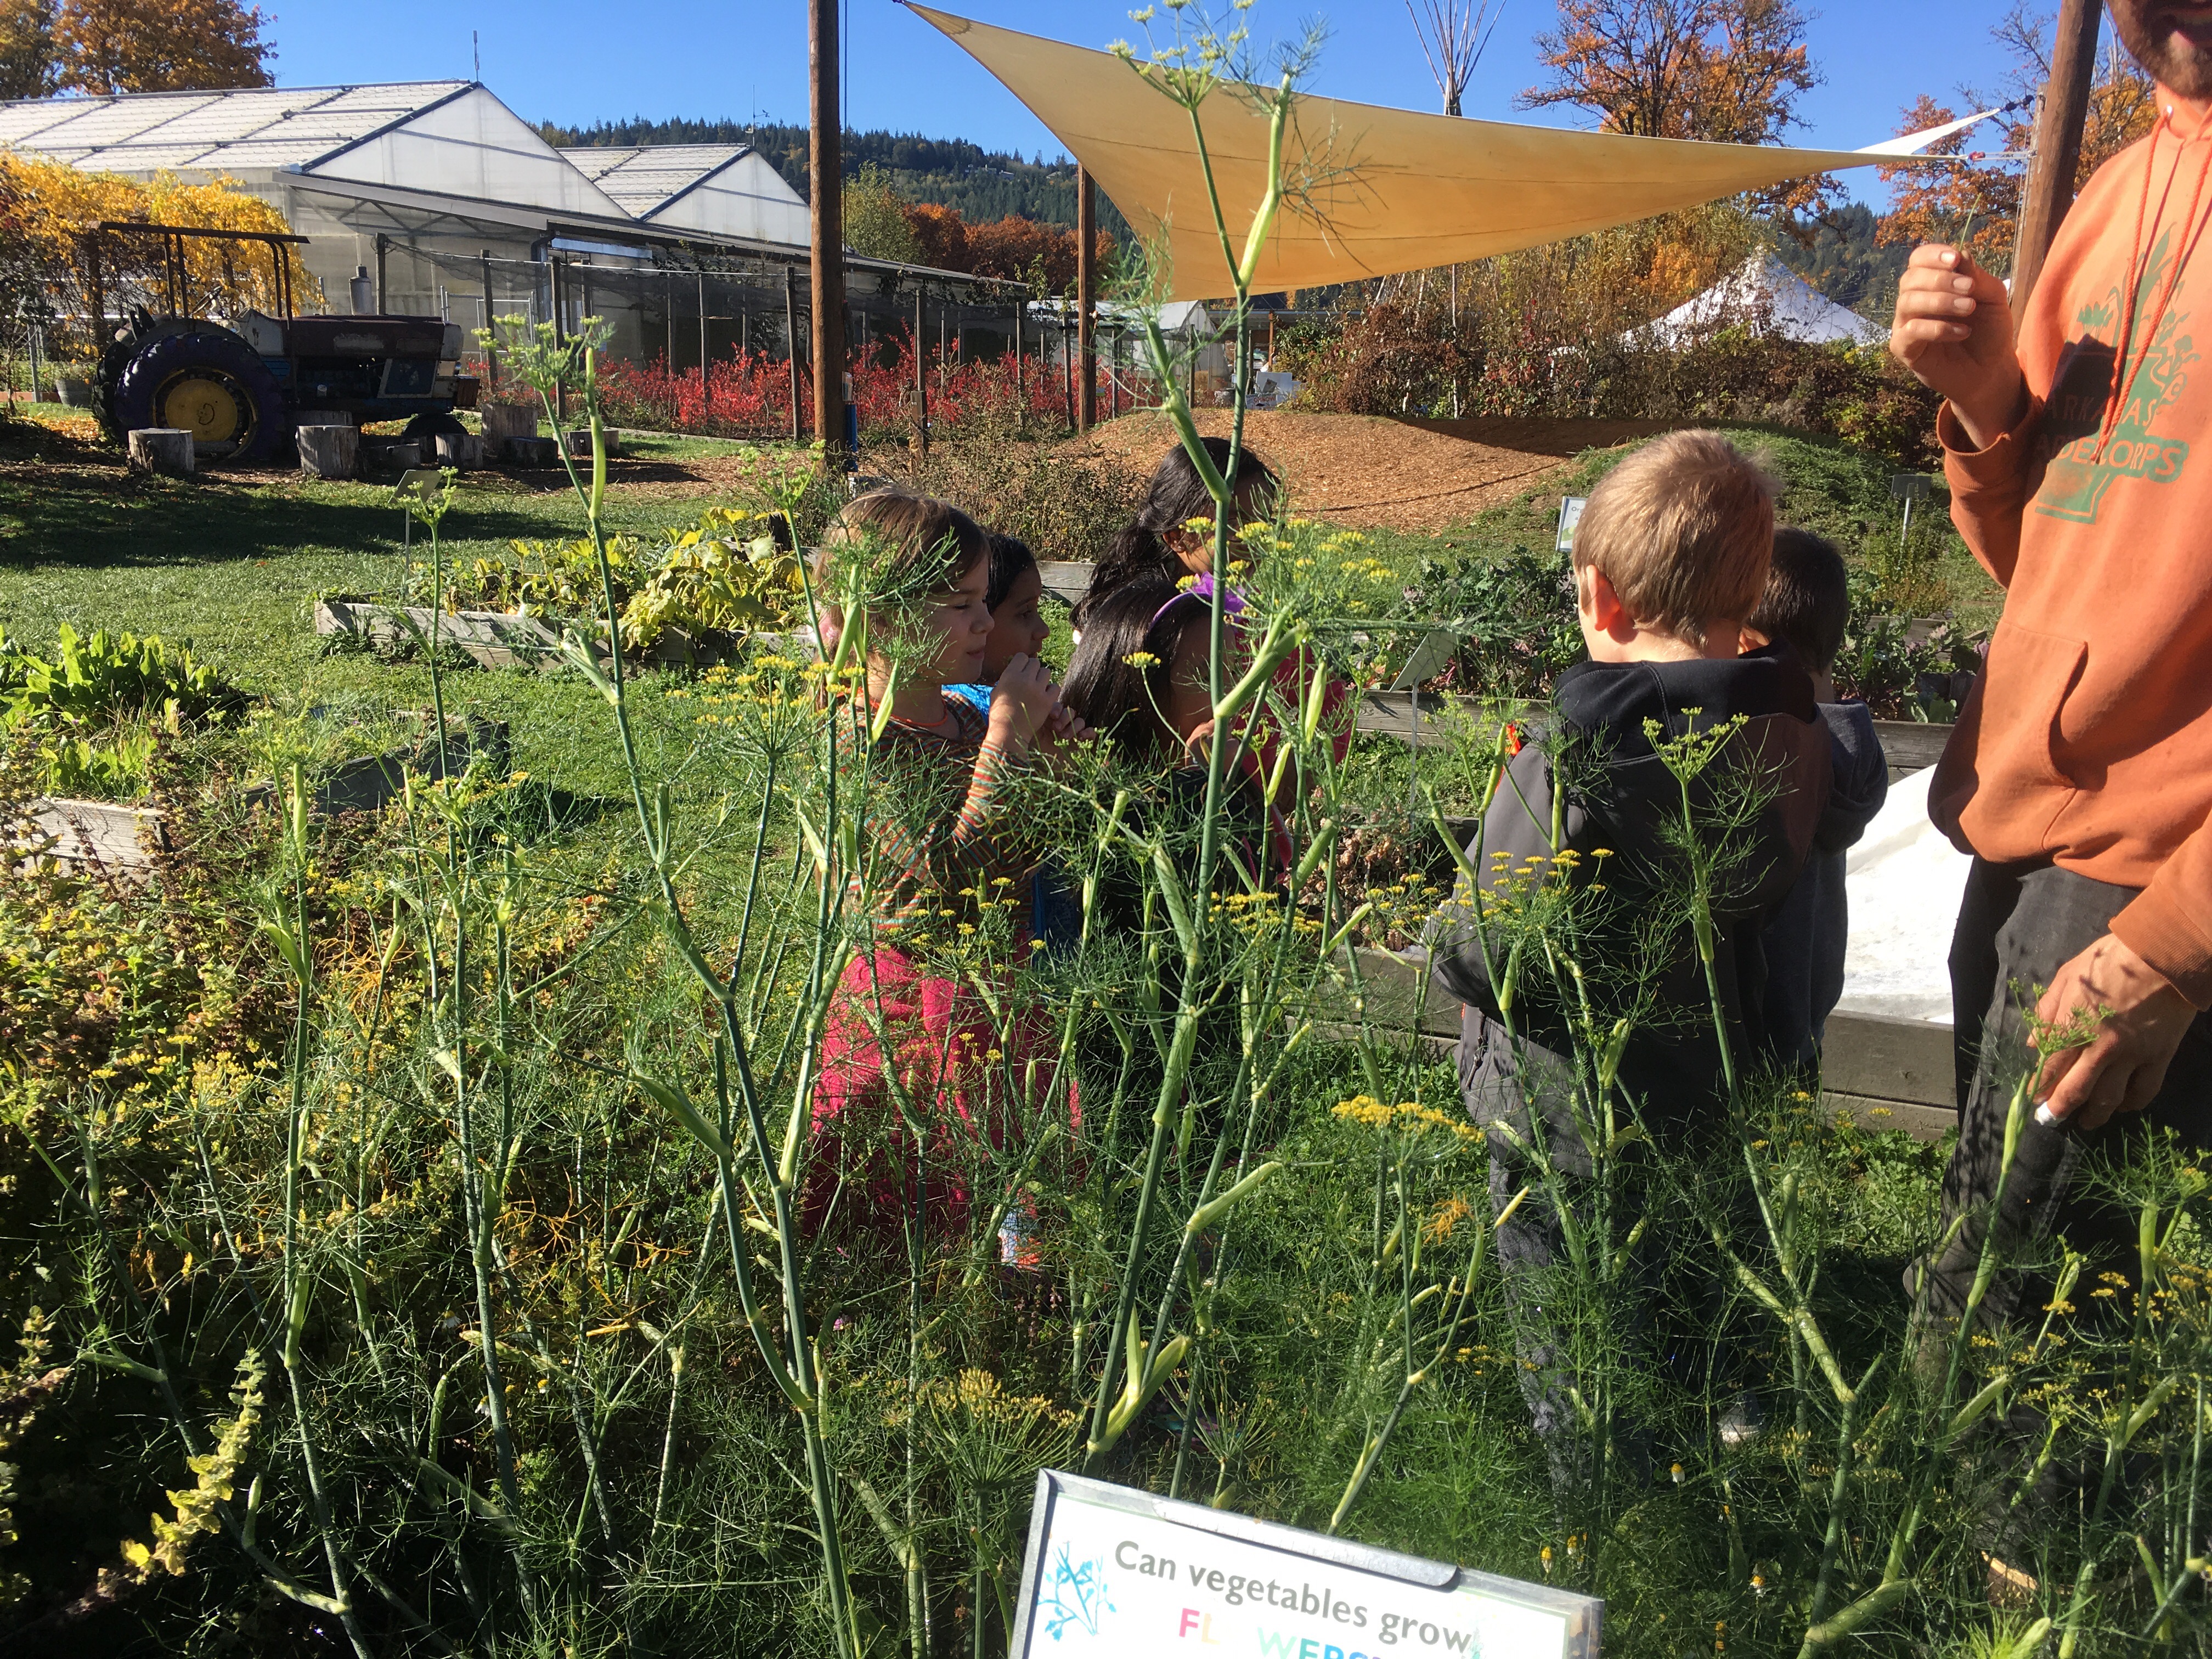
Oxbow Farm is my favourite place for field trips. The guides are wonderfully entertaining and keep the kids motivated with songs, movement, challenges and a fast paced, hands-on journey through the farm.
The children learn about the farm plants and have an opportunity to investigate, pick and taste everything, whilst being shown respect for the plants and their environment.
They eat leafy plants being careful not to stand on the plants.
Snap off a whole Kale leaf and eat it. “It tastes like broccoli”
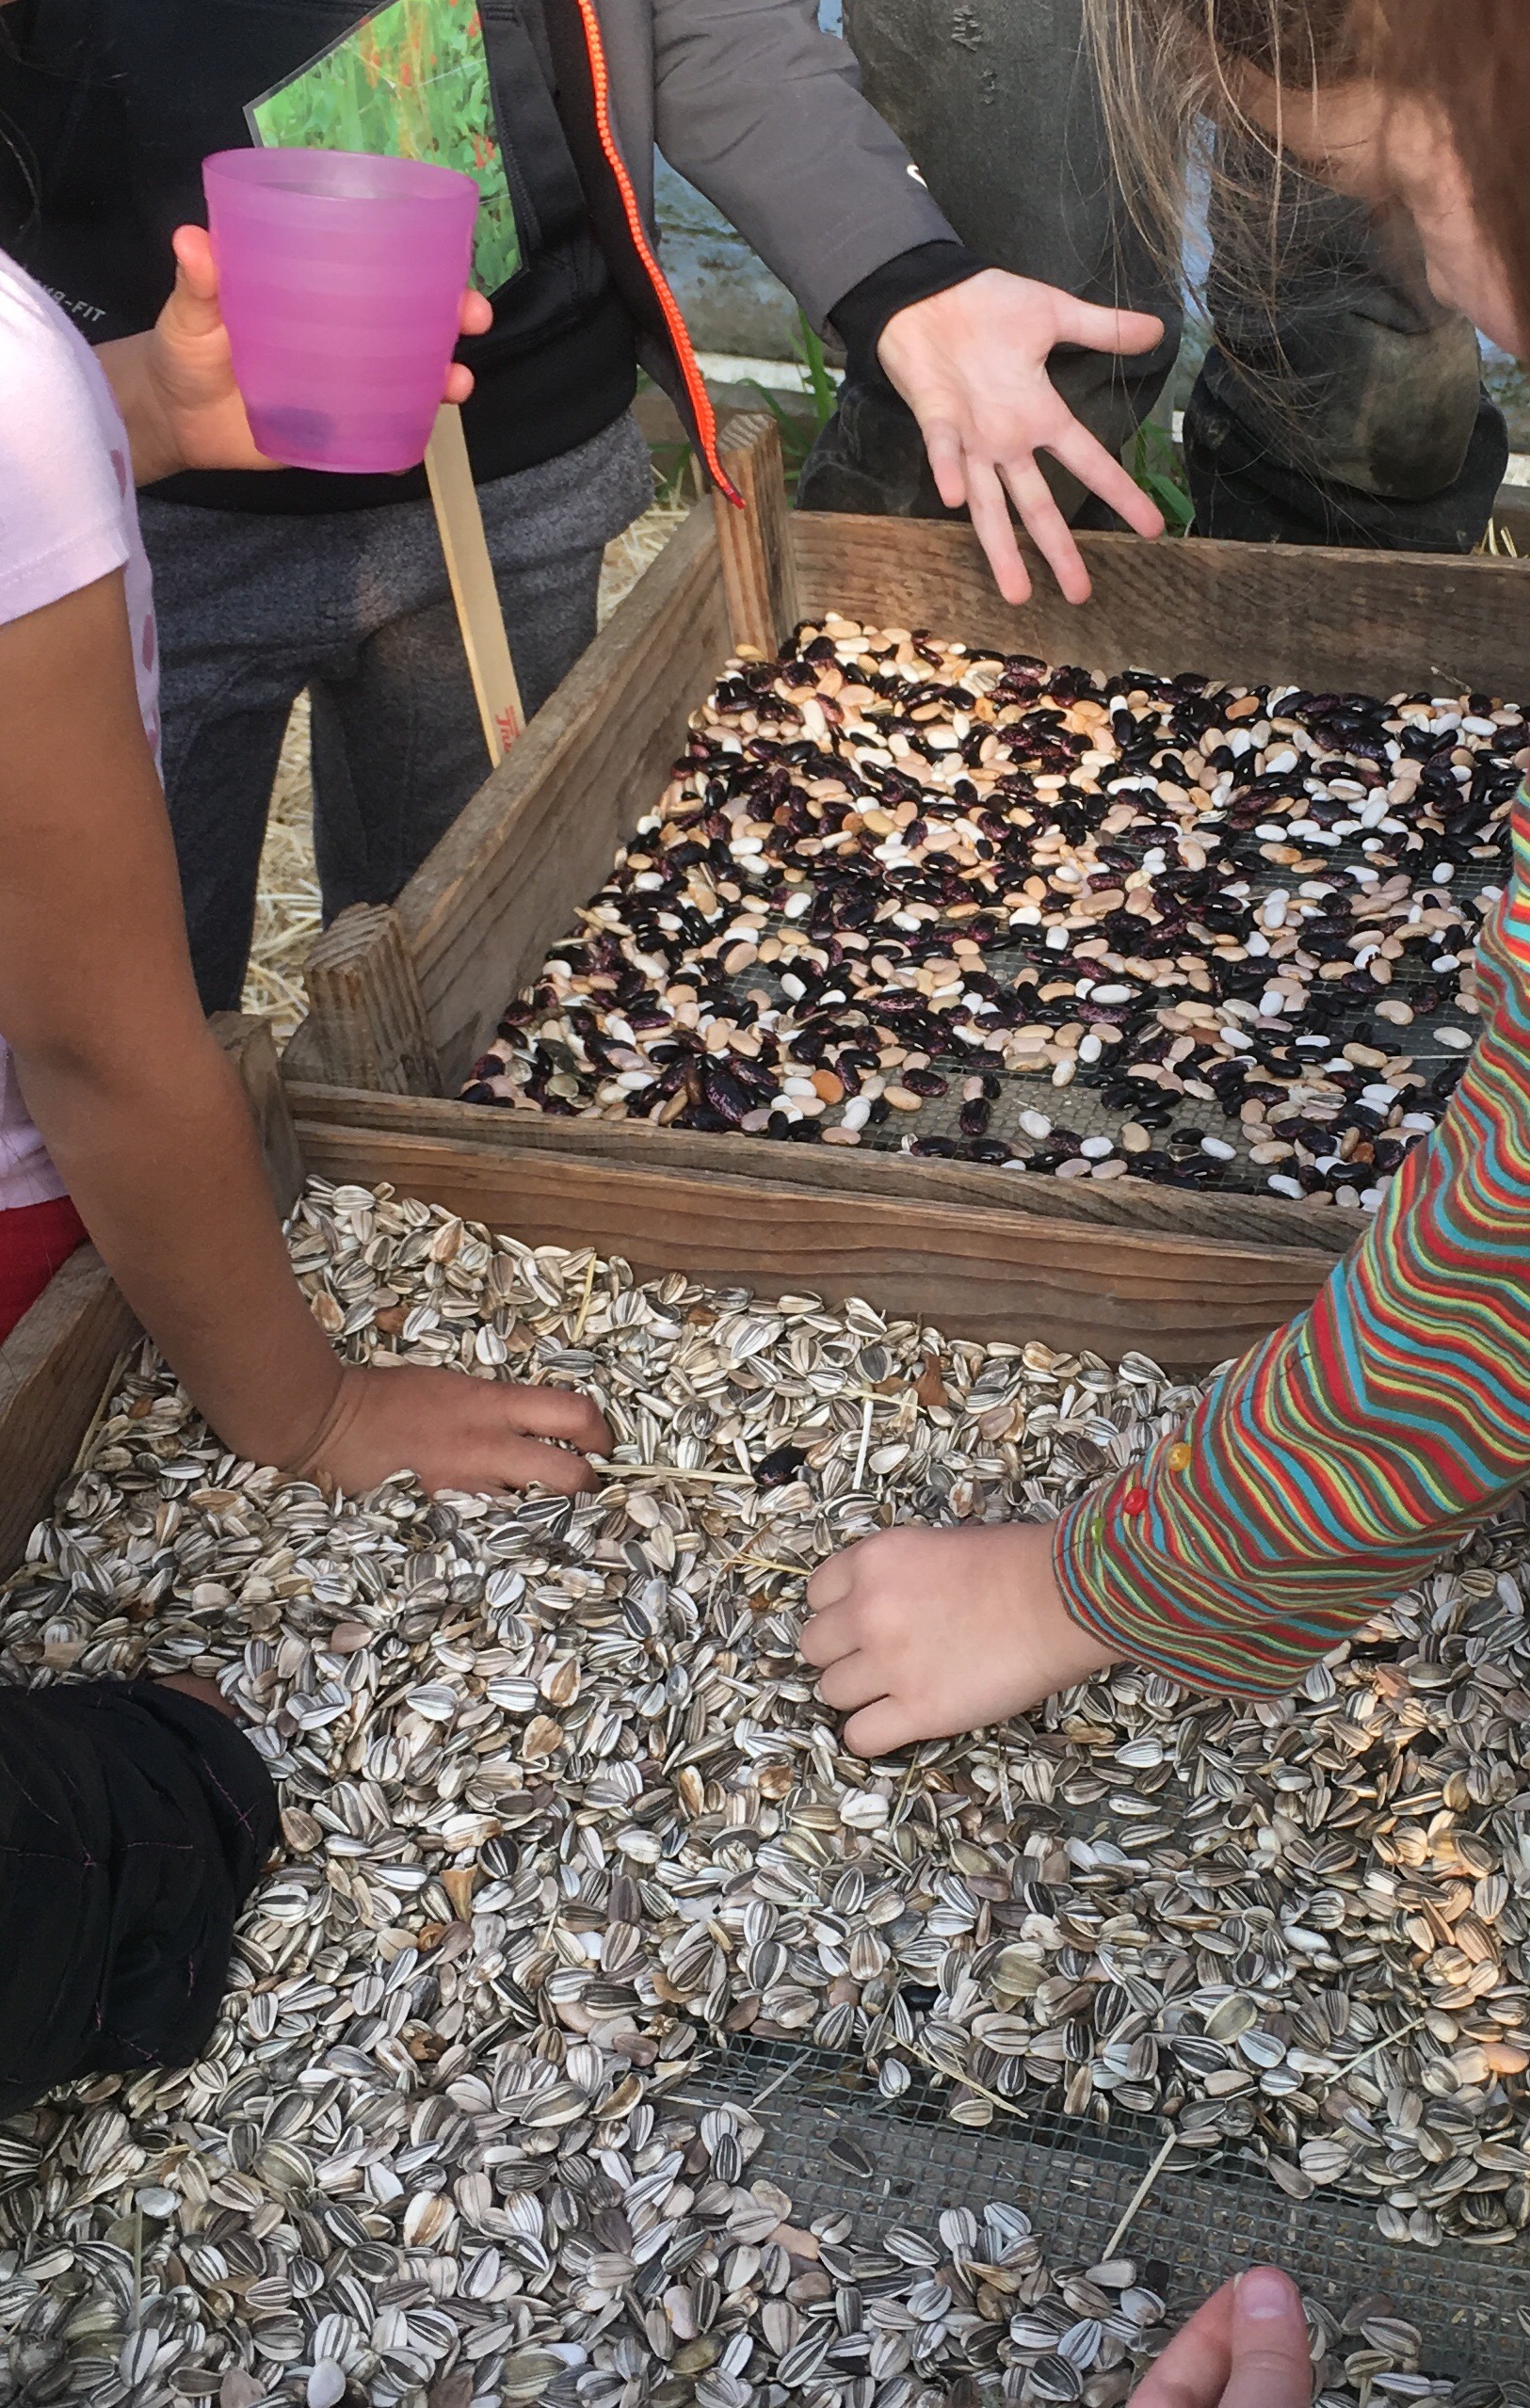
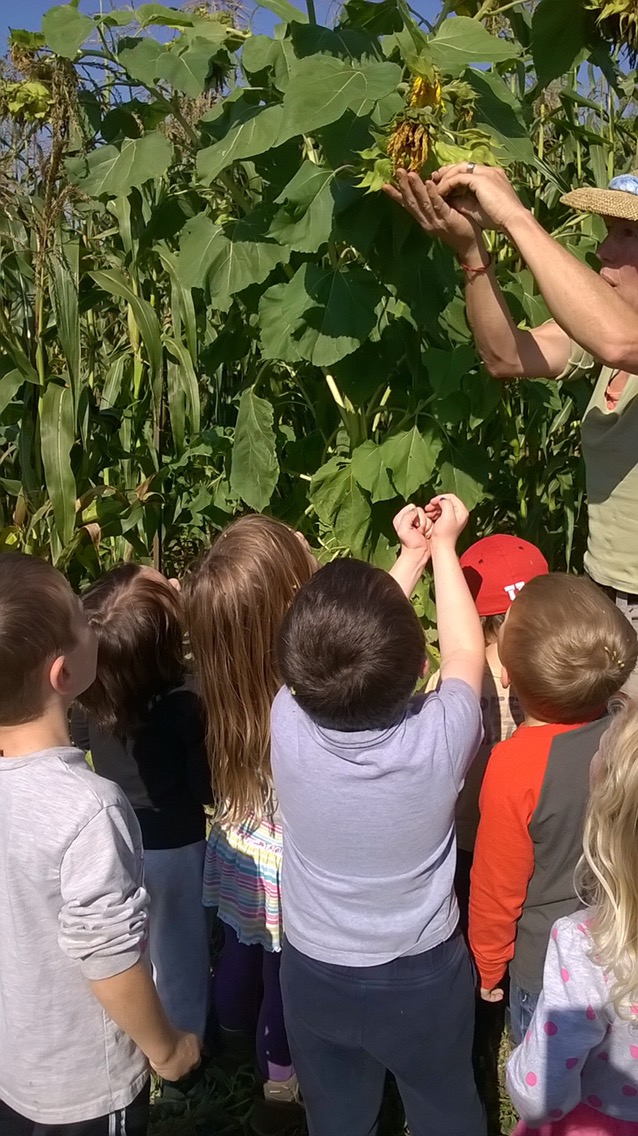
They eat seeds, learning about where the seeds come from, how they are spread and dried out in the greenhouse.
The children collected bean pods in the garden, split the pods and brought the seeds to dry in the greenhouse
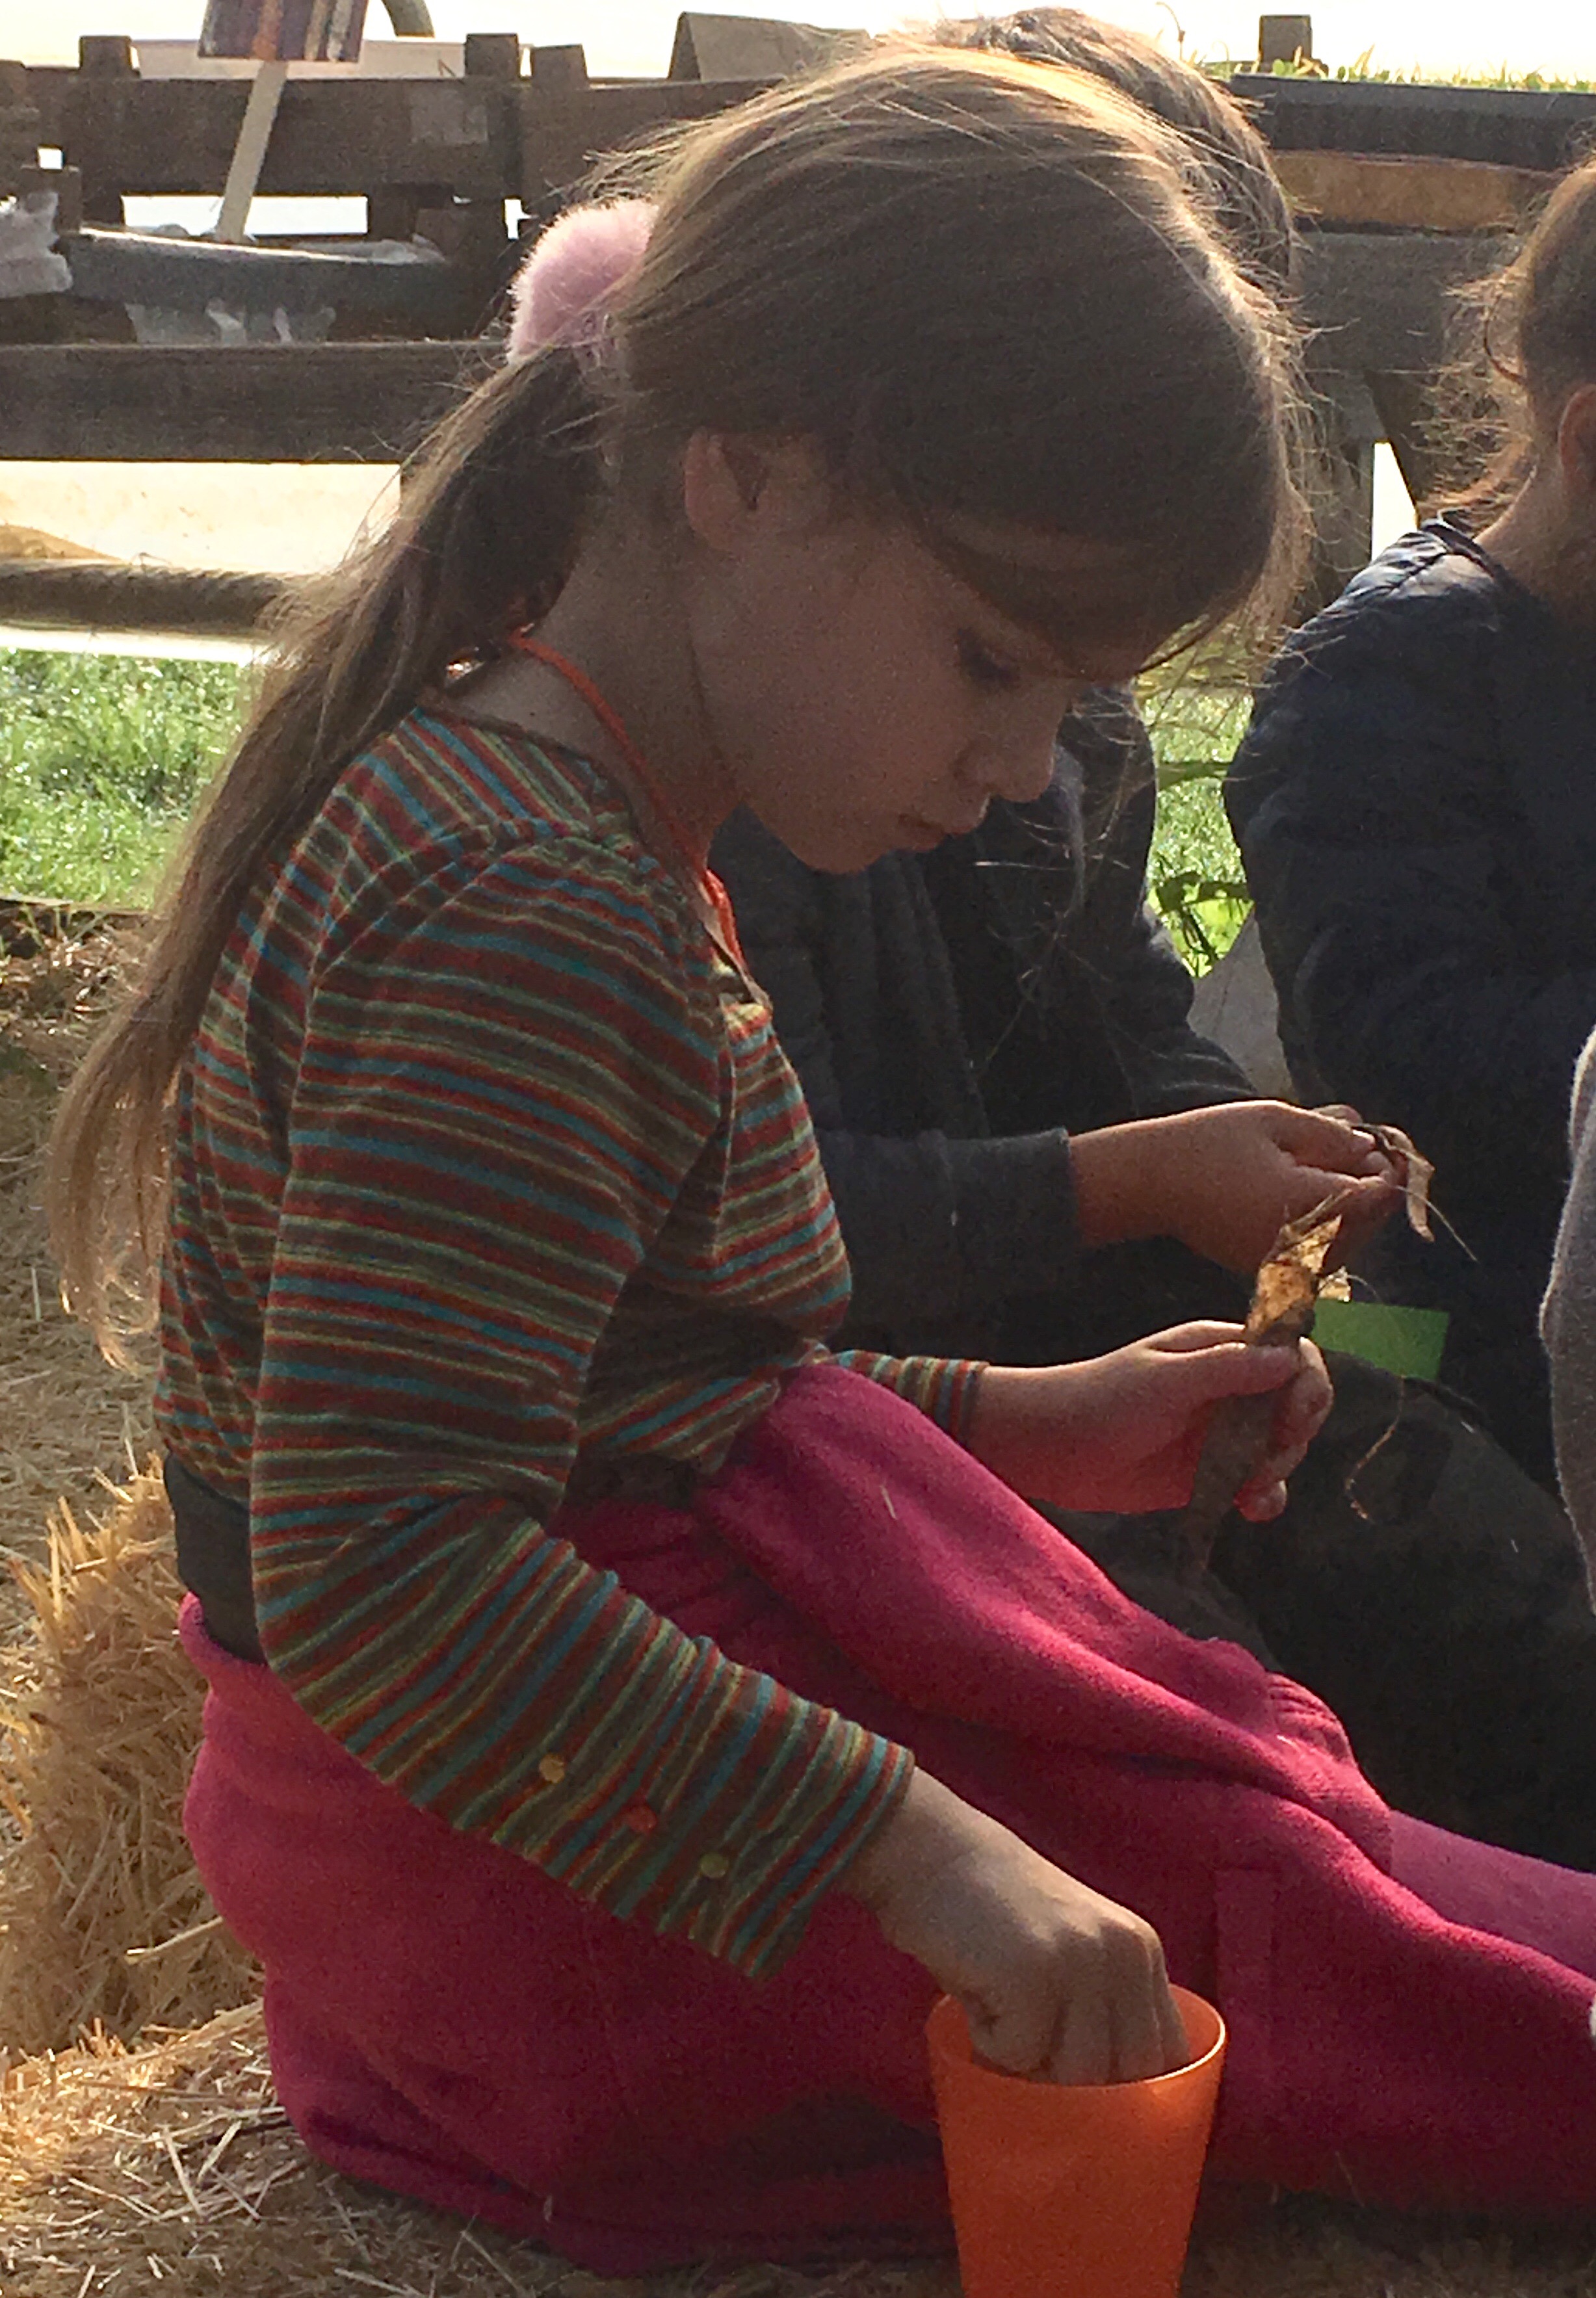
They eat stems. We found tiny celery sticks to try.
They eat flowers. We ate small yellow flowers that tasted like licquorice.
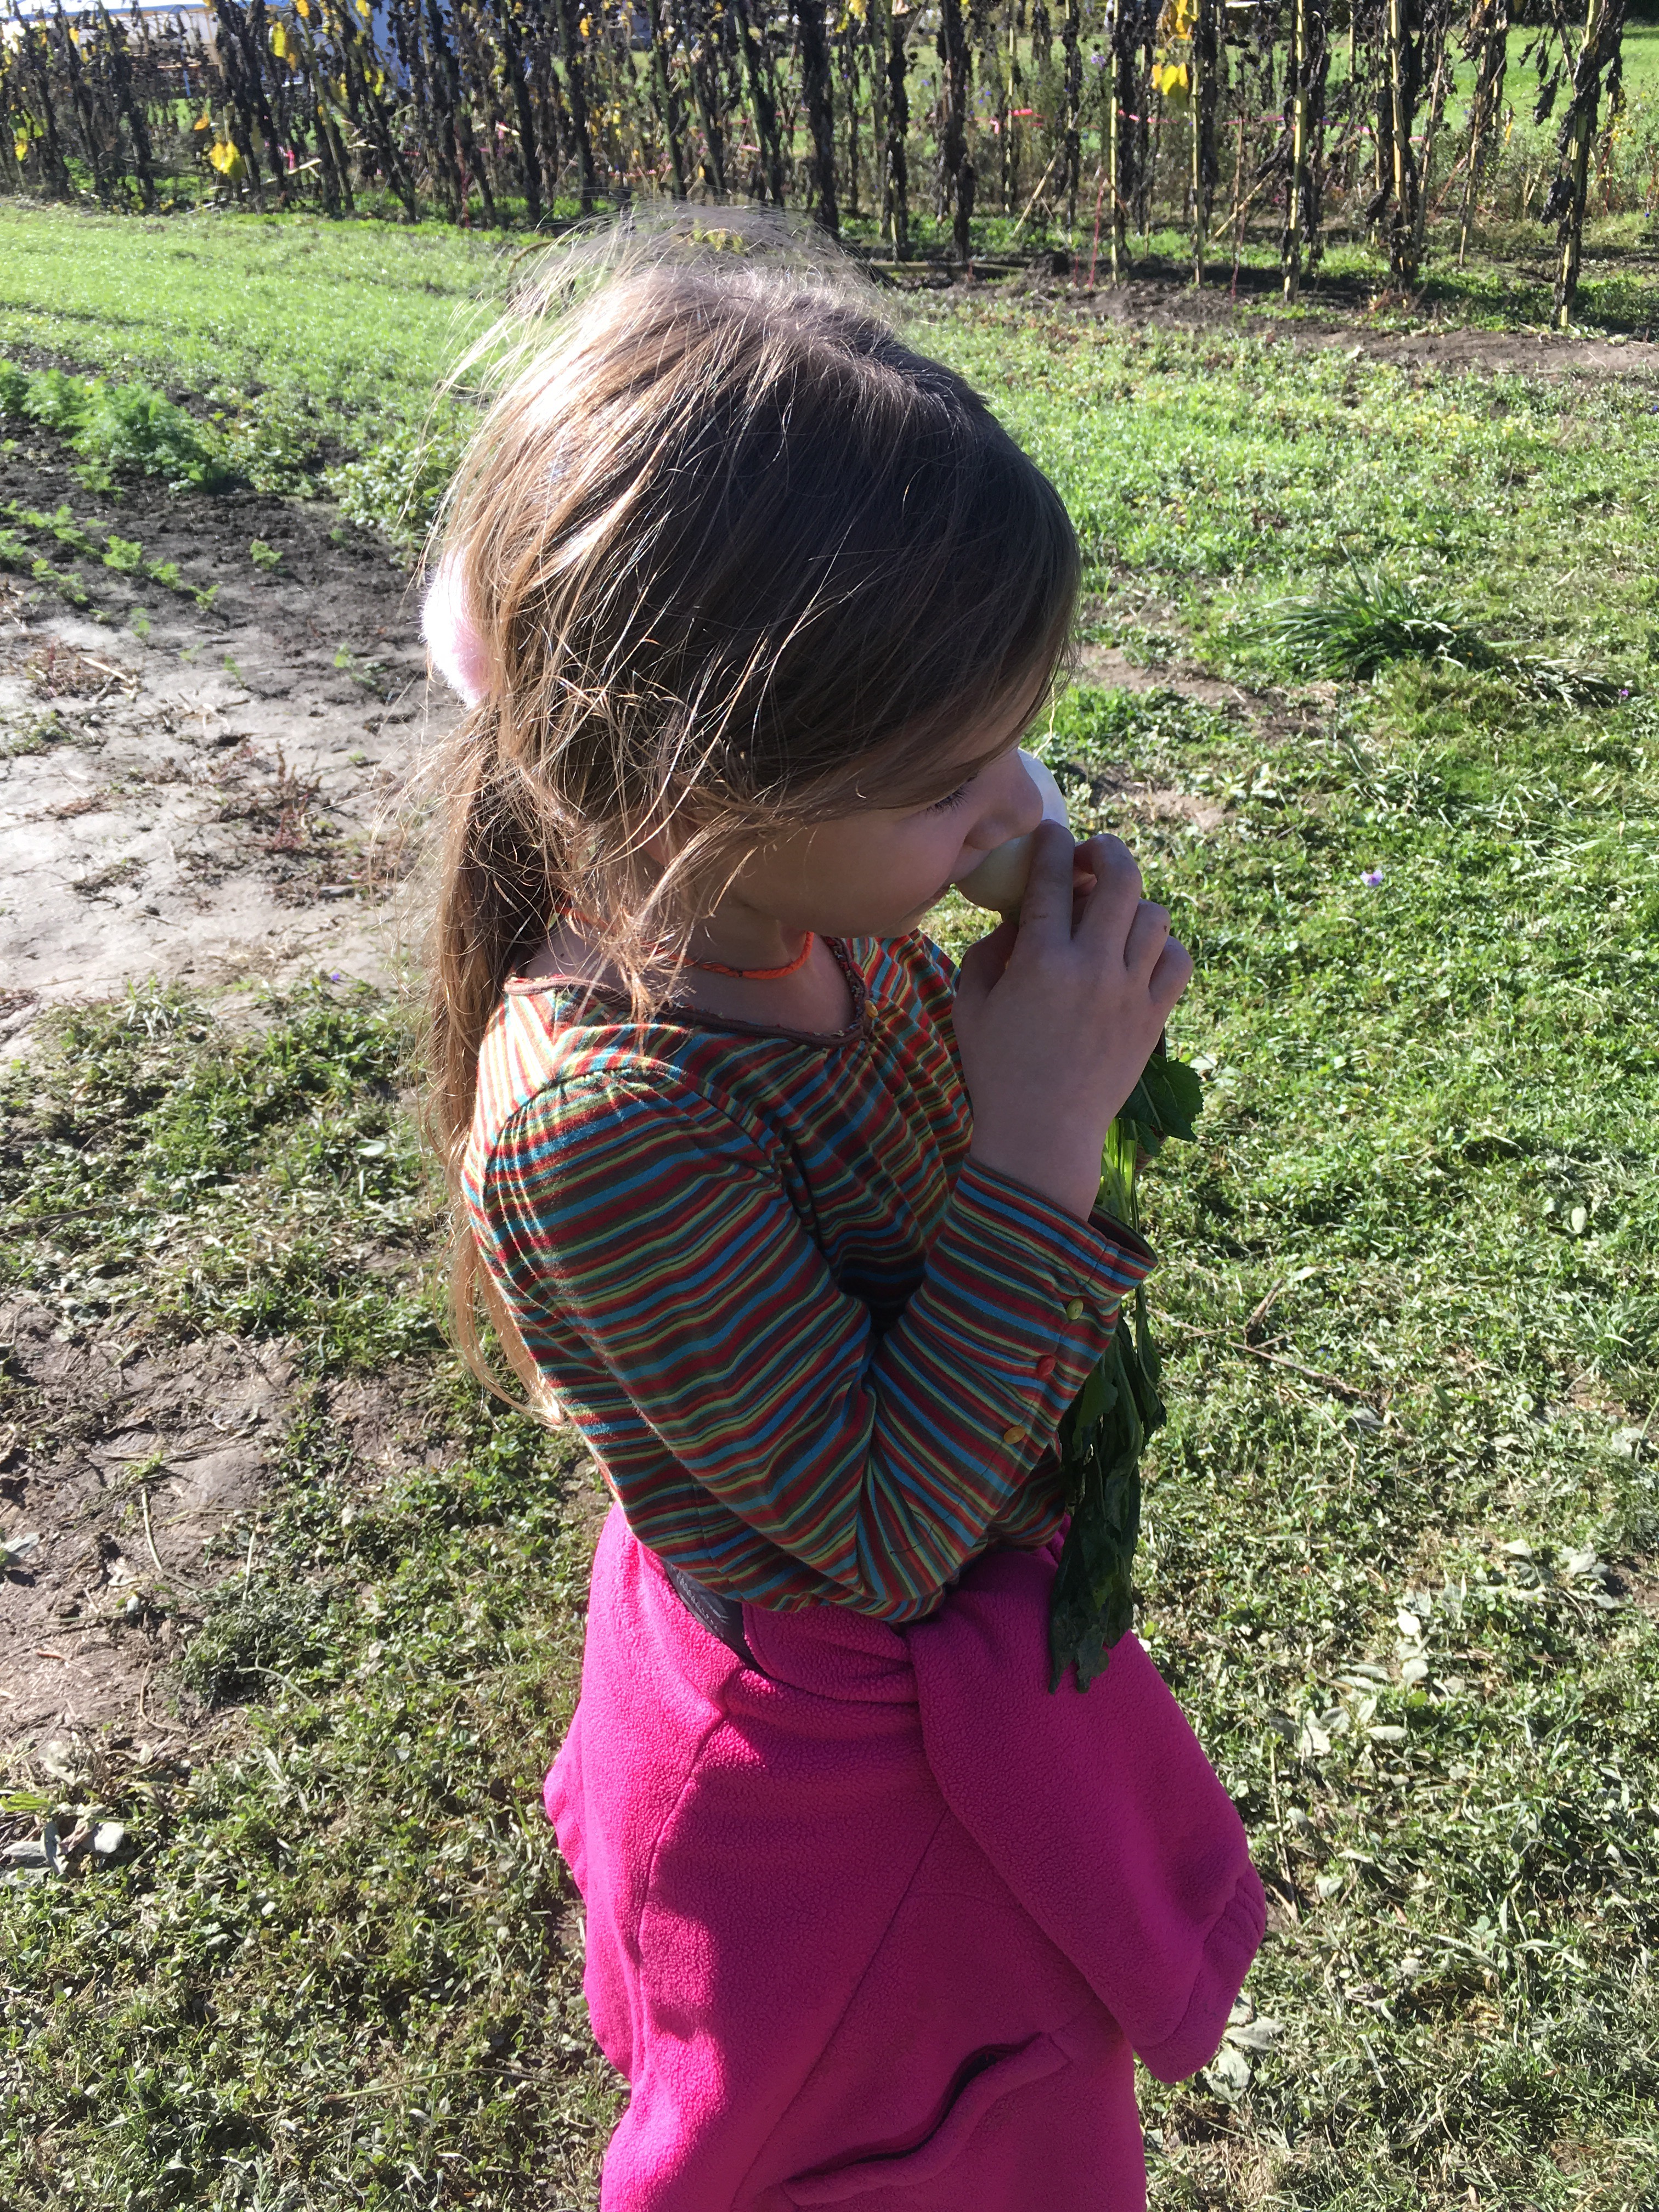
They eat fruit. We ate juicy apples from the tree and found the seeds inside them.
They eat roots. We pulled salad turnips and carrots from the ground, washed them and ate them.
Disclaimer: This post contains Amazon affiliate links, this means if you purchase any products using these links, I will receive a small commission.
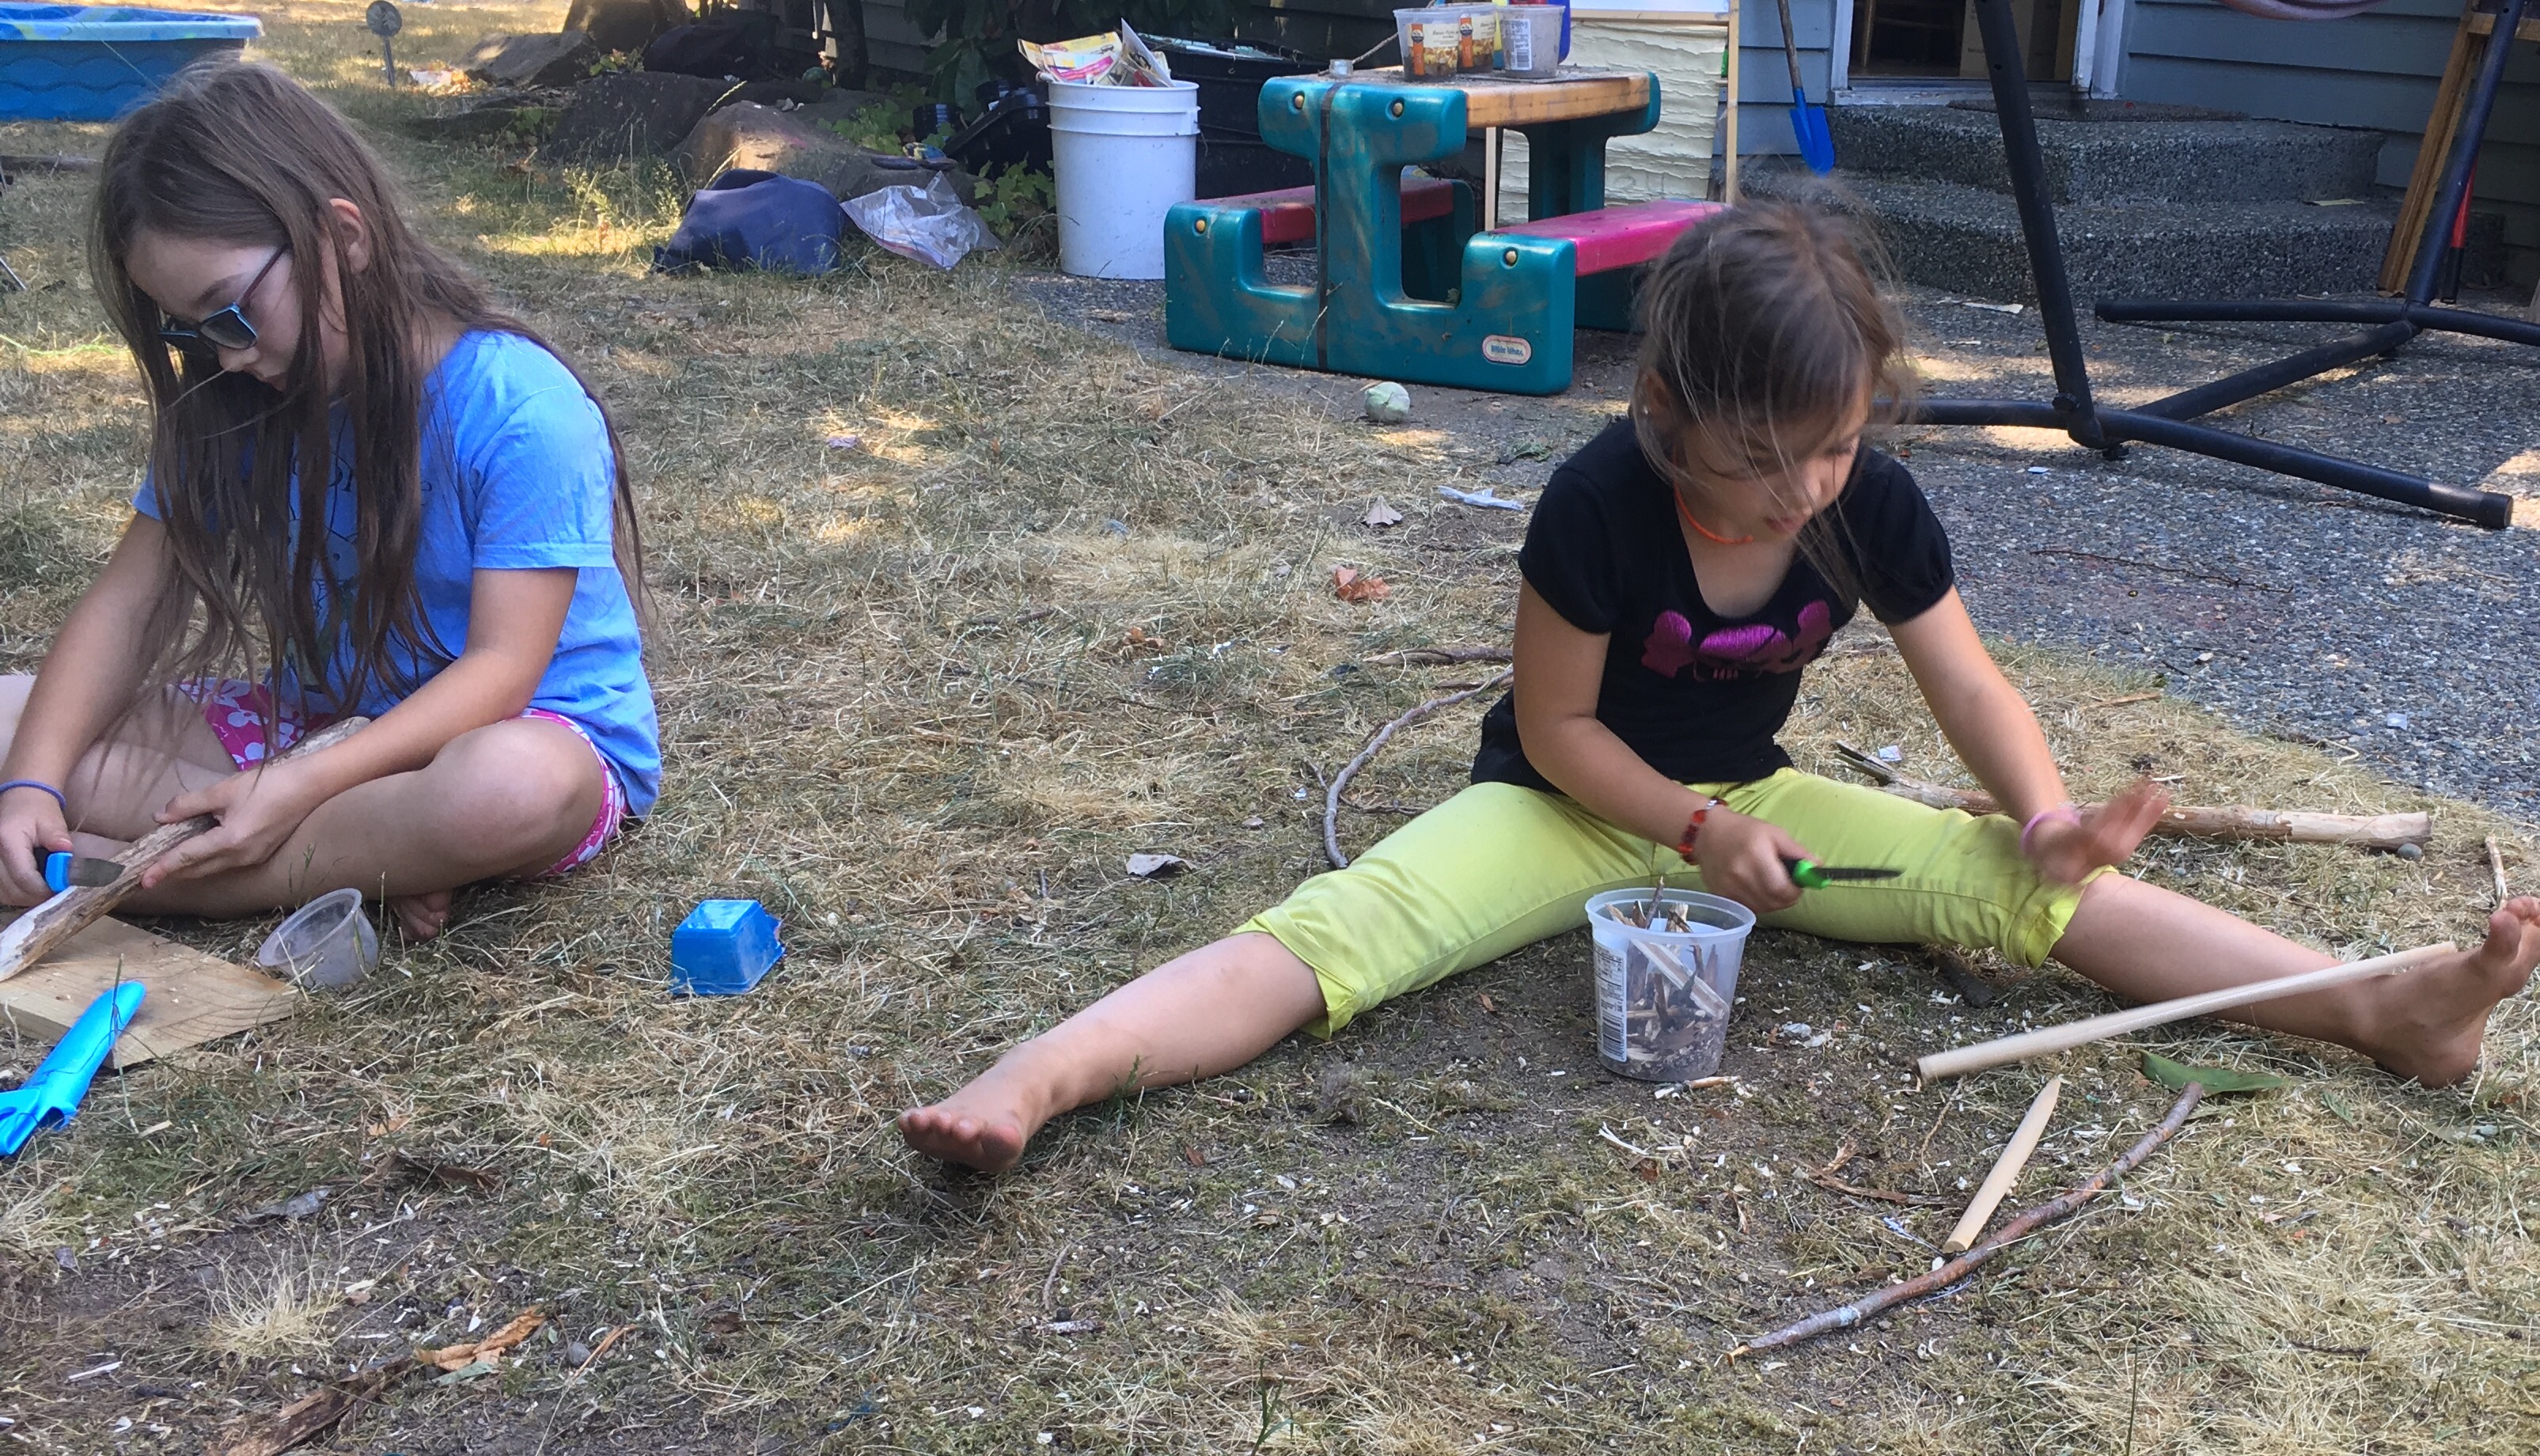
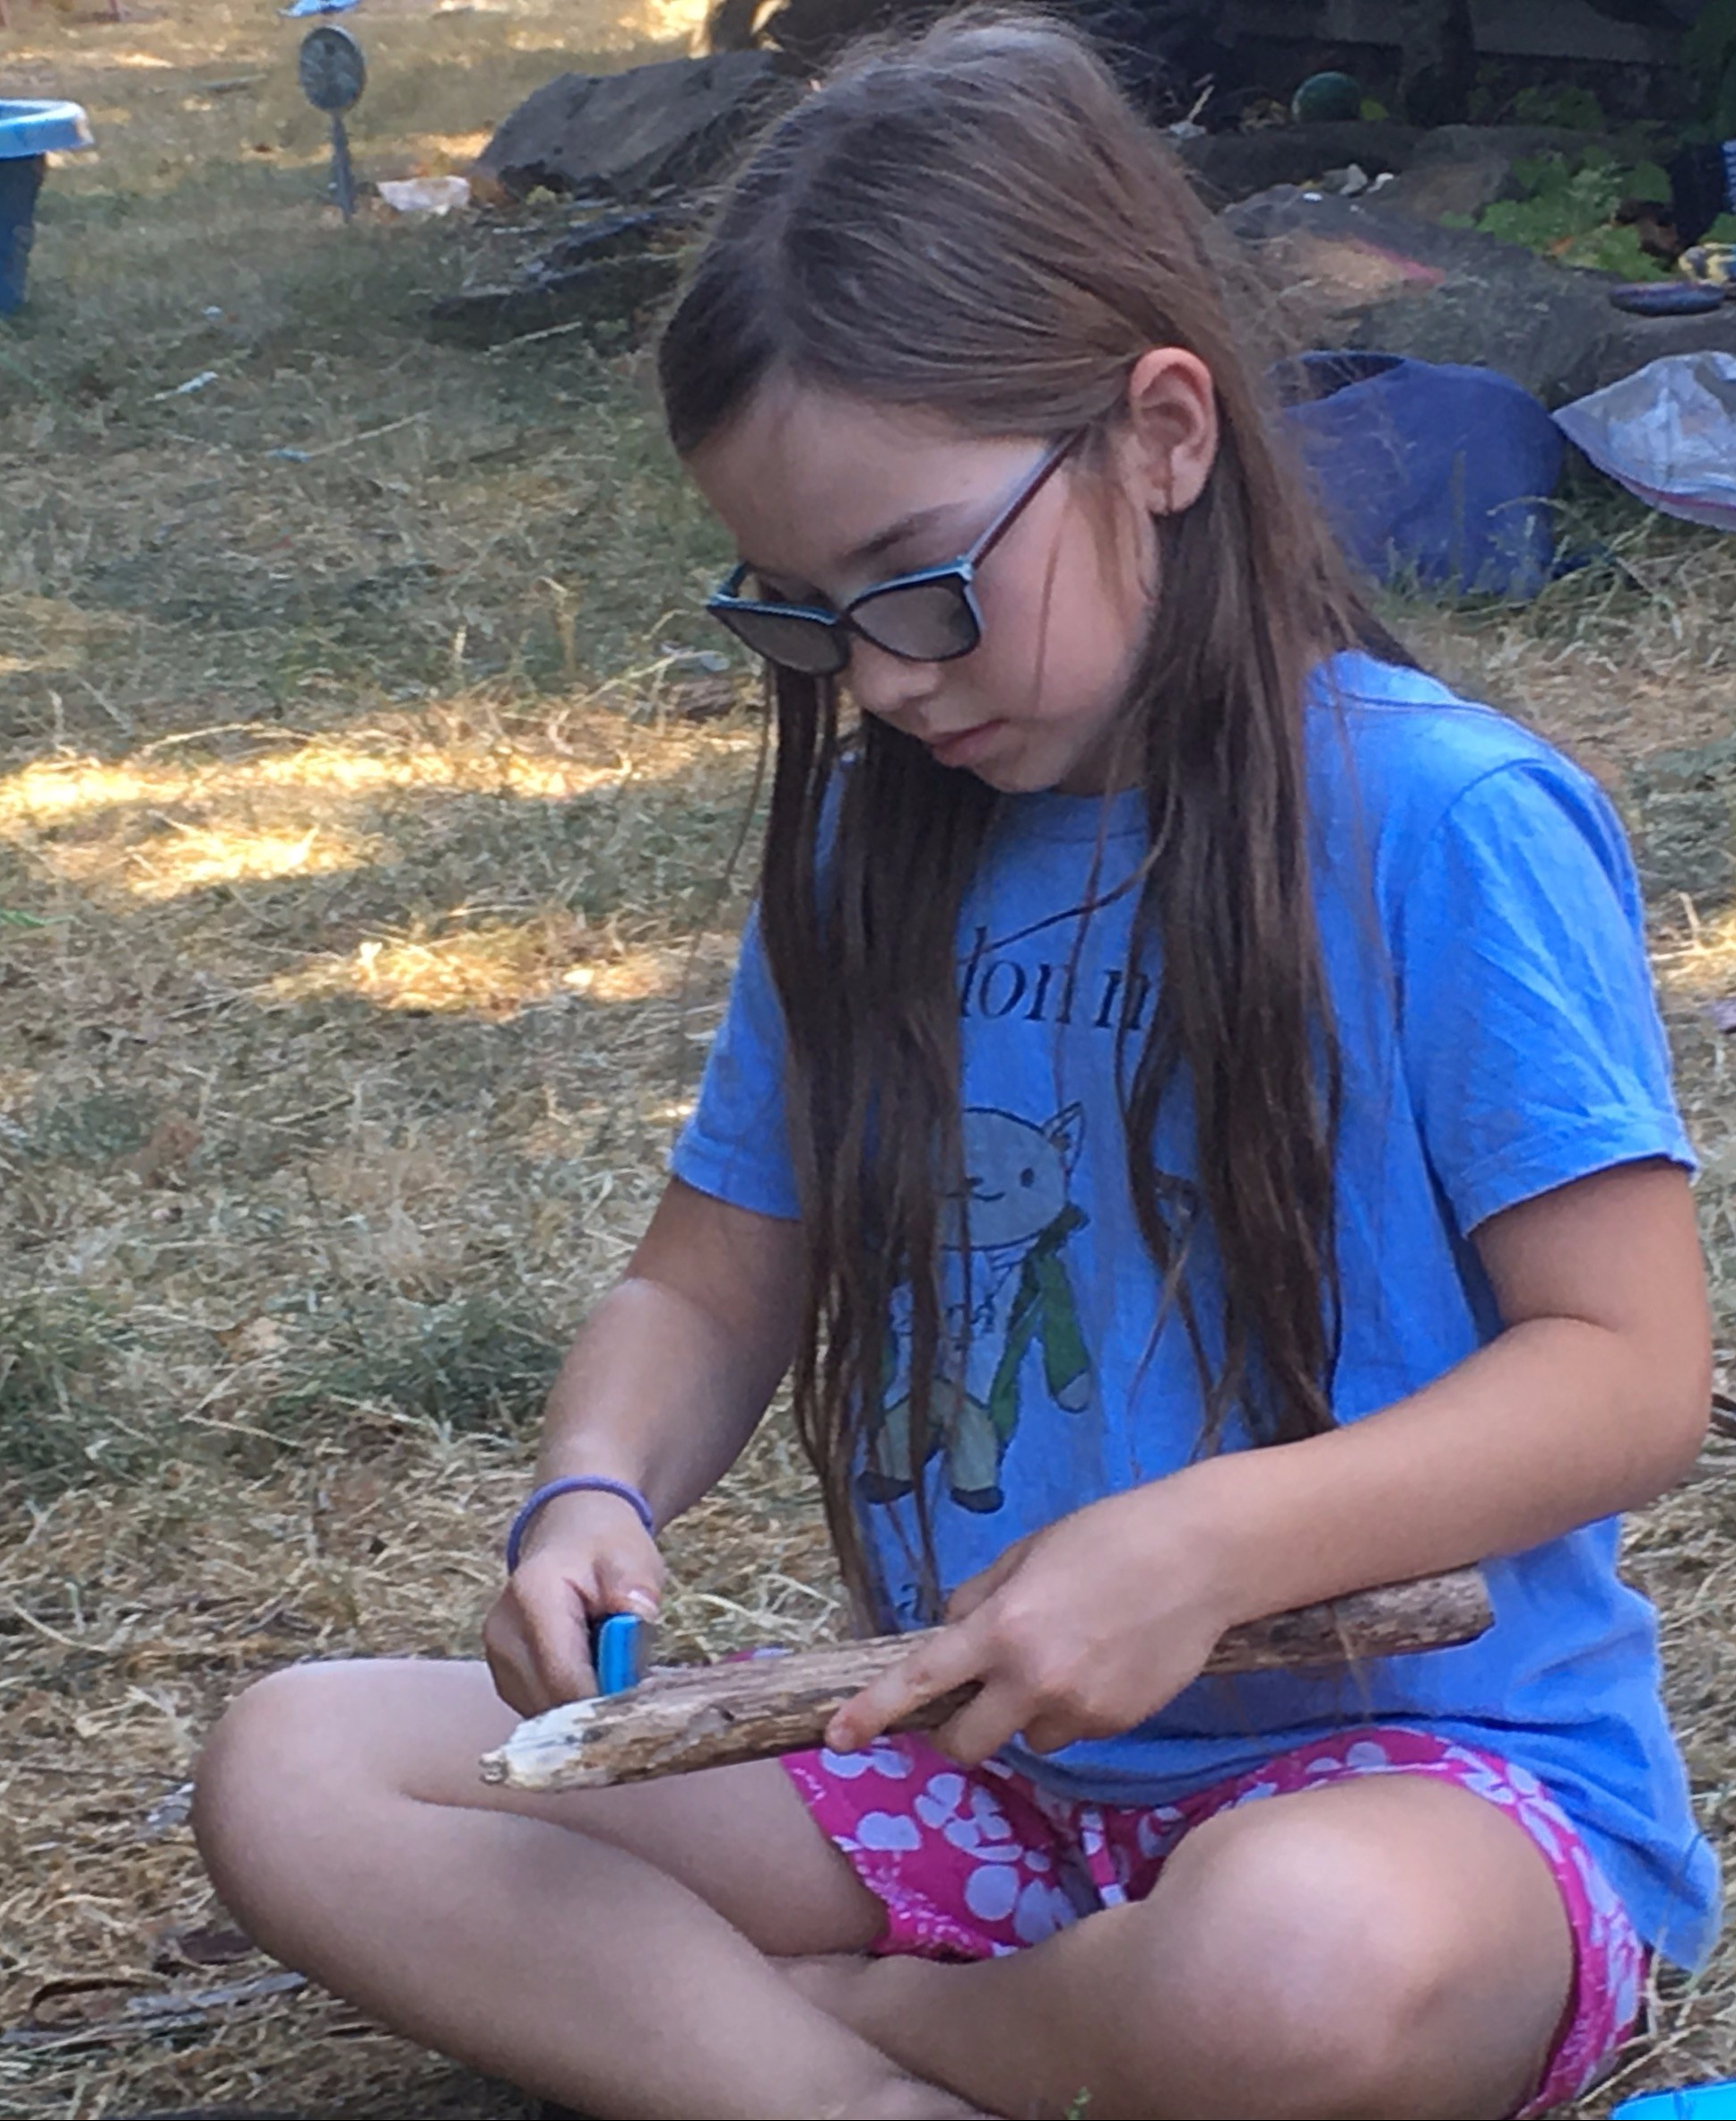
The girls are totally hooked on the television survival series Alone and eager to go out into the woods and test out their skills. My 6-year-old can often be found attempting to whittle a stick with a pair of blunt ended scissors. It worried me that she didn’t have the correct tools to do this properly and I felt it may be more dangerous to whittle with scissors than with a suitable knife.
My husband bought my eldest a knife when she was younger, so we discussed when might be a suitable time to introduce the younger girls to knife skills. I always believe that when children show a strong interest in learning a skill, then the time is right to introduce them to the appropriate tools. My youngest has very strong motor skills and co-ordination and follows instructions well. The girls are able to peel vegetables with a peeler and have practised chopping fruit and vegetables with a small kitchen knife. With this in mind, we decided the time was right to buy the girls their first knives.
My husband researched the knives used by a local wilderness school and decided on the morakniv fixed blade outdoor knife. The knives are the perfect size for little hands. They have a grip handle, sharp blade and a sheath with a clip belt. They come in a variety of colours. We chose neon colours, so they would be able to see them easily.
The first lesson was how to get the knife out of its sheath. They were a little frightened at first but soon got the hang of it. These knives have a bump at the side to remind the children of the correct way to face the knife when removing it from the sheath.
The children have to follow the following rules and guidelines:-
They are only to use the knives under adult supervision
Always put the knife back in its sheath when not in use.
The knives are to be stored in a special drawer and always put away after use.
Never cut towards their hands (they’ve seen what happens if this rule is broken on Alone).
Always sit down when using the knife
Always keep their eyes on what they are doing. If they need to look away, put the knife away first.
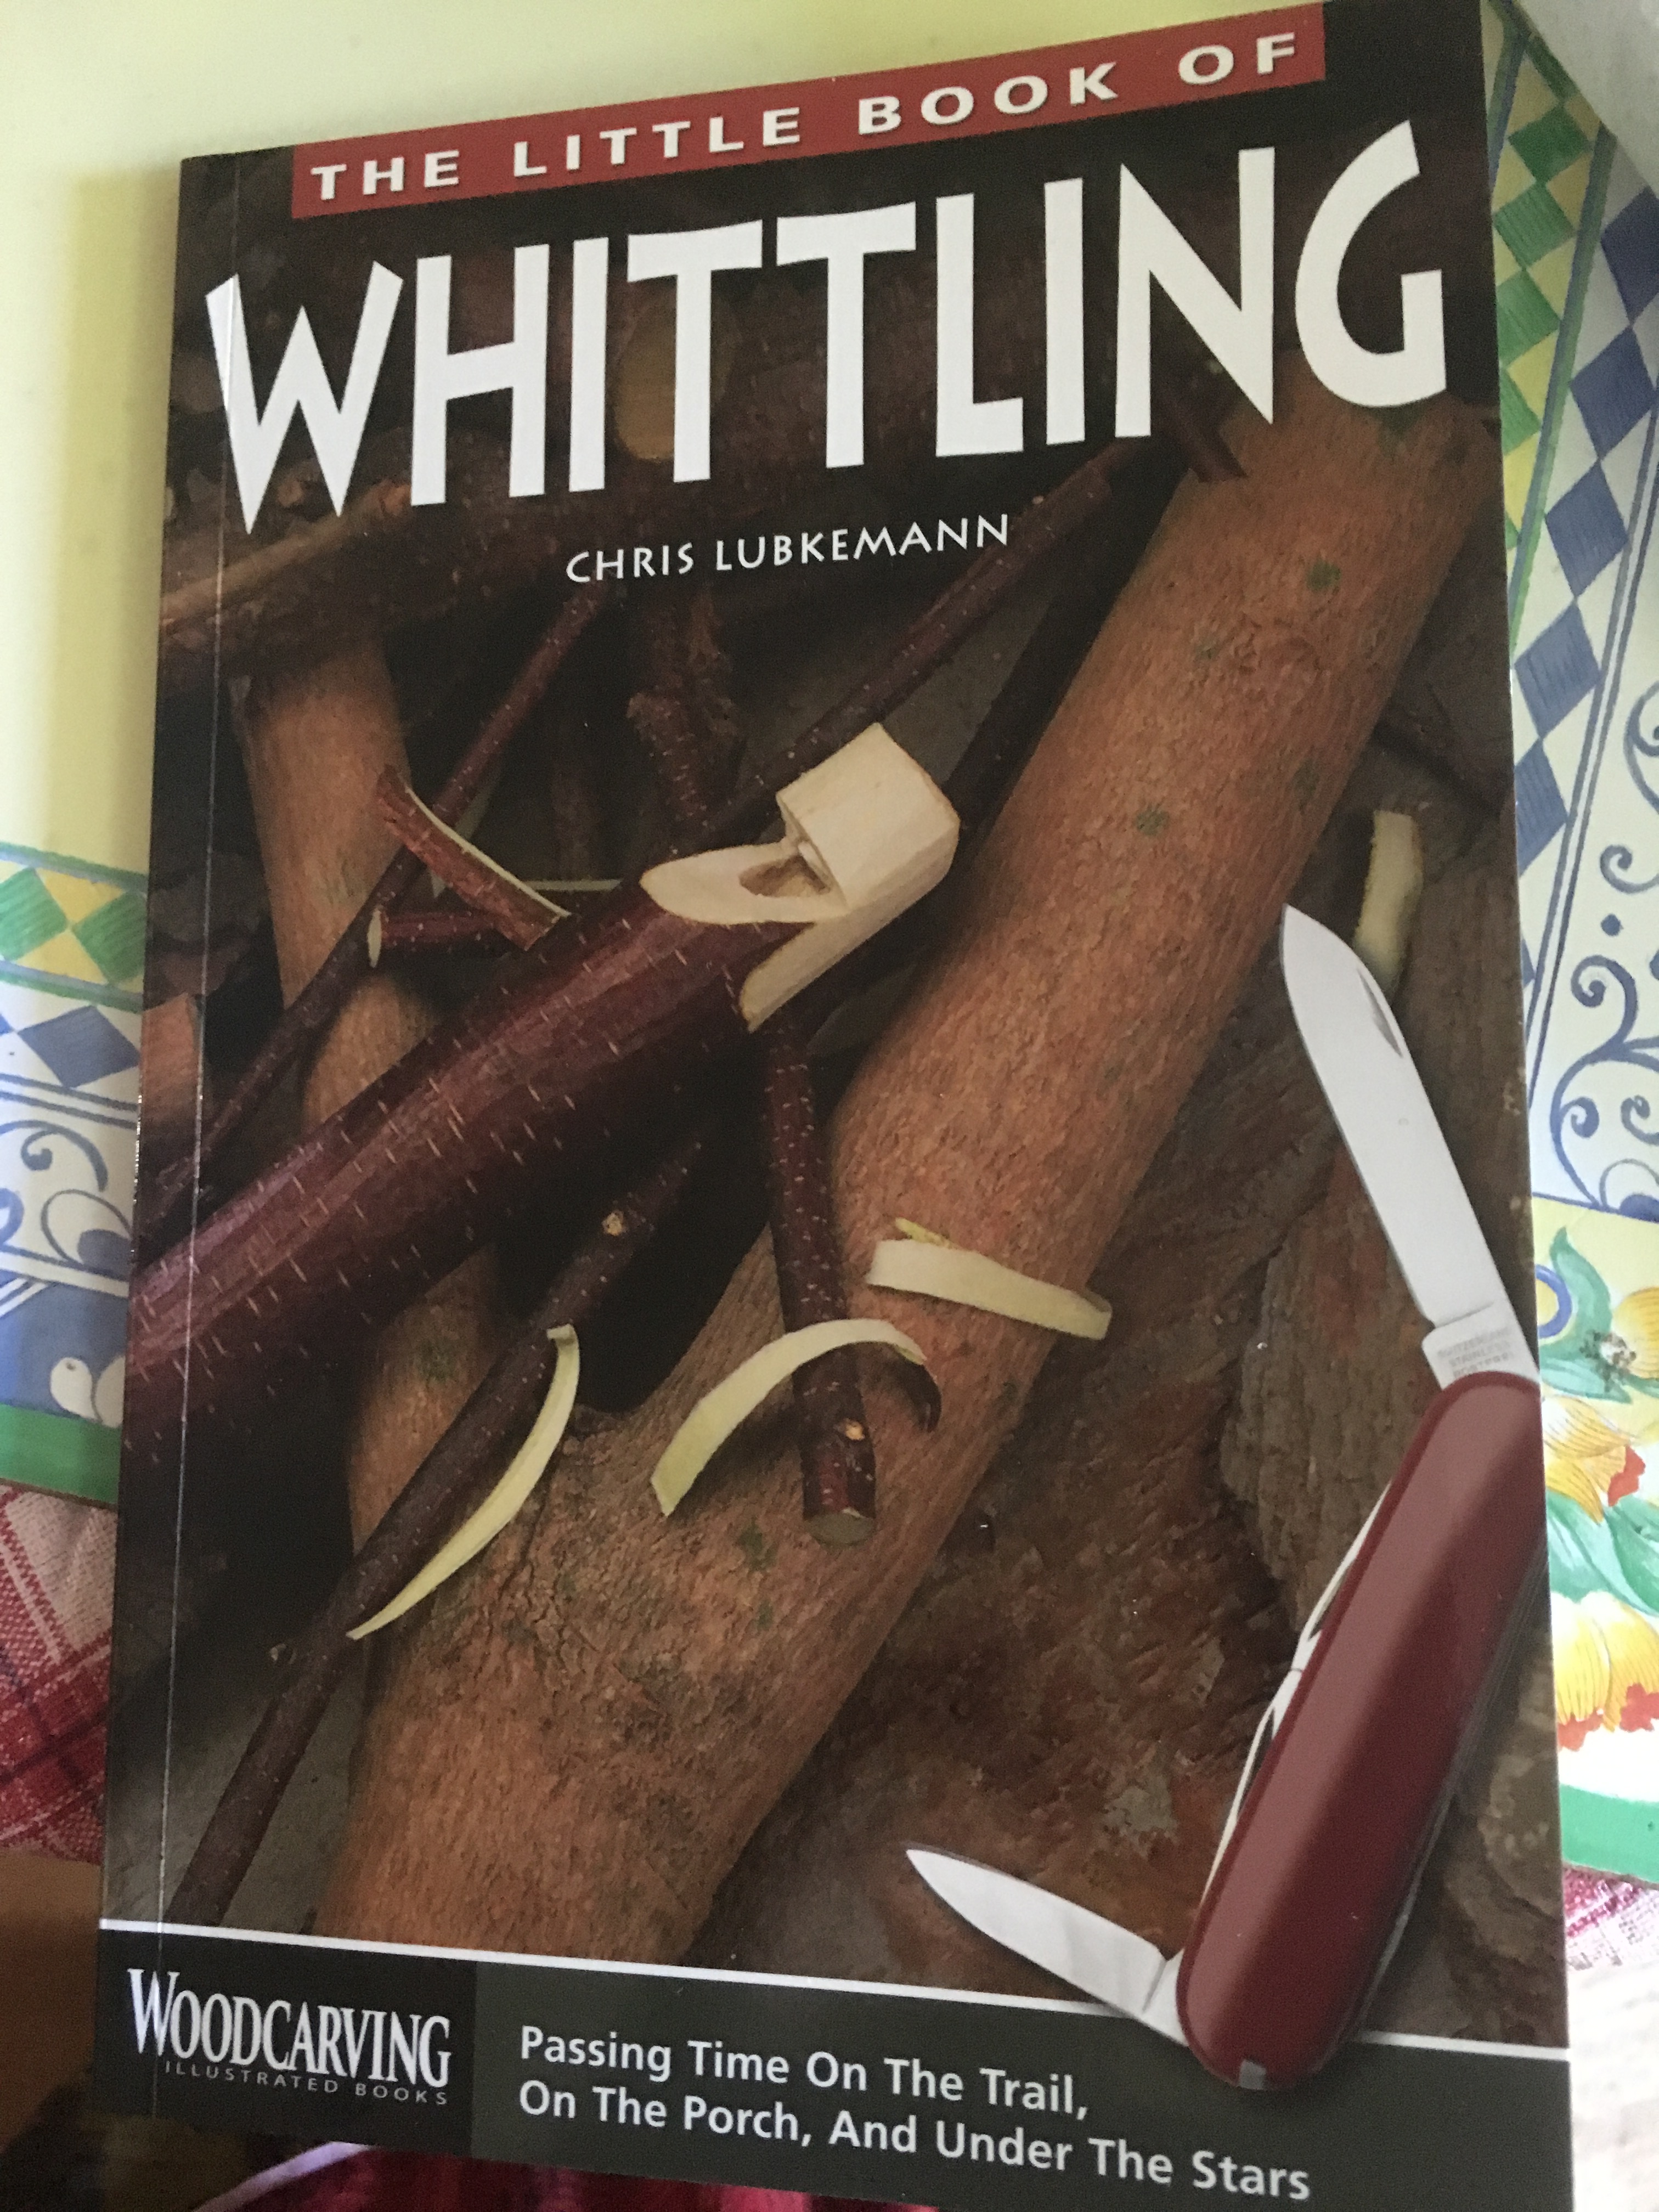
The girls loved whittling sticks and were desperate to try other projects. I bought them a book on whittling, The Little Book of Whittling. Some of the projects were difficult with their knives because the blade was too long. On our camping trip this summer, we bought them a multi tool with a smaller knife. With this, they were able carve more successfully and new skills were learned. They learned how to fold it safely and we only had one small accident when my youngest closed it a little to close to her hand. This made the girls more careful in future.
Whittling has been the favourite pastime of the summer. I had to spend a lot of time supervising them, and my garden is littered with bits of wood and splinters but they have had so much fun and learned a lot.
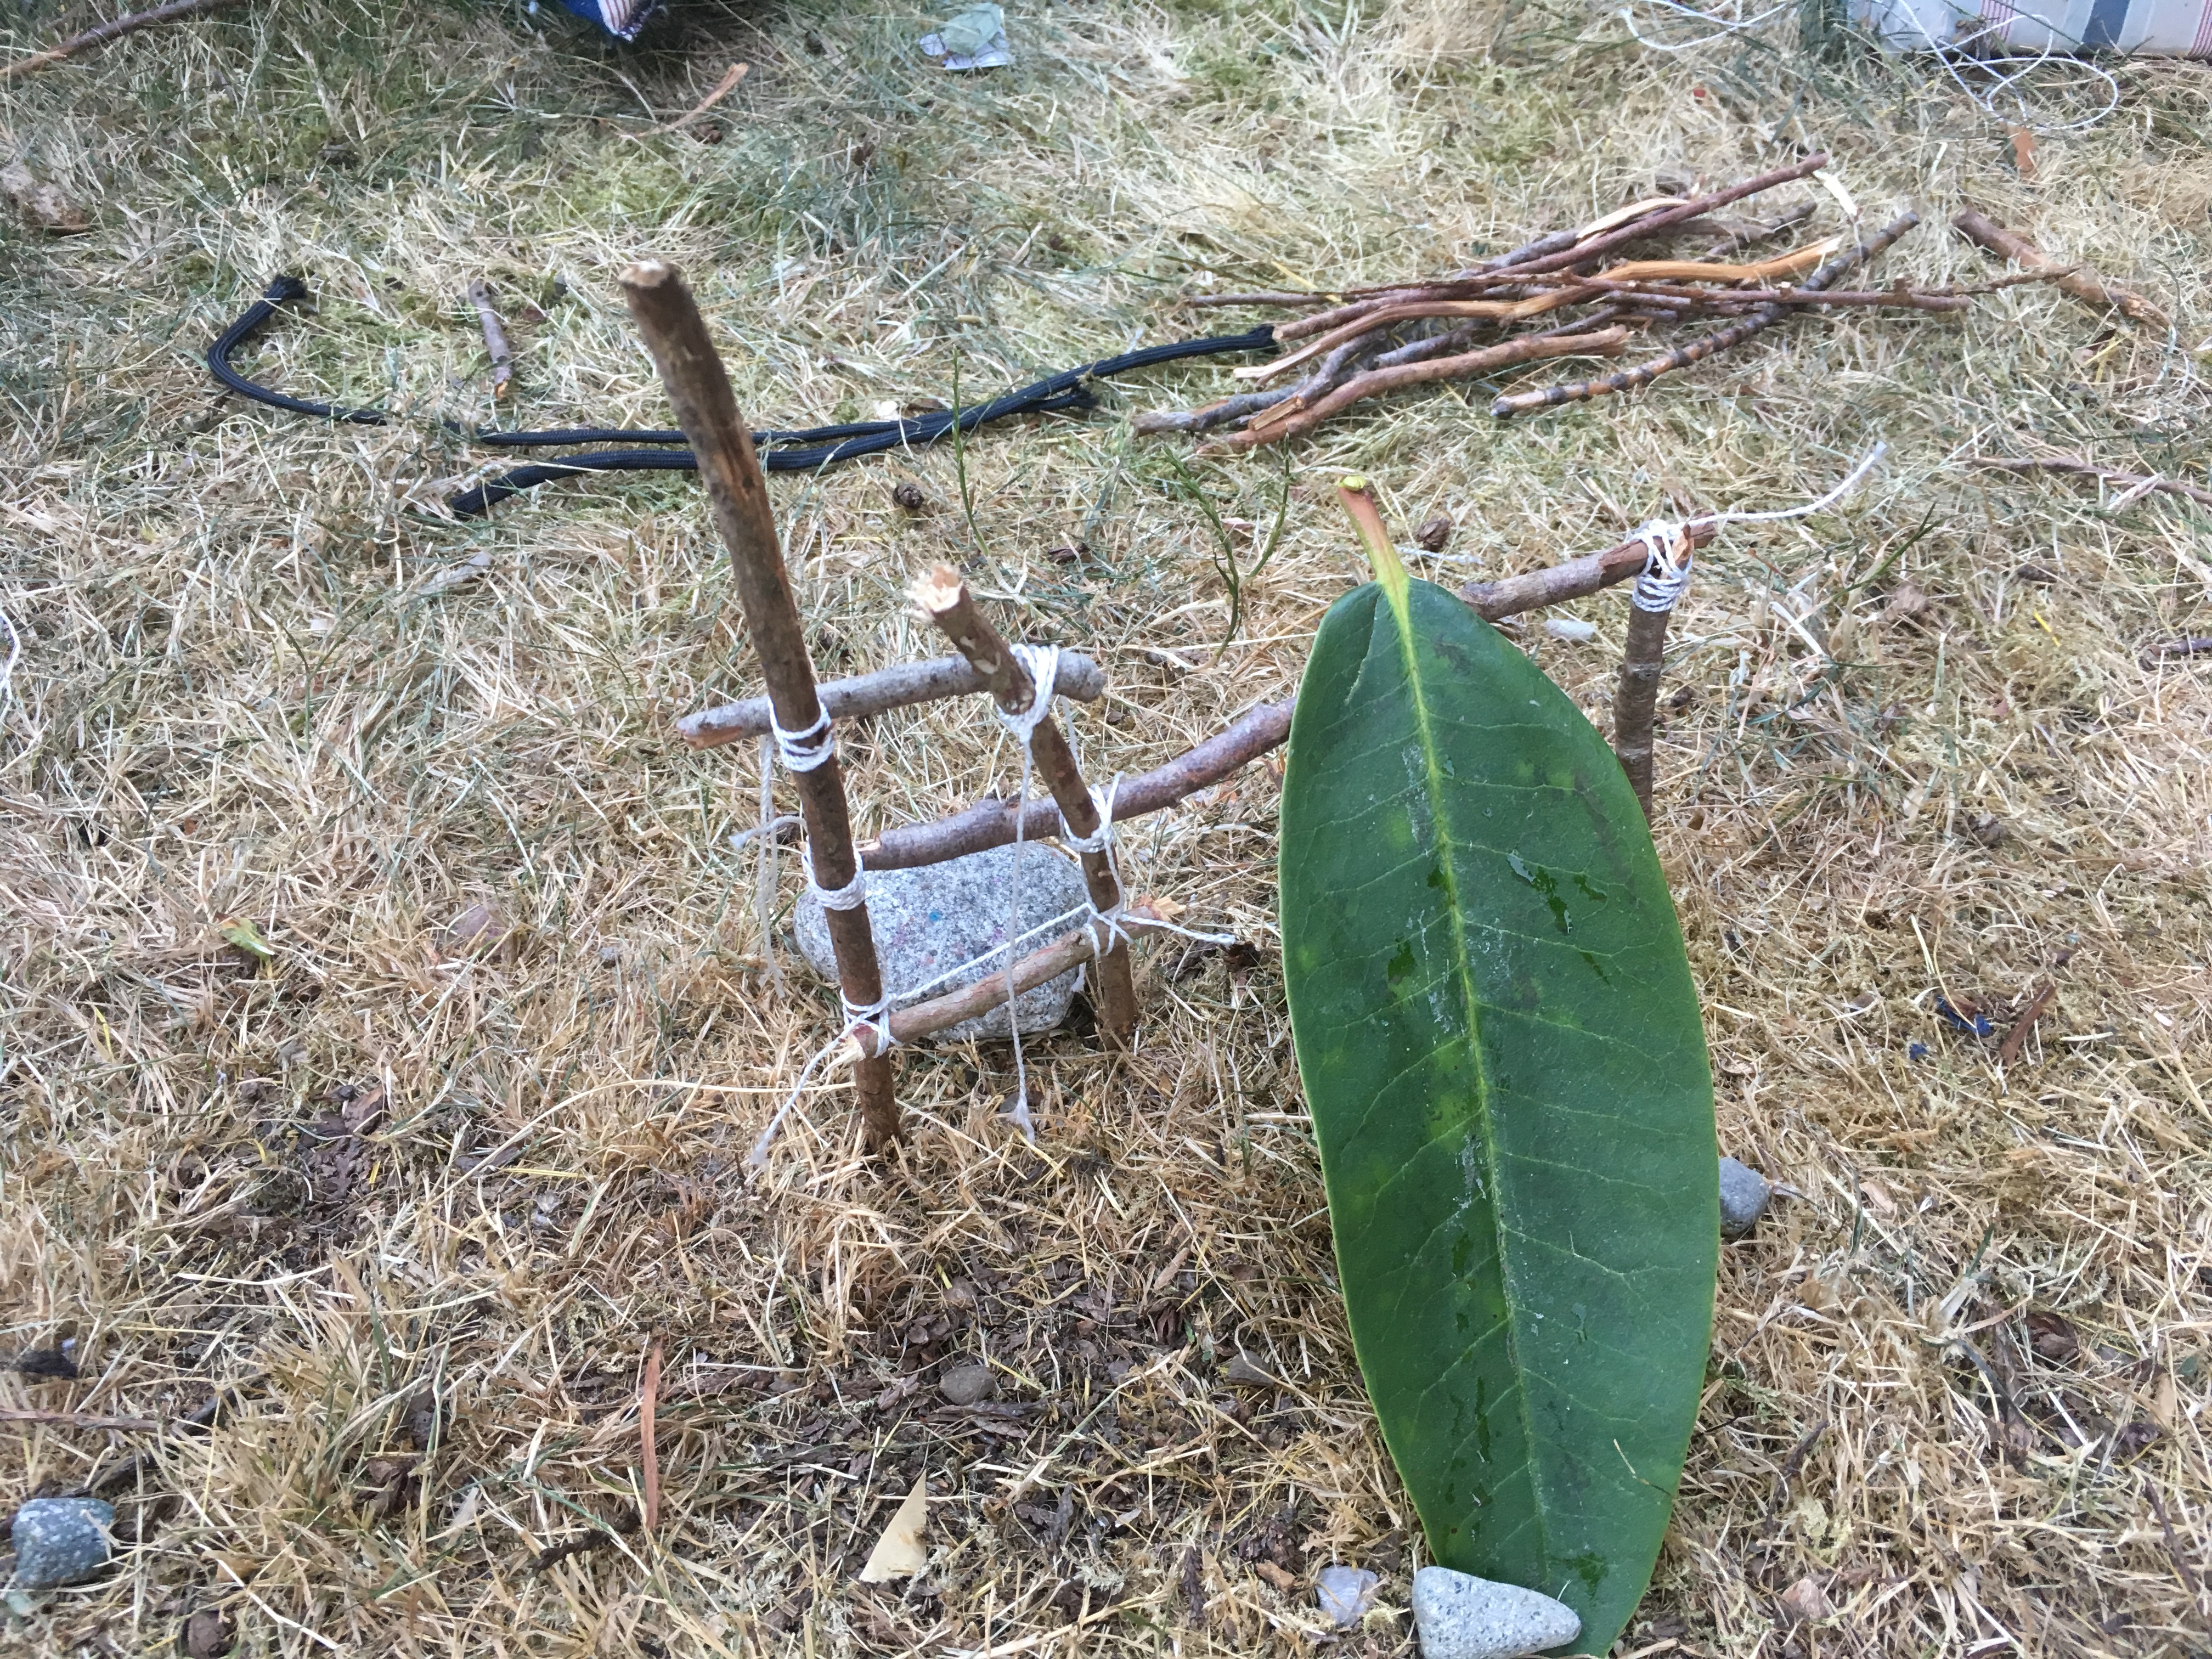
One of my favourite projects, was sharpening sticks to put in the ground and make a playground. They added string to join pieces together and made a zip wire, slide, climbing frame and monkey bars.
The slide
My personal favourite, the zip wire for teddy
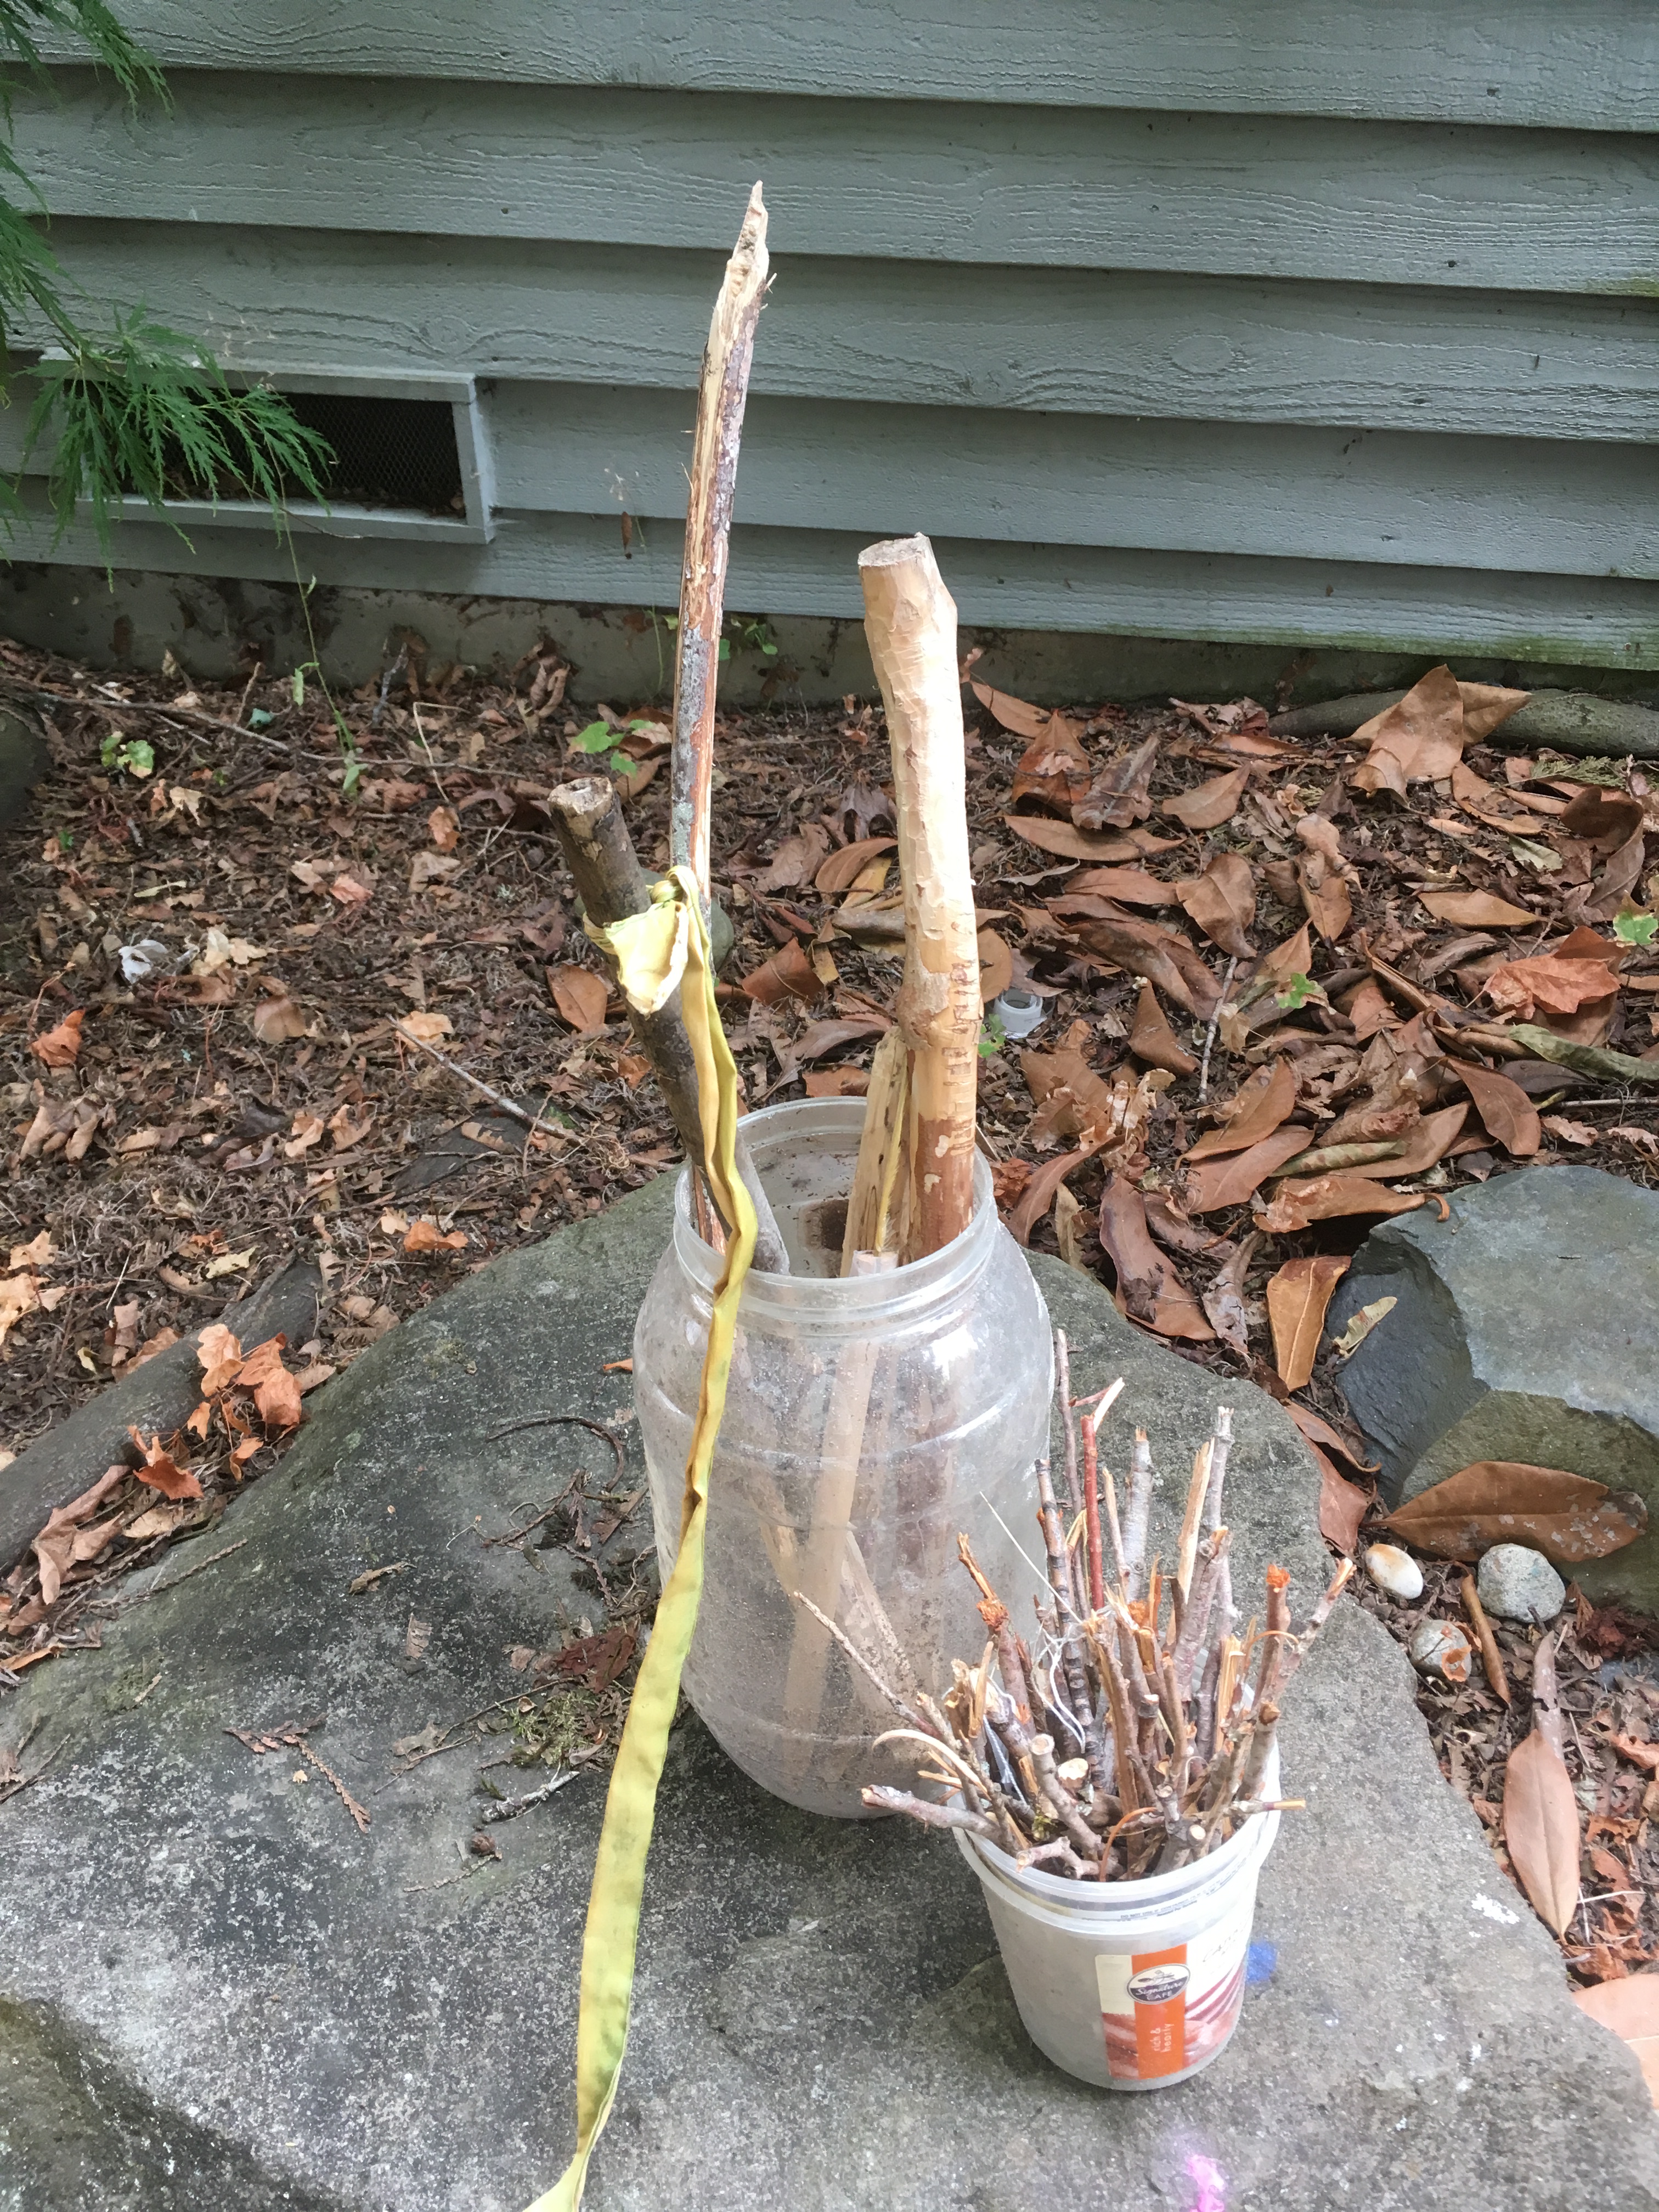
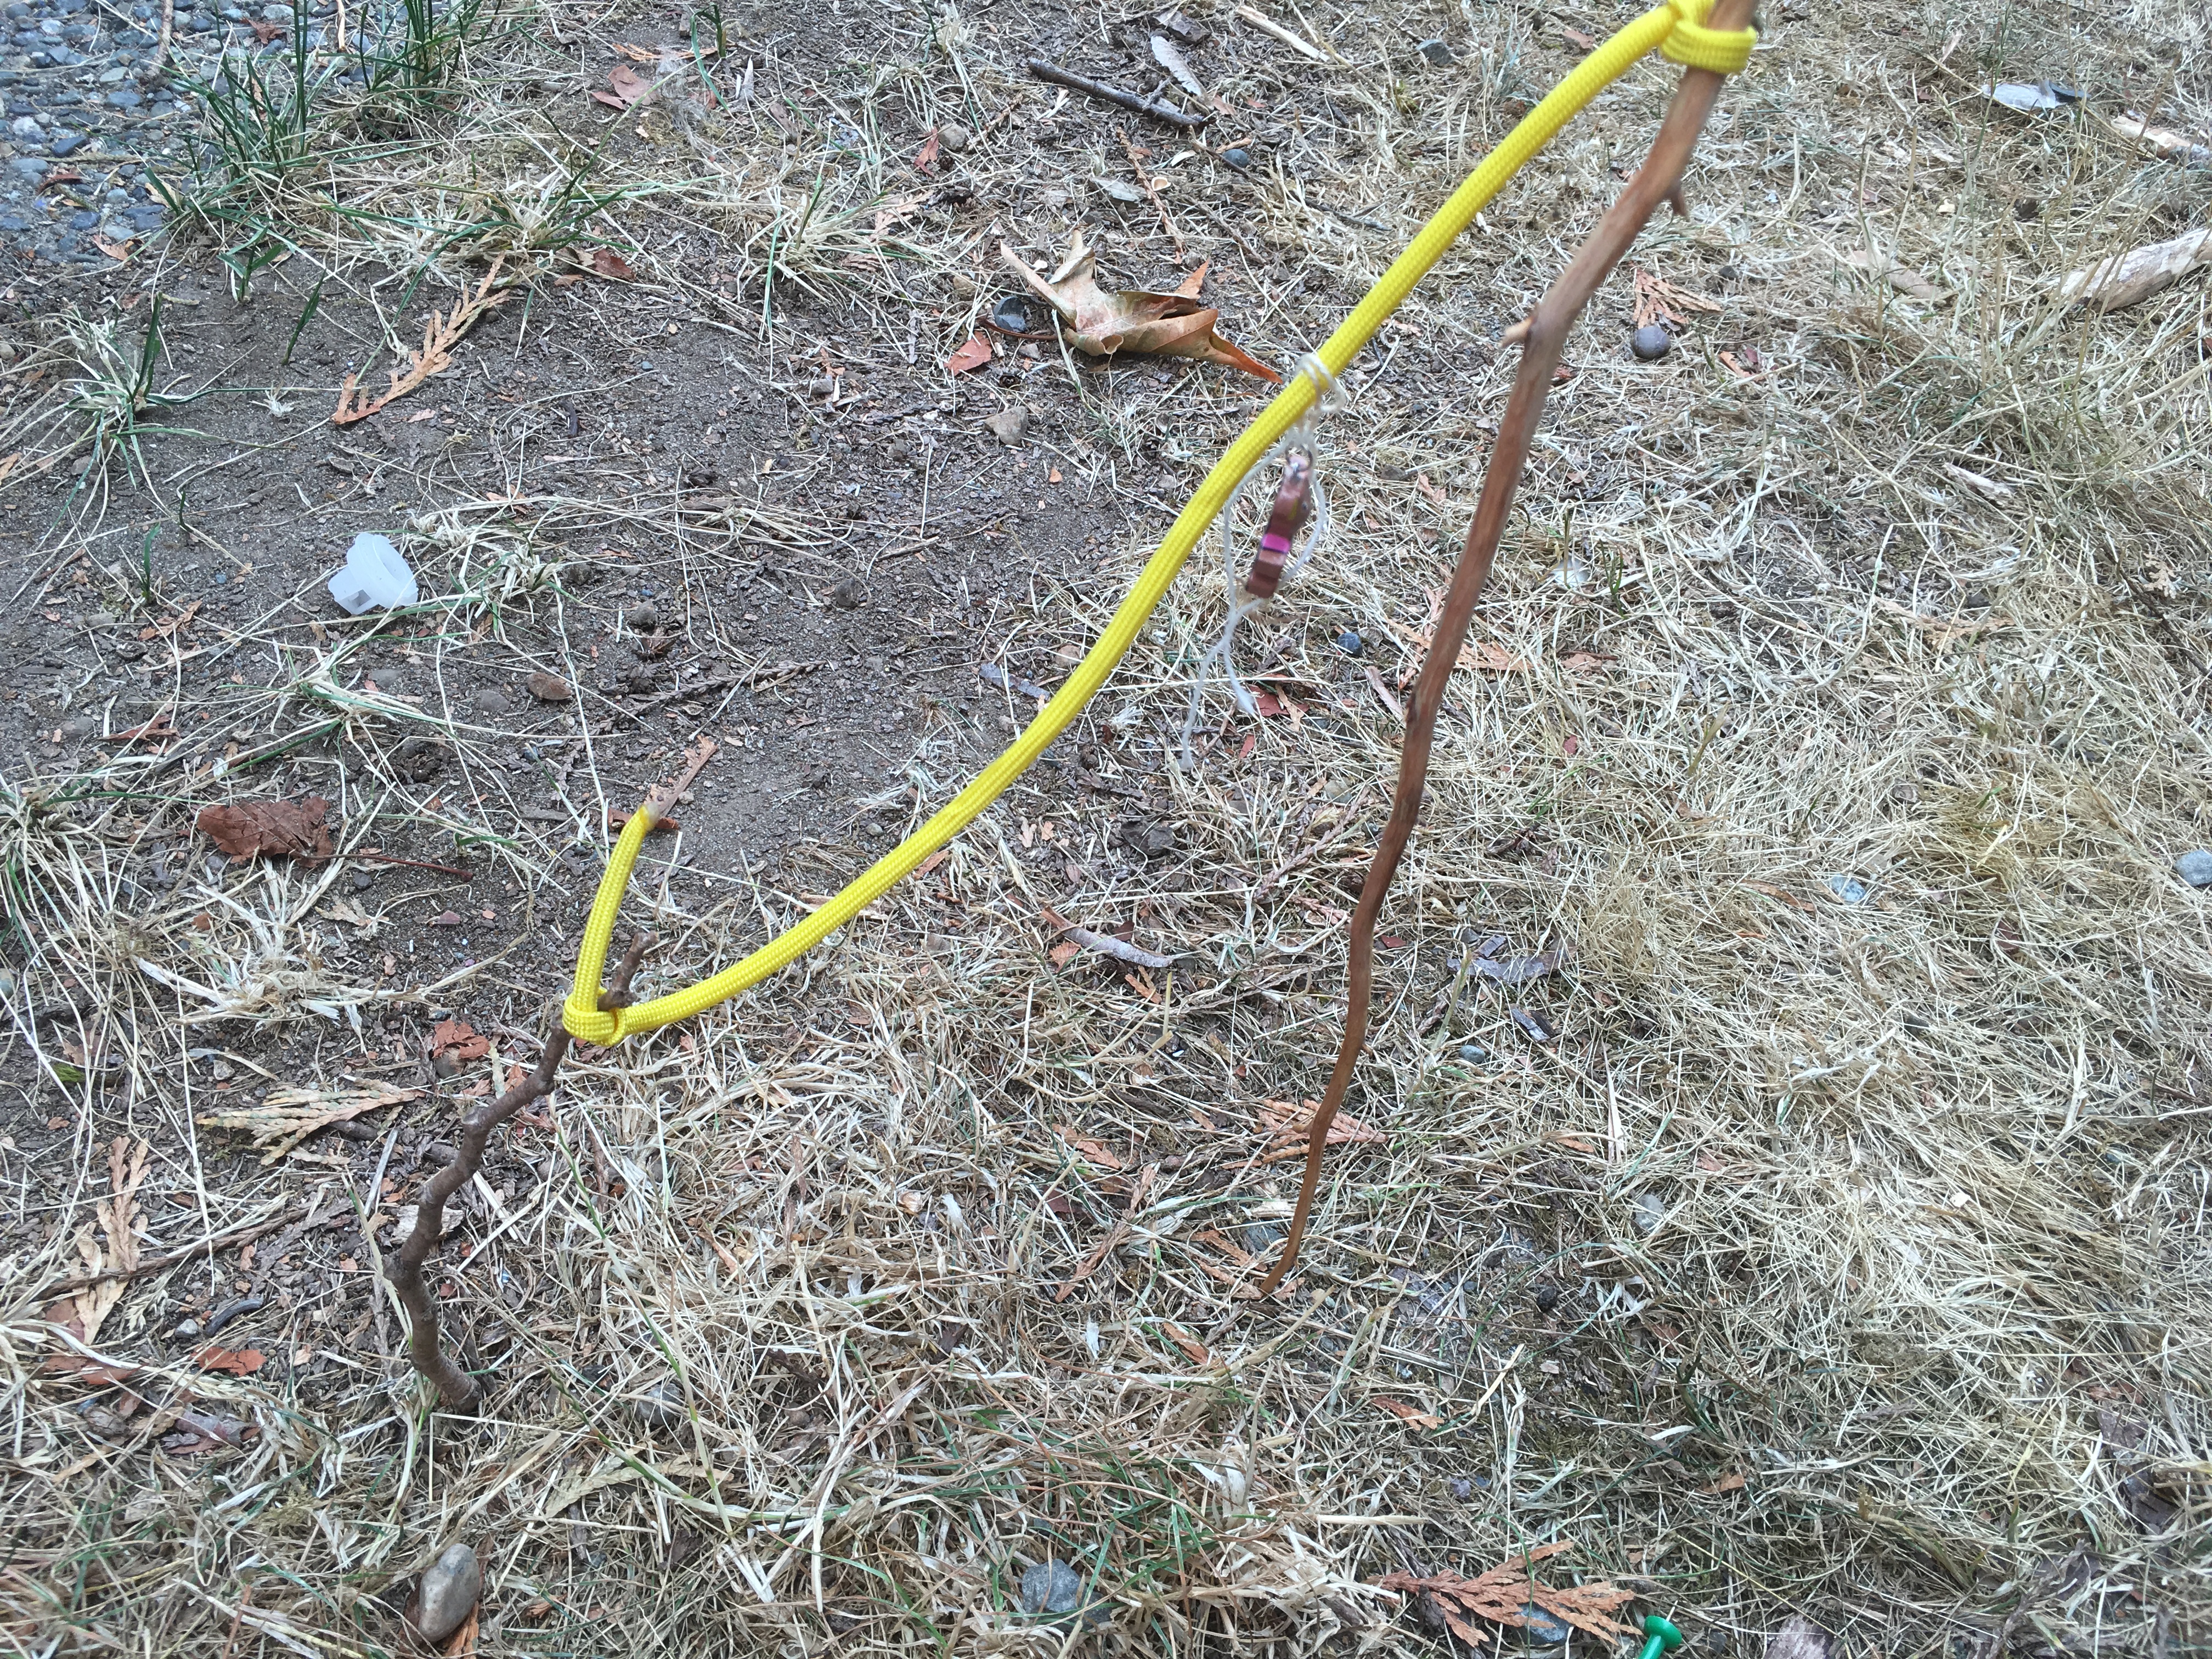
They spent a lot of time stripping bark from sticks. Some they used for tent pegs, some they sharpened to make arrows and sometimes they simply whittled the sticks for fun.
They also learned to split pieces of wood with a knife. They used a thick stick as a hammer to push the knife through the wood.
They attempted to make a spoon, like one of the contestants on Alone, but hollowing out wood was a little tricky with their knives. They found it much easier with the multi tool.
They came up with all kinds of imaginative projects,some more successful than others. In the video my daughter demonstrates how she is making a rain collector. The large stick on the floor is the one they used as a hammer, to split sticks. You can clearly see the difficulty the girls had with hollowing sticks. This project remained unfinished, which is just as well considering we haven’t had any rain this summer!
I can’t wait to see what they achieve as they become more skilled.
clear plastic or sheet of glass from a photo frame
bowl of water
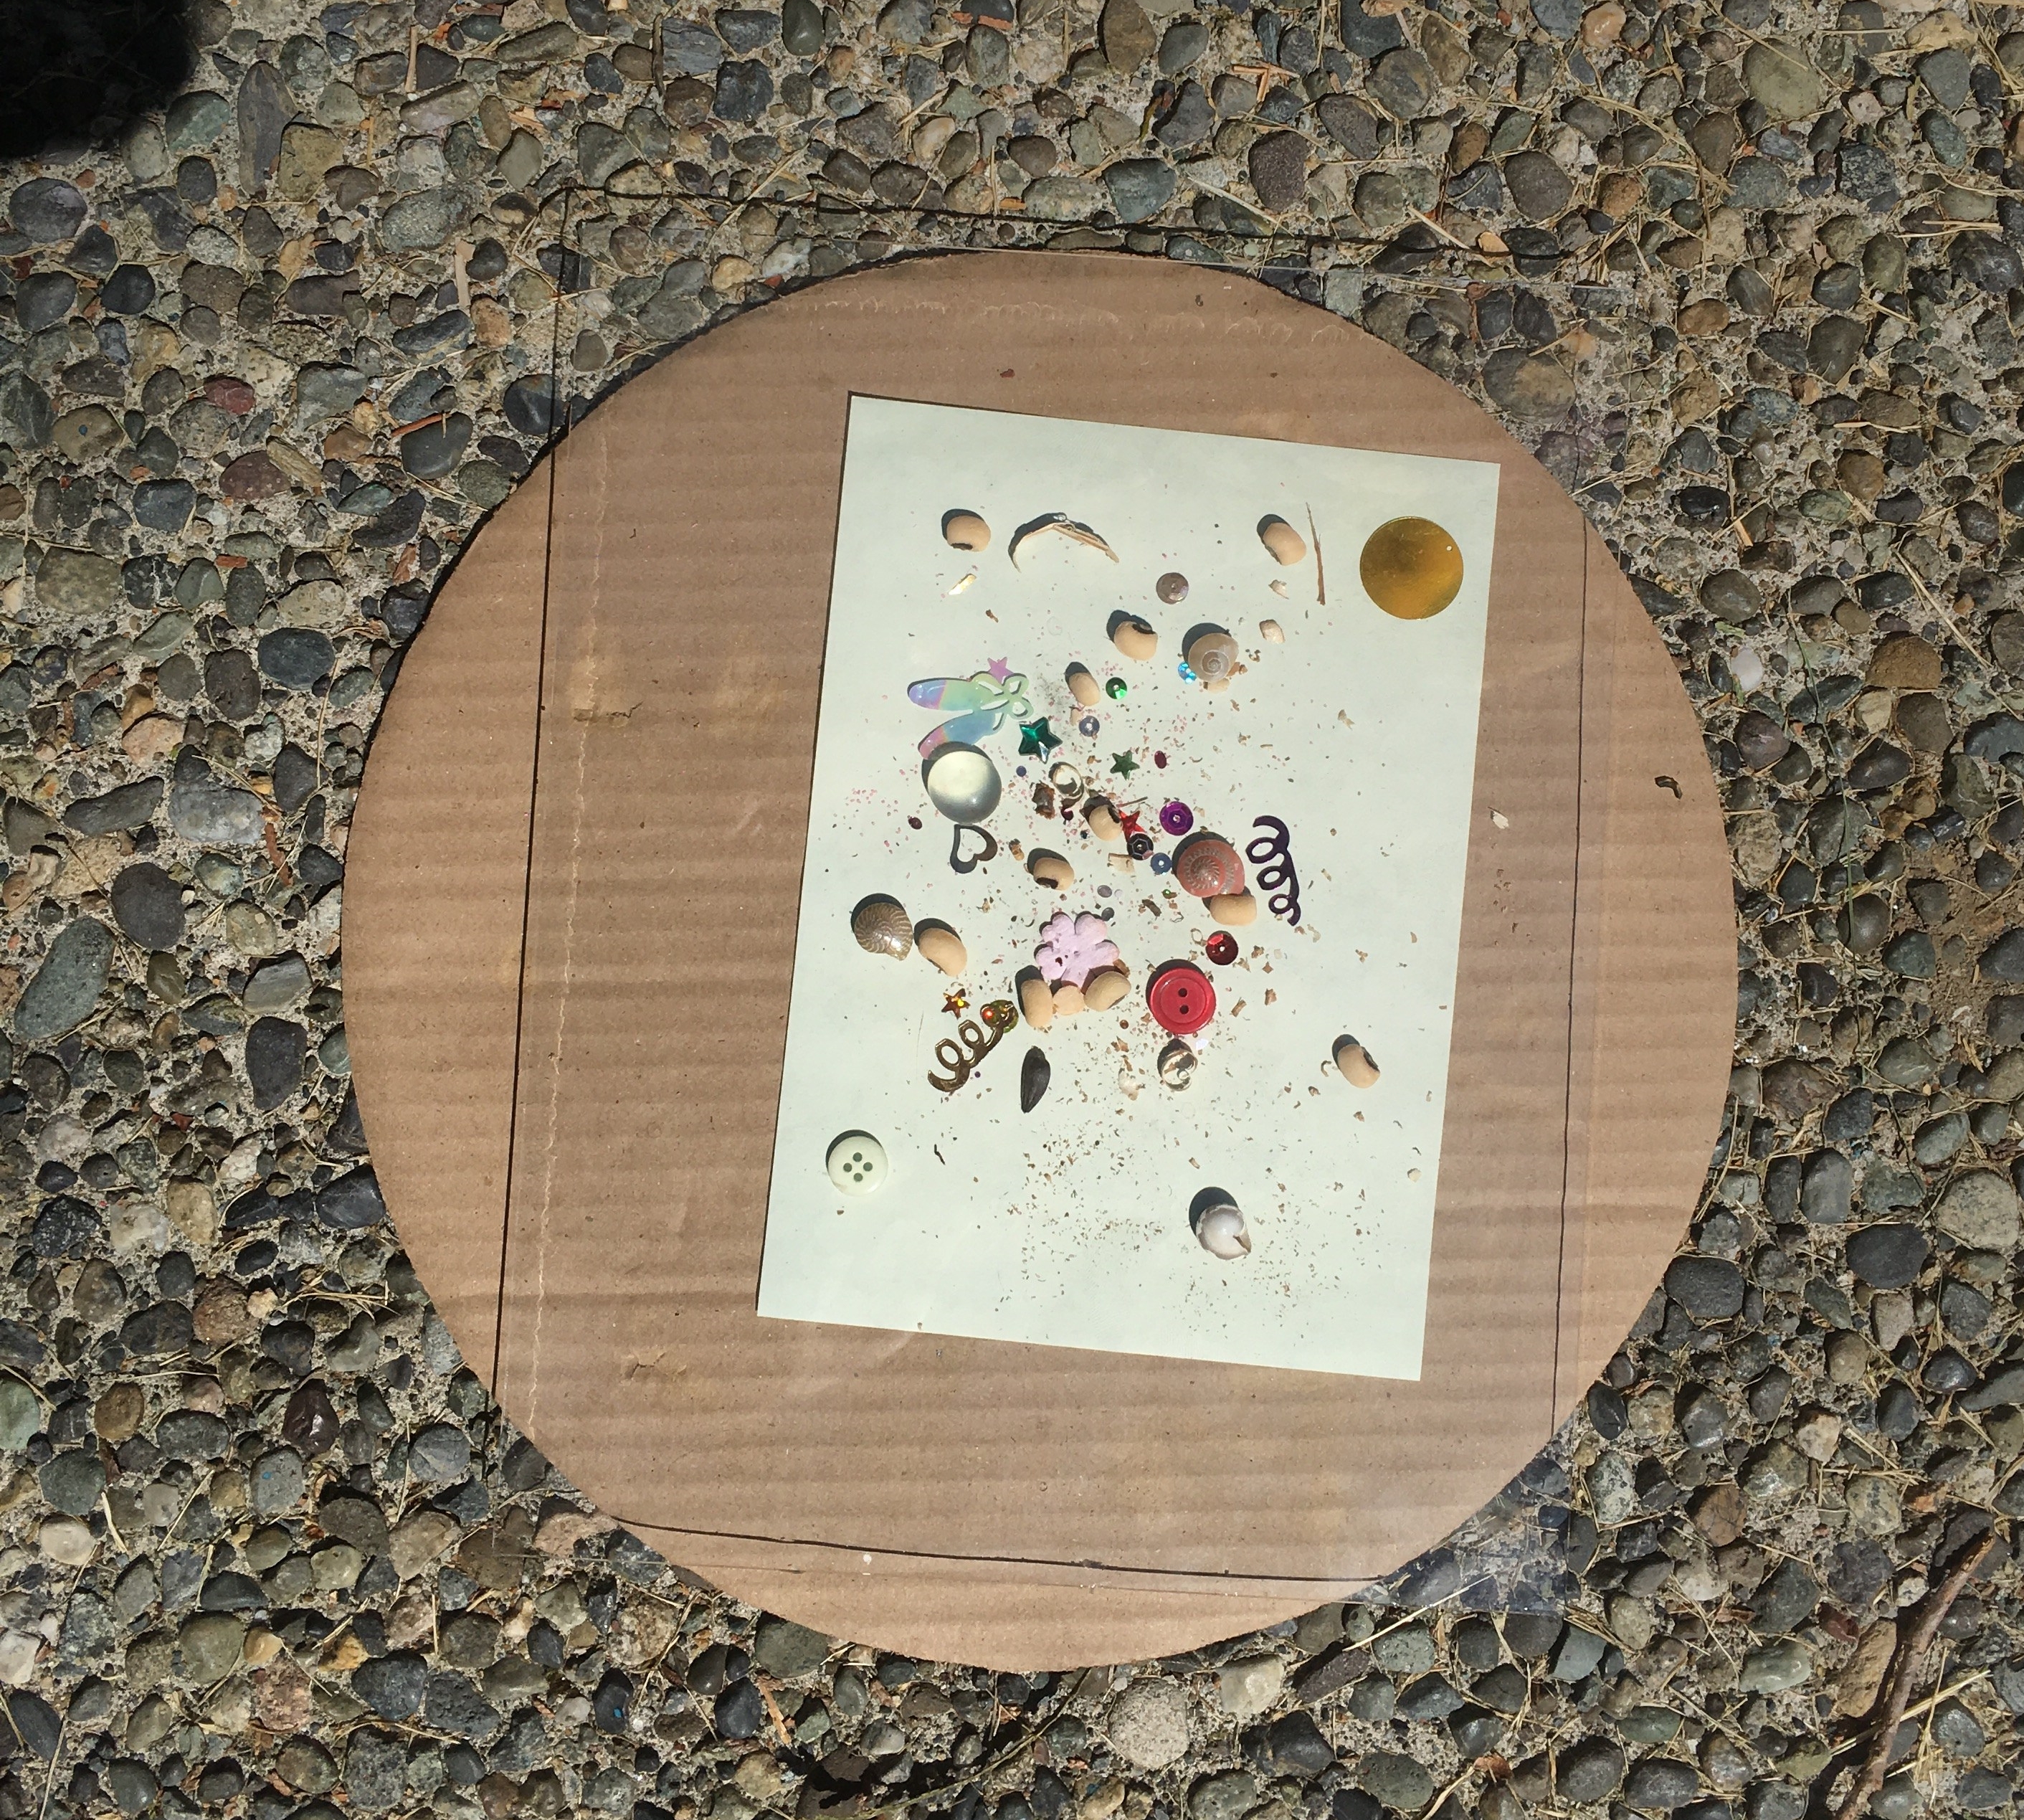
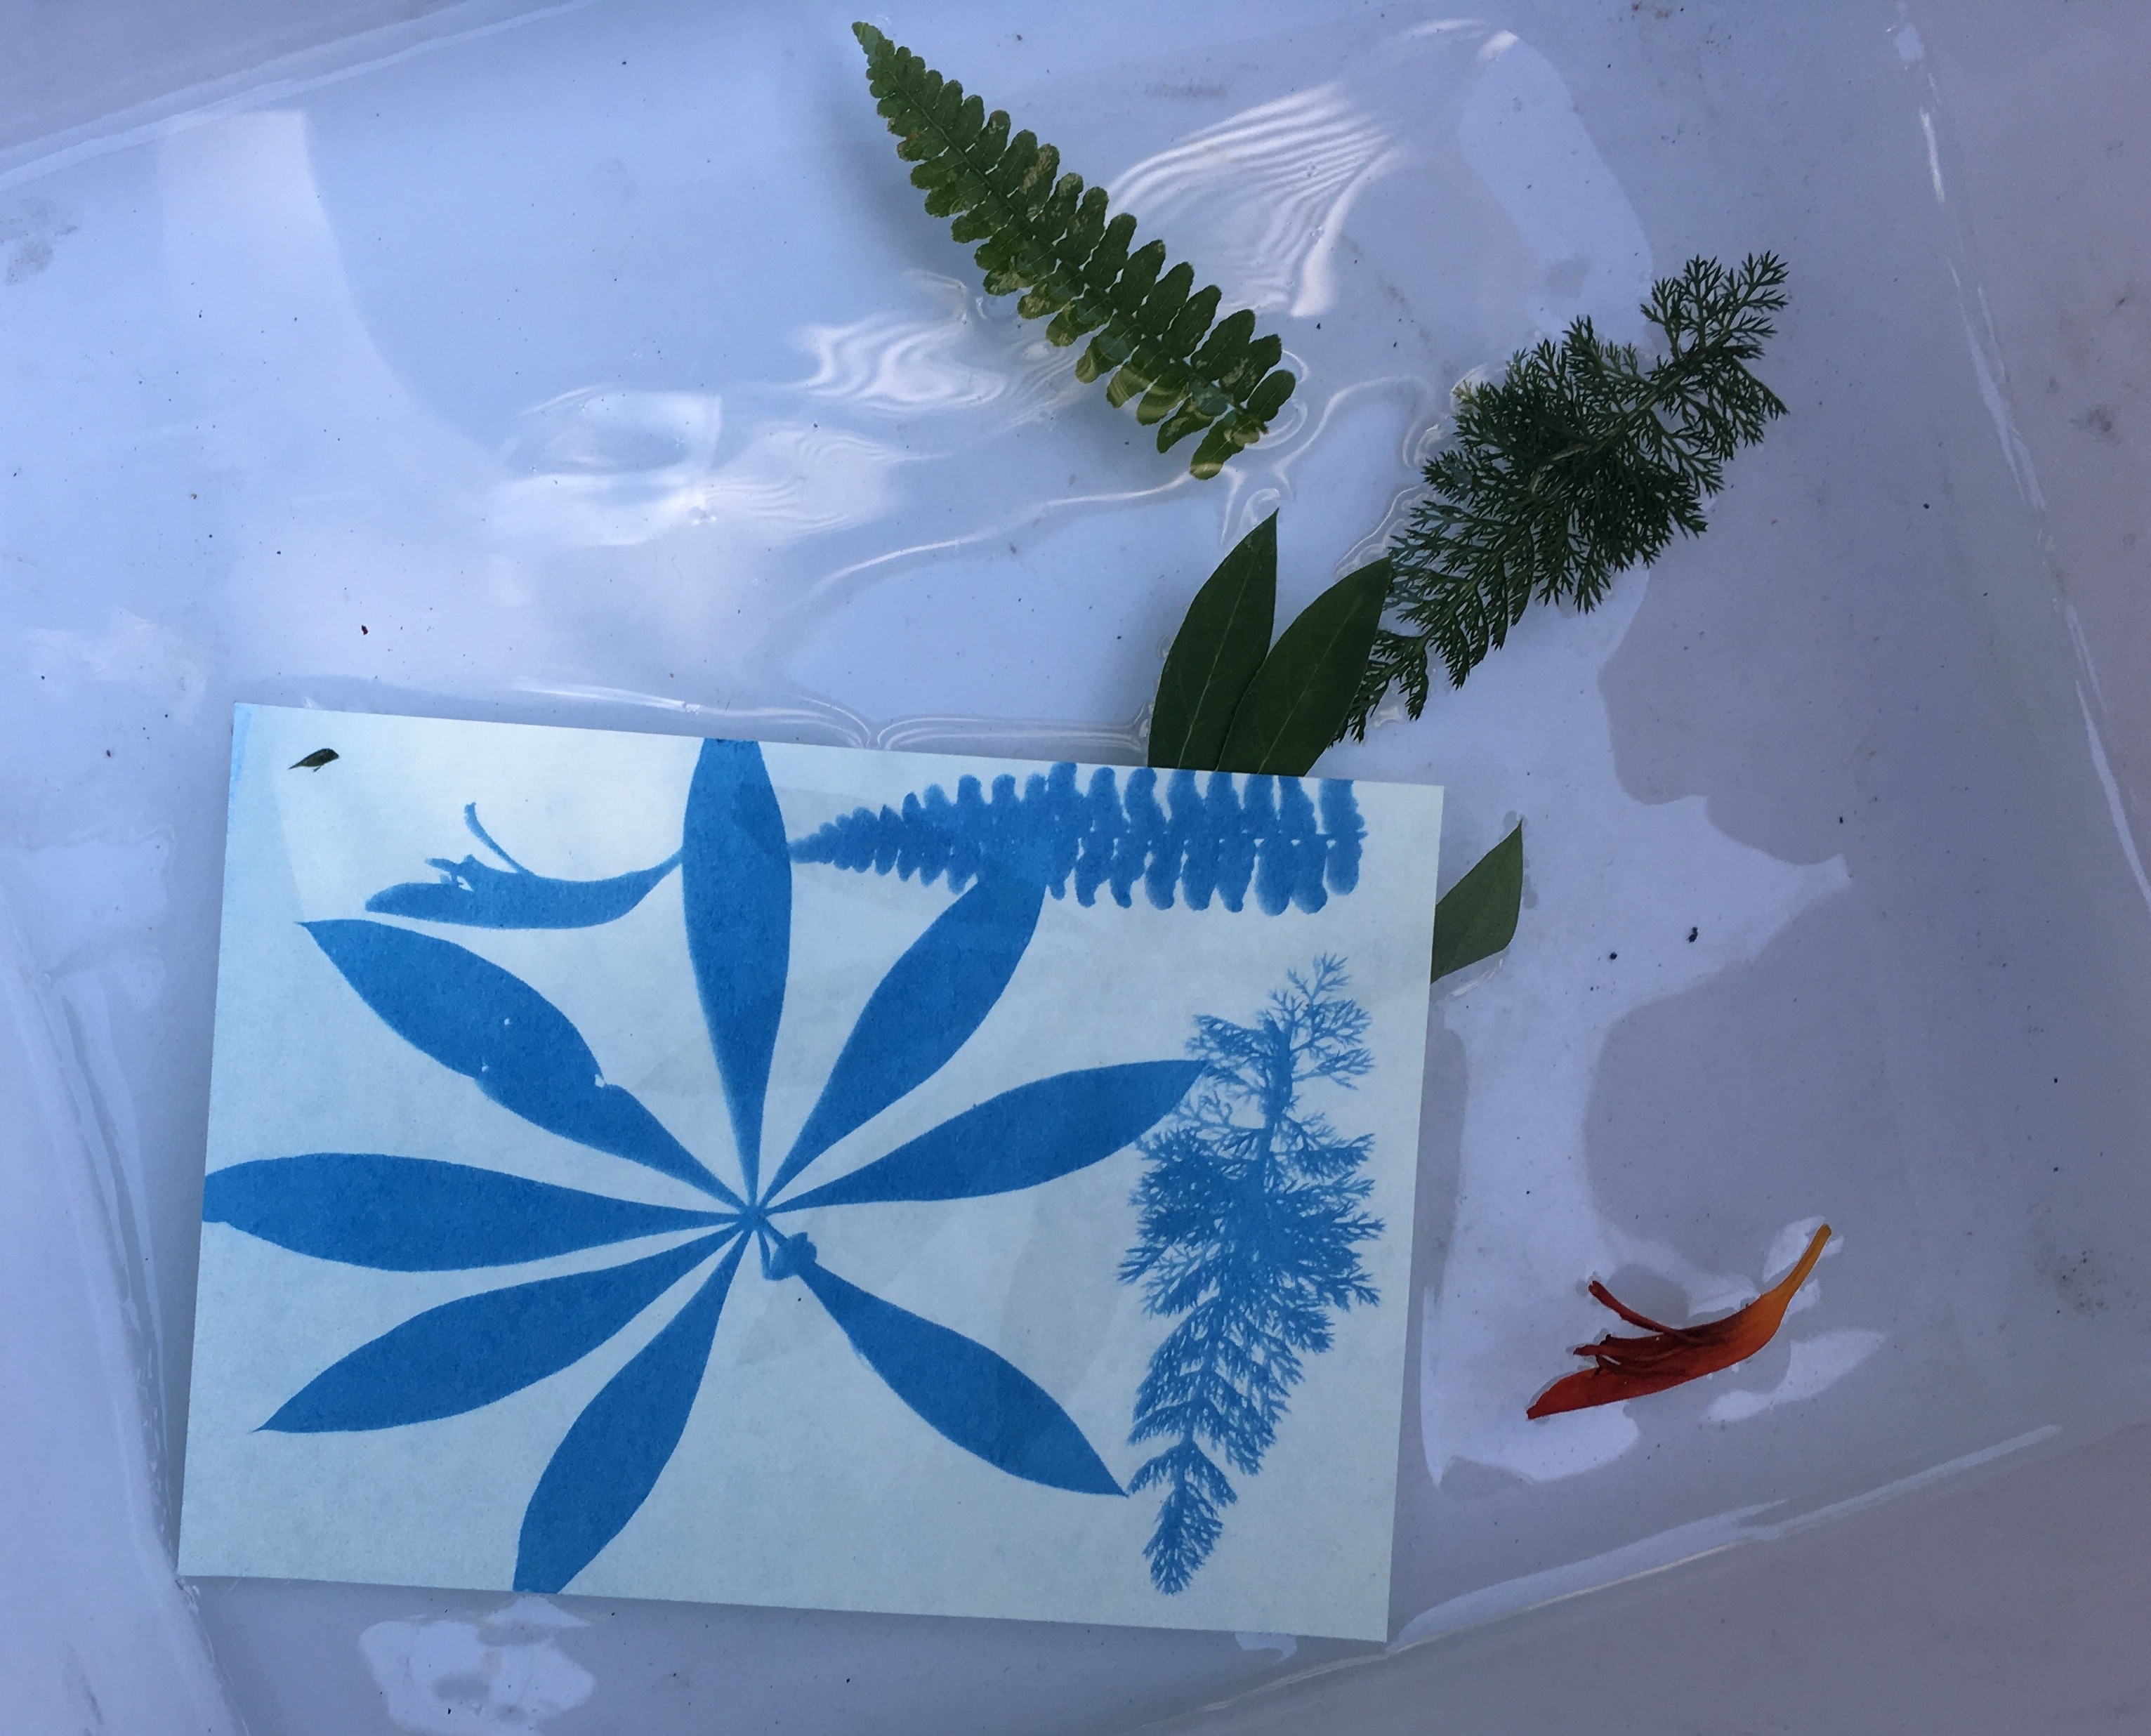
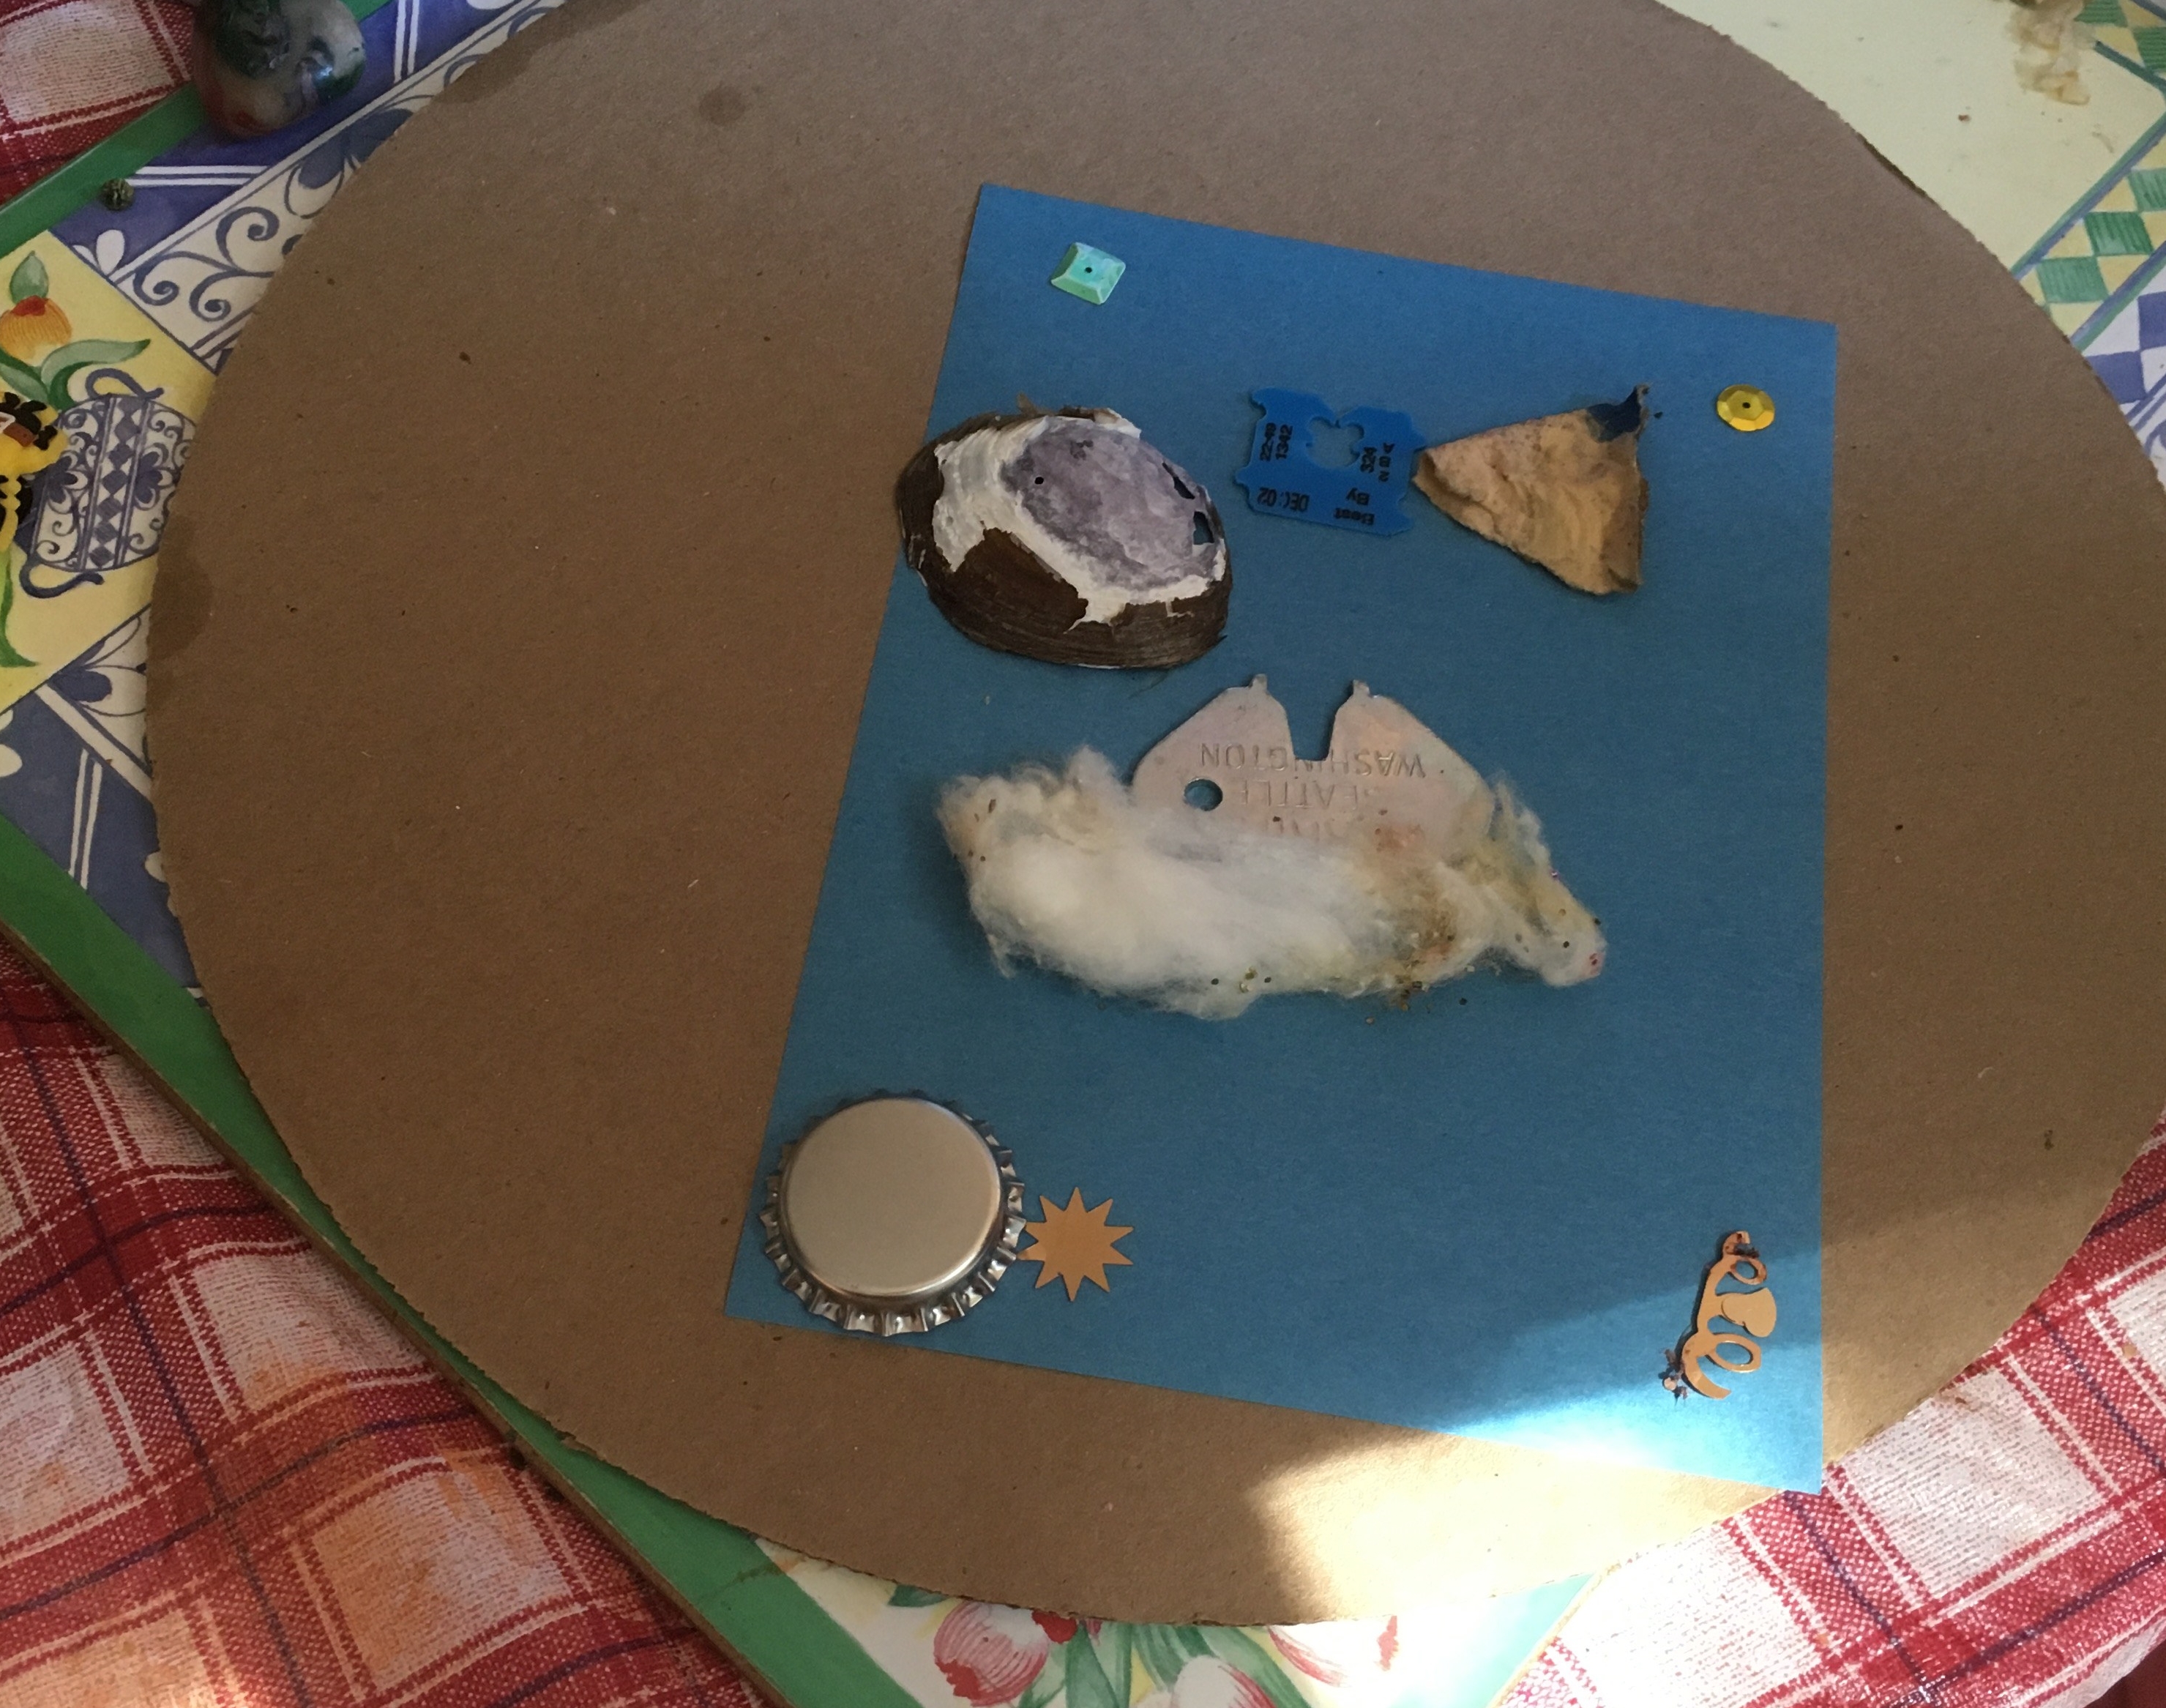
I bought sun sensitive paper for my girls as a gift, but today was our first trial. We set out to find objects to place on the paper. Our first attempt used loose parts.
1. Create your designs inside, away from sunlight and put the paper on cardboard or a tray to help carry it outside.
2. Cover the picture with glass to stop it blowing away and keep it flat and place in the sun for 3-5 minutes. The paper will turn white.
3. Remove the glass and the objects. Place the paper in a bowl of water for 1 minute, to stop the chemical reaction.
4. Remove the pictures and leave to dry.
As you can see, one of the pictures came out clearly, whereas the other had only faint prints. The girls discussed why this might be.
Why did mine work better? I thought mine was in the sun longer but the other one was definitely in the sun for longer, so I don’t know.
It wasn’t because my things were heavier because I used sequins too. Maybe it wasn’t pressed on as hard?
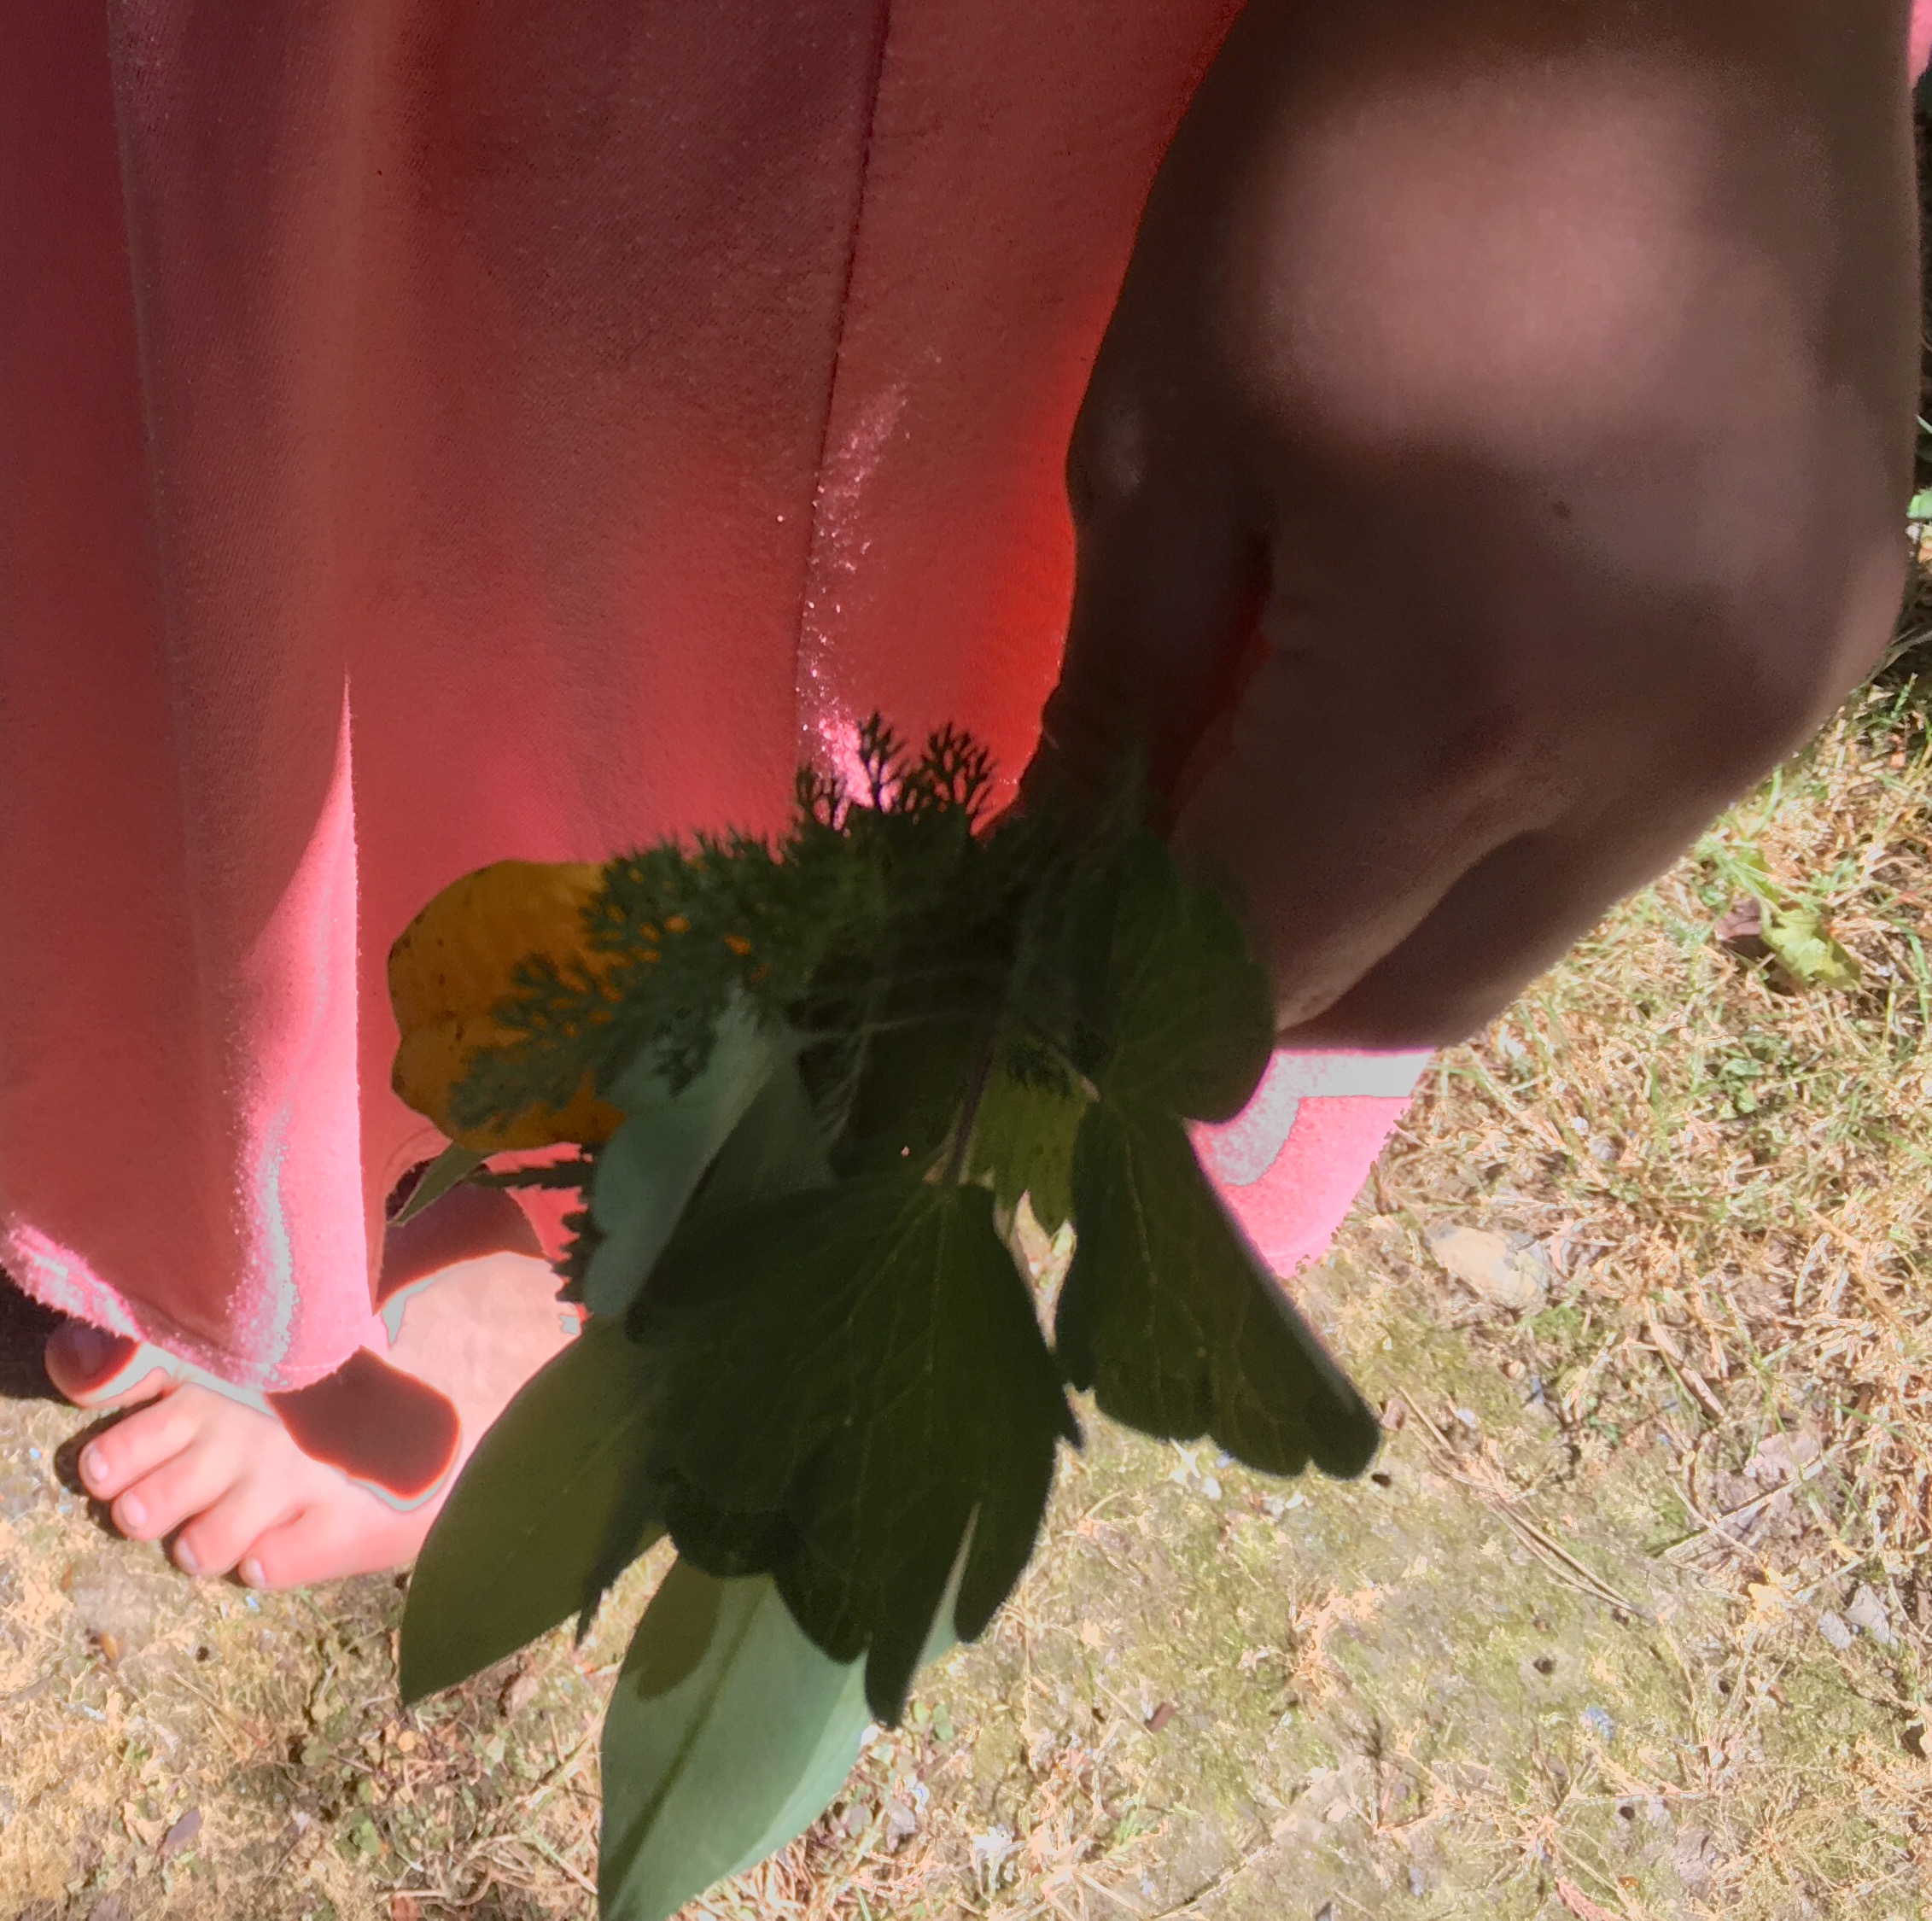
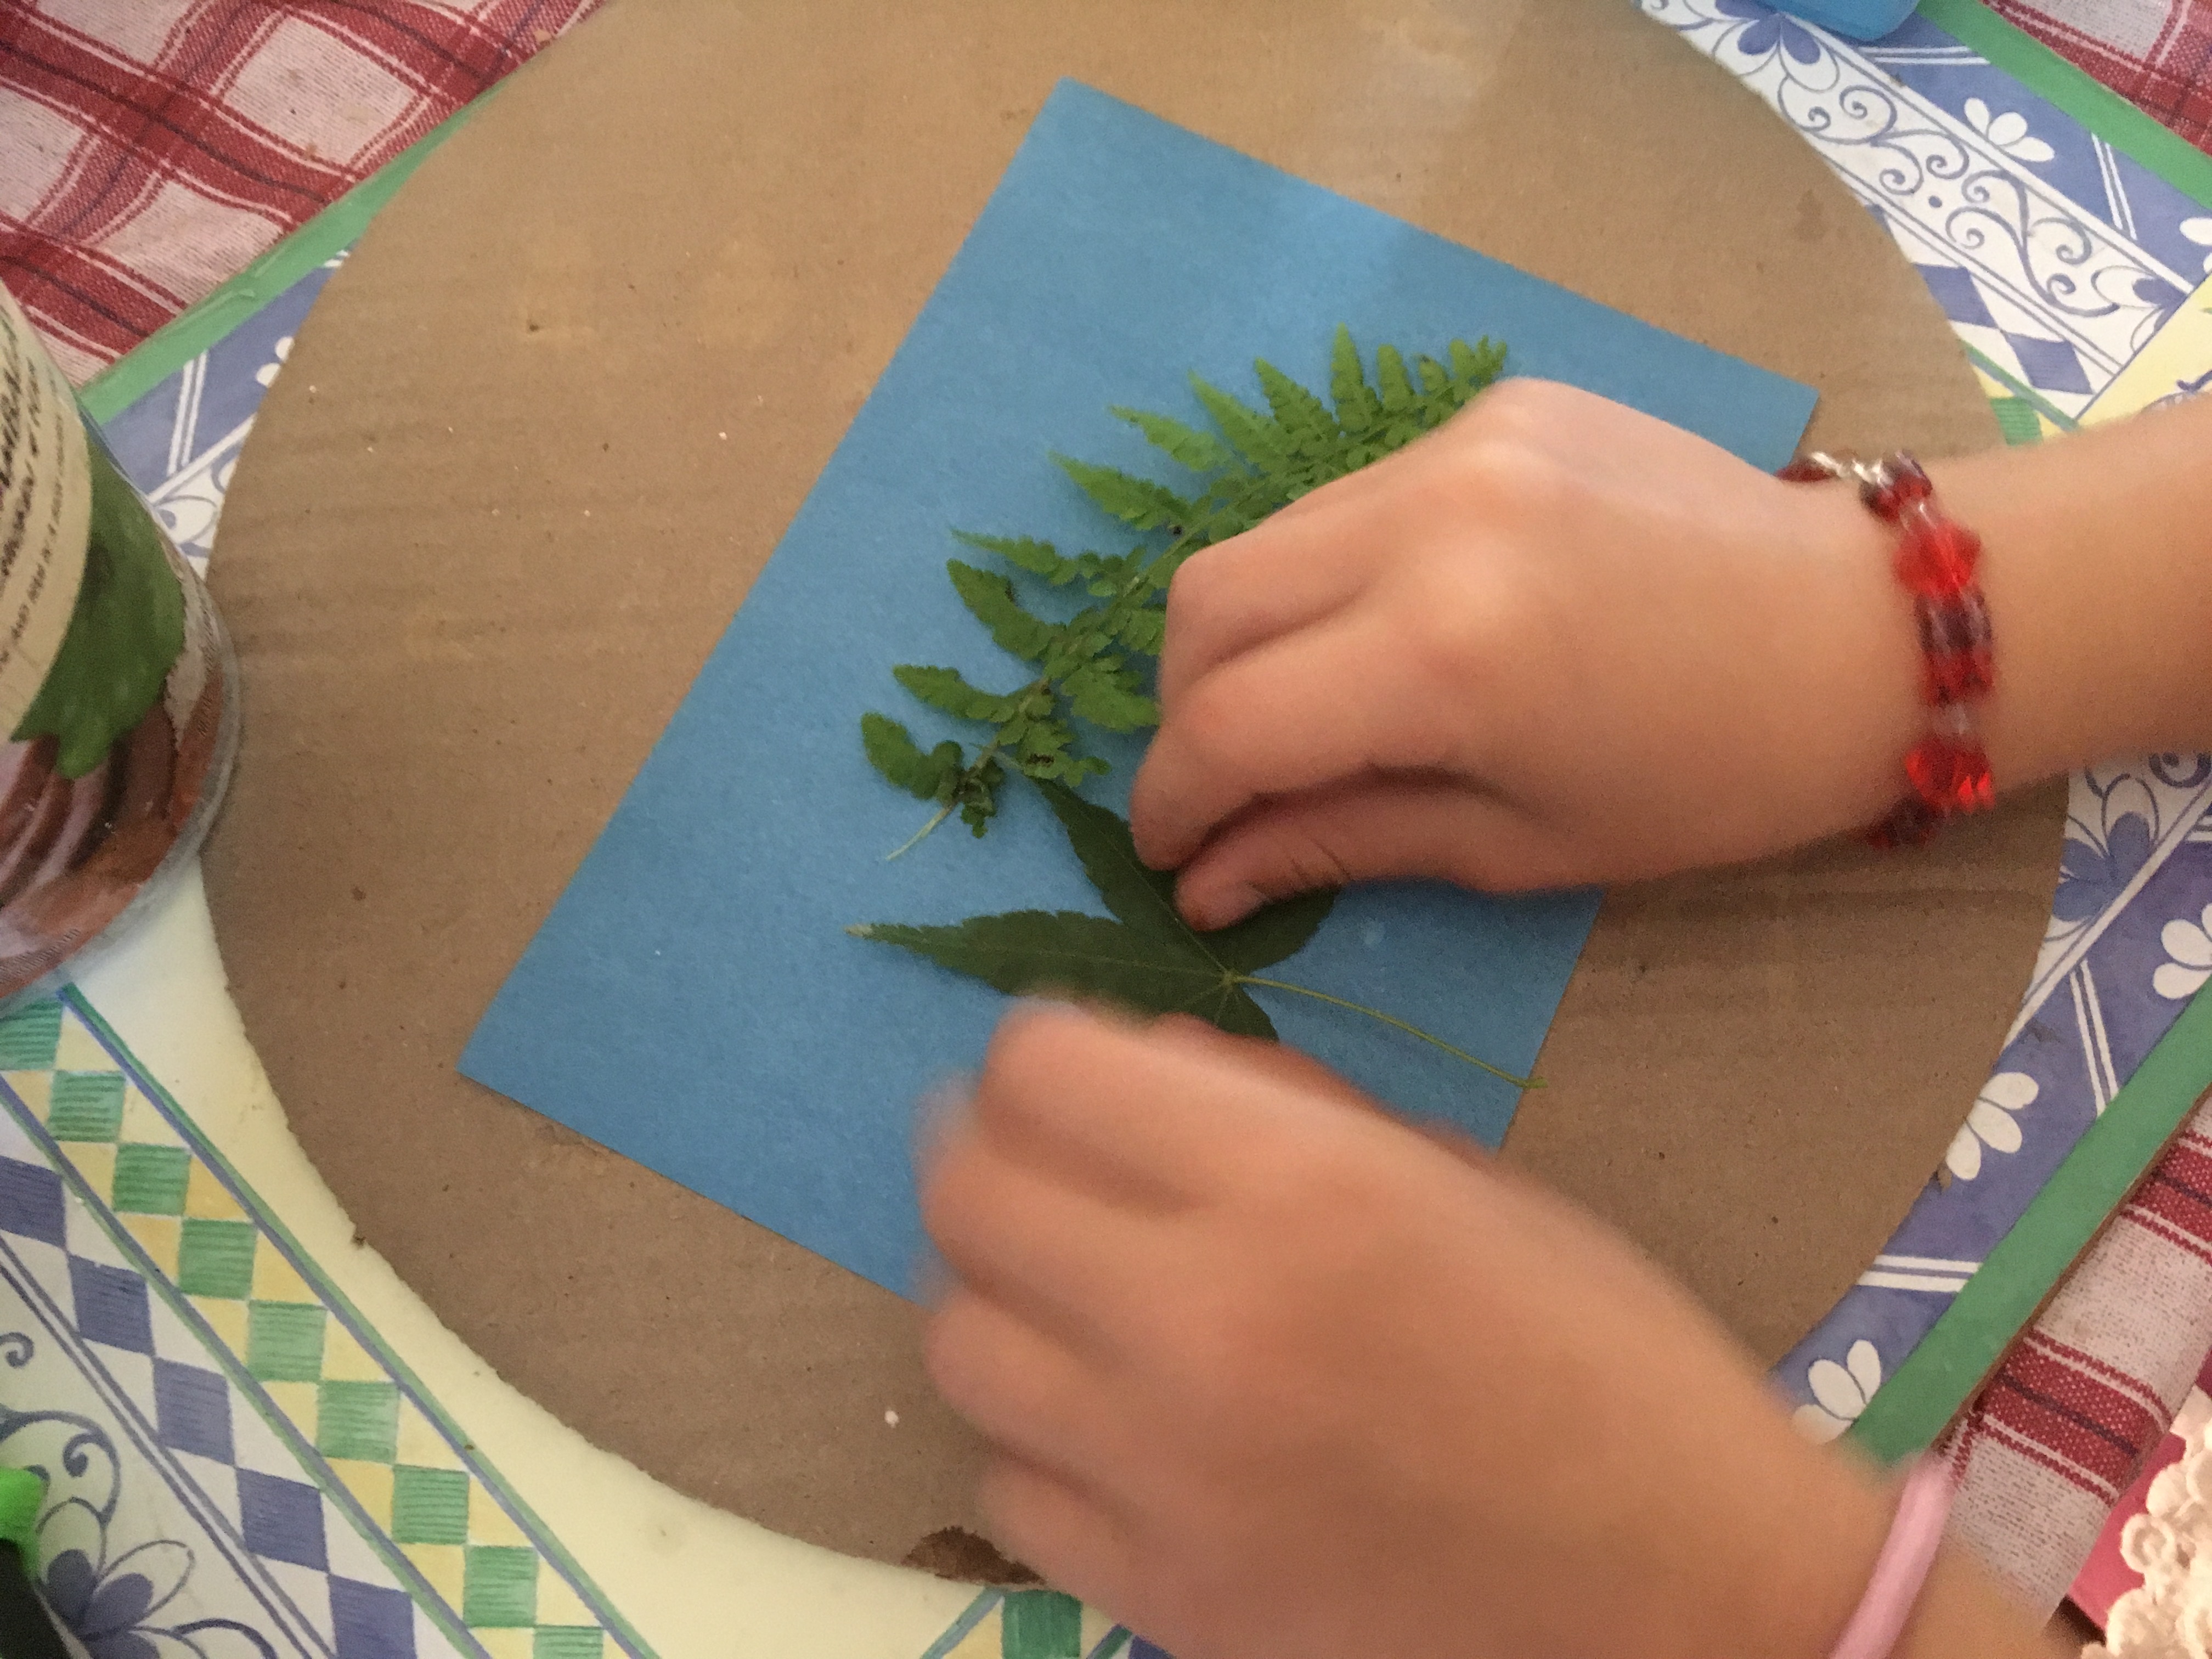
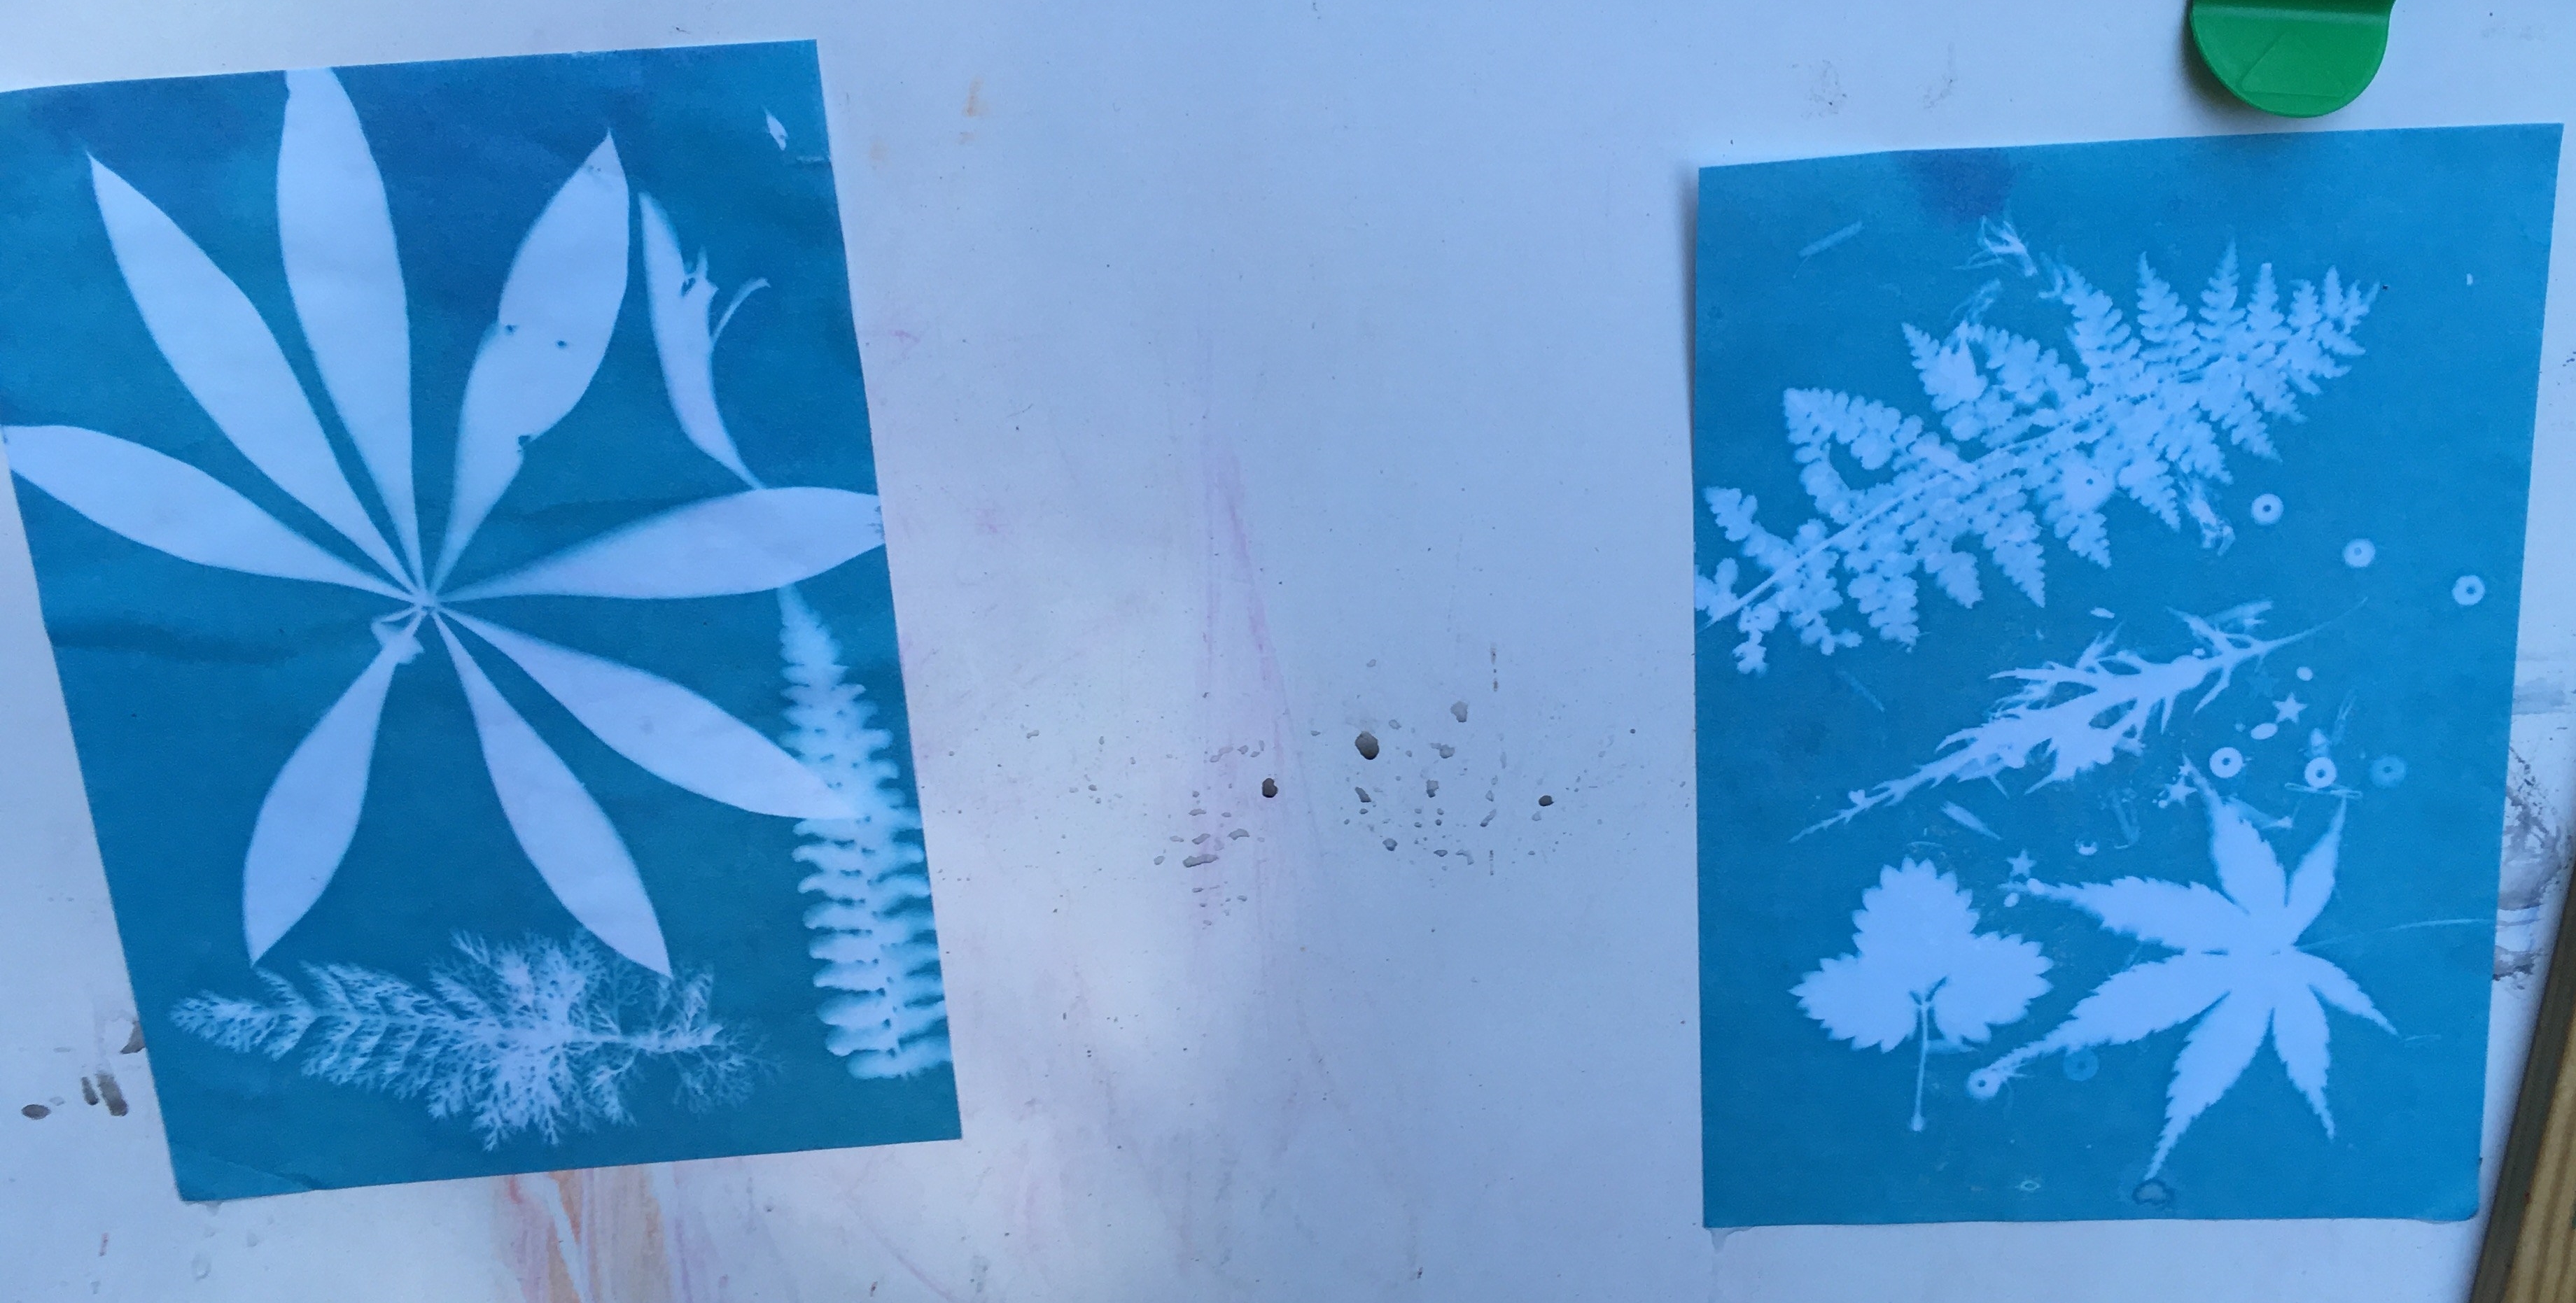
I suggested they try another, to see if they could work it out. This time we searched the garden for natural materials. Usually, I only let the girls use natural things from the ground, but this time I gave them permission to pick flowers and leaves. They searched the flower bed and found things they hadn’t seen before, climbed the tree to reach leaves and lichen and we found that even weeds could have interesting shapes.
They chose their favourites to make a design.
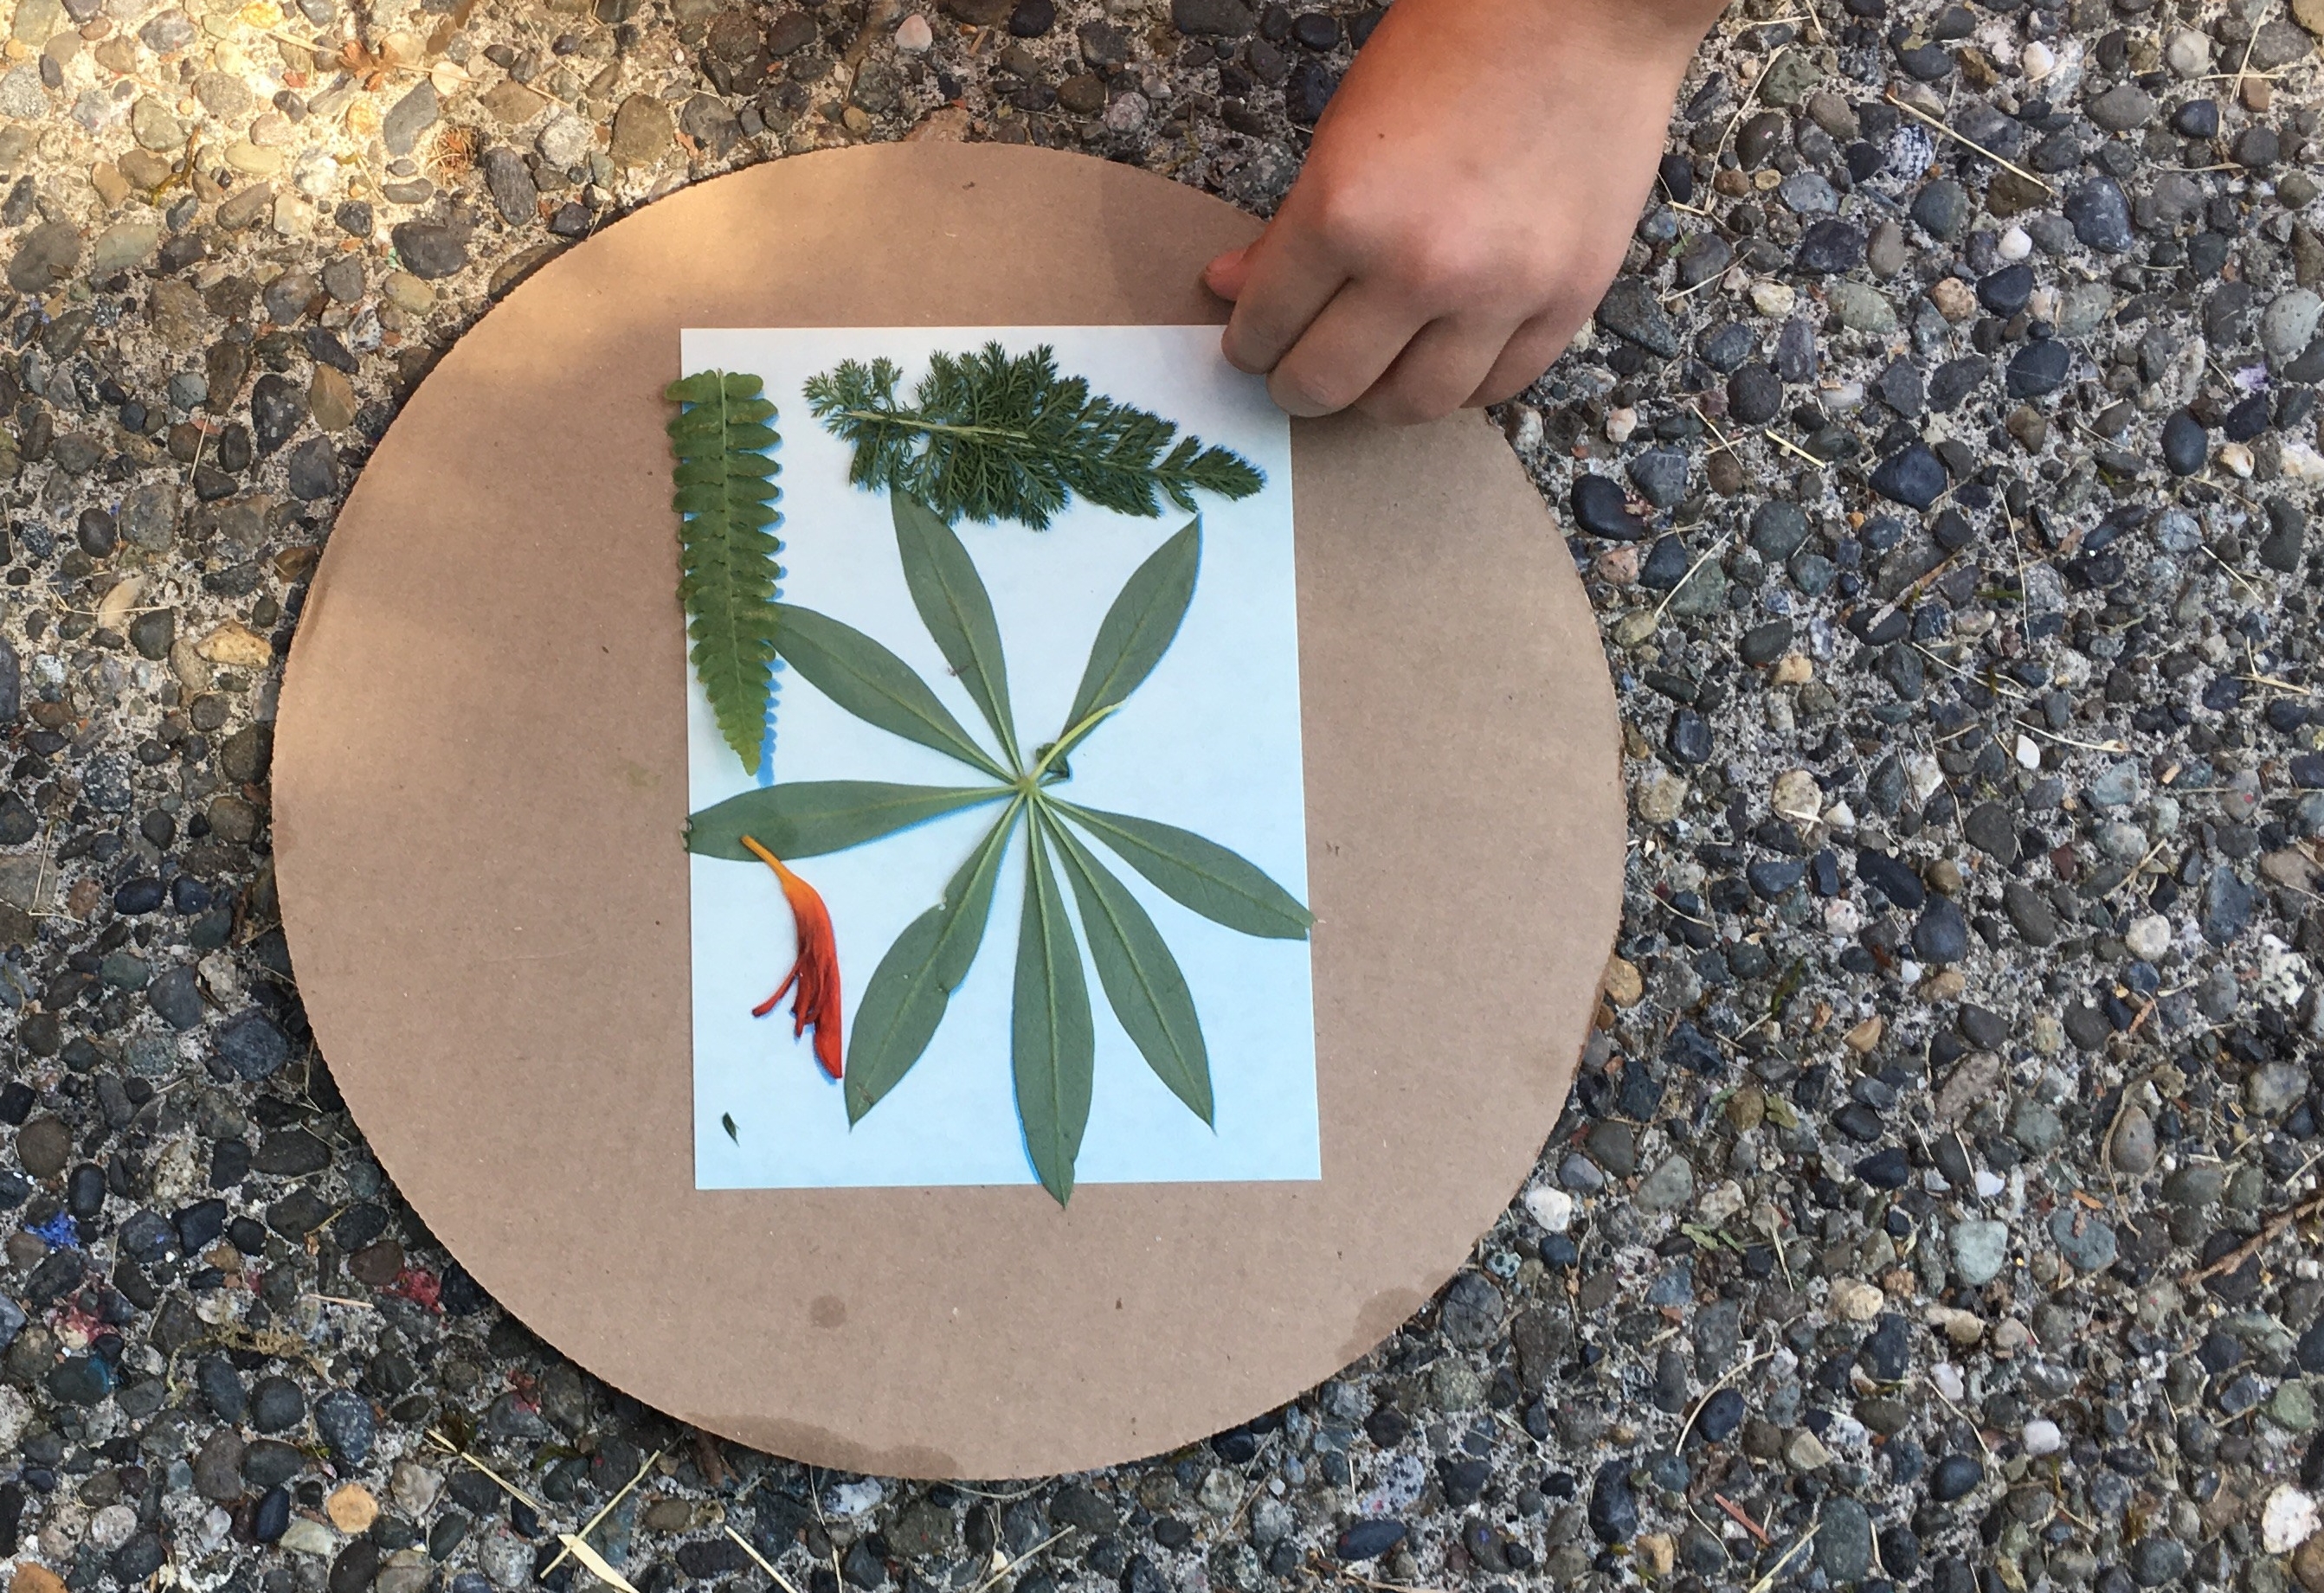
And left them in the sun to develop
This batch was both successful.
I love the detail of the smaller leaf. The girls reflected on the success of these pictures.
I think it worked better this time because we laid the leaves really flat before we started, or perhaps it is because we left it in the water for longer? But I don’t think that would make a difference.
Even the little sequins came out this time.
We saved a few sheets for their big sister to try, it will be interesting to see what she will create. I also ordered bigger sheets because some of the bigger leaves didn’t fit on the 5×7 paper.
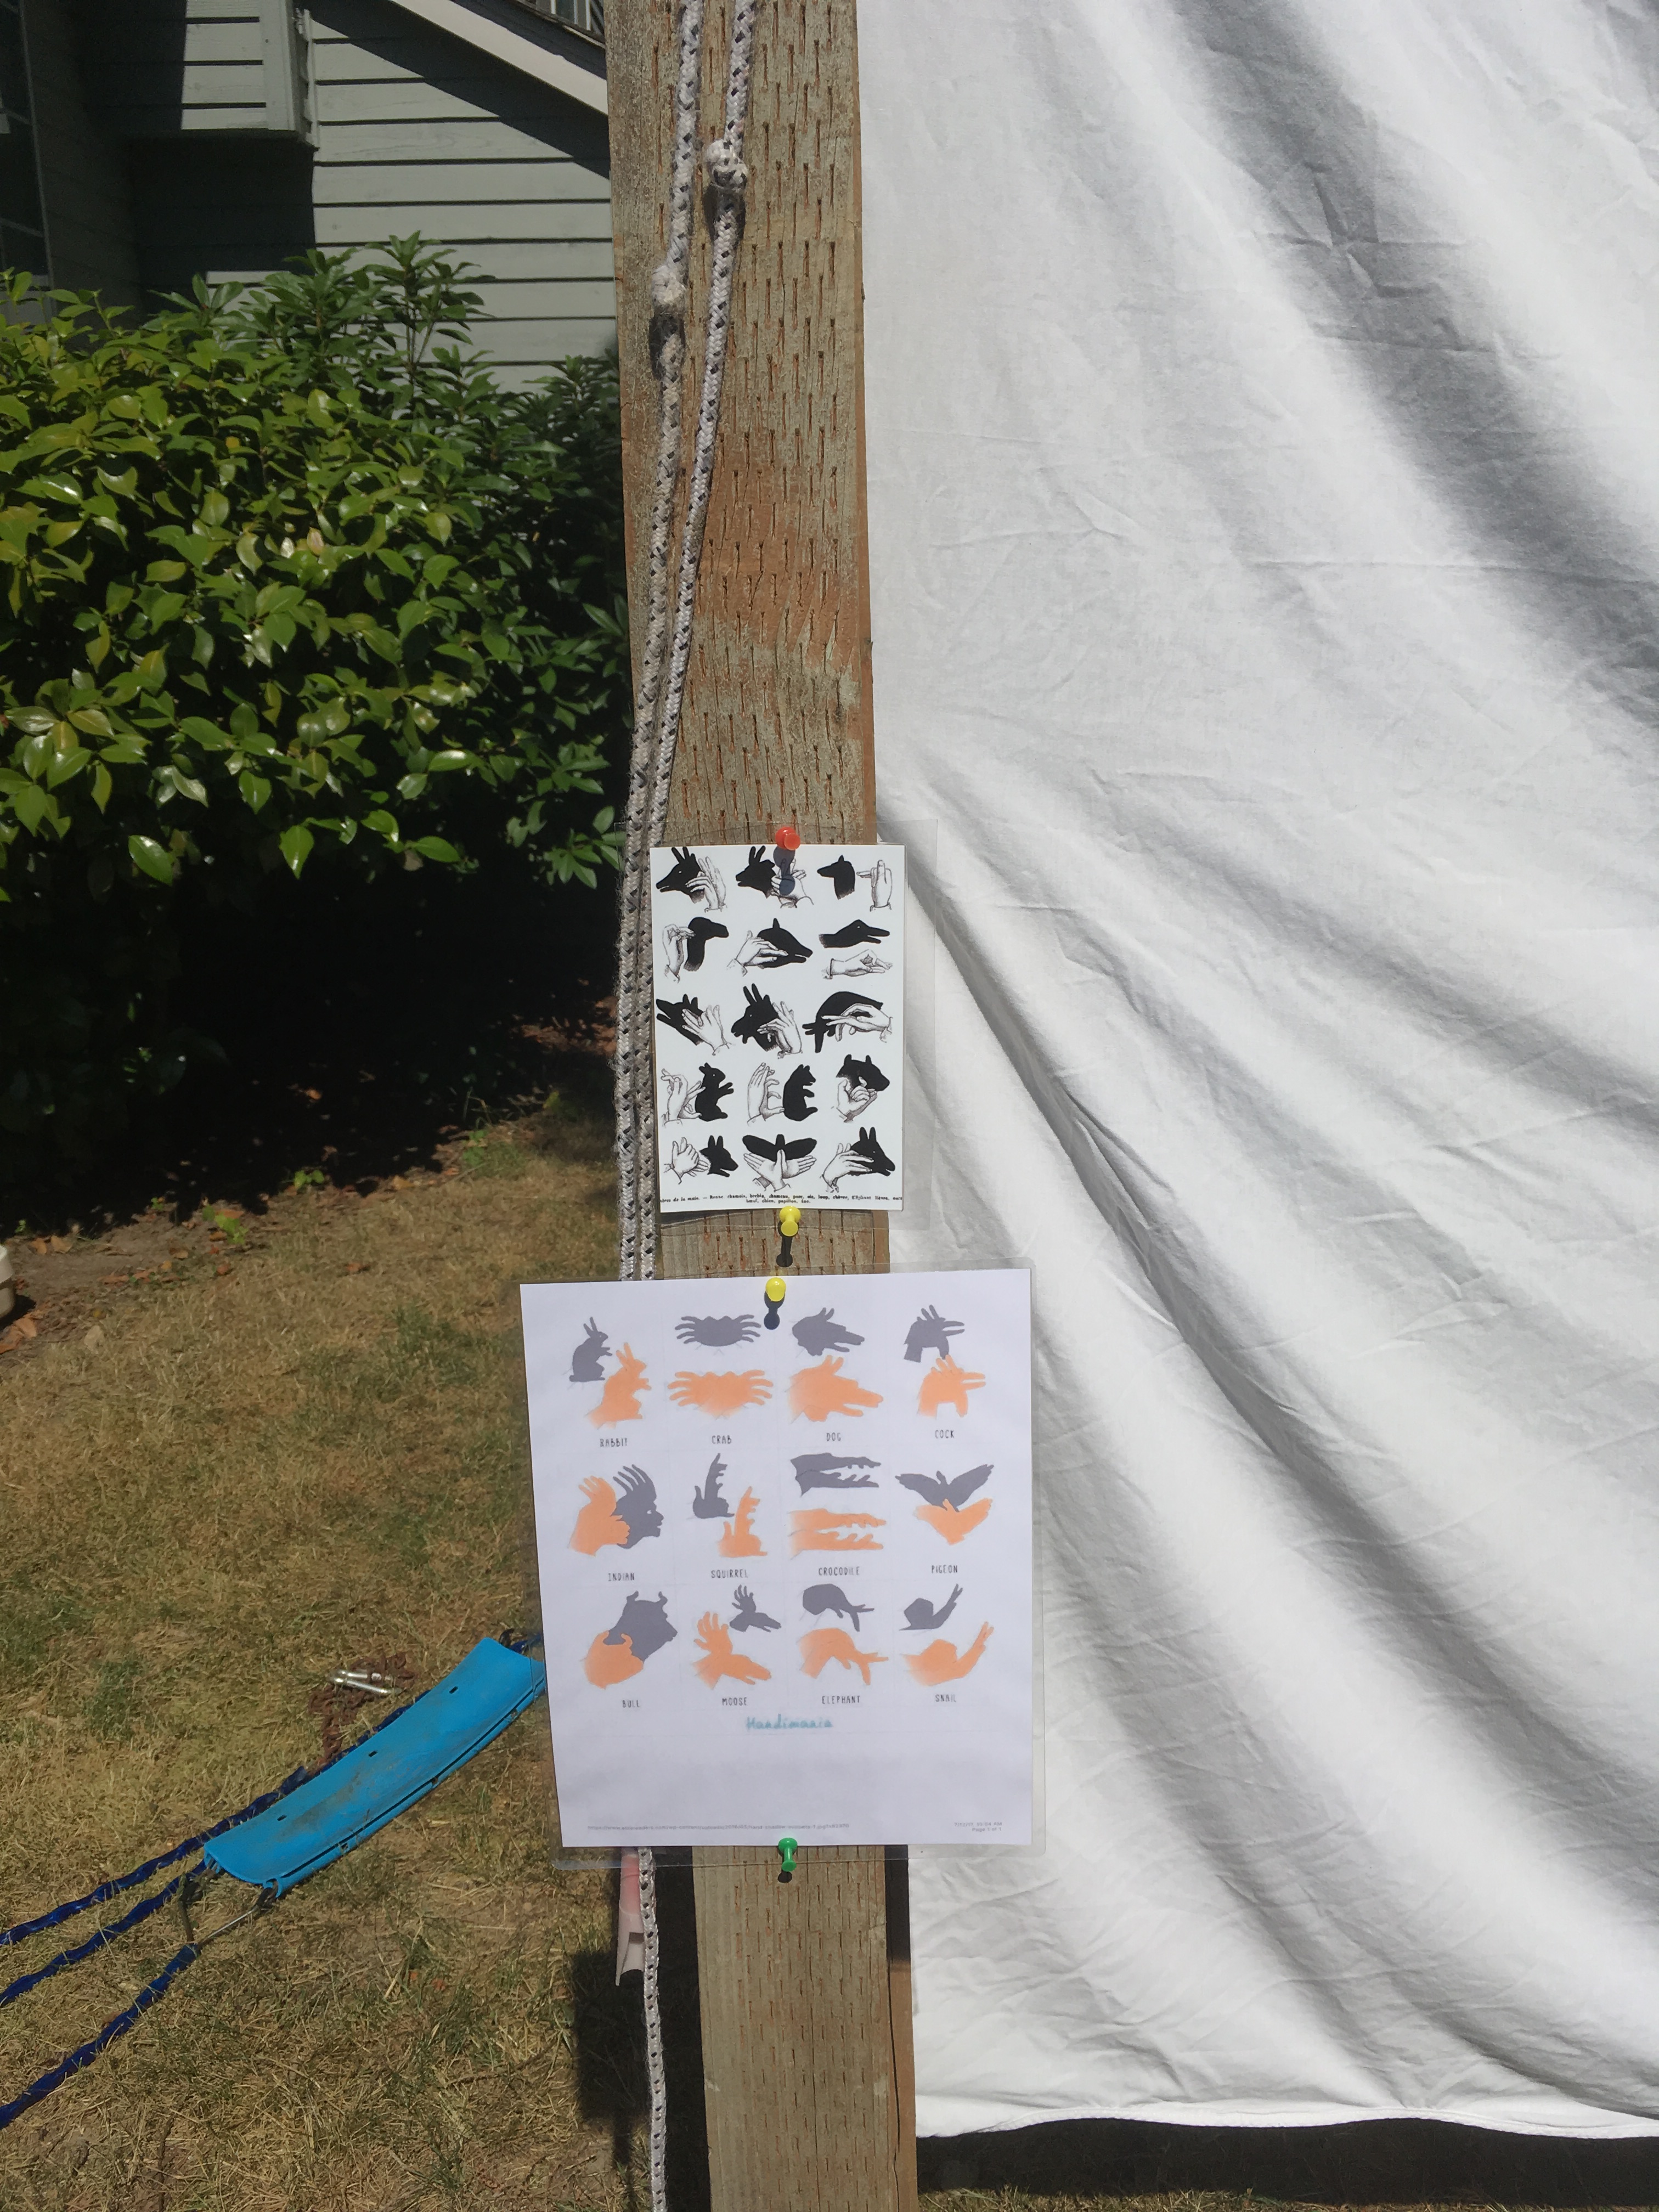
I recently cleaned out the linen cupboard and gave the kids a huge bag of old sheets to play with. They like to make-up stories and turn them into royal capes or build dens with them. In amongst them was a white sheet. I thought it could be used to build a shadow puppet theatre in the garden. We have a swing set that isn’t safe to use, so I removed one of the swings and fastened the sheet to the frame.
The children and I made puppets from cardboard. The children chose characters and I helped them draw them in silhouette. They collected sticks from the garden, whittled them to smooth them out and stuck the cardboard characters on with tape.
I also found images of hand shadows. I printed and laminated them and stuck them on the swing set frame for reference.
We had to do a bit of work cutting back the tree branches to make a clear screen, but soon it was ready. The magical stories they have created have been wonderful. I think this would be a great resource for a school or pre-school to encourage story telling and build the foundations of story writing. You could build it outdoors or inside with a light source behind.
Videoing the story showed the children where they needed to improve. They saw that sometimes you couldn’t see the characters well because they were too low or placed at an angle. They also noticed that the size of the puppet changed according to how close to the screen it was.
I love the way my daughter played with accents and voices. It particularly love the voice of the bird and banana man in the land of the forgotten.
Disclaimer: Links to the book title are Amazon affiliate links. This means if you purchase the book from my recommendation I will receive a small financial incentive.
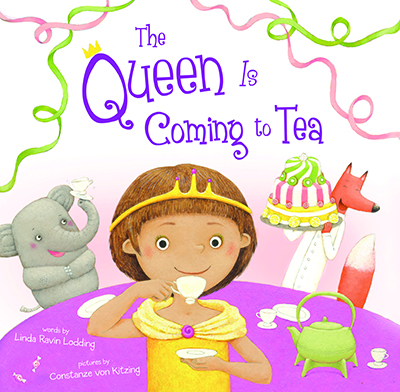
The Queen is Coming to Tea by Linda Ravin Lodding, is a sweet book that children who love to play at tea parties will adore. My girls love to grab a blanket, turning it into a royal cloak and lay out all their cuddly friends for tea parties. As such, they loved this story about a little girl travelling around the world to gather essential items for the Queen’s tea.
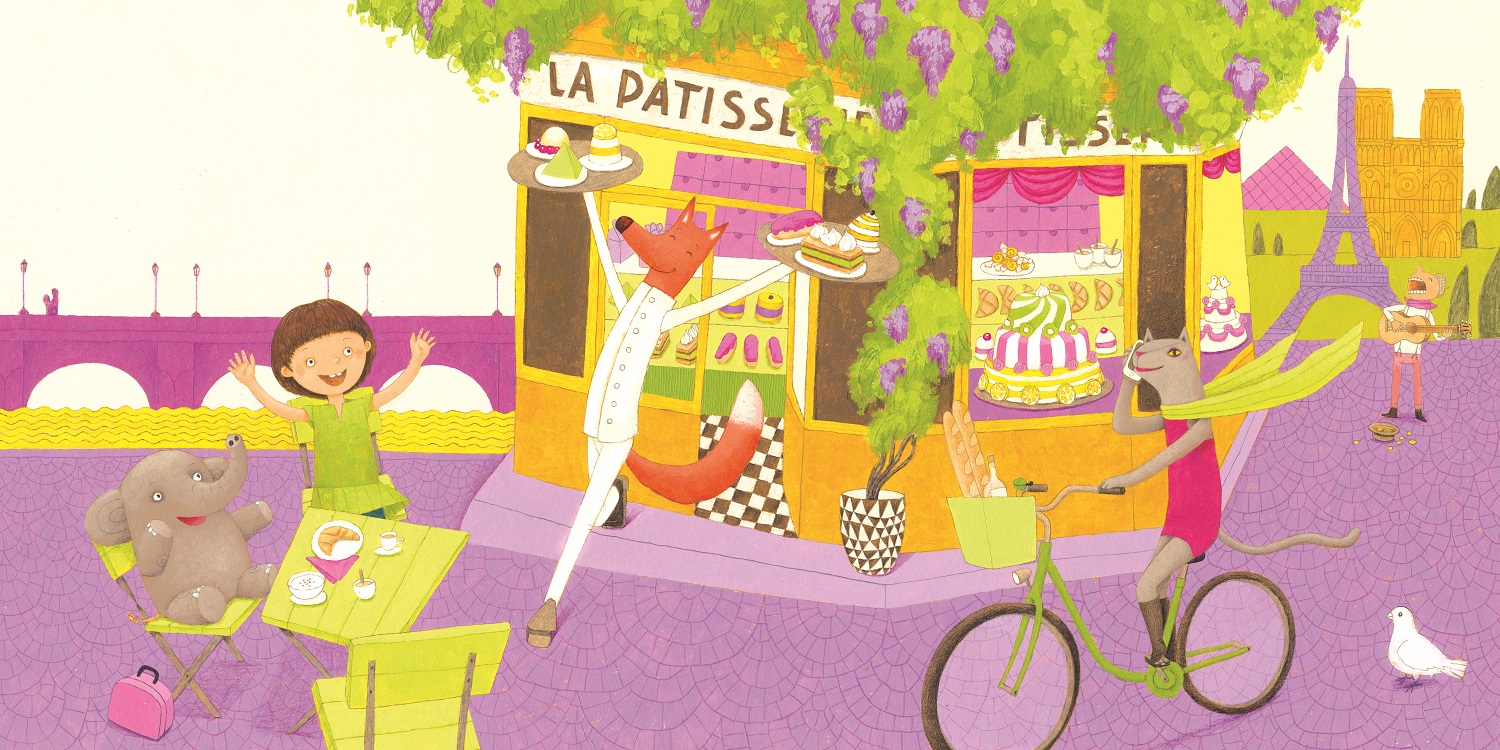
Ellie finds out the Queen is coming to tea and with her best friend, Langley the Elephant, travels to Paris, China, Italy, and New York to make sure they have everything they need for tea with the Queen. But will the Queen patiently wait? And what exactly will be waiting for the Queen?
I love the bright colourful illustrations by Constance Von Kitzing, but they may be a little too pink for some boys to enjoy. The illustration of Ellie’s playroom gives clues as to where Ellie’s ideas about gathering items from around the world came from. I liked this insight into the child’s imagination.
The Queen is Coming to Tea would be a great book to read aloud and inspire play and learning.
You could..
Bake cakes, or traditional British teatime treats like scones, biscuits and cucumber sandwiches and prepare a tea party or picnic.
Watch footage of real royal events like the Queen’s coronation or a royal wedding and plan your own pretend street party. You could make flags and bunting, make posters or invitations, play games or have races and dance to music.
Taste or smell different types of tea. Which country do they come from? Which is your favourite? How do the leaves turn into a drink? investigate with loose leaf tea, tea bags, warm water and tea strainers.
Make a graph or tally chart of the children’s favourite types of tea.
Could you make tea from herbs or leaves you find in your garden? These could be real or pretend.
Give the children tulle, paper and plastic bags and scraps of material. Can they design an outfit fit for tea with the Queen.
Are there any people from your community who have been invited to tea with the Queen? Perhaps recipients of MBE’s or OBE’s. Invite them to come and talk to the children.
Further investigate some of the places featured in the story – perhaps some of the children have visited them.
Practice squeezing lemons or perhaps try this fruit tea recipe
Peach Mango White Iced Tea RecipeIngredients:
4 Cups Water
3 White Tea Bags
1 Peach
½ Cup Chopped Frozen Mango
1 tbsp sugar plus Sugar to TasteInstructions:
Boil the 6 cups of water; remove from heat
Steep the tea bags about 5 minutes; remove bags and allow tea to cool to room temperature
Add chopped peaches and mango to a mixing bowl and mix with sugar; let fruit soften
Place fruit in pitcher and pour cooled tea on top; add sugar to taste and stir
Giveaway
For a chance to win a copy of The Queen is Coming to Tea and a porcelain tea set enter the giveaway below. The closing date is August 6 2017.


 1. Create your designs inside, away from sunlight and put the paper on cardboard or a tray to help carry it outside.