I used to work with a wonderful teacher who celebrated Holi with the children every year by covering their clothes and throwing powder paint around our art room. It was always a favourite time of the year but we thought him very brave for taking it on indoors.
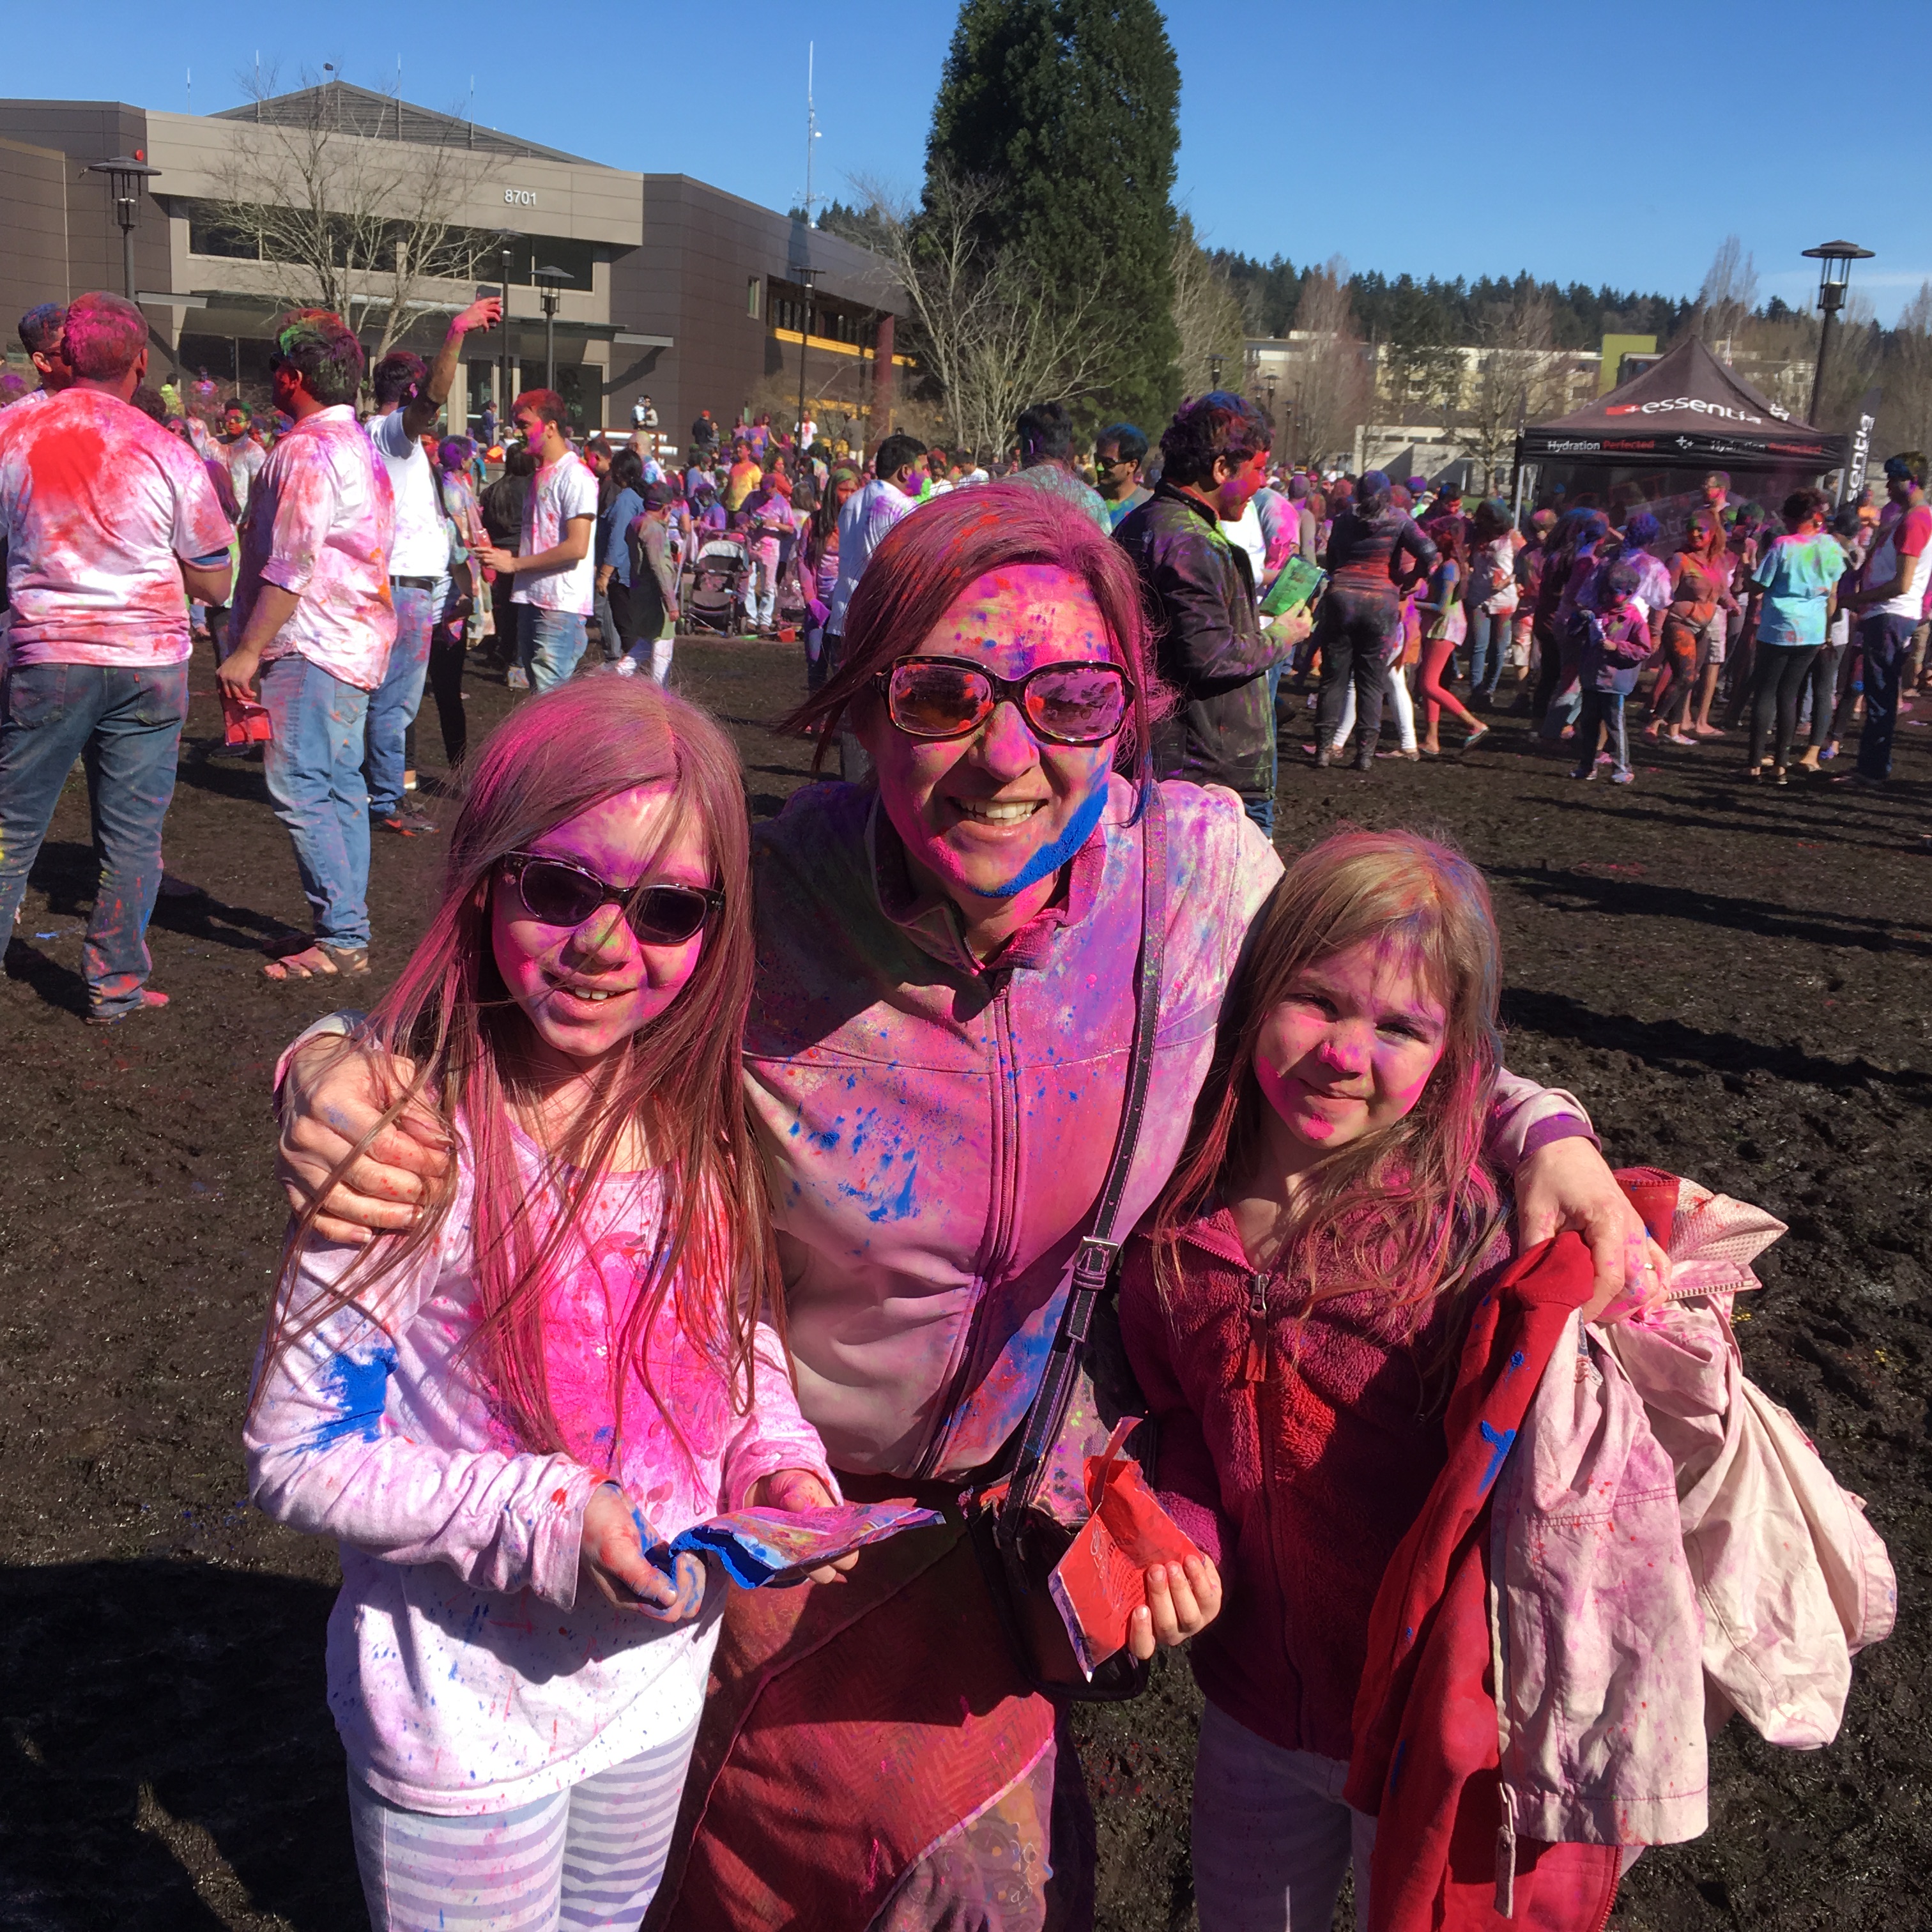
Since then, I’ve always thought my kids would love to be involved in the celebrations. This year I took them to the Festival of Colour at Redmond City Hall. This is how they describe the festival,
The festival does not recognizes any bars of caste, class or creed. Drenched in colors, everybody comes to resemble each other losing their original self. This is the beauty of this festival. Its uniqueness lies in the fact that this festival treats everybody at par, all differences dissolve in the colored water that flows in plenty in it.
Holi calls to put an end to any hard feelings that might have cropped up during the year. People apply color and give each other a friends hug as they greet Holi, the tradition is called, ‘Holi Milan’. It is strongly believed that even enemies turn friend on the day of Holi.
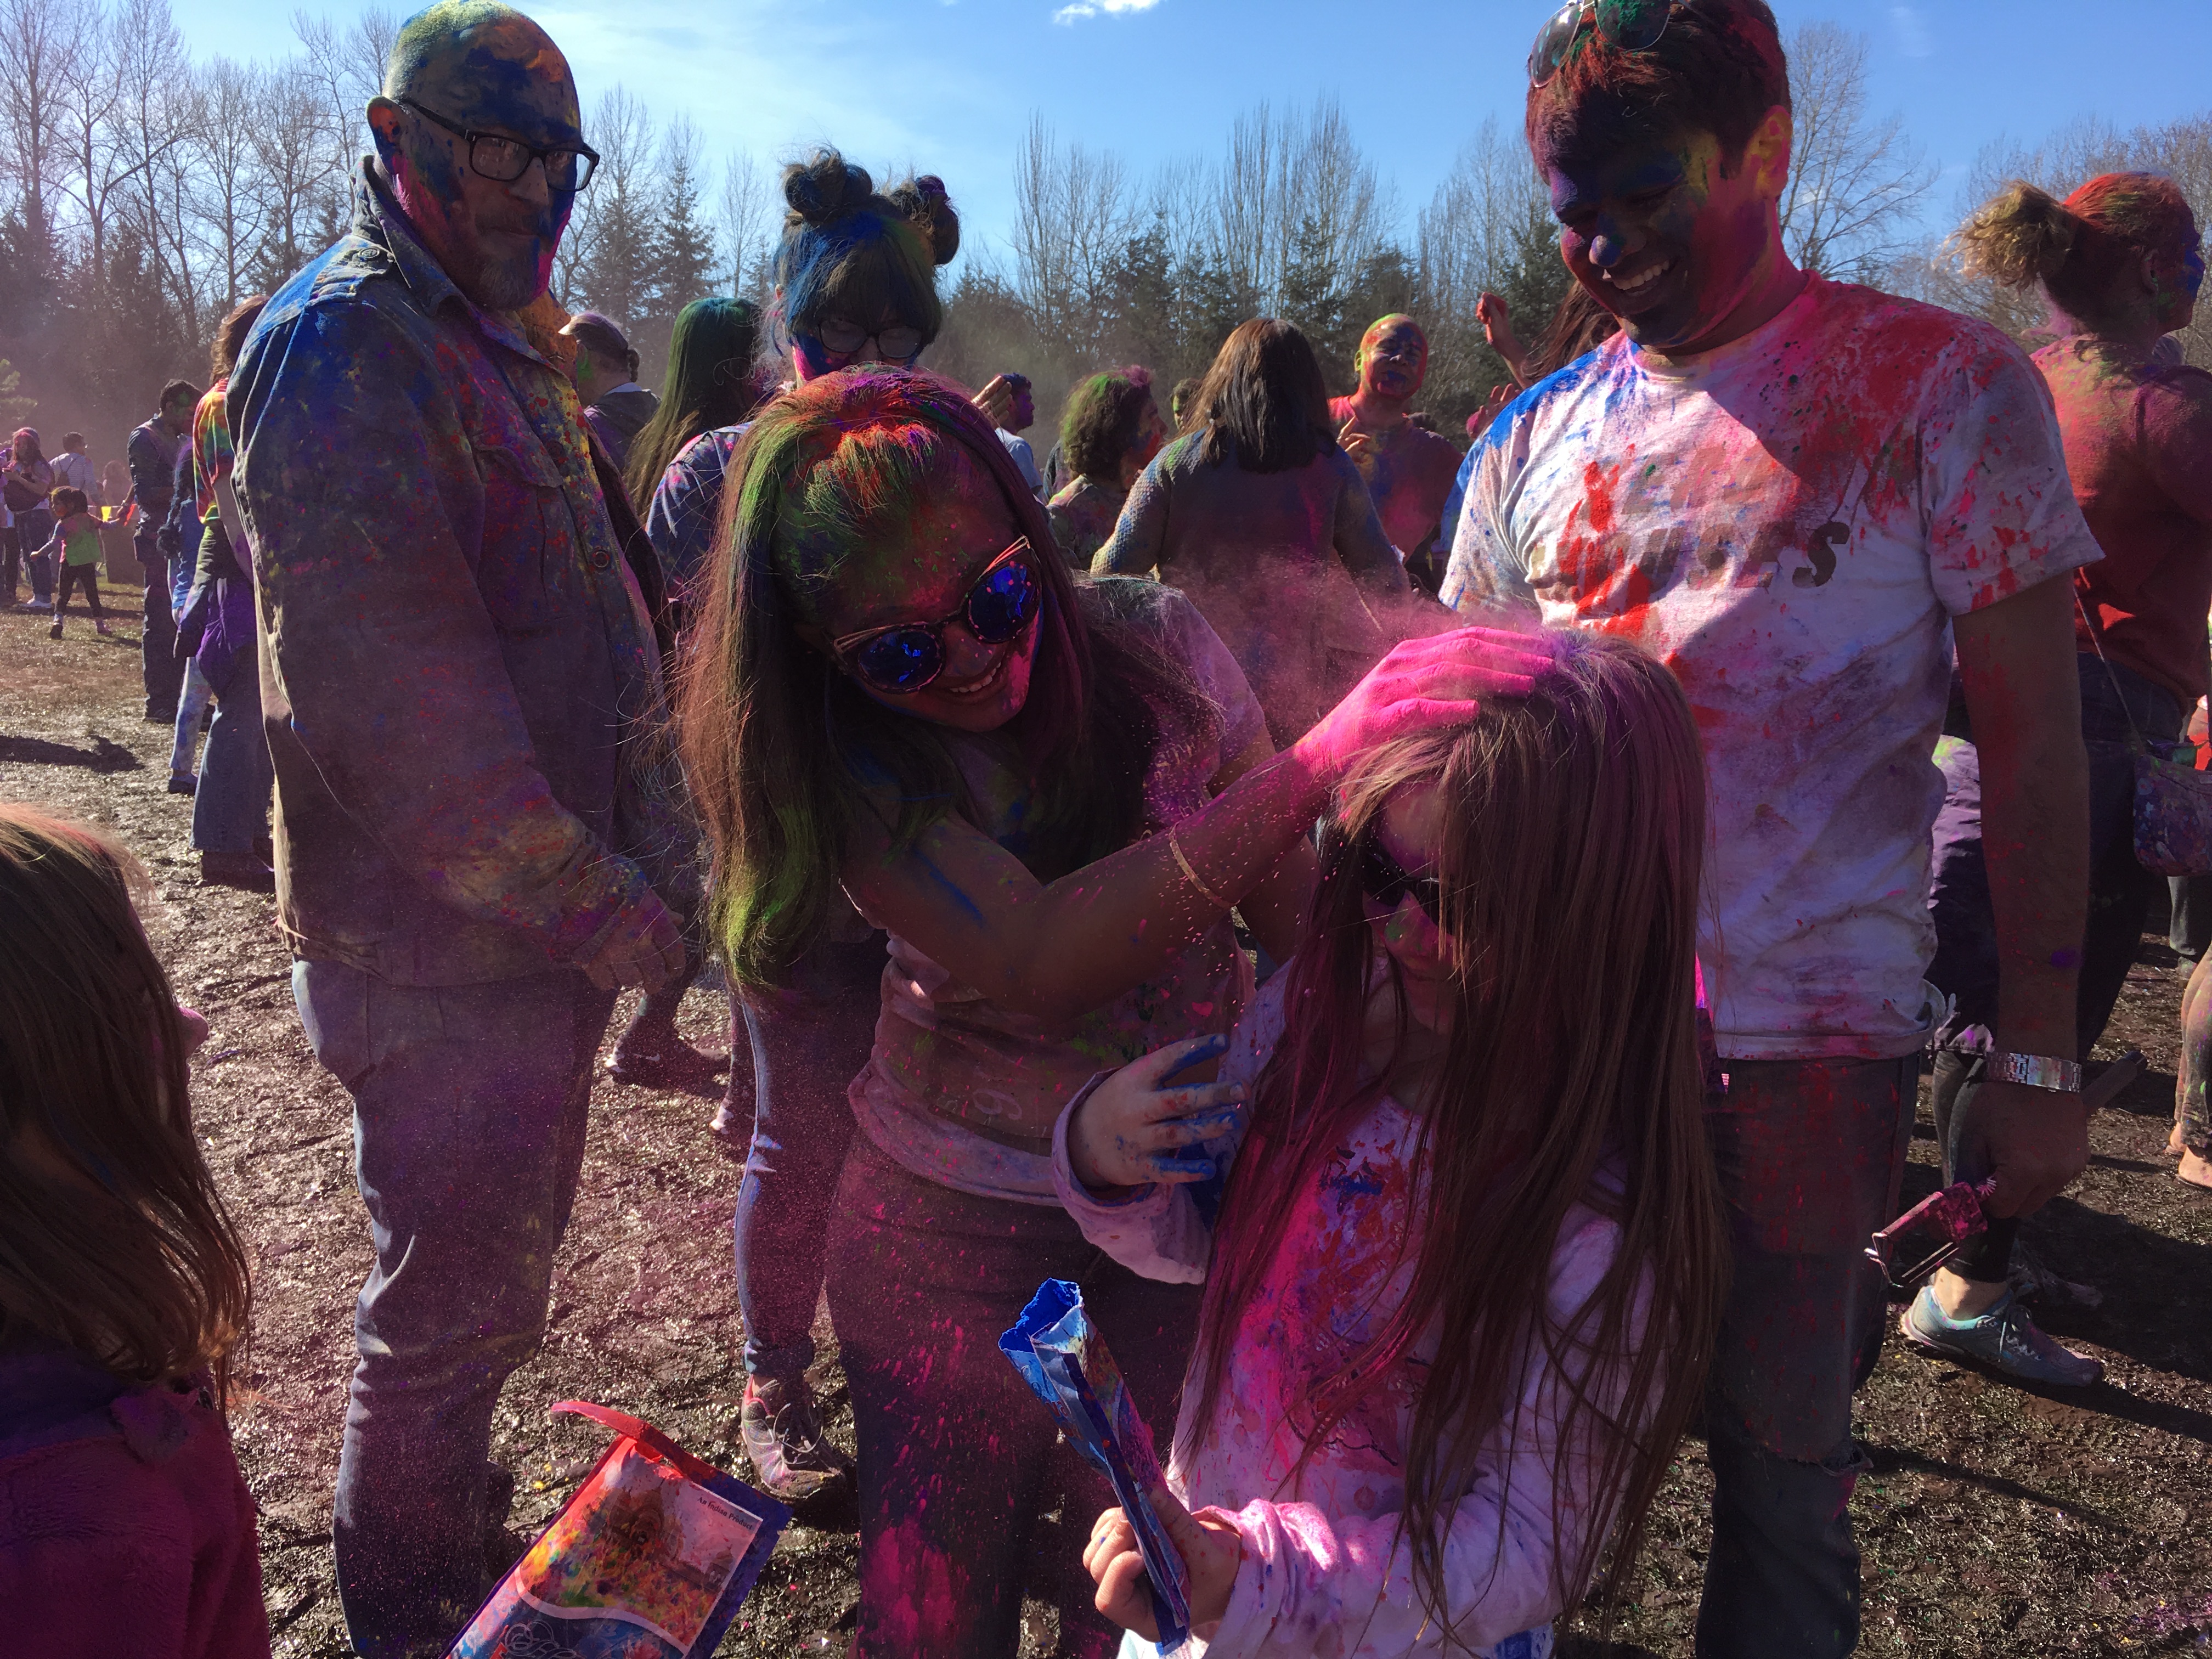
Holi announces the arrival of spring and the passing of winter. The festival breathes an atmosphere of social merriment. People bury their hatchets with a warm embrace and throw their worries to the wind. Every nook and corner presents a colorful sight. Young and old alike are covered with colors (red, green, yellow, blue, black and silver). People in small groups are seen singing, dancing and throwing colors on each other.
Two bags of coloured powder costs $5 on the day and slightly cheaper if you book in advance. Other packages are also available, for those who want additional colours, t-shirts or food. We chose two bags each which was plenty for at least an hour of fun.
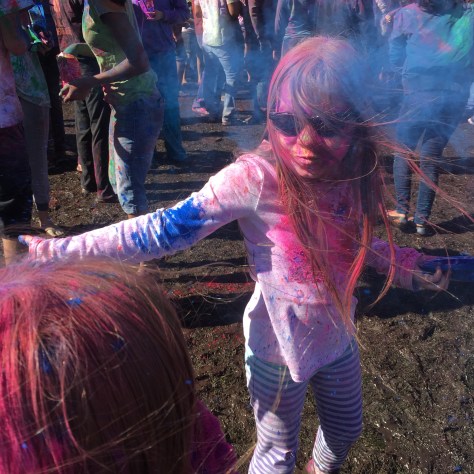
Wading in mud, music and dancing and throwing coloured powder at each other – it was pretty much my kids idea of Heaven. Strangers greeted them with cries of Happy Holi as they daubed colours onto their face.
They competed to see who could get the most colourful hair.
And their favourite part was the countdown.
All topped off with a bit of dancing.
Mess, music, fun and friendship, essential ingredients for the best festivals .
A friend recently gave me a beautiful book about illustrators and the story behind their work.
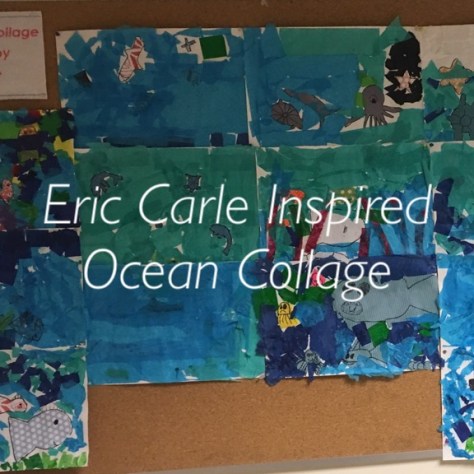
The cover design of Artist to Artist was the inspiration for my art project for 2nd grade. I read the Eric Carle section of the book with interest and looked up videos of Eric Carle explaining how he creates his illustrations.
Materials
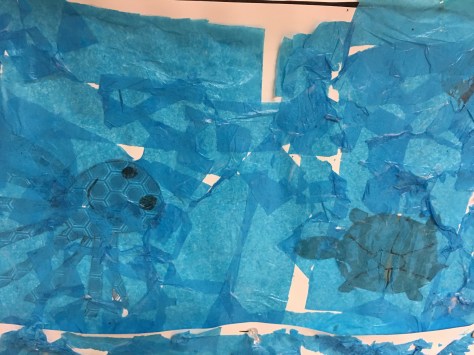
Various shades of blue tissue paper
Scrap book paper
glue and scissors
black sharpie
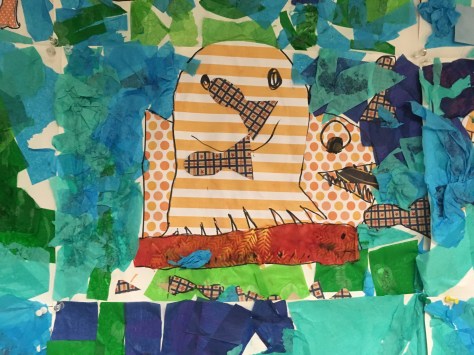
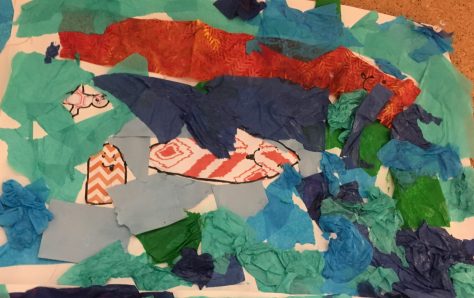
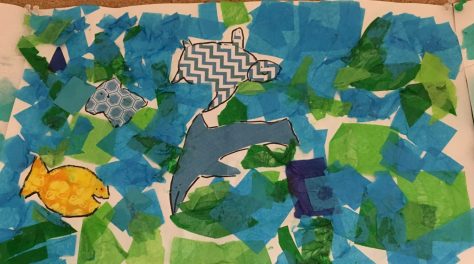
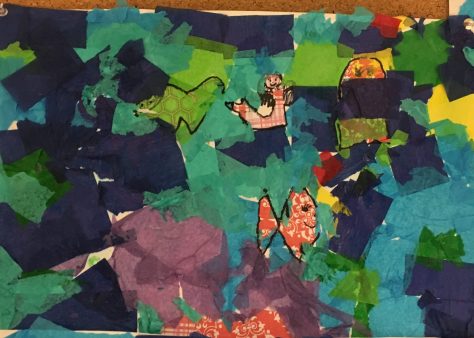
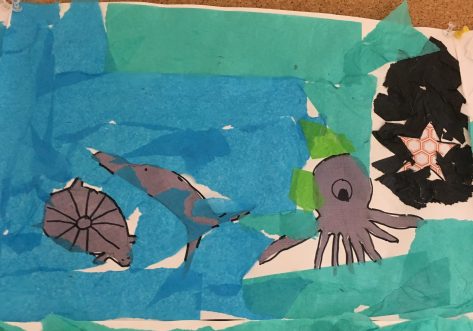
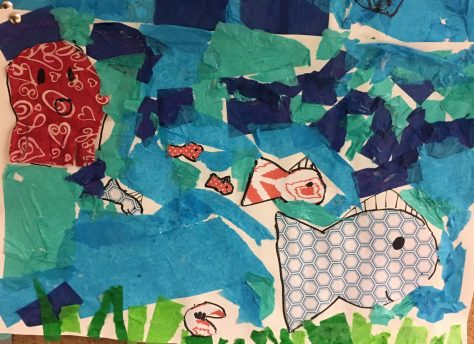
After watching the video with the children, I explained our under the sea themed collage. The children would draw and cut out sea creatures using scrap book paper and then the sea around it (or over the top if they preferred) would be made using a collage of tissue paper.
The children chose their paper , drew sea creatures of their choice, cut them out , drew features with a sharpie and stuck them onto their paper.
Following this the children added different colours of tissue by tearing it into strips or small pieces to make the Ocean. I showed them how they could put a thin layer over their creature to show it was under the sea and give it a shadowy effect or collage around the creatures.
Some children didn’t want to have sea creatures in their picture and instead chose to draw stones or shells.
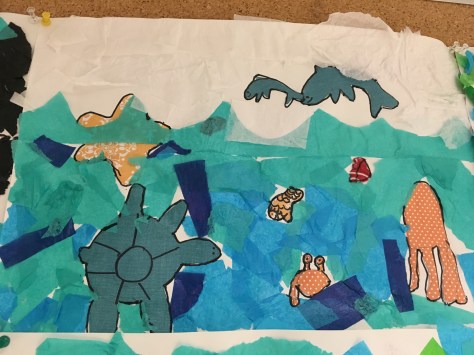
I explained that we would combine the pictures to make a complete under the sea scene. Some had clear ideas as to where their picture should fit into the display. This child for example asked if the dolphins could be jumping out of the ocean and used white tissue to make the foamy waves, her picture was placed at the top.
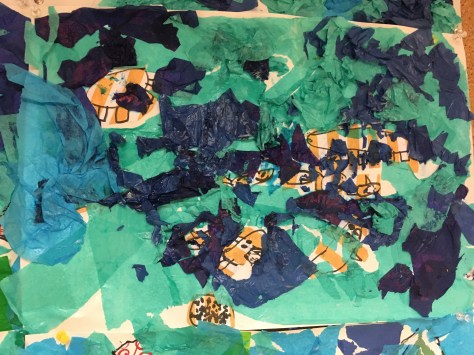
Once the pictures were dry, I coated them with modpodge. This gave them a varnished effect and helped loose bits of tissue to lay flat.
One observation I have made with this class is that often I come away feeling that some children have been so carried away with the process that the finished product feels rushed and very messy. I wish we could have a process session before making a product as I do with Kindergarten . However, my main observation is, even when I feel some children’s projects really will not come together properly, somehow they always do. Every child has a different idea (which I encourage) and somehow they all work in different ways in the end.
And once they were all put together they looked like this.
We have an art walk later in the year. I intend to add a 3-D art project to this piece and hang it, so it looks more complete.
Following my recent post about traditional playground games, by chance I came across this wonderful collection from the British Library. For a play enthusiast like me, it equates to giving my kids free rein with the pick n’ mix.
The collection includes over 100 video and audio clips of children’s play, articles and video about the history of play and how it translates to modern times and teaching resources for KS1 and 2 (elementary age).
The Playtimes website is part of a wider research project entitled Children’s Games and Songs in the New Media Age. The project sought to preserve play traditions and investigate how these types of play continue to be used in the modern age. The project digitised the Opie collection of games and songs created in the late 1960’s through to the early 1980’s, capturing the games and songs of children across the UK. The majority of the recordings were made by Iona Opie as she travelled the country recording in playgrounds and schools, estates and parks. These visits were often unplanned and Iona described how she would simply wind down her car window and ‘follow the sound of children playing’. The project also carried out a two-year study of children’s playground culture today.
Many of the videos are narrated by Michael Rosen and others are animations created by schoolchildren.
I’m fascinated by traditional games and their rhythmic quality so I have ordered Opie’s books of rhymes and games and some of her research findings to learn more. What a treasure trove!
Click on image for link for US readers. Click on image for link for UK readers
I absolutely love this one. Pepper visits a dress-maker who is making her a dress for a special occasion. Pepper can’t decide which pattern she should choose for the fabric, so the dressmaker shows her different patterns, explaining their origins and meanings. Julie Kraulis’ illustrations are adorable; delicately drawn with a simple colour pallet of blue, white and red. The patterns form the background to the illustrations as they are explained in the text, merging text and illustration beautifully. This would make a wonderful read-aloud story to introduce pattern to young children. I learned a lot! Available for pre-order, release date 1st August 2017.
Further Activities
1. Bring in different fabrics – can the children identify any of the patterns in the story? Are there any other patterns? Do all patterns have names? Make a matching or sorting game.
2. Ask the children to create their own pattern (limit the colours so they focus on the pattern element). What do you call your pattern and why?
3. Creative writing : what is the story behind your pattern – this could be done orally for pre-writers.
4. Discover fashion designers, look at sketches and photographs of fashion shows. Create designs from pieces of material and scrap materials and role-play a fashion show.
5. Investigate how textiles are made both in modern times and in the past – visit a mill or find a visitor who can spin wool.
6. Practice cutting out pieces for a pattern, laying them on fabric and drawing and cutting around them. Perhaps try sewing the pieces together with small groups of children or cut them in paper and see if the children can piece them together with tape to make a garment.
Different? Same! by Heather Tekavec illustrated by Pippa Curnick
This non-fiction title, highlights differences between animals and then asks the reader to stop and think about how they might be the same. The simple repetitive pattern of the text encourages children to look closely at the animals and predict their similarities, before it is announced in the text. This makes it a lovely interactive book to share with young children. The illustrations are bright and bold. At the end of the book, you will find additional activities and further descriptions of the animals featured in the book.
Available for Pre-order: Publication date 2nd May 2017.
Further Activities
Sort other things into same and different groups e.g. fruit and vegetables, transport, natural materials, household objects.
How are you the same as other children in your class/family? How are you different?
Play a guessing game – show four objects and work out how they relate to one another.
Explore animal skins, shells and /or feathers or choose two objects of the same category and describe them orally for young children and in writing for older children.
Where Will I Live by Rosemary McCarney
Click on image for link for US readers
Click on image for link for UK readers
This powerful photo-based picture book for young readers, written by Rosemary McCarney, Canada’s Ambassador to the United Nations, tells the story of the hundreds of thousands of children around the world who have been forced to flee their homes due to war and terror. The photographs are stunning, and depict the hardships these children face and their resilience without being disturbing to young children. The text and photographs work together to explain the plight of refuges to young children in a completely age appropriate manner. A perfect book for introducing a difficult topic to young children.
Available for pre-order: publication date 4th April 2017.
Future activities for this one will undoubtedly arise from the children’s questions.
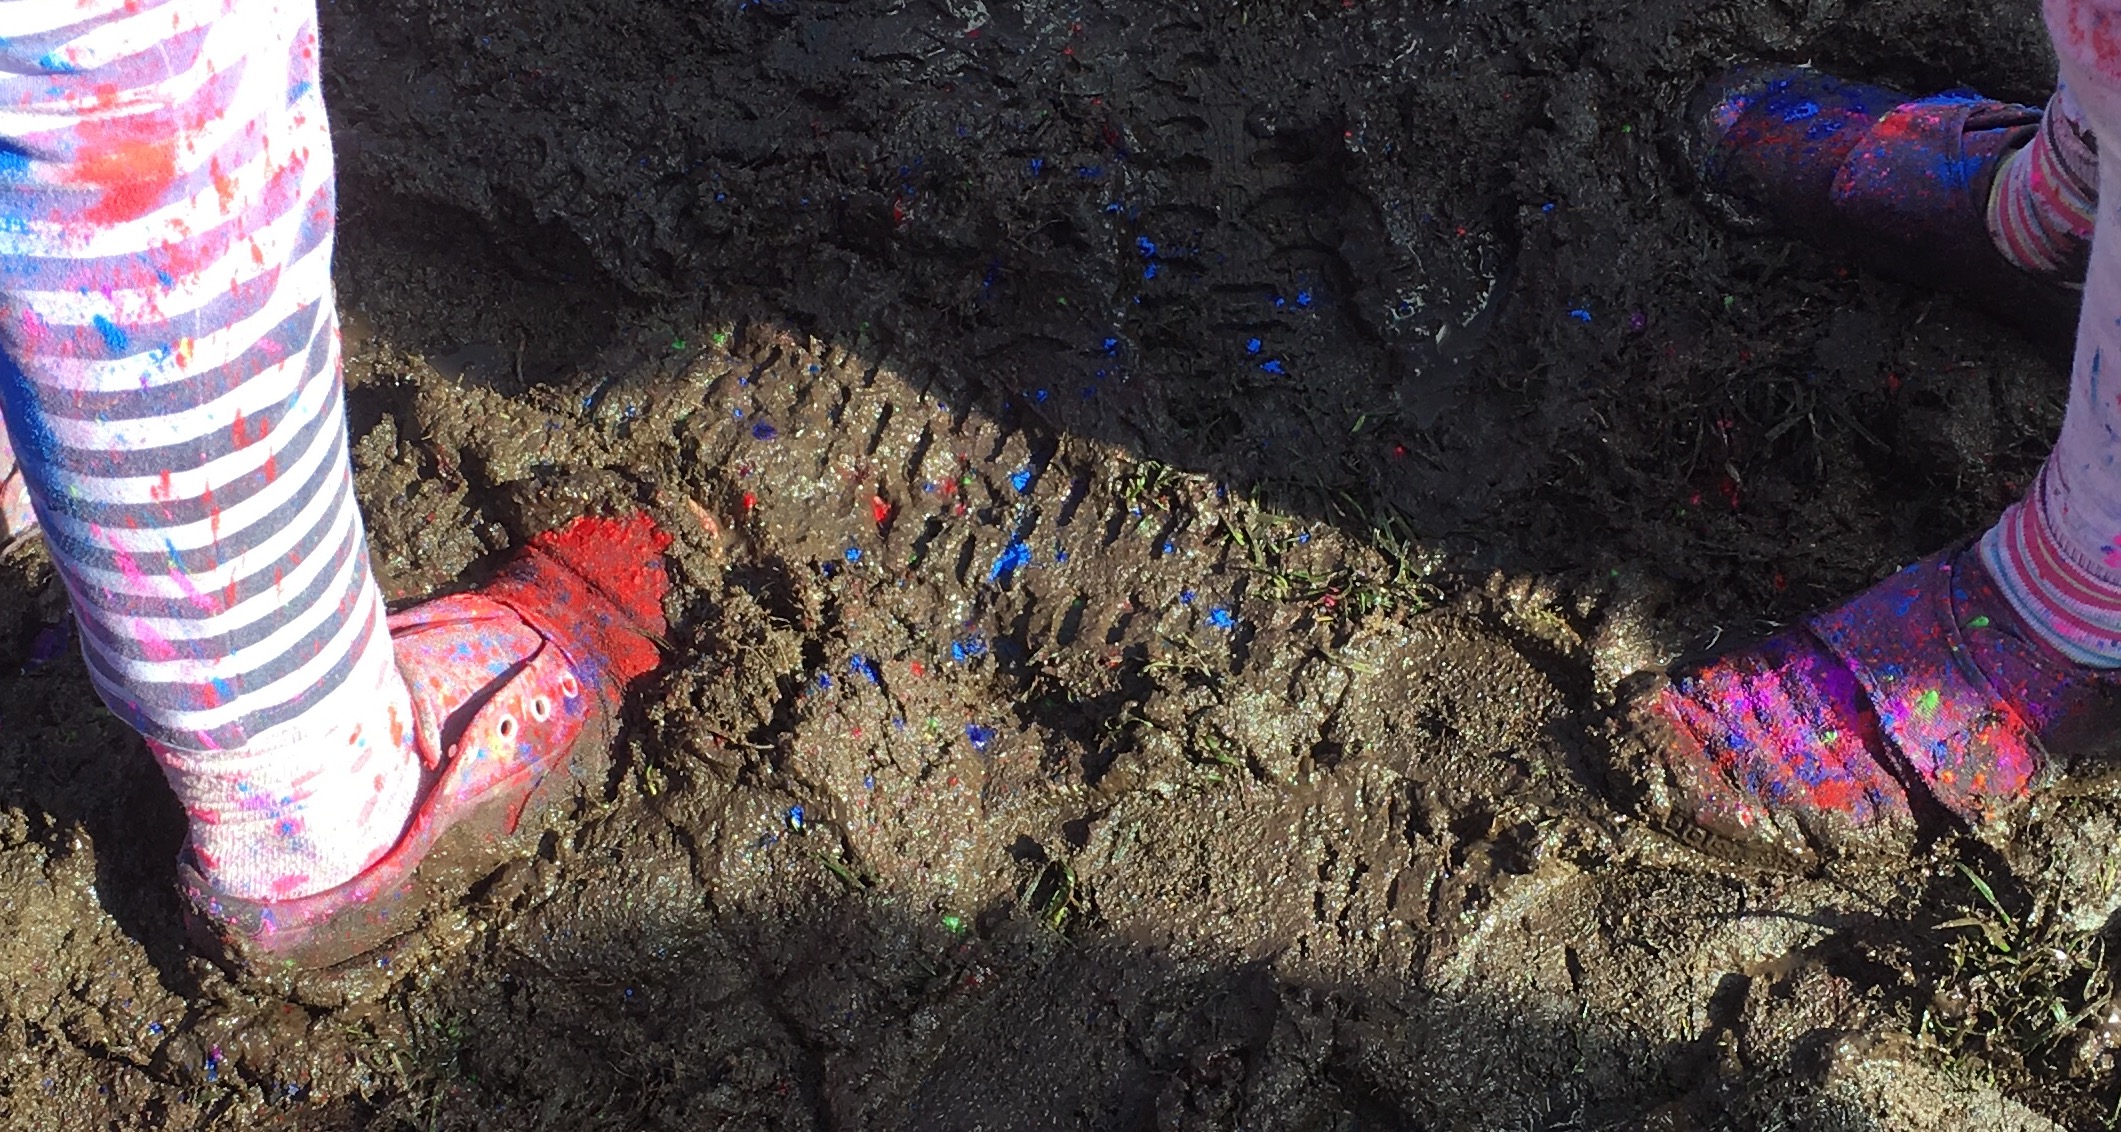
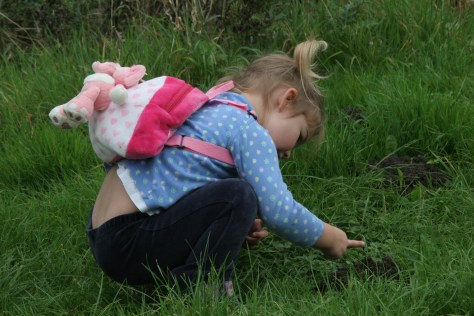
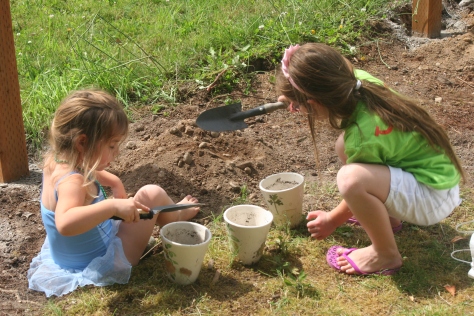
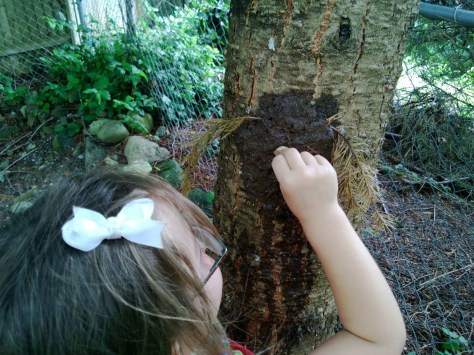
I’ve never been able to avoid playing in dirt with my kids, nor have I ever wanted to. From the youngest age the girls would pick up small stones from the ground or carry sticks. I would walk the dogs at the local park and my daughter would gravitate towards a dirt patch and spend the whole time absorbed with the dusty dry mud. At other times, she would stop at every mole hill in the meadow, exploring it with her fingers.
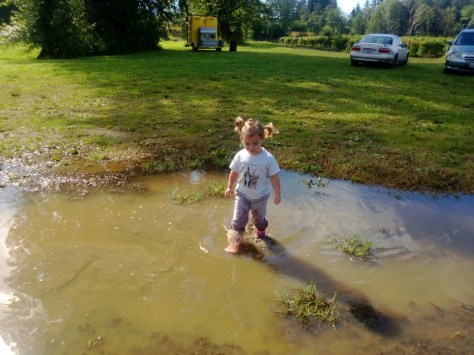
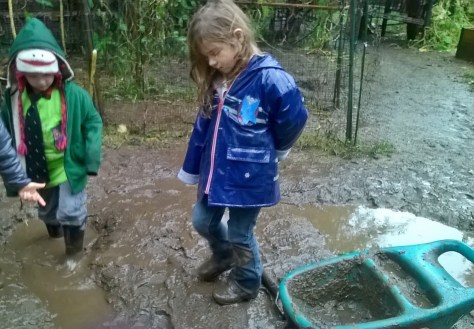
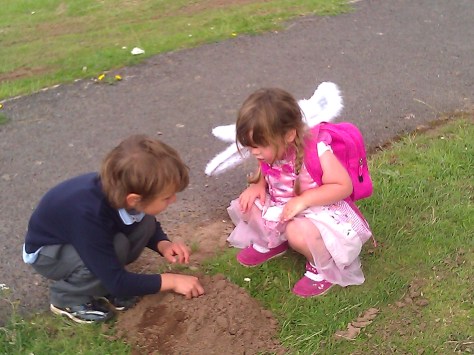
As for muddy puddles – regardless of footwear they are just too tempting to resist.
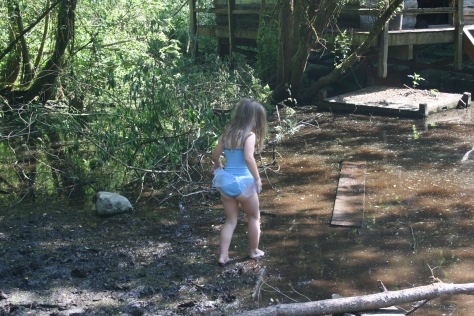
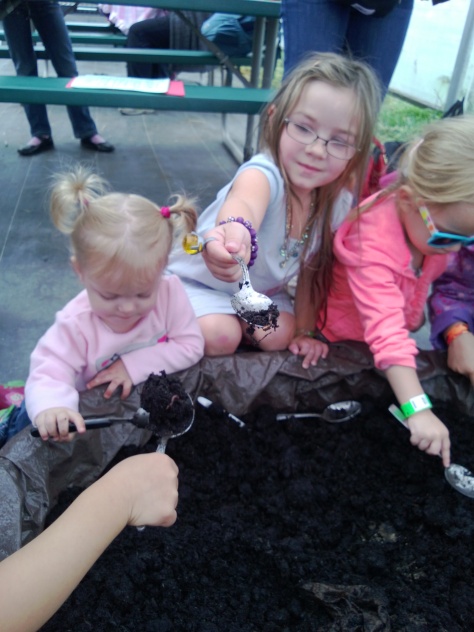
I was very lucky to find a preschool for my youngest that embraces mud play.
The swamp
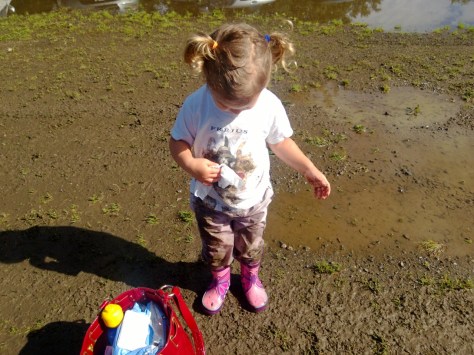
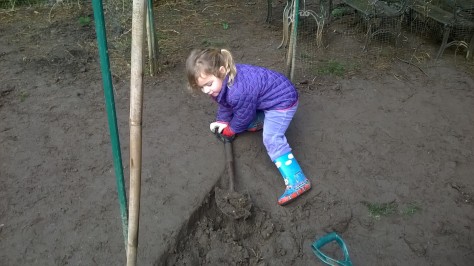
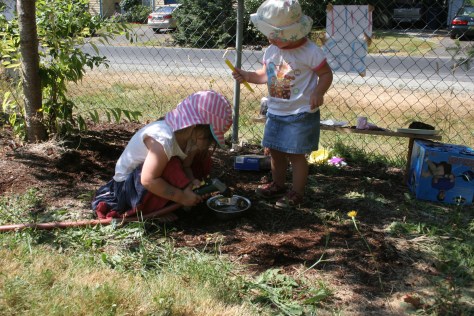
The mud patch – building rivers and streams
If you can’t enjoy getting dirty when you are a child then when can you?
I want it to have hair like mine.digging for worms
Mud play isn’t just fun, it is also great for children’s health and development. Check out my article in Parentmap to find out more.
Four years ago, all of our worldly goods were packed onto a container to make the journey to our new home in the US. We wouldn’t see them again for 10 weeks.
The children packed a small case each with colouring pencils, paper, a few books and a cuddly toy. They were without any other toys for the whole of the summer.
This was an amazing opportunity to be creative with things around the house. We decorated pistachio nut shells, made pictures with coffee filters, built a mud kitchen and hosted our own Children’s Olympics. In some ways I wished it could be like this all of the time and once the toys arrived I was selective about what I unpacked.
The most popular activity however, was learning playground games from my childhood. I explained how I didn’t have equipment or toys in my school playground, when I was a child. We played our own games, which we would also play in the street at home. I am very conscious that if we don’t pass games down to our children they may be lost forever and I’m glad that our lack of toys gave me an opportunity to resurrect them.
There has been concern for some time that children no longer play outside. The good old Seattle or British weather doesn’t help. Couple this with the constant lure of TV and electronic media and it can be hard to get kids outdoors. Teaching them a new game was a great way to get my children outdoors and they often ask me to teach them more. I really must make a point of doing that now that they are a little older.
One of my play sessions for pre-schoolers involved teaching them simple games, like What’s the time Mr Wolf?, Please Mr Crocodile and the Bean Game. I was surprised at how many were new to local families. After seeing how much my children enjoyed traditional games I was intrigued to see if any other parents remembered games from their childhood, most didn’t.
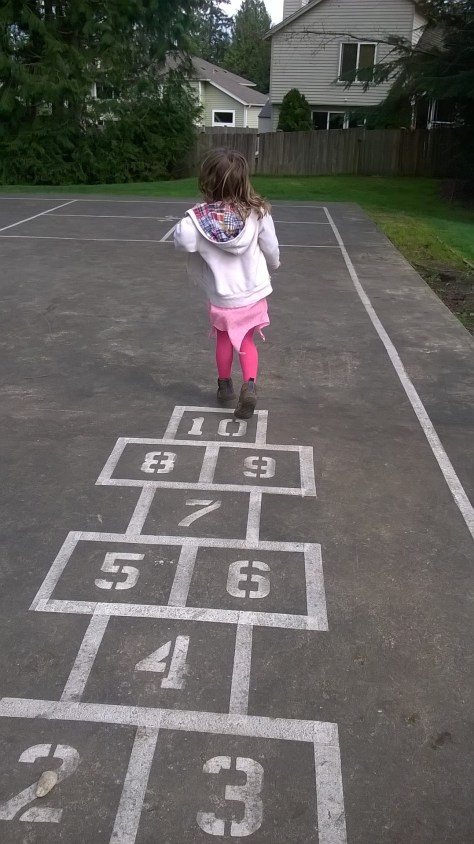
We played some of the more popular games; hopscotch on the driveway, skipping rhymes, What’s the time Mr Wolf but also some less well known games.
Polo
Polo
This was my kids’ favourite.
One child is it and stands at one end of the garden (as kids we used to play it in the road and run to the other side of the street).
They call out a category to the other players on the other side of the garden such as animals or colours.
Each player quietly chooses something from that category and a nominated player calls them out – let’s say dog, pig and cow.
The player who is it chooses one, e.g. ’dog’ and the player who is‘ dog ‘races them across to the other side and back.
The first player back to their place shouts ‘polo’ and is it the next time.
Red Letter
One child is it and the other children stand at the opposite side of the playground.
The person who is it chooses a red letter and tells the players what it is.
She then calls out a letter – the players take one step for each time that letter occurs in their name.
The first player to get to the caller is it the next time.
If the caller calls the red letter, she chases all the players back to the start, if one is caught then they are it.
Ice-cream
The person who is it stands with their back to the other players.
The other players stand on the opposite side of the garden and edge closer to the person who is it.
The person who is it turns around at intervals.
The players freeze when she turns around. If they are caught moving they go back to the start.
If anyone reaches the other side, they touch the person who is it, on the back and shout ice-cream, she then chases the players and if anyone is caught they are it.
Please Mr Crocodile
One player is the crocodile. The other players stand on the opposite side and recite
Please Mr Crocodile May we cross the water, to see the queen’s daughter, who fell in the water, 100 years ago. Which colour must we wear?
The crocodile chooses a colour and any children wearing that colour have to run to the other side without being caught by the crocodile.
If they are caught, they become the crocodile.
I’m sure that there are many other playground games that I have forgotten over time. Many of them will be unique to British childhood so perhaps I should write them in a book to preserve a piece of British heritage for my children.
Pooh Sticks
If we can’t remember the rules to our childhood games then they are in danger of being lost forever. I’d love you to share any games you can remember and if there are any lunch supervisors out there perhaps you could make it a mission to bring traditional games back to the playground.
I have a list of games I’m going to teach to my kids this spring particularly mob, and elastics (we got the elastic from Ikea recently) now that they are old enough to play.
When I first arrived here, I was shocked by the way Valentine’s Day is celebrated at school. Parties and giving little bits of pointless paper to every child in the class seemed completely meaningless to me.
When I was a child we all made a card at school. Some took it home, some gave it anonymously to someone they ‘fancied’ and some gave it to their best friend. Most of the class didn’t get a Valentine, usually one boy and one girl received loads, it didn’t really matter, that’s life.
I do however understand the policy of all or none when giving out these odd tiny Valentines they have here. Nobody wants to be the child who receives nothing. I buy into it because the children want to give, but they ask all kinds of questions.
Why do I have to give something to that person if I don’t really like them?
Can I give something more special to my best friend or will everyone else think it is unfair?
It takes too long to write cards for everyone can’t I just send a few?
Why should I give something to someone if they are horrible to me?
The answer to most of these questions is ‘because school says’, which is always the worst kind of answer in my opinion.
I think there is a better way. Can we spend time talking with children, discussing the issues and then let them decide for themselves?
What would it be like if we could choose who to give Valentine’s to?
Could we make a few really special Valentine’s with thoughtful messages instead of a piece of paper with a name on?
How about if all Valentine’s were anonymous – if we gave a Valentine to the people we care about but we don’t tell them who gave it?
Would that make it more about seeing a smile on someone’s face rather than how great a gift we could give?
How does it feel to be the only child without a Valentine? Think about those people, perhaps you would like to send them one so that they wouldn’t feel left out? (My daughter said she was going to send a card to the girl in her class from learning centre, even though she didn’t know her, because she thought otherwise she might not get any.)
Do you feel that you should send a card to all the class to make it fair? If you do then go ahead.
If we only send to some people what message are we sending? Are we saying you are the most special people in my life or I don’t like these other people?
Valentine’s Day is a celebration of love and friendship. We don’t care about all people equally and that is perfectly normal. Giving to all in my opinion makes it thoughtless. Rather than celebrating how we care for everyone, it degenerates into an automatic exercise that is expected of us. We send cards without sentiment because we have to, not because we care about those people. We can’t write special messages to our friends because that wouldn’t be equitable and to write a long message to the whole class would take too long.
I like the exercises where the children have to think of one good thing to say about each person in the class but even then I have had my child in tears because there are some children she doesn’t really know and can’t think of anything good to say. Even at that level then, it is false sentiment.
I wonder how much this is thought about at school before they decide on an all or nothing policy as a matter of fairness? Is it really fair and can’t we trust our children to show kindness and know right from wrong without imposing our own ideas on them?
I wonder what the children would say if we had these discussions? I think we might be surprised.
Many teachers (myself included in the past) base their planning on weekly, monthly or termly topics. Using topics helps us to come up with ideas, focus the children’s learning, ensure we cover all areas of development and makes planning easier because we can re-use plans from previous years. All of this sounds attractive but there are downsides too.
Topics can lead to a narrow focus of learning that isn’t necessarily relevant to the children.
Topics may have to be changed before the children have explored all the concepts adequately.
Topics are sometimes repeated in the same way, year after year without any consideration for the different dynamics or interests of the group.
Pre-planned topics come from the teachers ideas and don’t take the children’s’ thoughts views and questions into account.
If we follow a topic, we may miss a rich learning opportunity because it doesn’t fit in with our theme or topic.
There are ways we can improve this while still maintaining topics and themes.
Don’t plan topics too far ahead. Rather than having firm topics set for the year, review them on a monthly or weekly basis and adjust them in line with the children’s interests.
Choose topics that are very open-ended and can encompass many aspects of learning for example, water, questions, stories or movement. The book First Hand Experiences: What Matters to Children has some great suggestions for selecting topics from the real world.
Some settings decide to follow a child centred or emergent curriculum where children are co-constructors in the learning process. Projects are not pre-determined by the teacher but instead they are chosen based on the children’s interests.
Planning from the children’s interests can be difficult to begin with if you are used to following a topic based approach. Below are some common questions and misconceptions.
My children don’t know what they want to do next when I ask them? How do I plan for them?
A common misunderstanding is that teachers should ask children what they want to. It is more important to think about what might be driving the children’s learning and using those insights to inform our planning. By all means engage the children in conversations about their interests but asking them directly may not yield useful answers. Rather than asking children what they would like to do, set up open-ended activities and observe children in their play. Watch for patterns or common recurring themes, watch for resources they return to time and again. When interacting with children offer suggestions that might extend their play e.g. I have something that might work really well for that or I wonder what would happen if we tried this?
If I plan at the end of one week to start something new next week how will I have time to get the resources ready?
Theplanning should be anatural progression of what was already occurring, rather than a completely new experience. If the children were enjoying mixing paint colours, give them a new media to explore like a different type of paint, pastels or dough. Provide the children with a challenge e.g how many shades of green can you make or can you match up these shades? Add one small item to their play or ask a different question . There may be times when a completely new interest emerges. Involve the children in the planning process – what do we have that you could use for that? How could we find out more about that?
How on earth can I record my planning to show Ofsted / Head teacher or an inspecting body?
This is probably the most common question. When you are required to record planning how can you make in the moment planning visible?
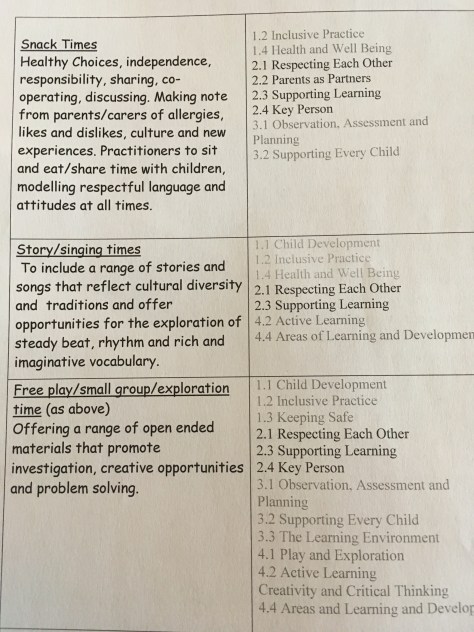
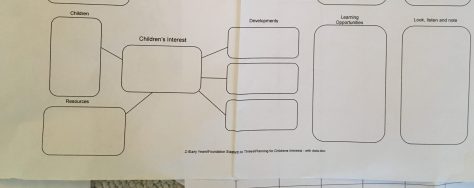
Have a clear long-term plan. This would outline all of the things that you intend to achieve in your setting and your core philosophy. Also include how you will organise your environment and the strategies you will use to support learning. This will be a core document and can be referred to if you are asked how you fulfill particular criteria. Collate the things that happen everyday like snack times, transitions, group reflections and explain how each of these items map to the standards you are following.
This example was mapped to the 2008 EYFS.
2. Medium term planning will use observations to create an overview plan of opportunities for exploring projects and interconnecting themes, based upon the children’s’ genuine interests or explorations. A medium plan might include a list of resources to be collected or a description of some of the key materials within different areas. You may also want to highlight key skills to be developed, for example to use a variety of ways to represent pattern or to co-operate and listen to others ( these will likely come from your observations). These might fit with a project you are following. Daily/weekly schedules could also form a part of your medium term plans and stories or songs you plan to share.
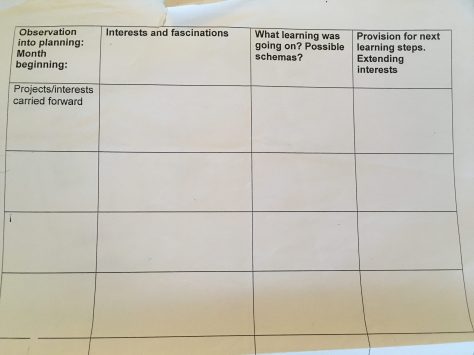
3. Short term planning This is a joint record of what you observe the children doing, their fascinations, questions they are asking, clear patterns of play , an analysis of this data (what learning is taking place? can you identify schemas?) and then using this analysis to determine what will happen next. Often the term next steps will be used. I prefer to break this down into more useful questions –
How might you encourage those interests further?
How could you encourage their interest to be more complex?
How could you bring that interest into other areas of learning/activities?
These plans could be daily or weekly records of what you will provide in the environment and the adults role within it. Keep them simple and flexible so they can be changed and adapted easily.
Think about what you are recording – only record information that is useful for future planning – don’t record for the sake of it.
Examples
Use any format that works for you.
All my children have different interests, how do I plan for all of them?
Sometimes there will be clear group interests but often, children will show an interest in different things. For individuals, watch for patterns in play –
are children following a particular schema?
how do they play,?
what questions are they asking and can these be incorporated into the future planning for the whole group?
Some weeks you may be planning for a particular group of children or developmental milestones for a few individual children. Some children will not display a clear fascination every week. Talking as a team and documenting learning will help you to reflect on learning and decide on next steps. Don’t overcomplicate things. If there isn’t a clear interest put out exciting materials, follow something seasonal, share an interesting book, observe children in free play or talk to parents to develop ideas.
My children love Pirates/Fairies/Star Wars what ideas do you have to support those themes?
Don’t assume that the idea the children appear to be interested in is necessarily their fascination. Think deeper – what aspect of cars do the children love, is it the motion, is it speed, is it building roads and tracks or do they like them to be transported from one place or another? Watch and listen over a period of time before organising complex and sometimes expensive resources to support a theme.
If I always plan from interests how can I make sure that children are challenged to try new things and cover all areas of the curriculum?
Use the children’s interests to channel them into other activities by linking resources, moving them into different areas or using slowly adding new elements to their existing play. Use small group times to focus on specific skills that children may not choose to demonstrate at other times.
What about small group time?
For small group time the teacher may decide on an area of focus e.g number, rhyme or cutting with scissors. Through recording the children’s progress the next session can be planned according to the children’s skills, needs, questions or next stage of development. This probably won’t be the same for every child.
Turning Planning on its Head
When I was a student teacher we were taught to plan by asking the following questions:-
What will I teach?
Why will I teach it?
How will I teach it?
What resources will I need?
What will I do next?
For child led, in the moment planning, turn these questions on their head.
ALWAYS START WITH THE CHILD
What are the children learning and what do they already know?
Why are the children learning? (interests and fascinations)
How are the children learning?
Which resources/materials do they find motivating?
What is my role as a teacher in extending this learning? What resources can I provide? How should I present them? How could I present this learning in a different context? What questions could I develop further?
Perhaps the most important thing to remember when planning in this way is that the teachers role is not to let children do as they wish. The teachers role is to reflect on how the children learn, to interact with the children and to work as part of a team that shares ideas for the benefit of the children.
I like the analogy of throwing a ball used by Filippini in The Hundred Languages of Children,
We must be able to catch the ball that the children throw us, and toss it back to them in a way that makes the children want to continue the game with us, developing perhaps other games as we go along.
As I see it, the children throw us an idea, we think about it and toss it back to them from a new angle or in a more exciting way and this back and forth continues as we learn and develop together.
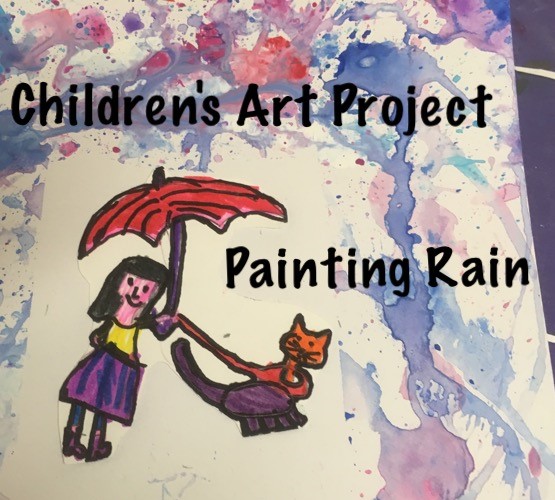
This month we were asked to create something for square one art using the theme of water. Square one art is an annual fundraiser to create an art project that prints onto mugs, key rings etc. Since it rains a lot here, I decided it would be apt to create a rain themed project.
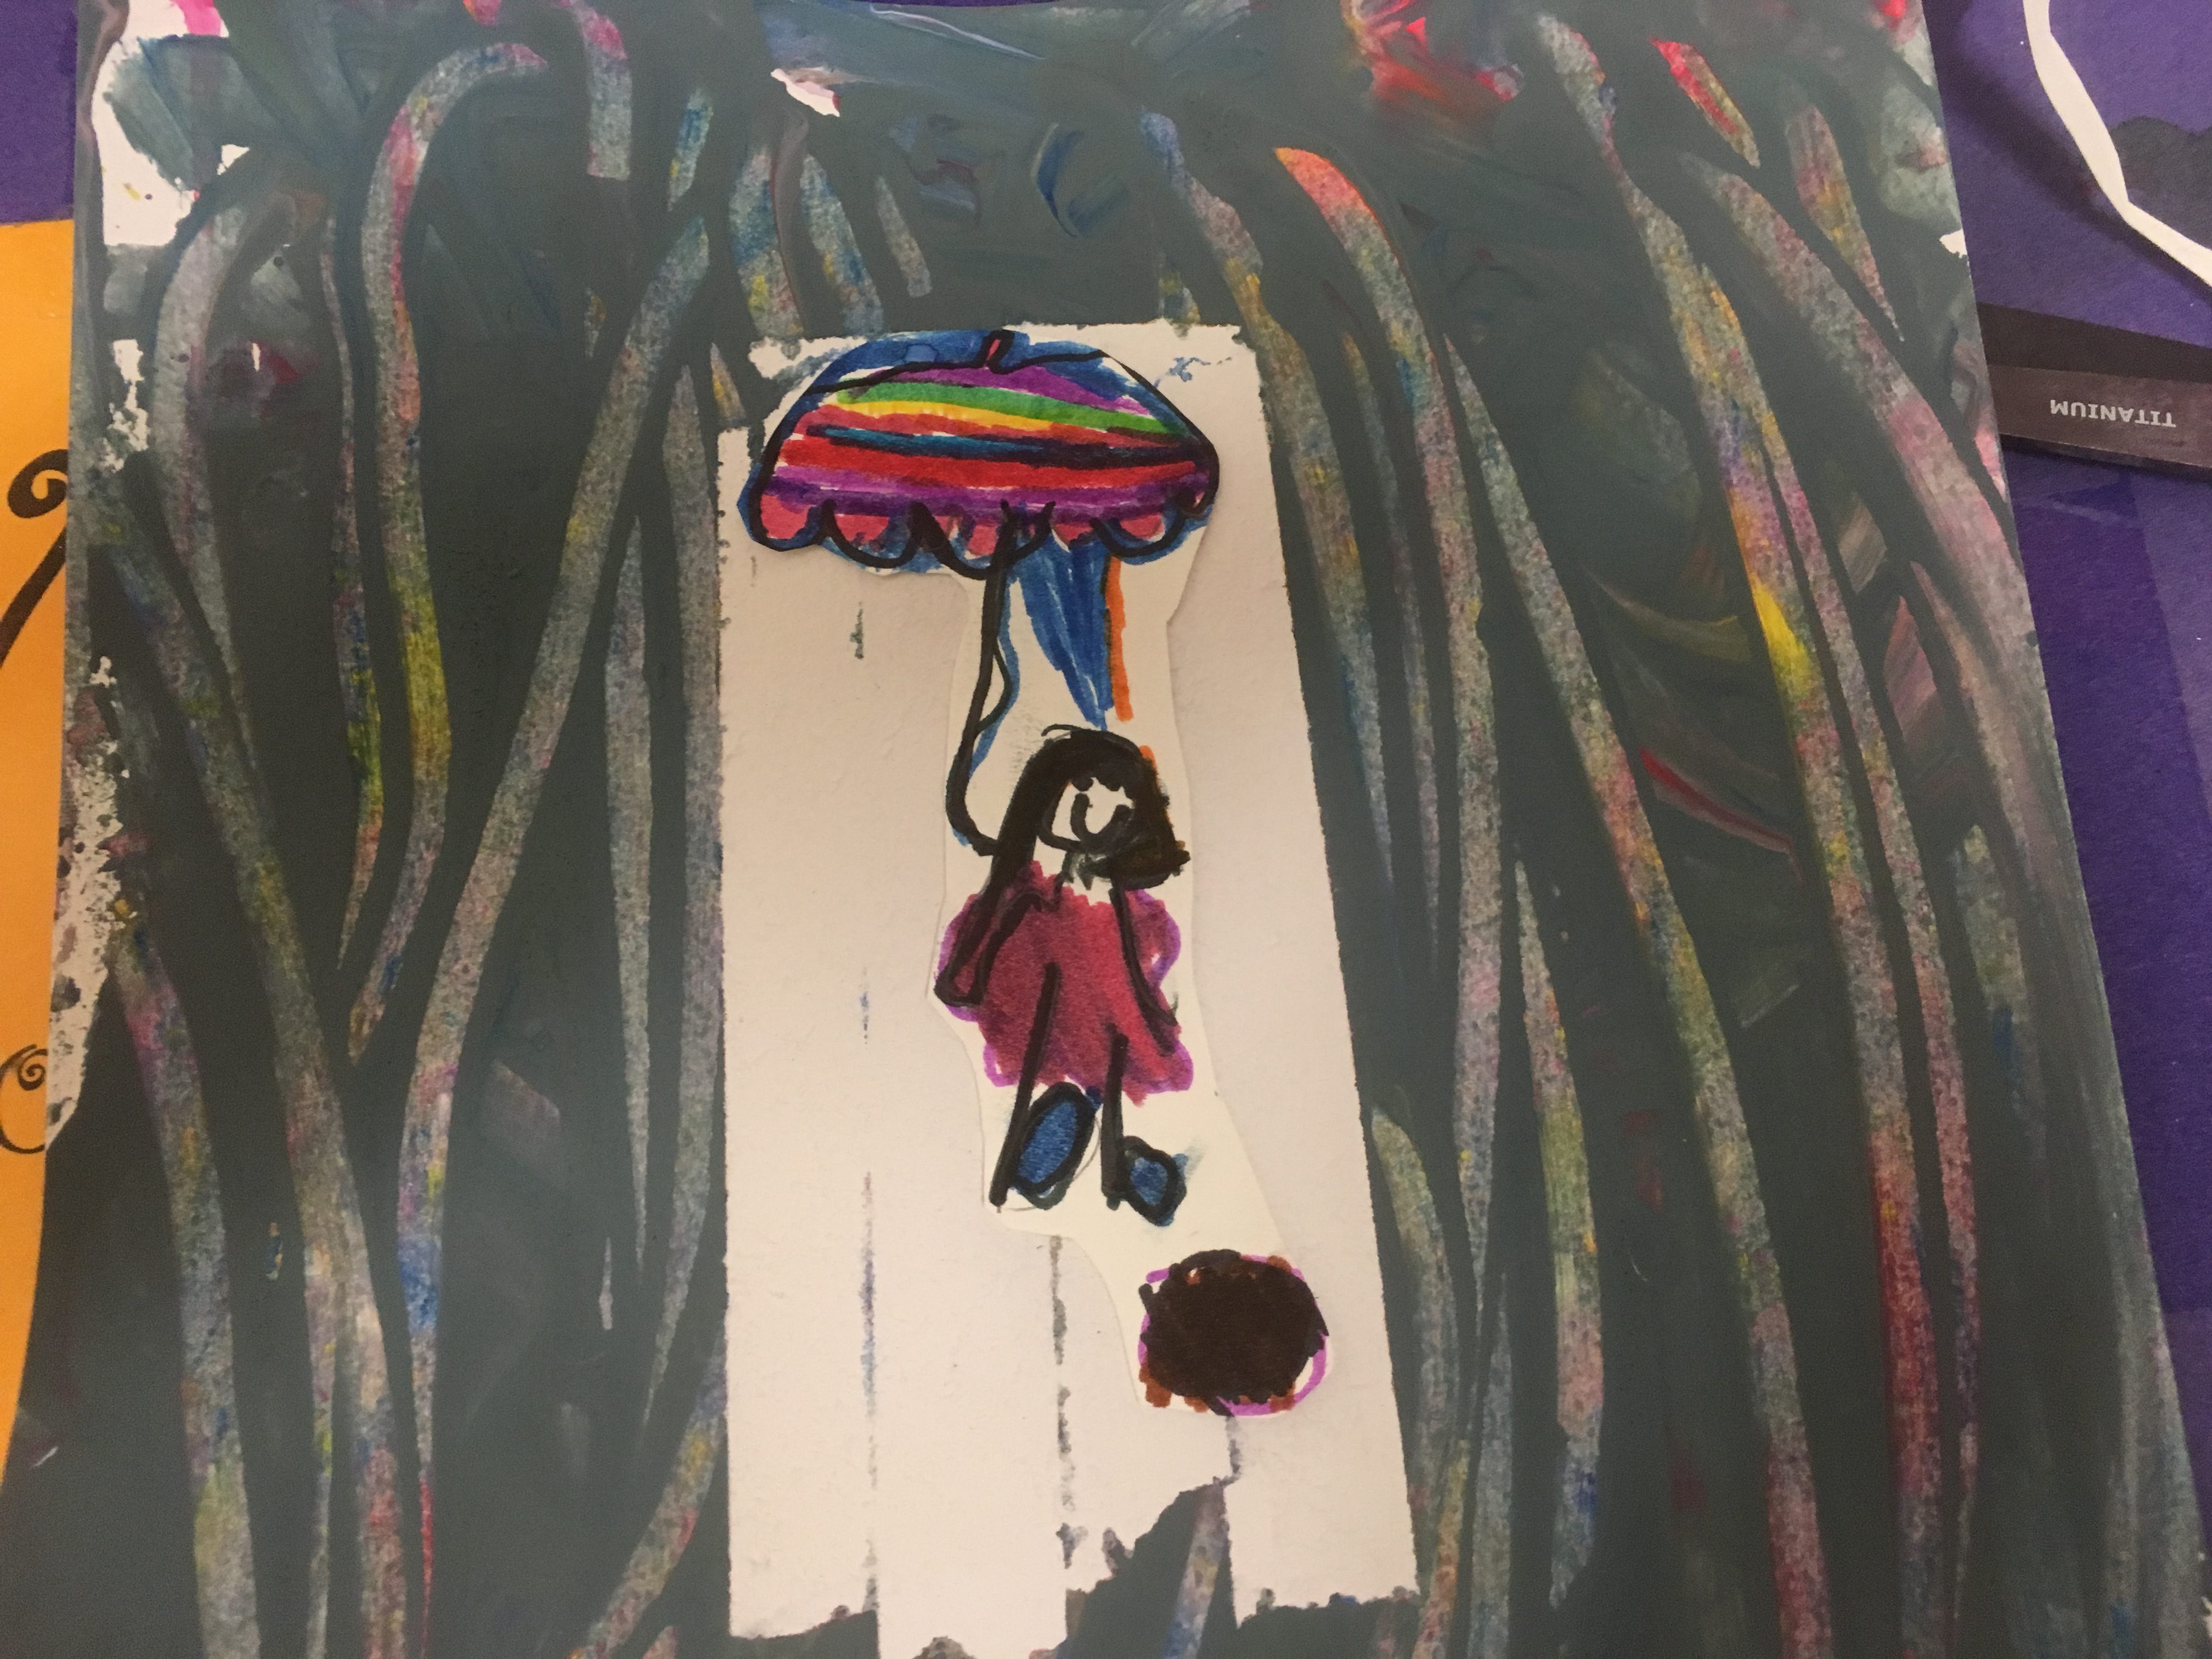
For square one, I always try to make something that is unique to each child and that parents will think is cute enough to persuade them to place an order. With this is mind, I decided to ask the children to draw a picture of themselves under an umbrella. The rain would be painted on top of the picture but the area under the umbrella would remain without any rain by marking it off with masking tape.
I collected images of rain paintings to show the children different ways of painting rain. Some showed rain dripping, others had splashes or fine sprays and some just had a mix of crazy colours in streaks.
I decided to practice rain painting techniques with kindergarten before creating the finished product. When I told my daughter we were painting rain she asked, “But how can you paint rain because rain doesn’t really have a colour? ”
I started the lesson by showing the children pictures of rain paintings. We talked about some of the techniques and I demonstrated how to make paint drip down the page using a paintbrush and using a pipette/dropper. I also showed them how to flick the paintbrush to make a fine mist that looked like a rain shower.
Each child had the following materials:
watercolour paper
a pallet with tempura paint colours
a pot of water
a paintbrush
a dropper
The children went away to practice. They tested different ways to make the paint drip. Some made their paintbrush really wet and then dipped it into the palate.
Some painted a splodge of colour at the top of their paper and then used the dropper to add water to make it drip.
Some found it worked well if they painted splodges all over the paper and then added water with the dropper.
Some used a combination of techniques.
and some did completely their own thing.
When I came to do the project with 2nd Grade, we didn’t have practice time. I decided to water down the tempura paint in advance and give each table pots to share.
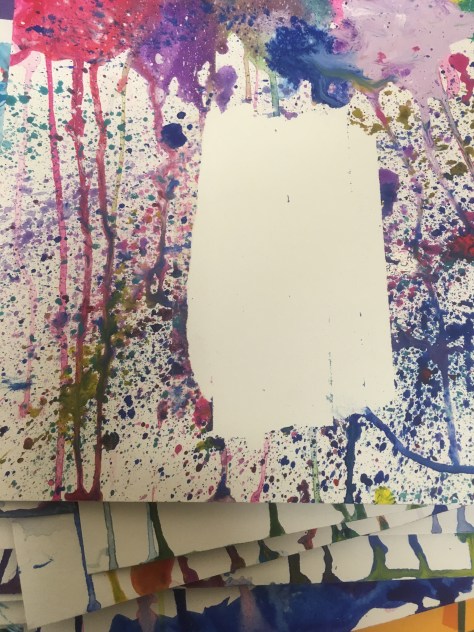
The 2nd graders started by drawing a picture of themselves under an umbrella. I marked out a border so that the drawings wouldn’t be chopped off. I think with hindsight I would also have drawn a square within which the children should fit their pictures as some of them were a bit small. We then taped over the pictures with masking tape and then dripped and splattered paint to make rain. The 2nd graders loved the drippy part as much as the kindergartners and some were a little over zealous.
The next day when I came back to remove the tape from the dry paintings some of them needed to be fixed because the colours from their drawings had bled.
Some I was able to fix myself by re-colouring them but some needed to be painted over with white acrylic and the children coloured them in again or in some instances re-drew the whole picture.
The kindergartners had already drawn their pictures on a small piece of paper. When I prepared their project, I decided to measure the pictures and then place masking tape over an area of the same size. We could then create the rain picture, remove the masking tape when dry and stick on the picture, hopefully avoiding any colour bleeding.
I showed the kindergartners some of the 2nd grade pictures to show how they had chosen to paint rain and how they might be improved. We saw that the paintings needed to have paint all around the masking tape for them to clearly show them sheltering under the umbrella. We also discovered that too much paint sometimes didn’t leave a perfectly clear area; although in some cases this left an interesting effect, like rain dripping from the umbrella.
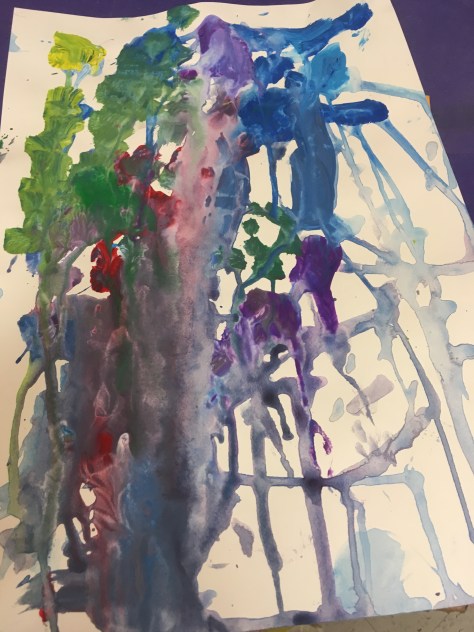
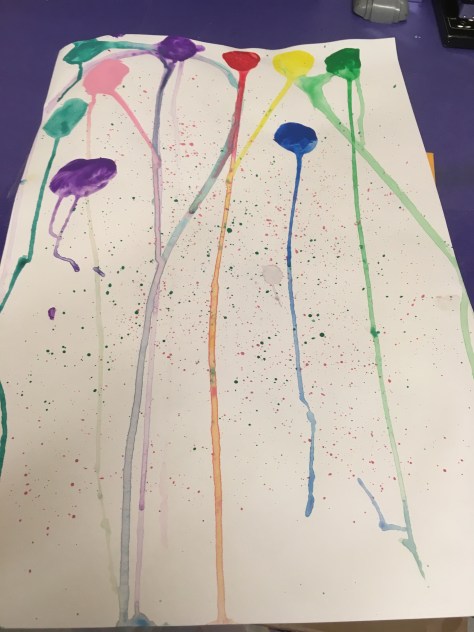
I watered down the paints and showed the children how to put the paint at the top of the paper and let it drip. It was important that they made their brushes really wet before dipping them in the paint as this helped it to drip. Having experimented with painting rain beforehand, the children had clear ideas of how they would like their rain to look. I added a yellow paint to the kindergartners colour choices, the 2nd graders had shades of red, blue and purple. Some children mixed a green shade.
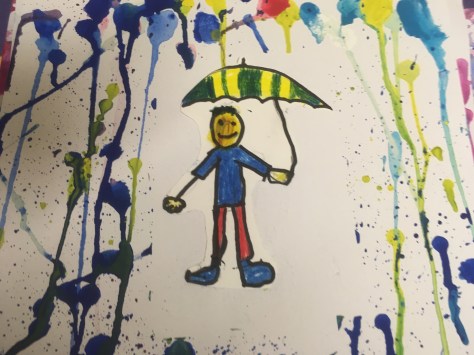
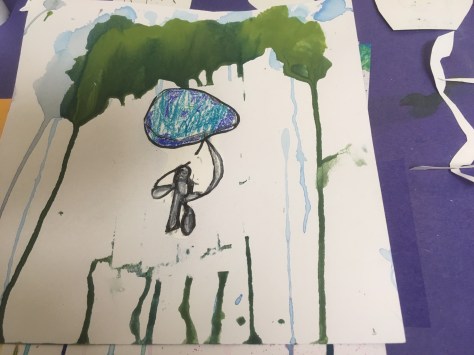
I love this one. It looks like a big gloomy rain cloud above his head.
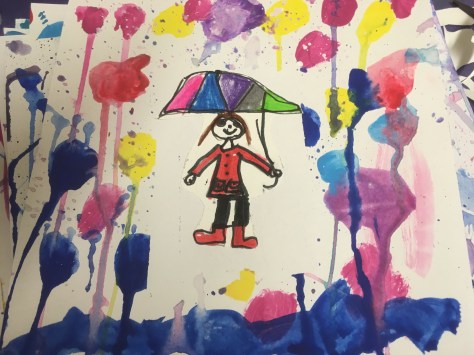
The 2nd grade rain pictures were more experimental as the children explored the materials, whereas the practice session enabled the kindergartners to be more precise and have a clearer picture of the finished product. Each child found their own way to depict rain. Some used all the colours,
Some chose their own colour scheme,
Some used individual dots dripping down,
others spread paint along the top and let it drip.
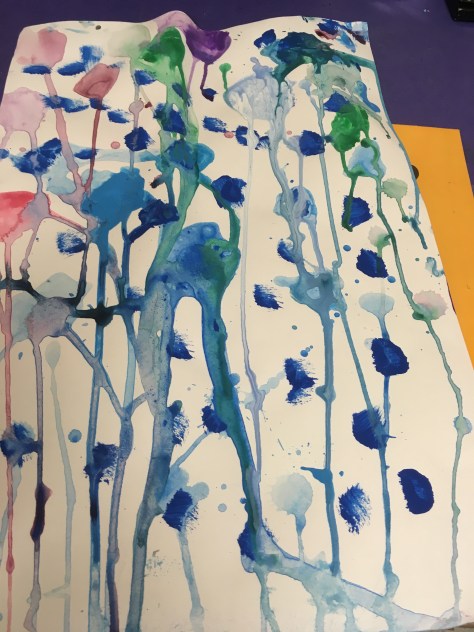
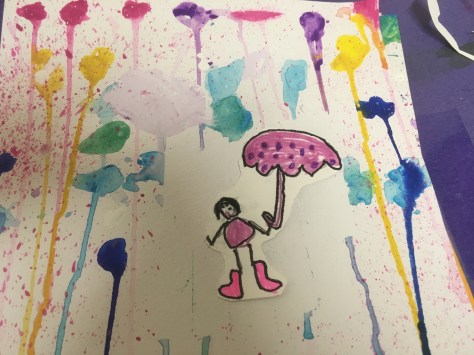
Some added lots of paint splatters by flicking the brush,
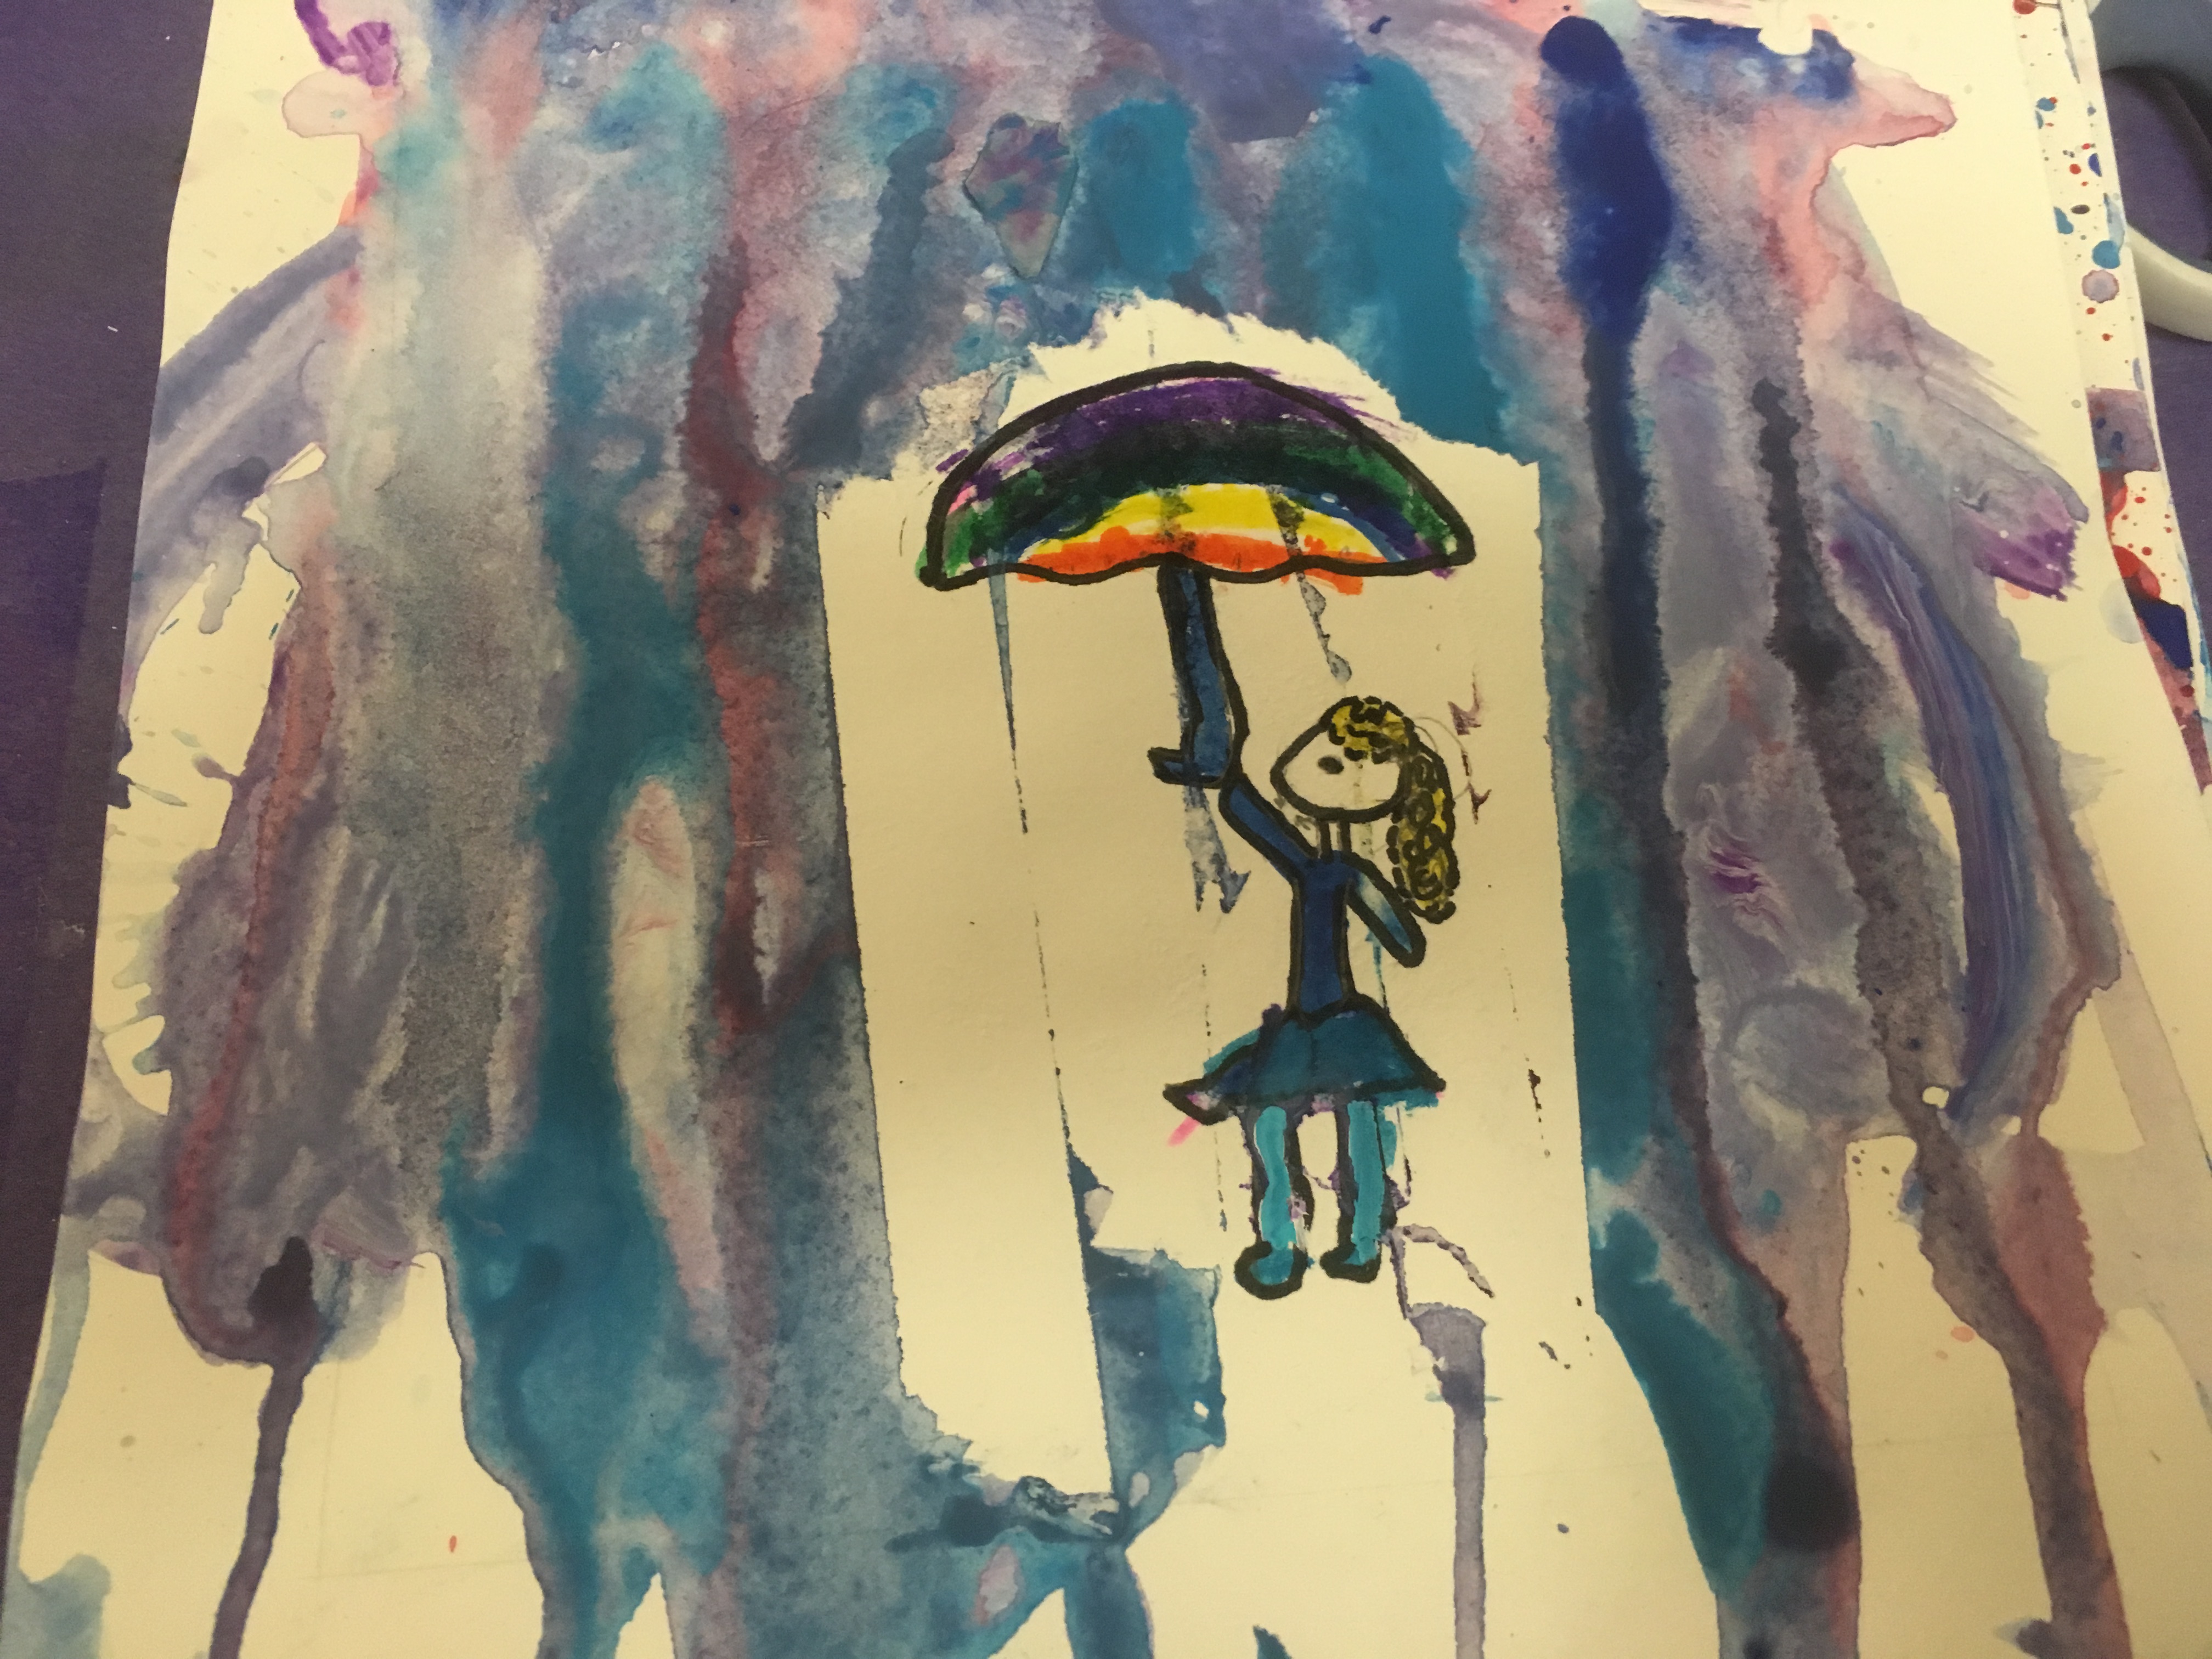
Others used a lot of water to make softer colours and spread them with the brush, creating the effect of rain blowing.
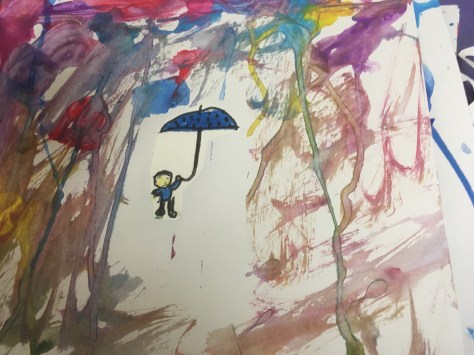
One child wanted to spread paint all over the picture and made the rain by running her finger through it to make lines.
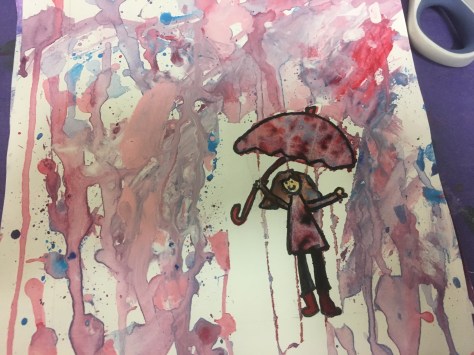
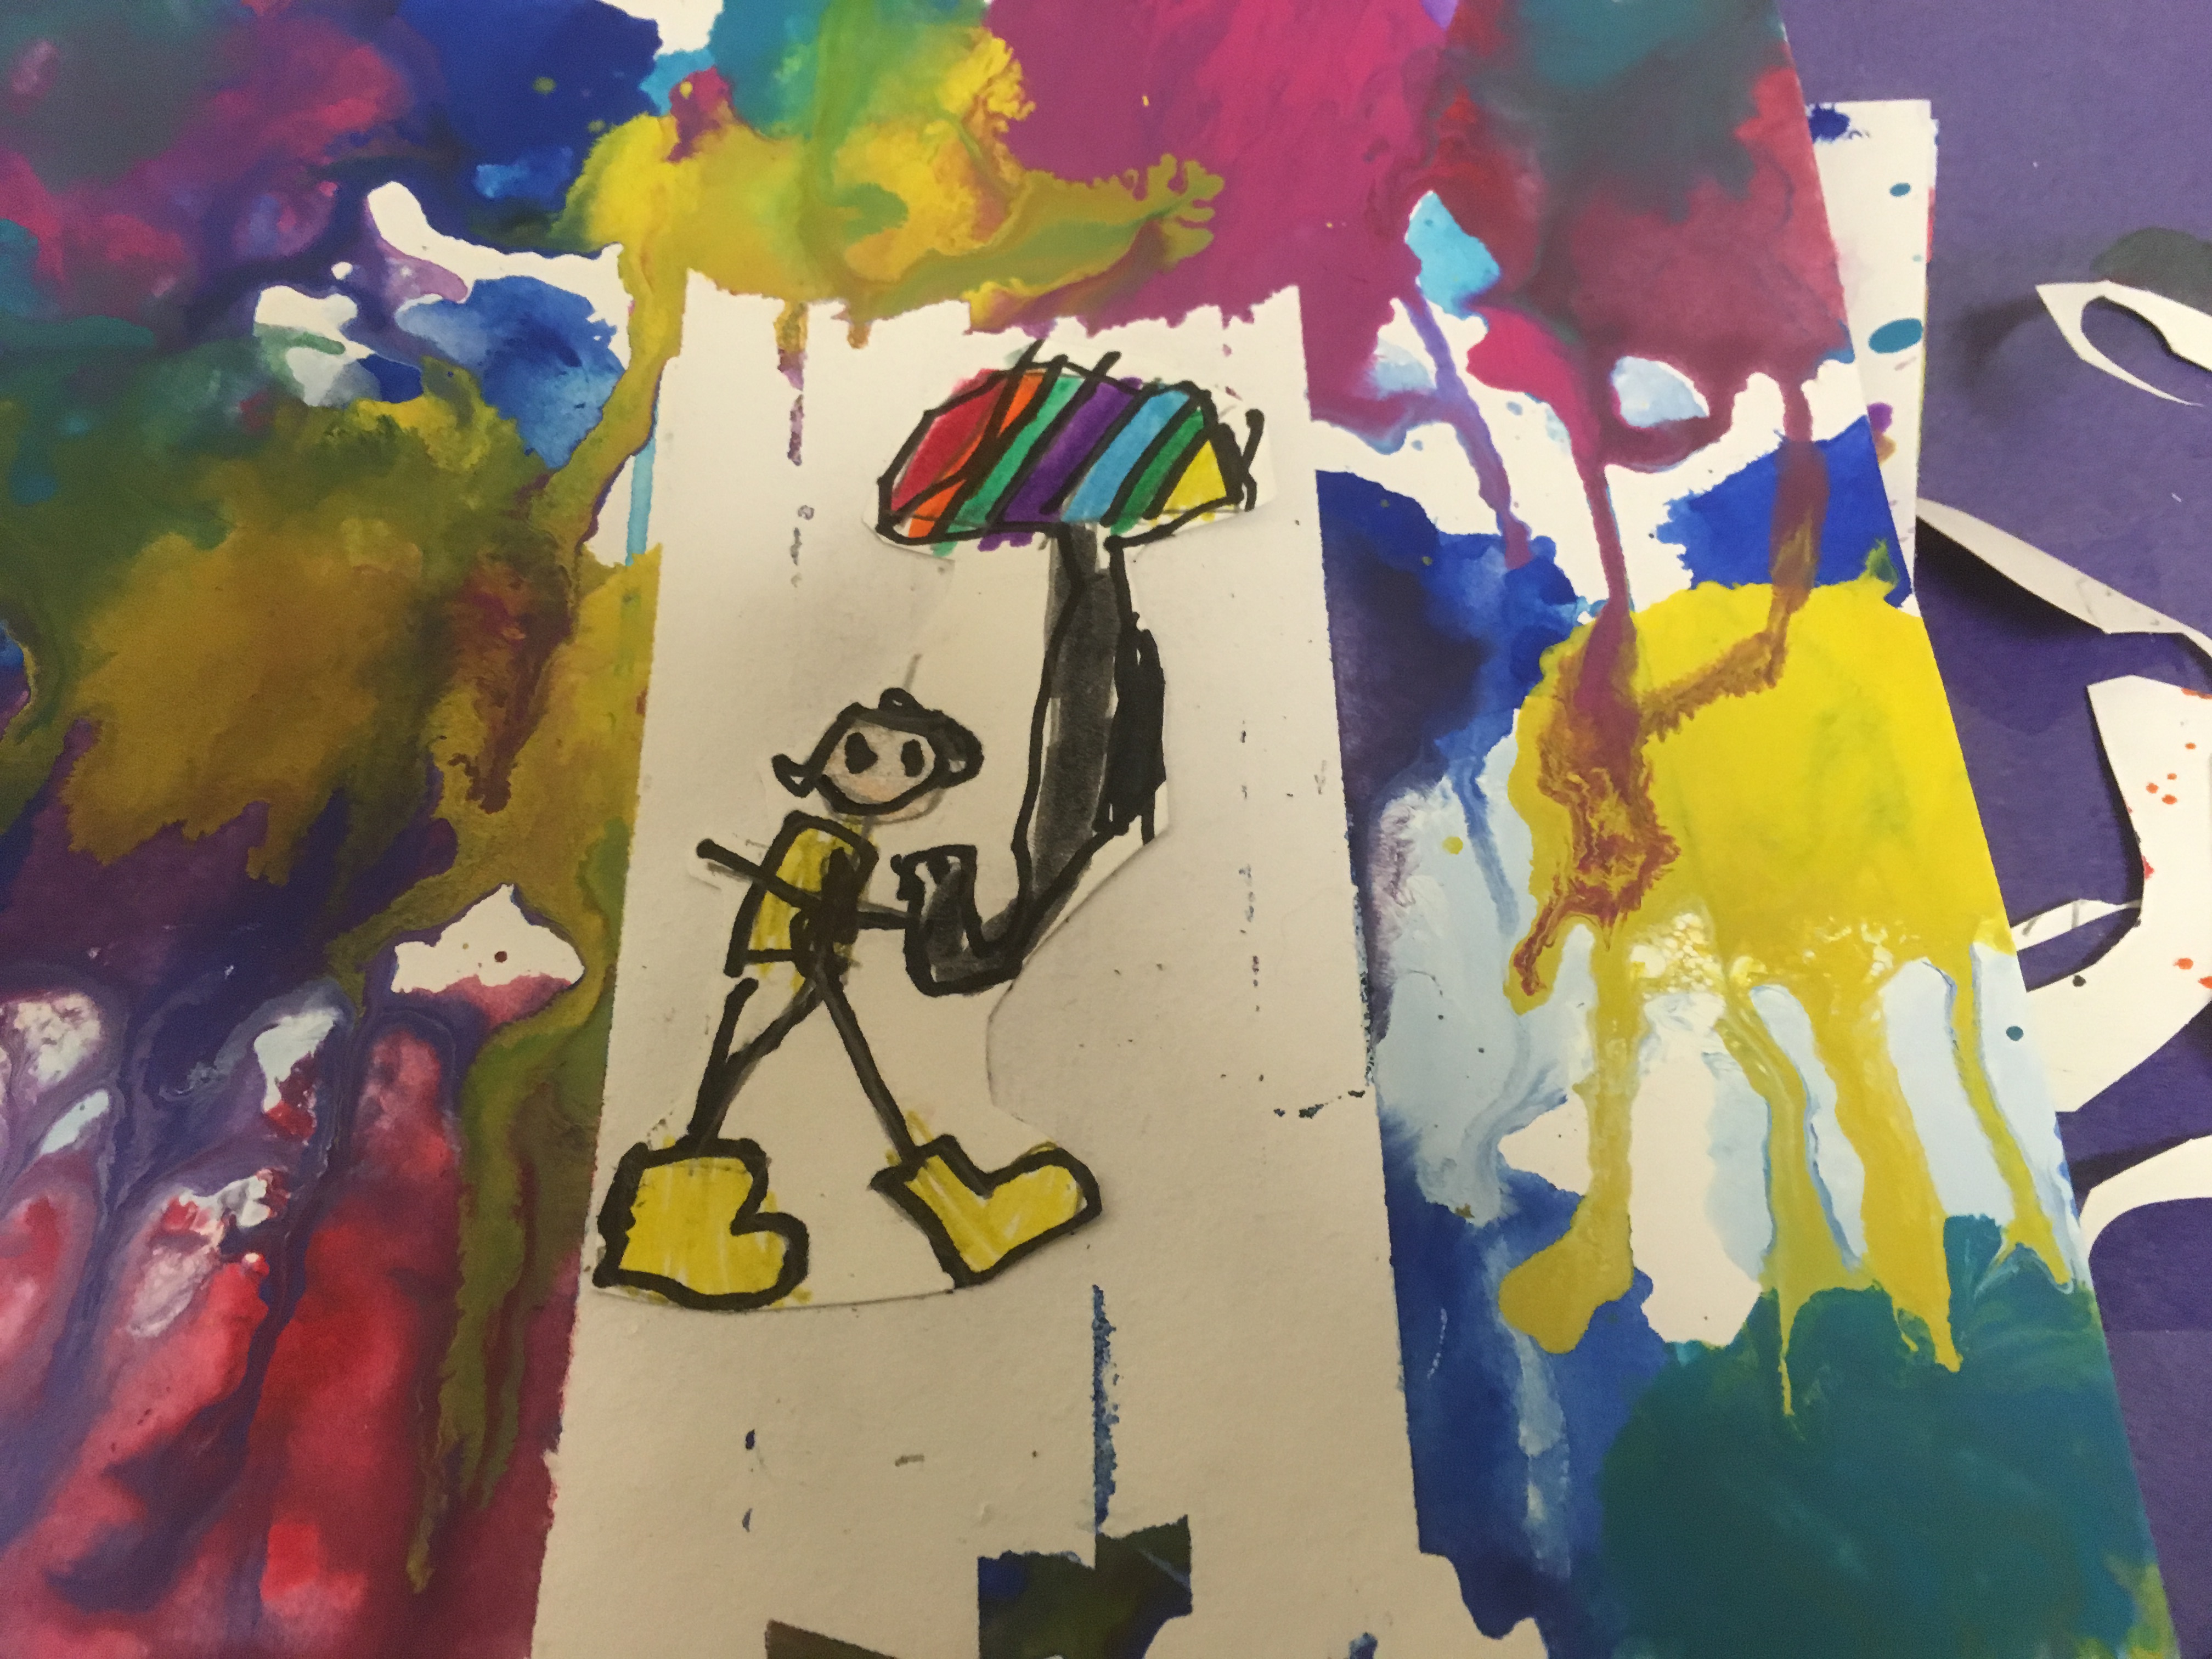
The kindergarten pictures were much brighter than the 2nd grade ones. My personal favourite is this one. I love the big splashes of colour in a heavy downpour, in contrast to the person walking in safety under his umbrella.
The colour choices, use of droppers and the volumes of paint make the 2nd grade pictures darker and more intense like that of a grey, winters day with heavy rain.
The Kindergartners are more akin to spring showers.
Perhaps a cool project would be to test out different techniques and colours to make a display of rain through the seasons.
I’m always frustrated by the infrequency of my art sessions. I can already see the progression and probing questions that might make this into an extended project.
How does the use of different colours change the way we see the rain?
What colours would you choose for winter rain, tropical rain or a spring rain shower? Test out your ideas.
Does the texture of the paint and how much water we add change the type of rain we paint?
How does the size of the brush alter the painting.
Try other ways of painting rain, use sponges, droppers/pippettes, cotton balls and what else can you suggest.
Make a giant collaborative painting of rain – what can you drop onto paper to make a splash?
How can we paint a heavy rainstorm?
What would happen if we tried a different type of paint?
Do you like rain? What colours would you use to show that you didn’t like rain? What colours would you use to show rain is fun?
Think about all the different types of rain you have in your area, are they the same or different? How would you paint each type to show the differences?
Make a list of rain adjectives or similes under the title ‘Rain is'(particularly after spending time in the rain) – choose one and paint a picture to illustrate the description.
Look in a large puddle. What do you see? Can you try to draw/paint it?
And that’s just the art – the possibilities for other areas of learning is endless. Perhaps you’d like to use my pictures as a springboard for an extended rain project? I’d love to see the results if you do.
Children always look forward to snow days but when it is cold but there isn’t any snow or only a smattering it isn’t always as enticing.
My children love playing with ice – so we often leave water in their water table or allow rain water to collect in containers. They are always keen to go outside on icy day to investigate how solid the ice is and I often find strange deposits of ice in my freezer.
On New Years Eve, it snowed. In the morning there was a smattering of snow left on the ground and the girls headed out to make tiny snow men. They took carrots from the fridge and borrowed our dogs Santa hat.
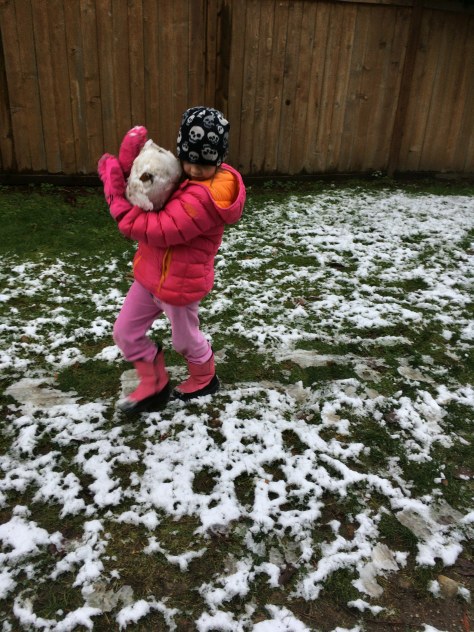
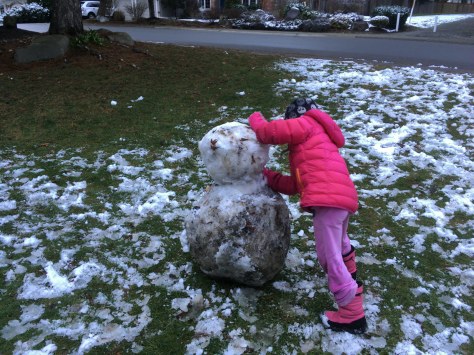
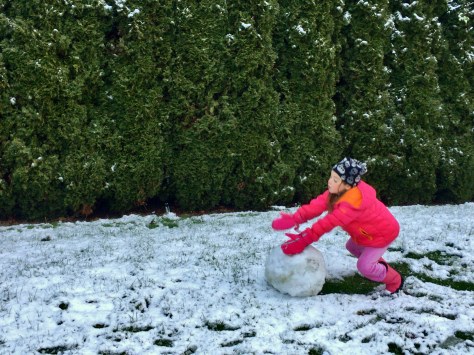
In the haze of a tired New Years Day afternoon, my youngest asked if we could go for a walk. We headed along the trail. She started to make a snowball, it was quite big and heavy .
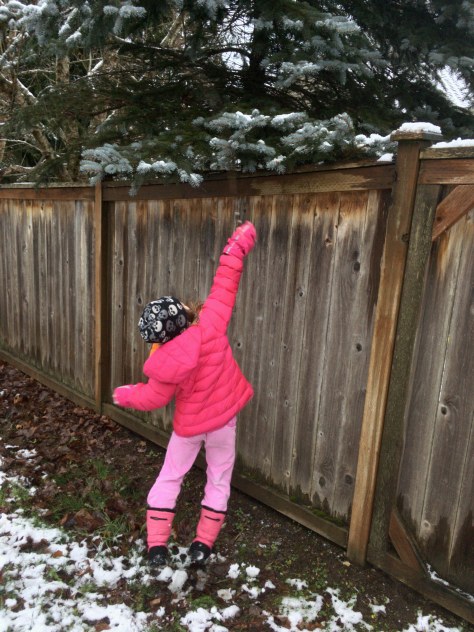
We continued along the trail and found a stick. The snowball was the perfect place to store it.
The stick was perfect for knocking snow from the branches of trees that were just out of reach.
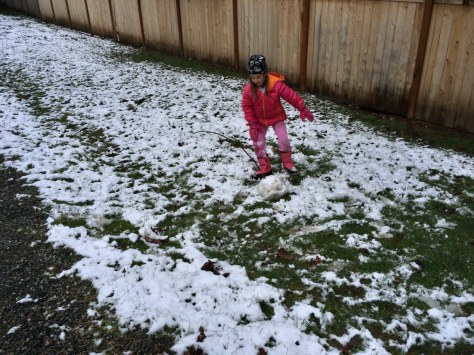
We started to roll the snowball.
“Maybe we could roll it back to the house and use it to make a snowman” my daughter suggested.
It seemed a good idea at the time but rolling an ice impacted snowball uphill and sometimes through patches without snow was the best new year’s exercise I’ve had in a long time.
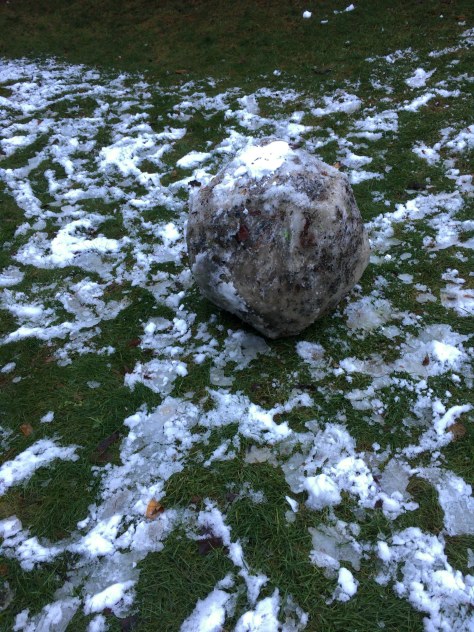
We had a base for a very dirty snowman.
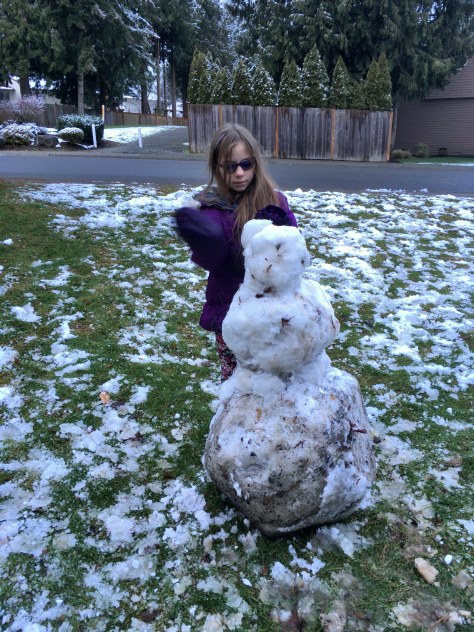
We added a middle.
and a head.
The finished result.
Proof that you don’t need a lot of snow to have fun.
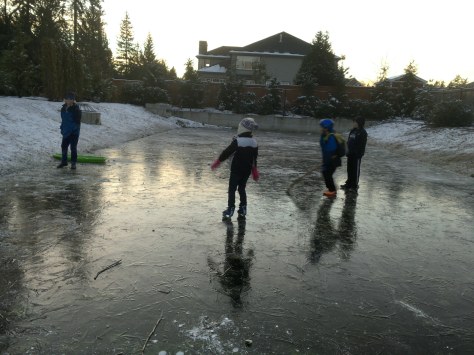
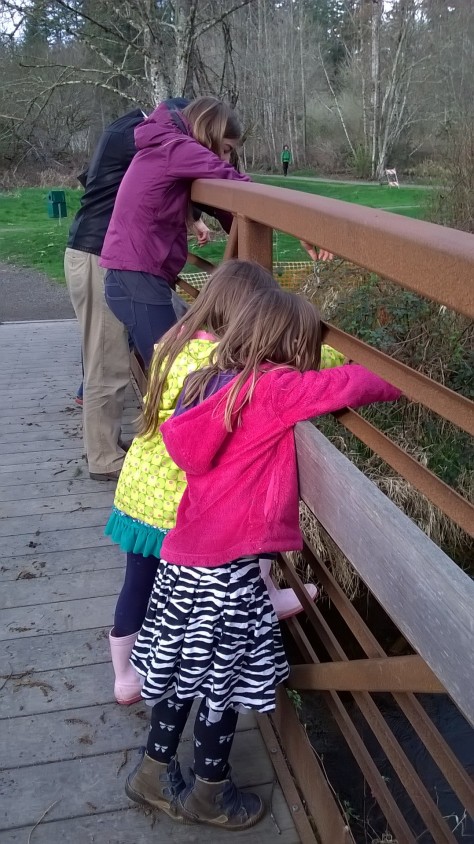
It has stayed cold all week, so the snow hasn’t melted and even the little snowmen are still there. Last winter we visited the storm pond when it was icy. the children tried to break the ice with sticks but it wasn’t thick enough to stand on.
This week for the first time it has been frozen enough to stand on and even get the sledges out. Every day after school, the girls would meet their friends at the pond. Convinced that it was solid, I allowed my daughter to use her ice-skates on the pond. This was a first for all of us and very exciting.
My youngest found a flat round piece of ice that looked like a puck – if the weather stays cold it would be fun to find sticks and play ice hockey or grab a broom and a big piece of ice for curling. Much better than when we tried a Winter Olympics without any snow!


 Four years ago, all of our worldly goods were packed onto a container to make the journey to our new home in the US. We wouldn’t see them again for 10 weeks.


 Some I was able to fix myself by re-colouring them but some needed to be painted over with white acrylic and the children coloured them in again or in some instances re-drew the whole picture.


 Children always look forward to