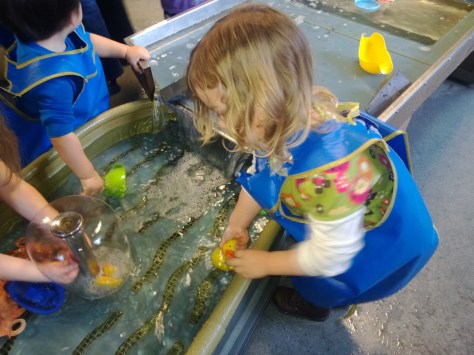
For a teacher like me, who spent her teaching career with under 5’s, I am used to teaching in a messy, noisy environment. Children are permitted and often encouraged to make a mess and be messy.
Young children need to do and create things on a large-scale. They use big chunky brushes, they use oversized pieces of paper, they are developing their motor skills through moving around in a large space, they build with big bricks, look at big books and work on the floor.
Children are developing their language, communication and social skills. They are encouraged to talk as they learn, to ask questions, re-tell events, act out scenarios, explore sounds and negotiate with their peers.
If an early years classroom was always tidy and always quiet, I would be very concerned.
Early years classrooms are well organised. Resources have their place and children are shown how to return resources and take care of them. But when the children are at play they are rarely tidy.
Early years classrooms discourage shouting, teach children to take turns when talking in a group and are building the foundations of listening skills but much of their learning is verbal and kinetic so would not and should not be silent.
It makes me so sad to see children at desks in silence once they start school, children walking around the school without making a sound. It saddens me to see lots of whole class teaching where there is little room to be different, make choices or move around the classroom. Carpeted classrooms where we have to be so careful about making a mess, so there are no painting easels, water trays or sand boxes. Where the kindergartners don’t have an outdoor classroom to extend their space and experiences. Mostly, the teachers know that this isn’t right for the children, they do their best to bring fun into the classroom and make learning as active as possible, but their hands are tied by environments, school policies and by national or state curriculum and assessment.
Sometimes I think I should return to teaching to show that there is another way. Mostly, I think I’d end up demoralised, frustrated and constrained by a system with very different values.
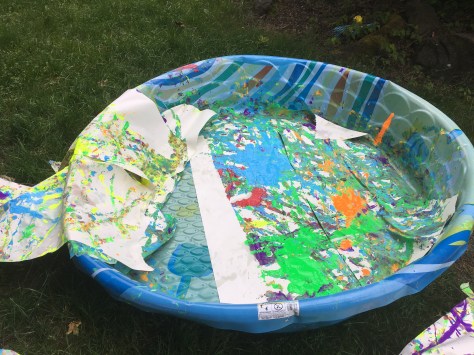
Yesterday, for our final art lesson, I wanted the children to have fun with art, to work on a large-scale and be messy. It was to be an outdoor celebration of art. My plan was to set up a number of art stations outdoors and have a volunteer on each station. This didn’t quite work to plan due to a shortage of volunteers so I scaled it down to 3 activities.
Activity one
I taped paper to the base of a large paddling pool. The children squirted tempura paint in different colours into the pool. I then threw in a variety of balls. We worked together, holding the pool and tilting it to make the balls roll in the paint and make a pattern. The children squealed with laughter. They took it in turns to send the balls towards different members of the class and tried different techniques to make balls of different weights and sizes move.
Activity two
I added powder paint to pots of bubbles and mixed it well. A large piece of paper was taped to the wall and the children used a variety of bubble wands to blow the coloured bubbles onto the paper and make it pop. They enjoyed touching it with their hands as it popped and dripped down the wall leaving splashes on the floor.
Activity Three
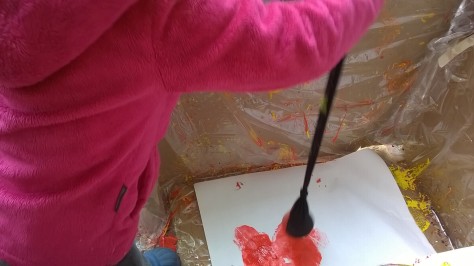
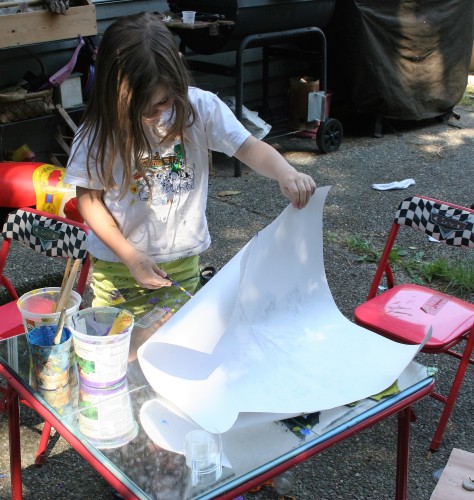
I would have done this one outside on a large piece of paper too, but I felt the teacher felt more comfortable at a table, so this activity was moved inside. The children blew paint onto their paper with straws and then used sharpies to turn the shape into a character or person.
My teacher was a substitute. She greeted me with a bewildered look when I described the projects. Her face suggested she was unsure that I had thought it through and that it would be a logistical nightmare to manage.
I suppose our priorities were different. I didn’t care if the kids were noisy and overexuberant. I wanted to see them laugh, explore and take risks. I didn’t mind if transitions weren’t completely orderly. The children were excited by what they had experienced and what they were to try next. I didn’t mind if the children were messy and paint got onto the playground. The paint was washable and the weather would wash it away. I didn’t mind that the end product wasn’t beautiful or particularly thoughtful. I wanted them to see that we don’t always have to sit at a desk to paint, that we can create with our whole bodies and with a variety of materials. I didn’t have a learning goal. I wanted the children to share a new experience and to have fun.
Children from other grades who were out at recess, came flocking to see what we were doing, they looked on with envy. The Kindergarten children were full of joy, they talked freely amongst themselves and to me, without inhibition and they helped me to lay the pieces to dry, placing rocks to stop them blowing away. They enjoyed the responsibility, before returning to the classroom to sit at desks, eat their snack and listen to a story in silence.
If you have thoughts about spaces for children Suzanne Axelsson is collecting information about how space affects children’s play and learning outcomes and also, more importantly, how it affects your teaching…. if you cannot teach the way children learn, then it is going to have a HUGE impact… You can respond to her questions and engage in a conversation about learning spaces here.
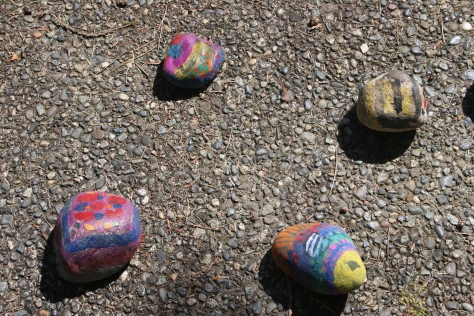
This week we have been painting pebbles. We used a mixture of our own designs and some that we found online. The ones that we liked we sprayed with mod podge so that the rain wouldn’t wash them away.
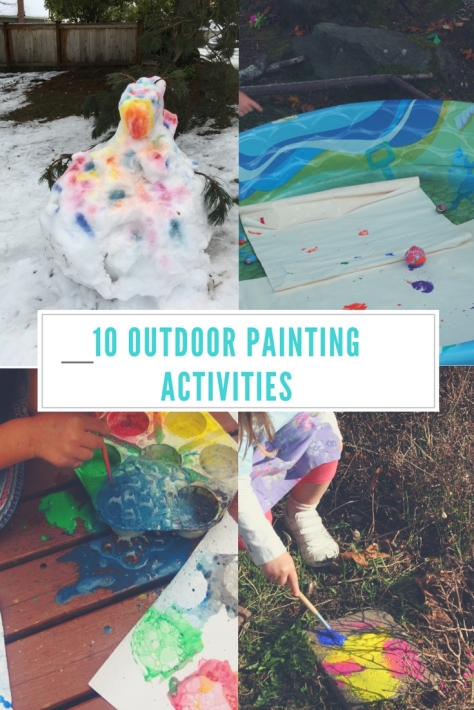
In the summer it is so much easier to paint outside and with more space and capacity for mess you can be more creative with your painting activities. Here are a couple of our favourites.
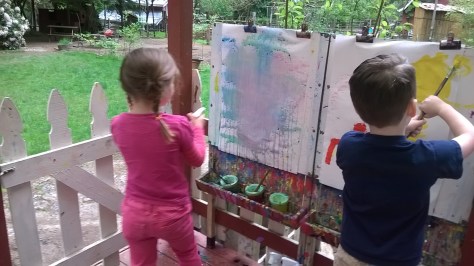
Spray painting
Save your old spray bottles and fill with paint to spray on an easel attached to a fence or on the floor. You can also tape images or leaves onto the paper to make prints.
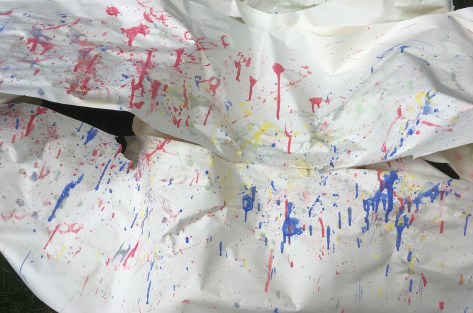
2. Splat painting
Fill a stocking with sand, drop it from a height and watch it splat.
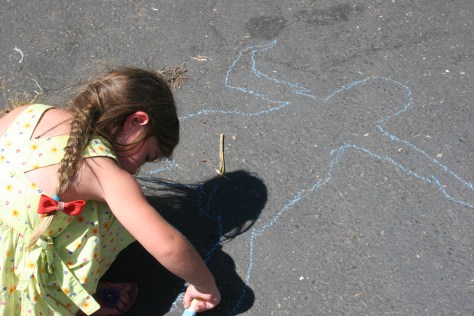
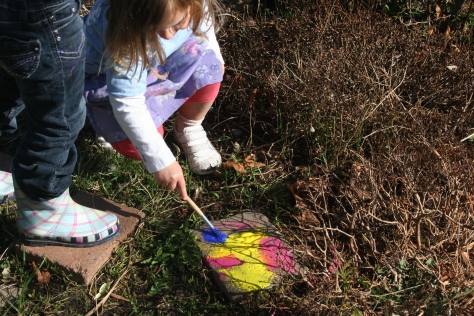
3. Paint the ground
Use watercolour paint or pavement chalk paint and it will wash away.
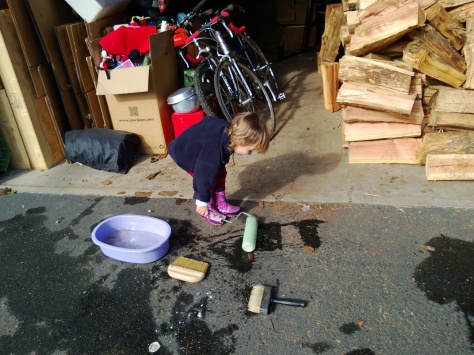
4. Paint with water
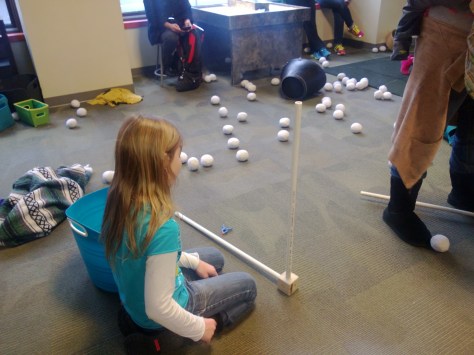
It’s a roly-copter.
Use different types of brushes and paint rollers
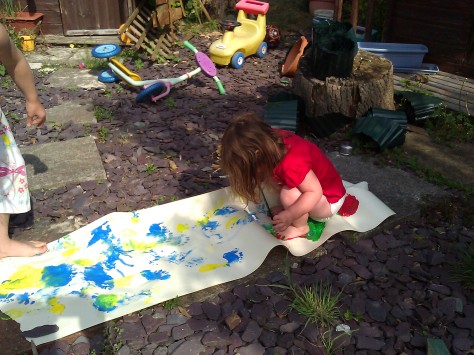
5. Foot painting
6. Print leaves
We painted this giant leaf in stripes and pressed the paper on top to make a print.
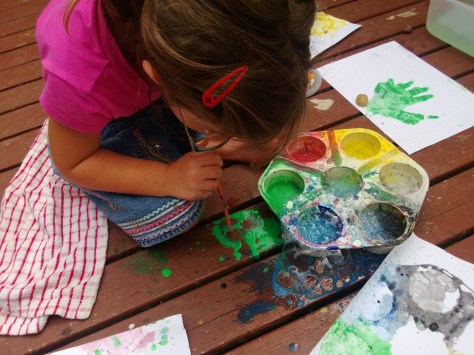
7. Bubble painting
Add dish detergent to paint and blow with a straw. When the bubbles come over the top print onto a piece of paper. Alternatively you could add paint to bubble mixture and blow bubbles onto paper and watch them pop.
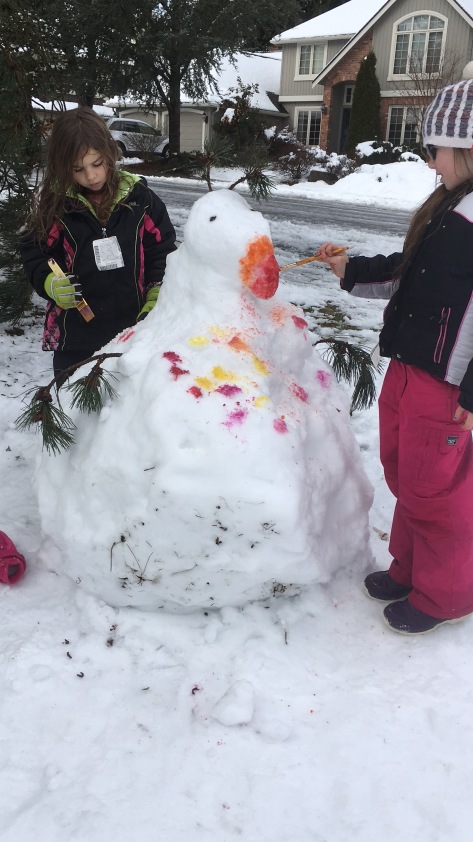
8. Paint a snowman
Outdoor painting needn’t be confined to the Summer. In winter paint a snow sculpture or paint on snow or ice.
9. Ice painting
Freeze ice cubes of paint with a stick inside. As they melt you can make a picture. You could also sprinkle powder paint onto blocks of ice to make patterns.
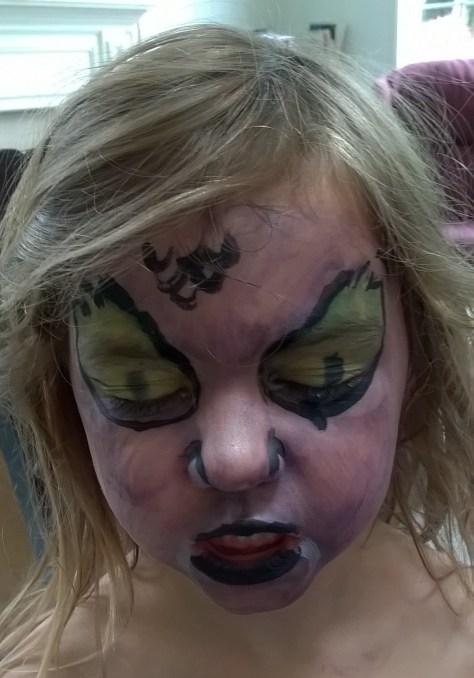
10. Body painting and Face painting
My kids love to get the face paints out in the summer, their designs get more elaborate as they practice. You don’t have to stick to faces, body painting is fun or paint tattoos on their arms and legs.
Disclaimer: This post contains Amazon affiliate links.
My family love to create things together but sometimes we need a little nudge of inspiration. These 3 new books from Quarto books are perfect to inspire ideas that will take us through the summer.
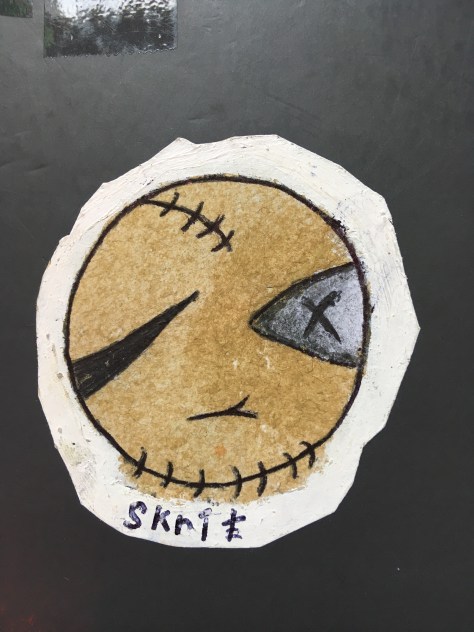
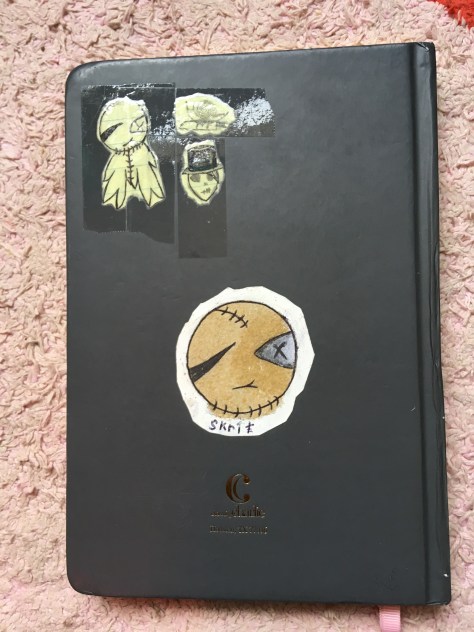
Stick it to ‘Em is your invitation to create customized stickers. With just a hint of silly irreverence, this guide includes a list of colorful art tools in addition to easy drawing and lettering techniques and step-by-step tutorials, all designed to get your cheeky creativity flowing. You’ll then be treated to more than 35 pages of stickers, including a selection of fully designed styles to use any way you like, a variety of stickers to color in, and blank stickers to create your own.
This one was my teenage daughter’s favourite. The beginning of the book teaches how to design stickers using water-colour and she used this as inspiration. She also took some of the ready-made stickers to decorate her laptop.
My younger girls liked the stickers that you colour in but may very well be inspired by their big sister’s creations. Some of the slogans on the ready-made stickers are not really suitable for young kids. Though they are meant to be sassy, a few refer to drinking or have acronyms I wouldn’t want my children using, so choose your stickers wisely if you have younger children.
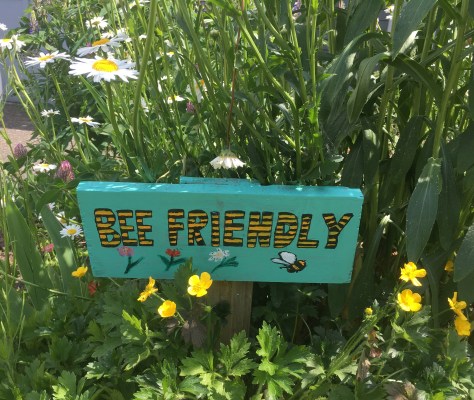
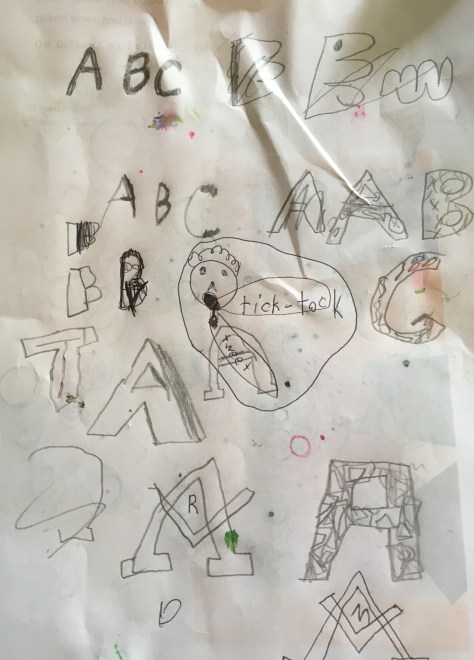
Hand Lettering A to Z is a fun, hands-on book in which artist and calligrapher Abbey Sy presents her creative lettering and invites artists from several countries to contribute alphabets of their own–all unique, all hand drawn. Each alphabet is paired with a collection of phrases to show readers different ways to use the lettering and have fun with it in different languages, including French, Spanish, Irish, Swedish and Portuguese. Readers can use the phrases when making cards, gifts, or embellishing their journals. And unlike calligraphy, hand lettering does not require disciplined study. Hand-drawn lettering is meant to be personal and original, so even beginners can dive in.
This one is really useful for us. My kids love to make signs and last year we made some for the garden.
Lettering isn’t always easy without a stencil but this book has given us inspiration to try new ideas and enhance what we have already tried. My 8-yr-old looked through the book and was a little confused as to how we could use it. We went through it together and I explained that the book shows you how to make different fonts step by step and how to add designs to create your own. She tried out a few in black and white to experiment.
This full-color art journal for mums and kids to colour and draw together in is designed to be a sharing experience. Mum and child can write each other letters, draw what scares them, imagine what they want to be when they are grown up, color a scene using only one favorite color, whatever their imaginations lead them to.
Mom and Me: An Art Journal to Share is filled with fun hand-lettering and artwork from Bethany Robertson along with creative prompts from licensed art therapist Lacy Mucklow. Mucklow offers up the best ways to communicate with a child through creating together; how to start an open conversation with your child; questions you can ask that will help generate thoughtful responses; and how to tailor the quality time so it’s still fun and engaging for your child.
I love the concept of this book and the activities inside are really well thought out. My 8-year-old said she couldn’t wait to share it with me. If I could change anything, it would be the title. Aside from my purely personal dislike of the word mom, I feel that this book is excluding dad’s thus I would have liked it to have been entitled Parent & Me. Perhaps there is a dad version on the way?
The book is designed to be used flexibly. Topics may be chosen based on issues encountered within your family or simply as a springboard for talking. Children often find it easier to express feelings through drawing or writing, so the book encourages parents to share experiences together. There is no right or wrong way to use the book. As a mother of 3 children of different ages and very different needs, I think I would spend time individually with each of them but also copy the pages and work with all 3 of them together so we could share different points of view. I also think this might encourage teenagers who might not want to share, as they guide and support their younger siblings. In a similar way I think some of the activities would work really well in a classroom.
The section on feelings has activities like drawing what makes you happy, sad and angry. These could be appropriate for any age group. Some activities, like drawing your inside and outside self may be a little abstract for younger children or may need illustrative examples and discussions to explain. Allowing time to talk and share ideas is an important element to this book as I feel some of the concepts are difficult to express, particularly the in the moment section. I would start with feelings and/ or imagination, particularly with children who worry about presenting their ideas.
I believe clay should be readily available in every early years classroom. For many kindergarten or reception classes this isn’t always possible or practical. In my daughter’s kindergarten class, I give them an opportunity to experience clay during our art classes in the hope that they will build on it in future years and at home.
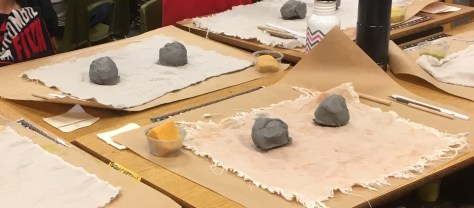
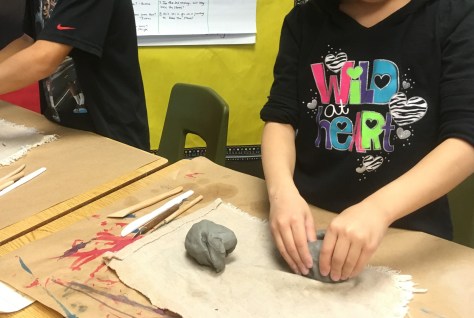
Before making a product, I feel it is important to explore and understand the properties of clay. In my own class I would give the children a chance to explore clay with hands, different tools and different sized pieces over a long period of time before creating any finished products.
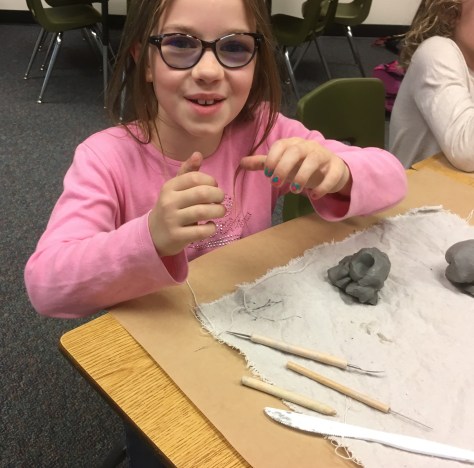
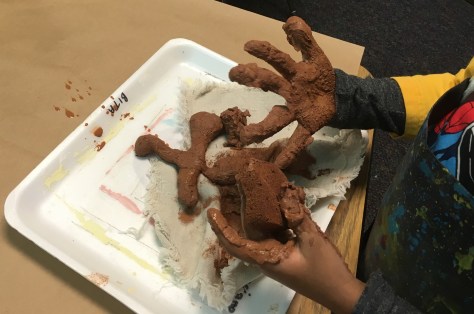
I made a shape. The clay makes my hands messy.
I showed the children a series of pictures of children exploring clay. Pictures of children climbing on big pieces, rolling great structures, building with blocks of clay and adding objects to clay. I feel a little sad that we don’t have the opportunity to explore these things ourselves but I want the children to see the many possibilities.
I can squash it flat
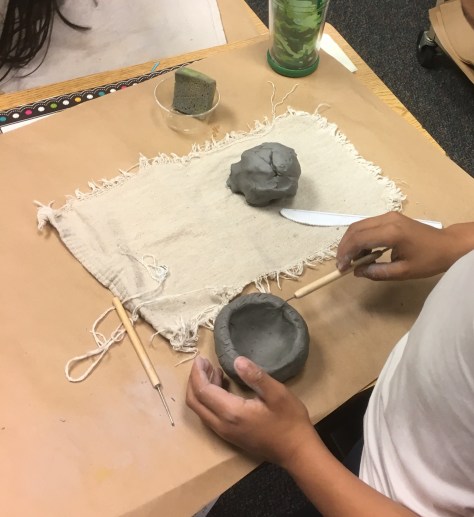
The children have a piece of clay to explore. I gave them questions
Can you roll the clay into a long shape?
Can you squash it flat?
Can you make a round shape?
How does it feel?
Can you make it smooth?
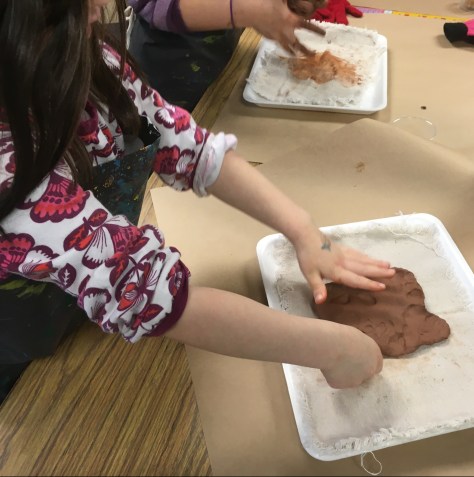
The pieces I gave them came from the scrap bin and they were really wet and sticky. We talked about how it felt and how it differed from some of the pictures we had seen.
For some the wet clay was too messy but others revelled in the feeling of squishing it between their fingers.
I then showed them how we could use tools and everyday objects to make patterns and textures in the clay.
Suggested objects
clay tools
shells
cocktail sticks/toothpicks
bottle tops
pine cones
mesh
stampers
straws
The children explored and we put the clay in a bag for the children to take home and explore further at home.
I can make patterns with my fingers
Building on the skills to make a project
In the introductory lesson we had explored the properties of clay and how we could manipulate it and add texture. We did not touch on how to join clay pieces together as I wanted to keep the project simple and work on pattern and texture.
I pre-rolled pieces of clay for the children to ensure it wasn’t too thin and it wouldn’t break in the kiln.
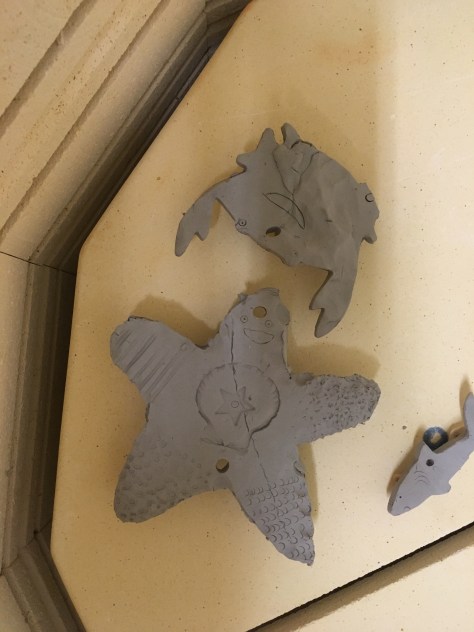
I demonstrated how to cut around a template with a clay tool to make a shape. The children were given a choice of a fish or a starfish as the finished products were to be displayed in our art walk with a water theme. I have also created similar projects in previous years with hearts and circles.
They then used different tools to create different patterns on each section of the fish or starfish. The smaller animals were cut out using cookie cutters.
The holes were made using straws. The children learned that by pressing hard they could make a hole but if they pressed lightly it would make a circular pattern, but not go all the way through.
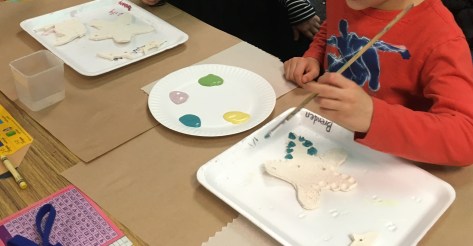
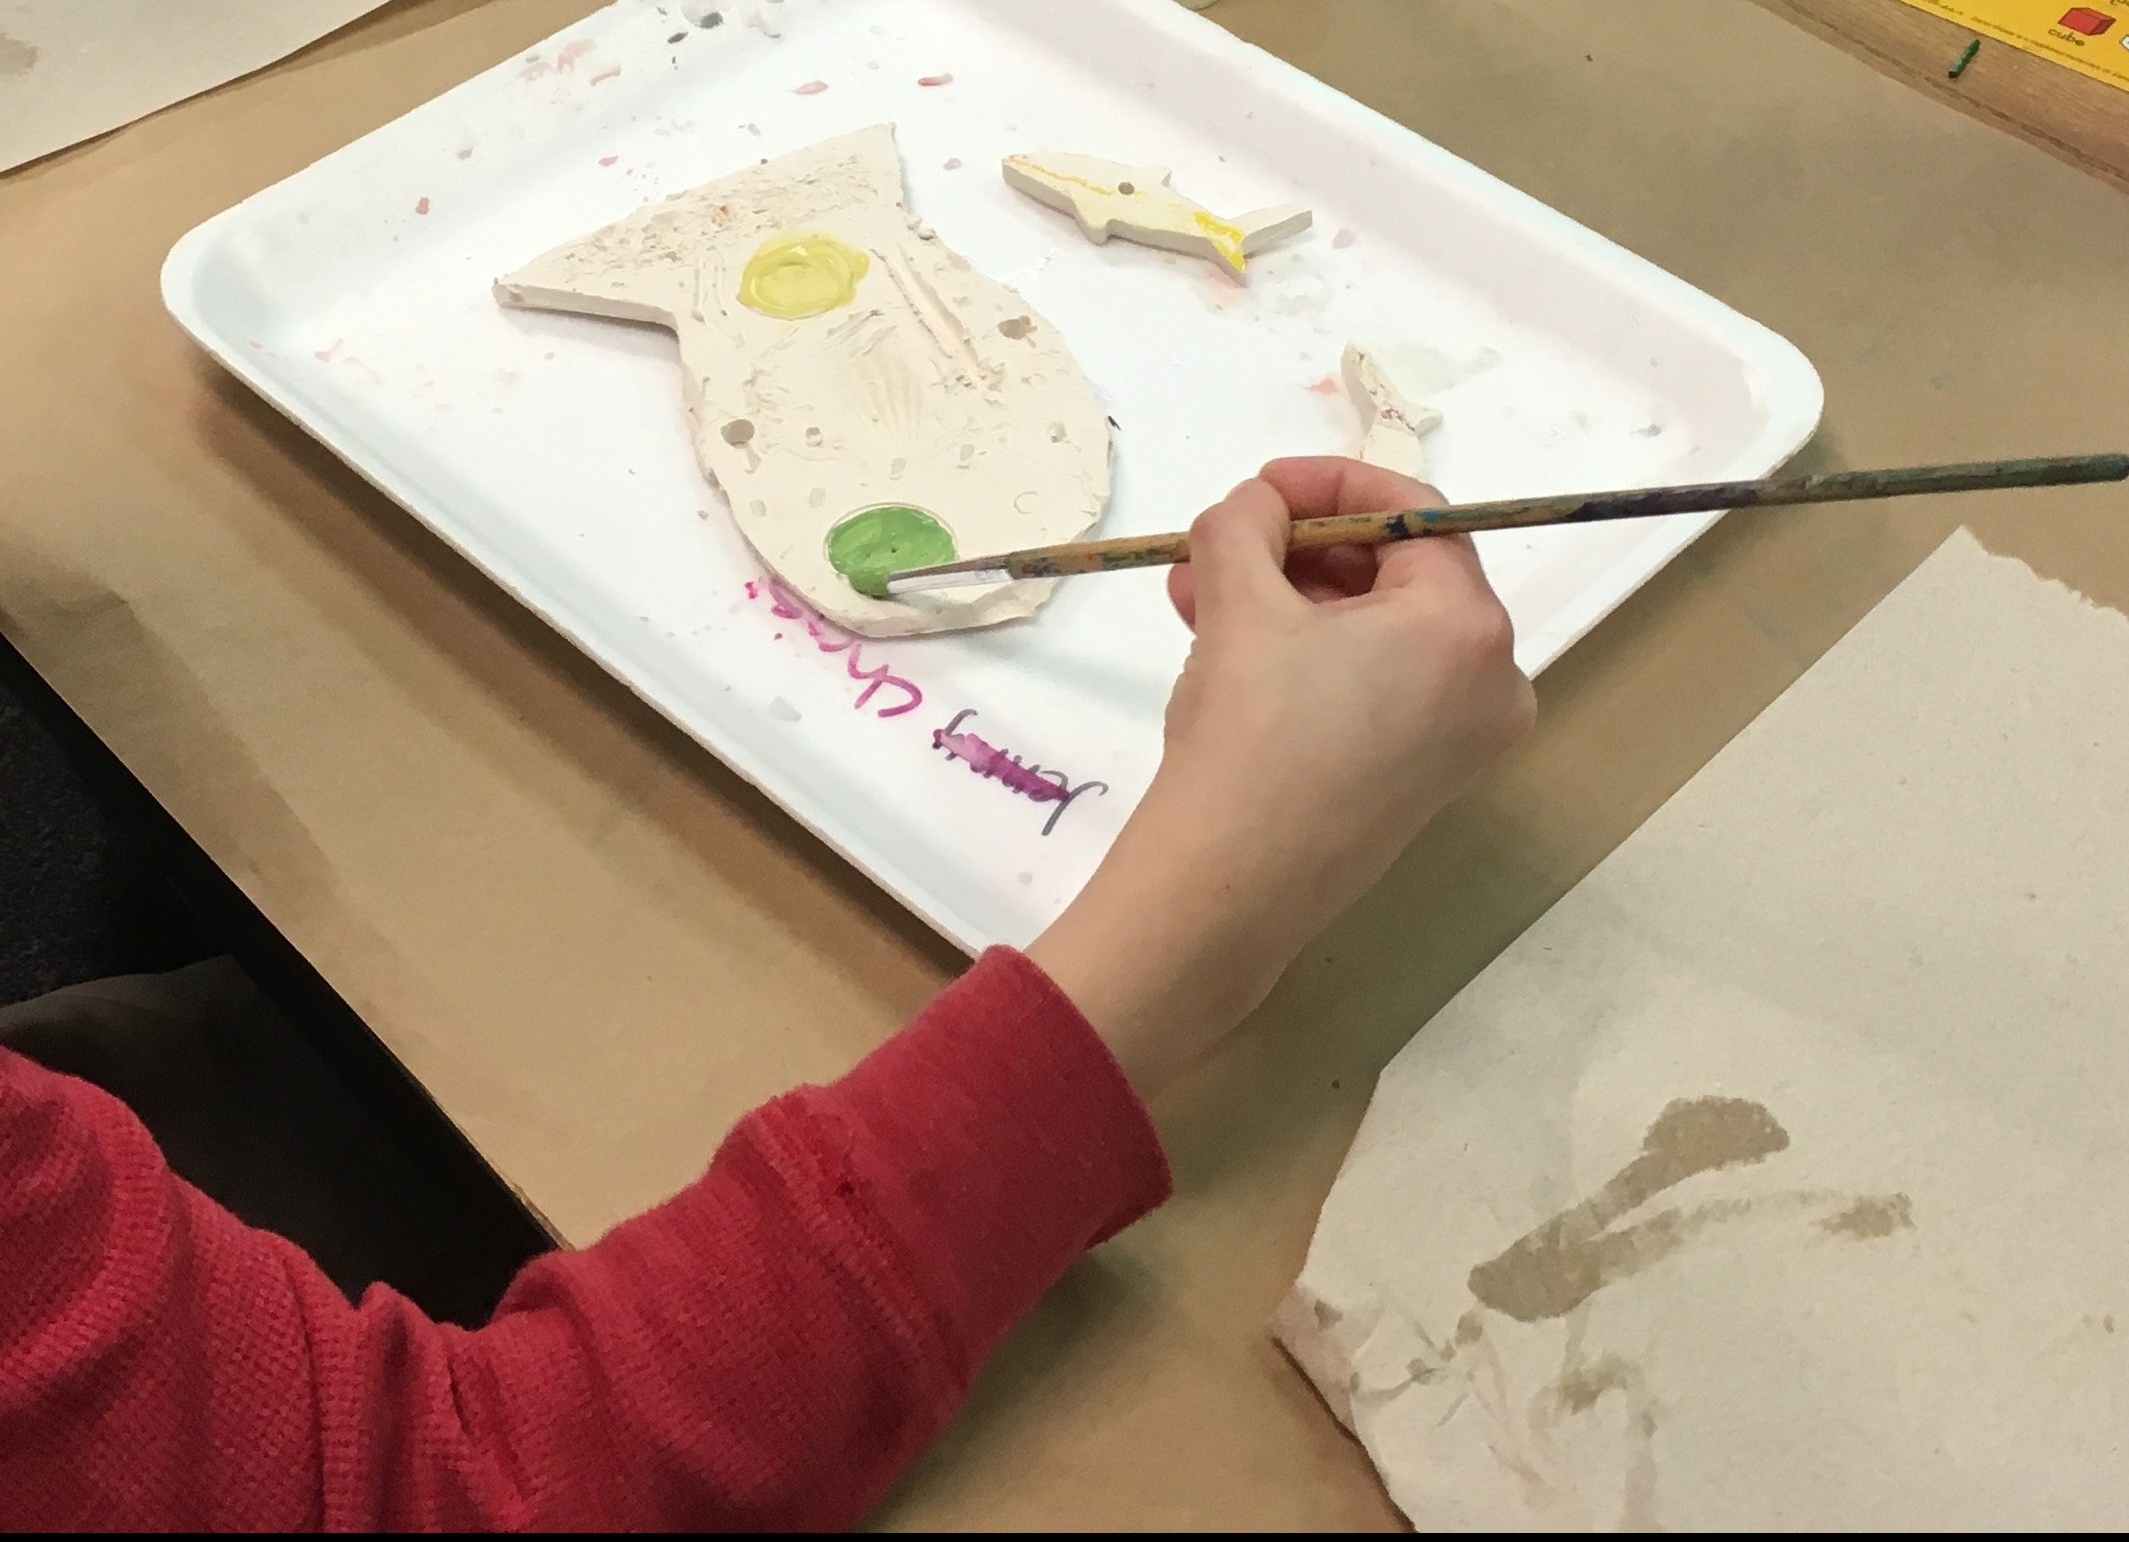
Lesson 2 : Glaze
We are really fortunate in our school to have a kiln and be able to fire projects, as this allows children to go beyond exploring clay and to learn about the requirements of creating lasting projects.
The children painted each section of their project with different colours and patterns. They were really meticulous in their execution. They painted three layers to make sure the colour coverage was strong. Some children painted different colours for each layer. I would suggest showing children different examples so they can see how different techniques will turn out.
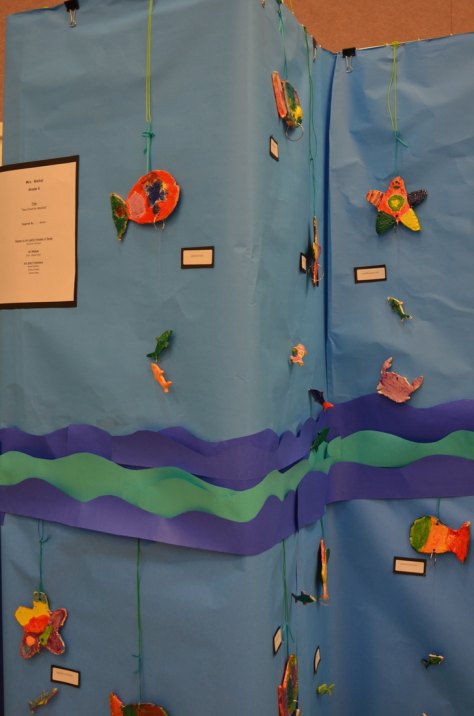
When they came out of the kiln, I made them into mobiles using fishing line and ribbon.
I wanted to make a collaborative, three-dimensional piece for our art walk with 2nd grade. The theme for this years art walk is water.
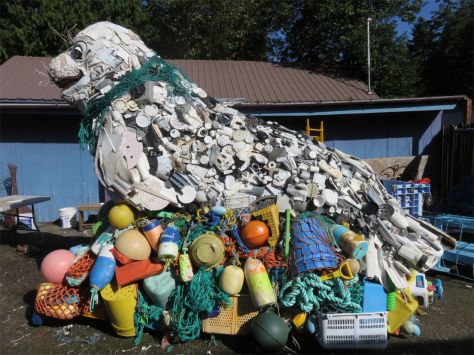
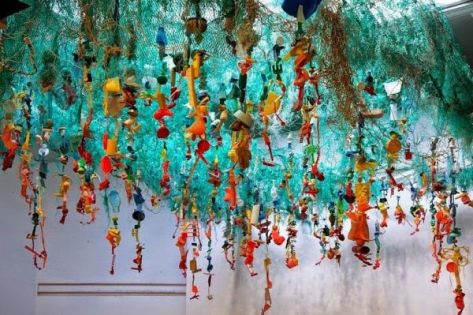
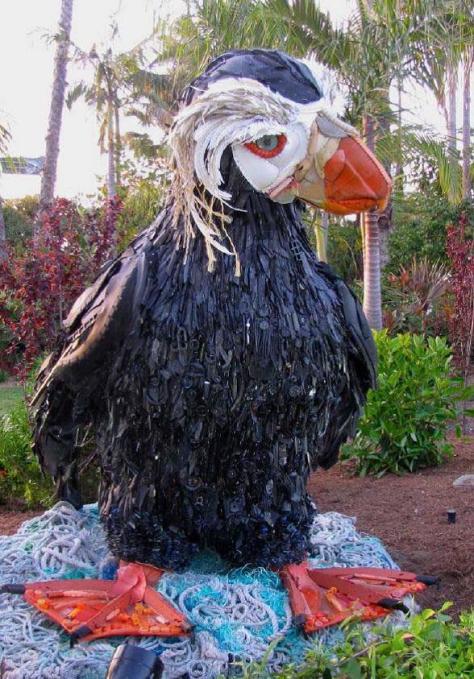
I came across a wonderful project called Washed Ashore . The Washed Ashore project is a joint art and education initiative. Artist Angela Hazeltine Pozzi, worked with hundreds of volunteers to collect plastic washed up onto Oregon beaches, clean it up and turn it into sculptures of sea creatures. The plastic is re-used to create art that represents creatures at-risk from the pollution of ocean plastic.
Photo credit Washed Ashore
This image immediately struck me as something we could use as inspiration.
Image credit greenspyke.com
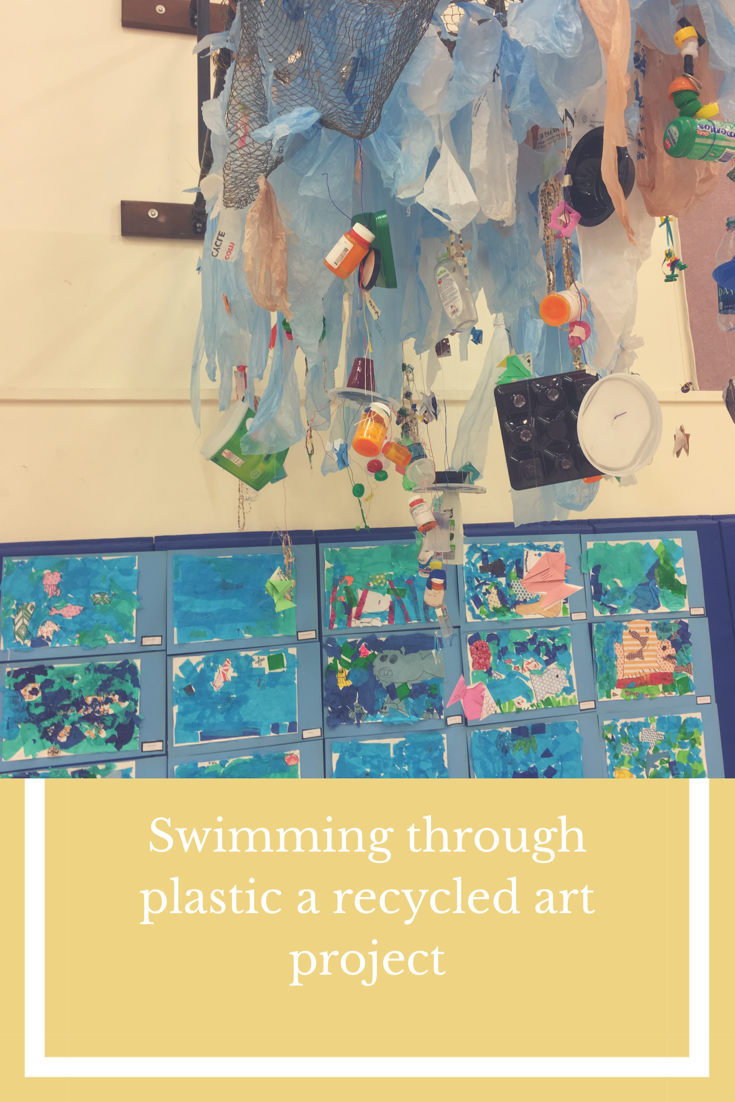
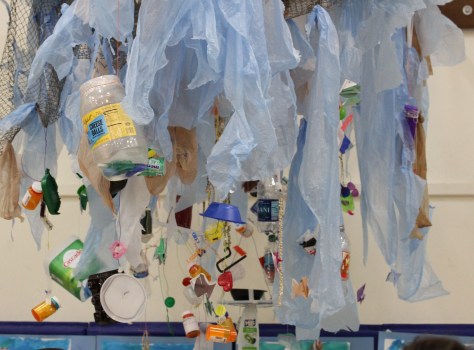
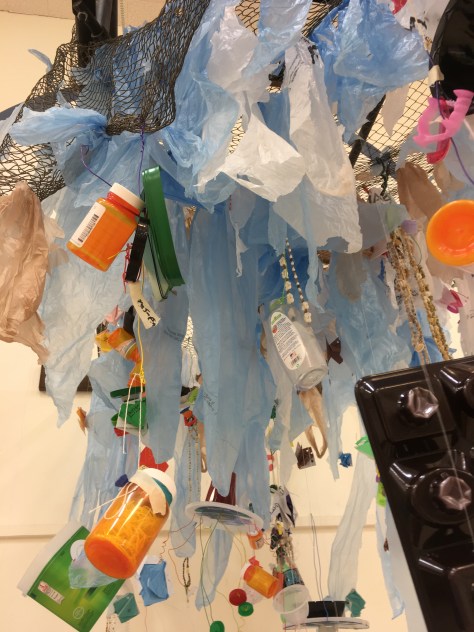
I decided to call our piece “swimming through plastic“, adding origami fish swimming amongst the plastic mobiles .The class have been learning about pollution in social studies this term so this was a perfect project to extend their thinking. The art project was completed in two art sessions.
We began the first lesson with a short video about the Washed ashore project and a discussion about how this linked to their social studies work on water pollution.
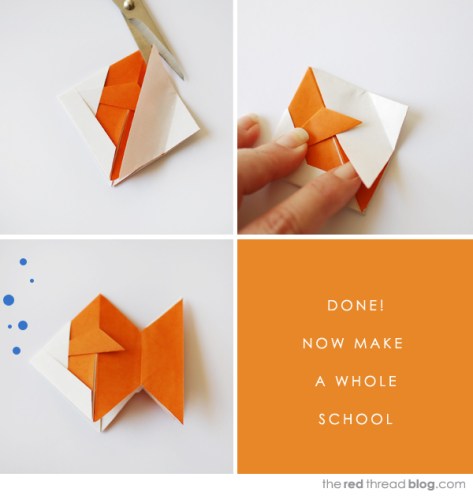
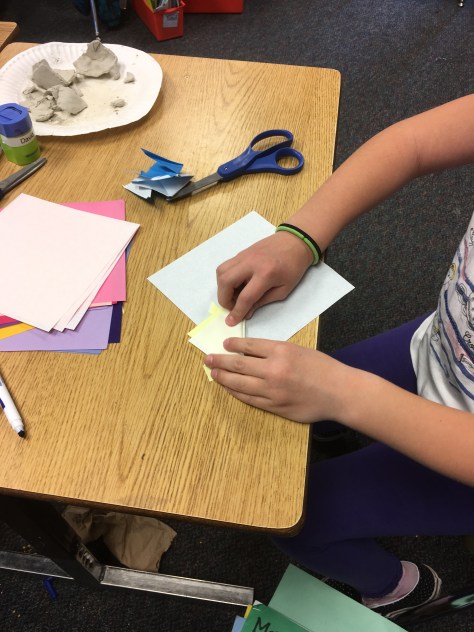
Origami Fish
As a whole class, we worked step by step to make a simple origami fish. We used this origami tutorial from We are Scout. Some children needed help with the final steps of the fish but most could complete it easily.
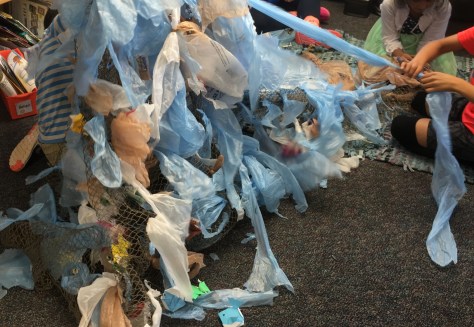
Once the children had made a fish some of the children cut plastic bags into strips and tied them to a decorative fishing net that would act as the base of the piece.
The rest of the class worked on making plastic mobiles.
Plastic Mobiles
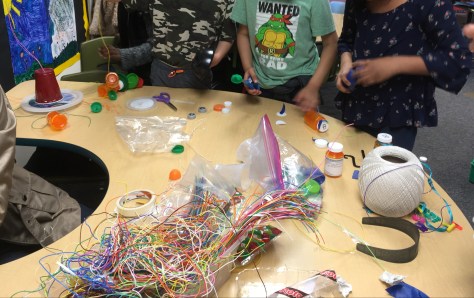
We collected plastics from home to make the mobiles. Ideally I would have scoured the beach for debris and used real beach trash, but the weather has been so awful this spring that we didn’t make it to the coast. I was also a little worried about hygiene, as I wasn’t sure I would be able to clean the plastic well enough.
We collected small pieces such as bottle tops and small plastic toys and larger objects like bottles and containers. The children were given wire, string and tape to fasten the pieces together in any arrangement they wished.
One child chose to place bottle tops in a plastic tub and fill it with water. I explained that the water would make it too heavy so we agreed to remove most of the water but leave a small amount, enough for the bottle tops to float.
The water-filled mobile takes pride of place at the front of the display
By the end of the first lesson we had part of the net assembled, one origami fish per child and ten plastic mobiles.
Lesson 2
I wanted to involve the children as much as possible in putting the piece together. Our next art lesson was the day before the art walk so we used this time to assemble it and create more pieces.
tying the bags and fish to the net
The lesson was split into four stations.
origami fish – a small group worked to make more fish
tying the fish to line and attaching them to the net – we punched holes into the fish and tied on the thread.
cutting strips of plastic bag and tying them to the net – I found more blue plastic bags and the children cut and tied them at different lengths
making mobiles from plastic. – this time we provided smaller pieces, that they assembled to make long, lightweight mobiles.
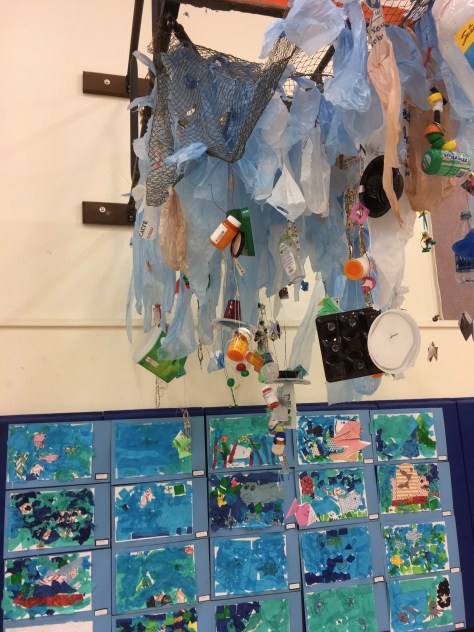
The Art Walk
My aim was to make this a piece that could be walked under. To create this, we mounted it around the frame of a basketball hoop with wire. The fish and mobiles were then attached at the appropriate height.
The water-filled mobile takes pride of place at the front of the display
Washed Ashore Exhibit at Point Defiance Zoo and Aquarium
When I was searching for information about the project to share with the children, I was excited to discover that the art pieces will be visiting Point Defiance Zoo and Aquarium from 22nd April, so the children will have an opportunity to see them for themselves.
photo courtesy of Washed Ashore
Each sculpture is accompanied by an interpretive sign that gives its name, information about the animal it depicts, and an “I Spy”-style list of plastic items that visitors can hunt for among the mountain of trash that Pozzi turned into an appealing sea creature or shore bird.
We’re bringing this exhibit to Point Defiance
Zoo & Aquarium to emphasize our deep
commitment to teaching our visitors that their
daily actions have consequences far beyond
what they might imagine,” said Karen Povey,
the zoo’s Curator of Conservation Engagement.
“We see Washed Ashore as an opportunity for families to learn more about the connection between our actions and the ocean – and do it in a very fun way,” says Andrea Smith , president of the Metro Parks Tacoma Board of Commissioners.
Point Defiance Zoo & Aquarium eliminated the sale of single-use plastic water, soda and juice bottles from its café and vending machines early this year, along with plastic bags in its gift shop and plastic straws and drinking cup lids.
The zoo has been a conservation leader in the Puget Sound region for 112 years, and they are proud to continue that tradition in 2017 with Washed Ashore. The exhibition runs until October 21 2017. I’m hoping to attend in a few weeks time, so watch this space for more insights into this exhibit.
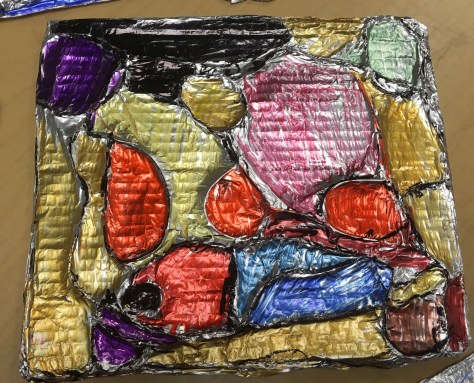
A friend recently gave me a beautiful book about illustrators and the story behind their work.
The cover design of Artist to Artist was the inspiration for my art project for 2nd grade. I read the Eric Carle section of the book with interest and looked up videos of Eric Carle explaining how he creates his illustrations.
Materials
Various shades of blue tissue paper
Scrap book paper
glue and scissors
black sharpie
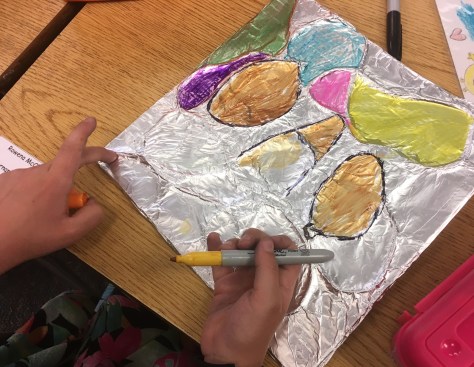
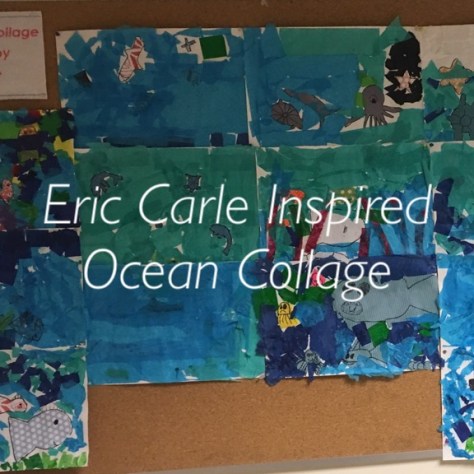
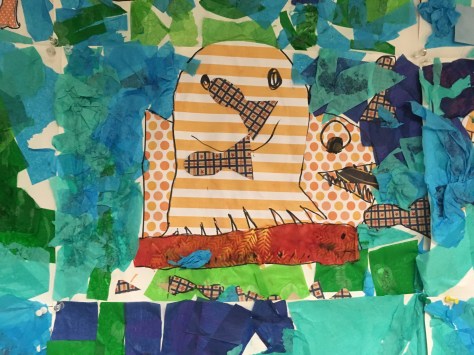
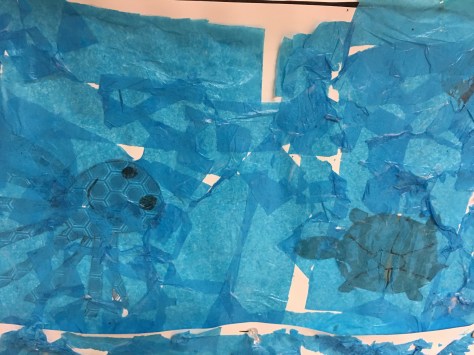
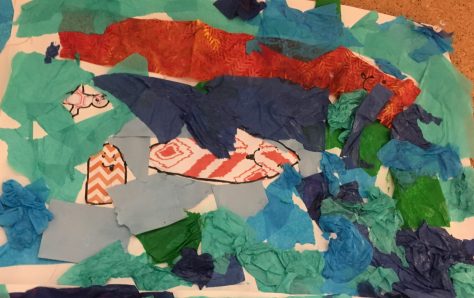
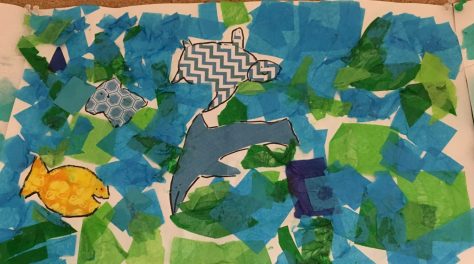
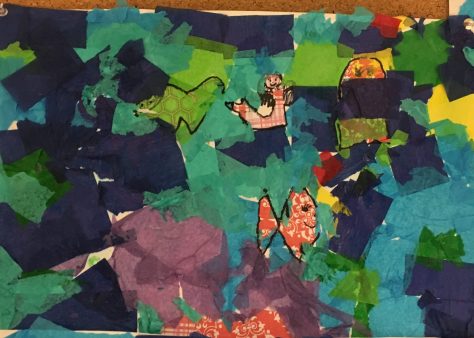
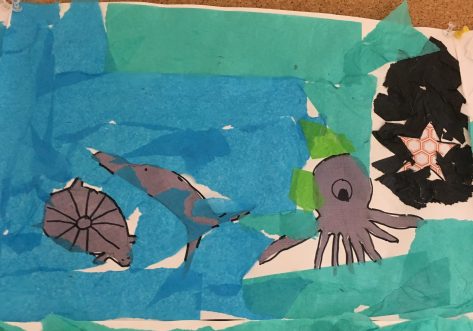
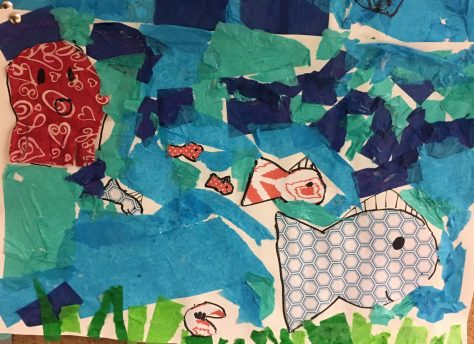
After watching the video with the children, I explained our under the sea themed collage. The children would draw and cut out sea creatures using scrap book paper and then the sea around it (or over the top if they preferred) would be made using a collage of tissue paper.
The children chose their paper , drew sea creatures of their choice, cut them out , drew features with a sharpie and stuck them onto their paper.
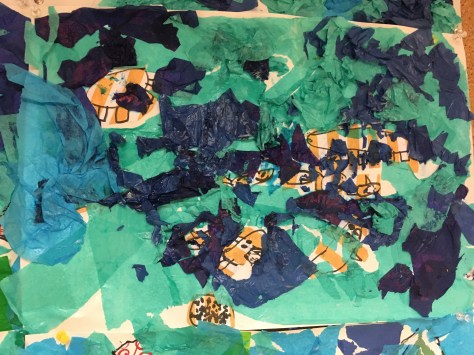
Following this the children added different colours of tissue by tearing it into strips or small pieces to make the Ocean. I showed them how they could put a thin layer over their creature to show it was under the sea and give it a shadowy effect or collage around the creatures.
Some children didn’t want to have sea creatures in their picture and instead chose to draw stones or shells.
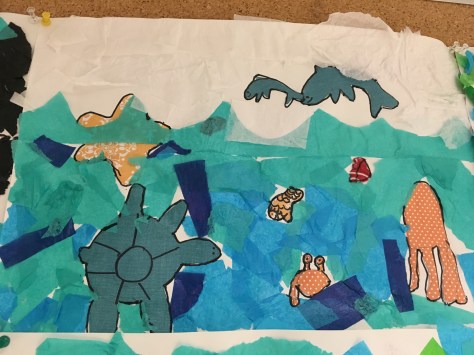
I explained that we would combine the pictures to make a complete under the sea scene. Some had clear ideas as to where their picture should fit into the display. This child for example asked if the dolphins could be jumping out of the ocean and used white tissue to make the foamy waves, her picture was placed at the top.
Once the pictures were dry, I coated them with modpodge. This gave them a varnished effect and helped loose bits of tissue to lay flat.
One observation I have made with this class is that often I come away feeling that some children have been so carried away with the process that the finished product feels rushed and very messy. I wish we could have a process session before making a product as I do with Kindergarten . However, my main observation is, even when I feel some children’s projects really will not come together properly, somehow they always do. Every child has a different idea (which I encourage) and somehow they all work in different ways in the end.
And once they were all put together they looked like this.
We have an art walk later in the year. I intend to add a 3-D art project to this piece and hang it, so it looks more complete.
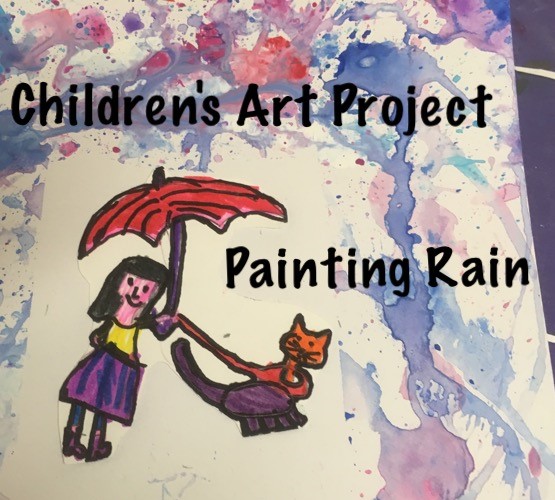
This month we were asked to create something for square one art using the theme of water. Square one art is an annual fundraiser to create an art project that prints onto mugs, key rings etc. Since it rains a lot here, I decided it would be apt to create a rain themed project.
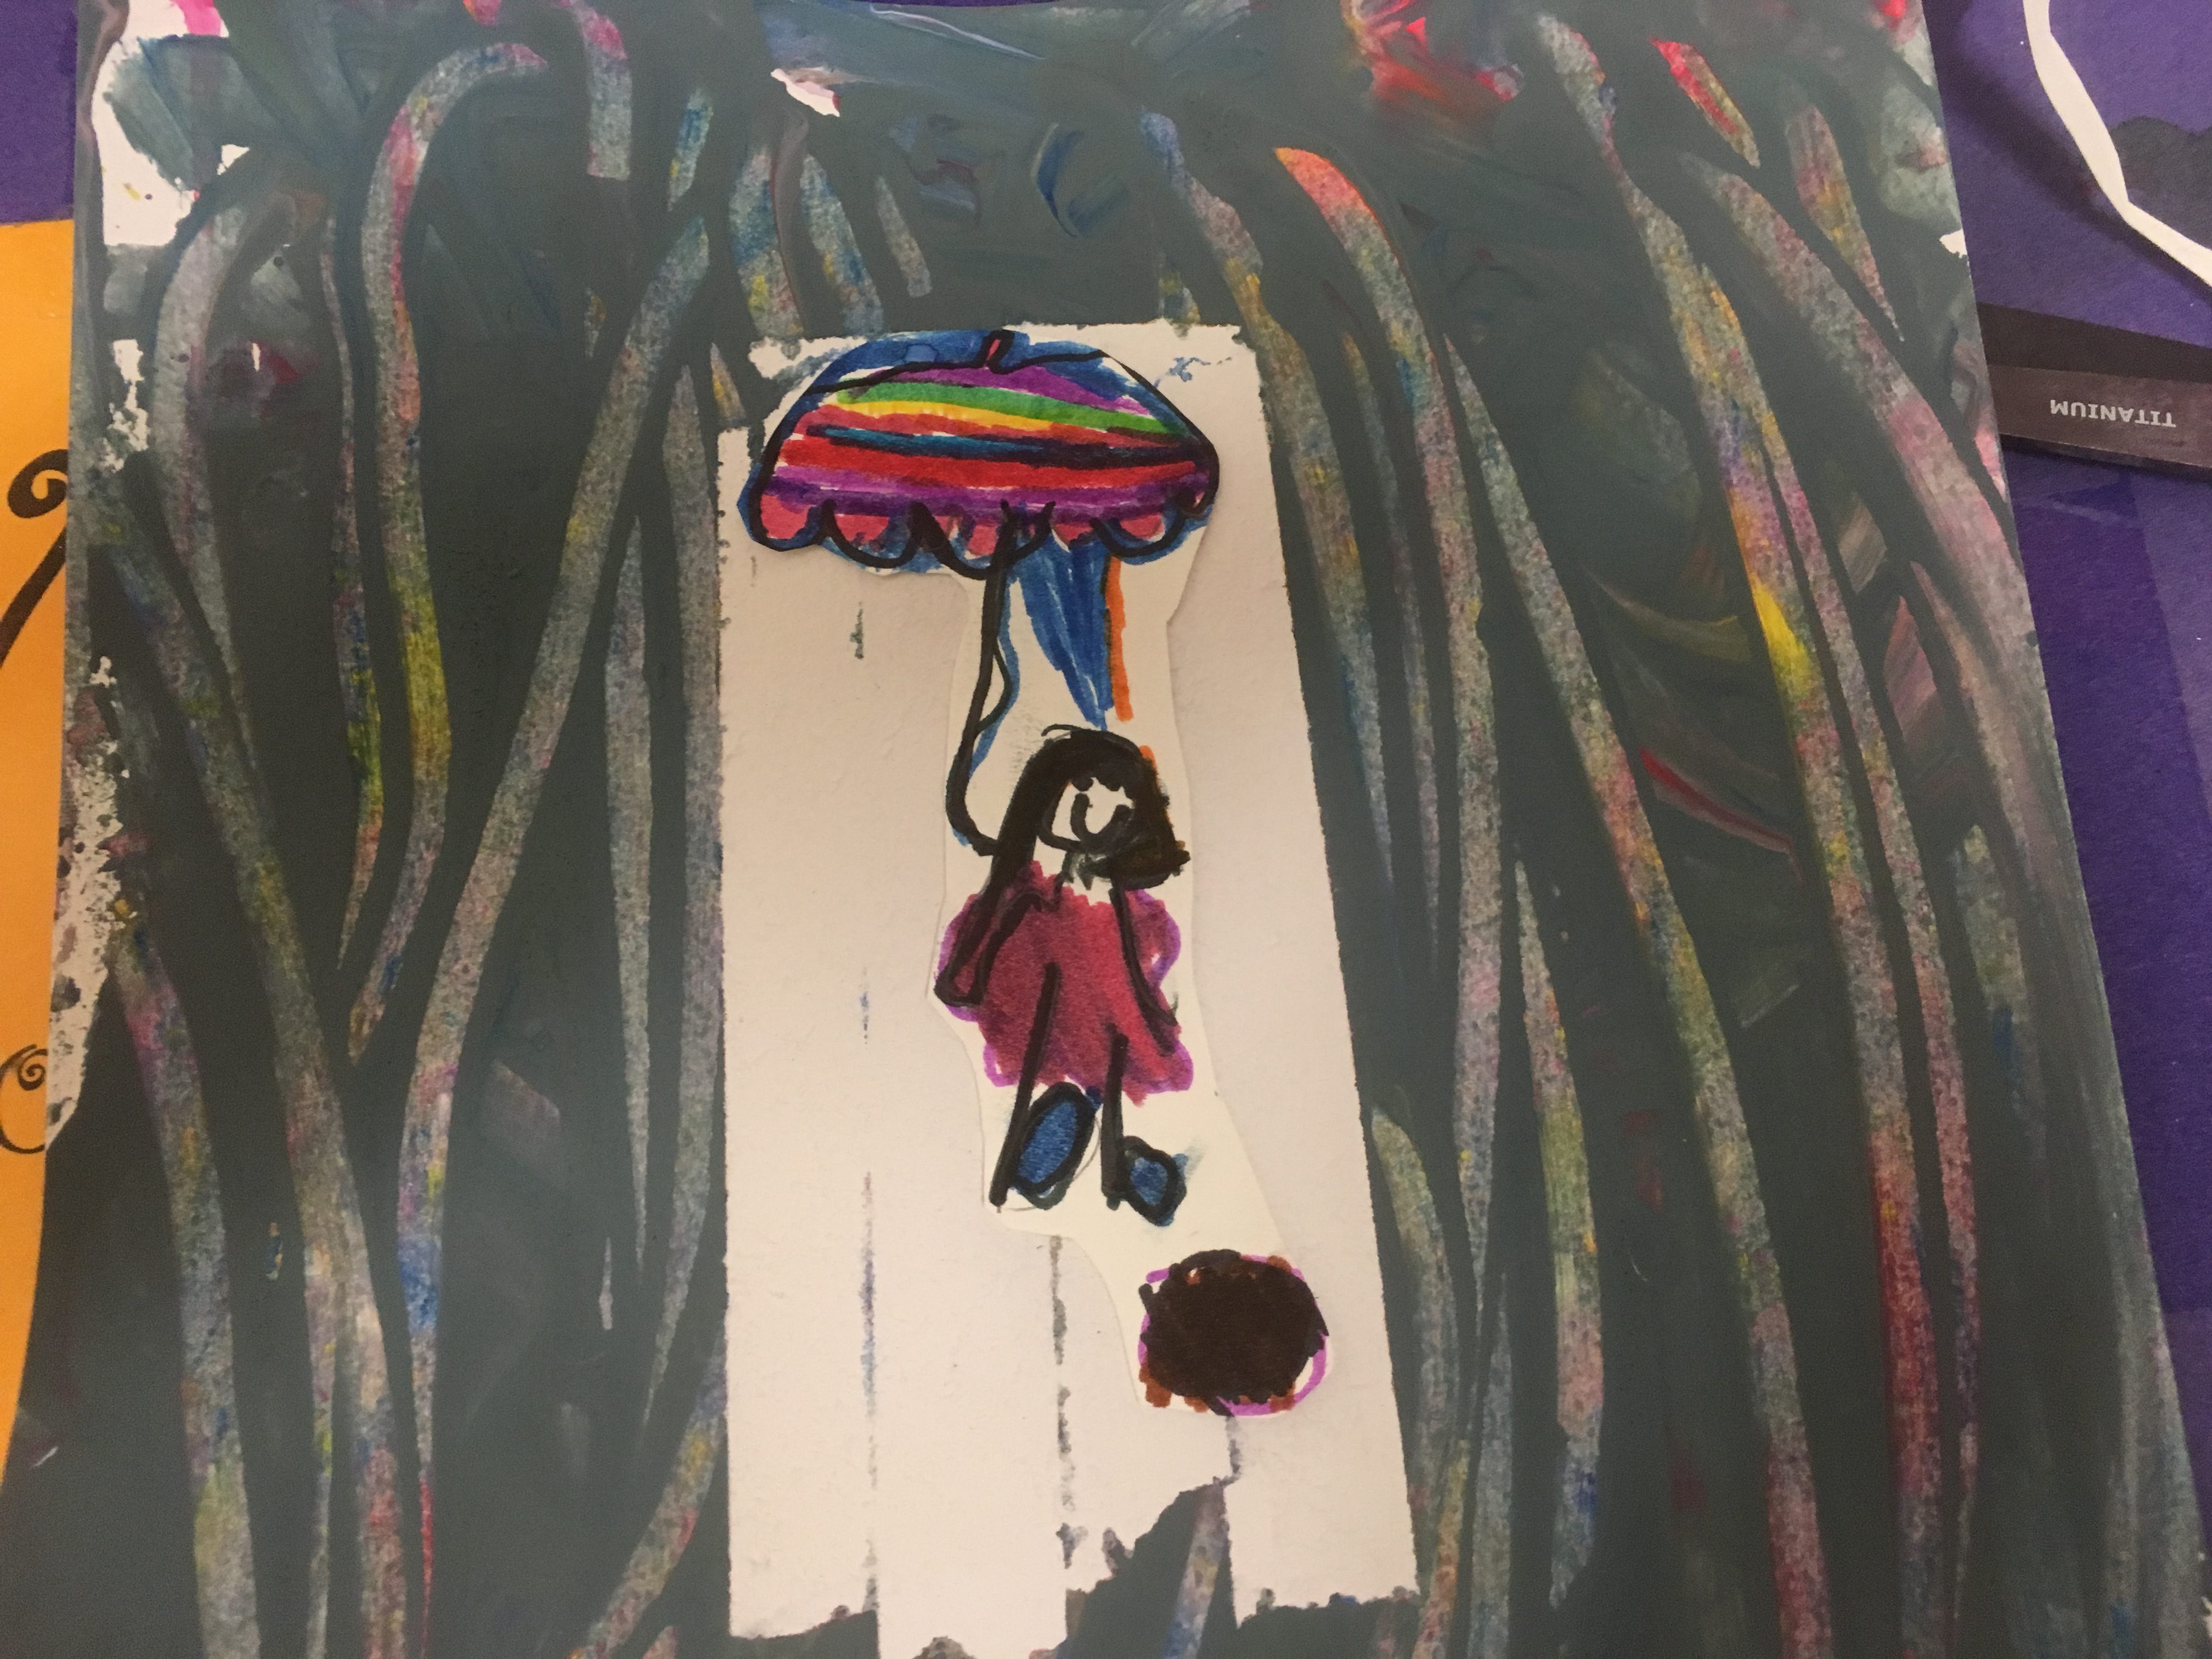
For square one, I always try to make something that is unique to each child and that parents will think is cute enough to persuade them to place an order. With this is mind, I decided to ask the children to draw a picture of themselves under an umbrella. The rain would be painted on top of the picture but the area under the umbrella would remain without any rain by marking it off with masking tape.
I collected images of rain paintings to show the children different ways of painting rain. Some showed rain dripping, others had splashes or fine sprays and some just had a mix of crazy colours in streaks.
I decided to practice rain painting techniques with kindergarten before creating the finished product. When I told my daughter we were painting rain she asked, “But how can you paint rain because rain doesn’t really have a colour? ”
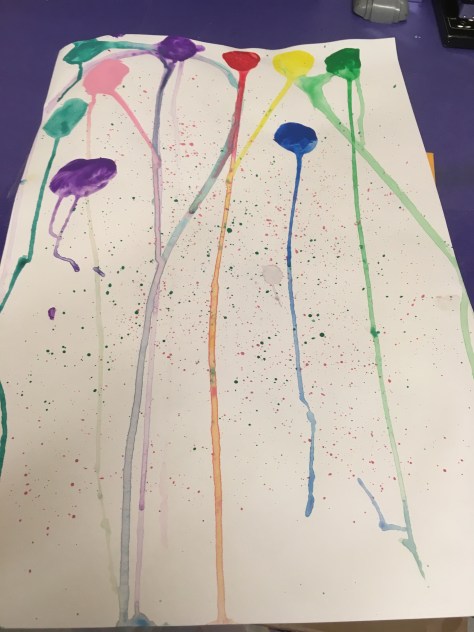
I started the lesson by showing the children pictures of rain paintings. We talked about some of the techniques and I demonstrated how to make paint drip down the page using a paintbrush and using a pipette/dropper. I also showed them how to flick the paintbrush to make a fine mist that looked like a rain shower.
Each child had the following materials:
watercolour paper
a pallet with tempura paint colours
a pot of water
a paintbrush
a dropper
The children went away to practice. They tested different ways to make the paint drip. Some made their paintbrush really wet and then dipped it into the palate.
Some painted a splodge of colour at the top of their paper and then used the dropper to add water to make it drip.
Some found it worked well if they painted splodges all over the paper and then added water with the dropper.
Some used a combination of techniques.
and some did completely their own thing.
When I came to do the project with 2nd Grade, we didn’t have practice time. I decided to water down the tempura paint in advance and give each table pots to share.
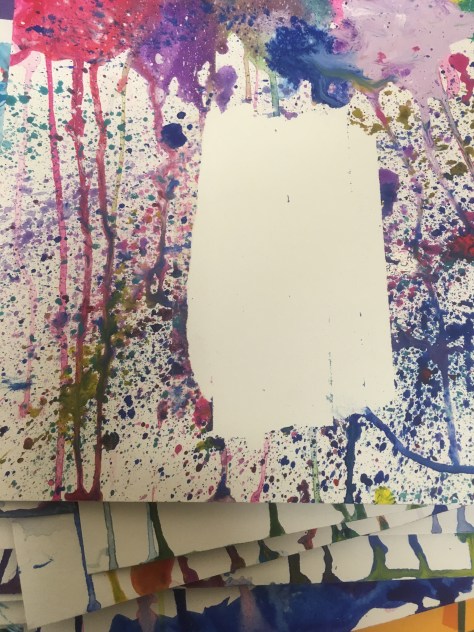
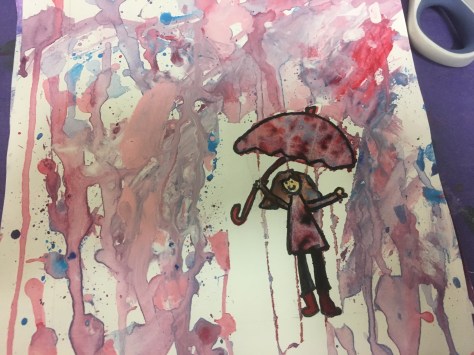
The 2nd graders started by drawing a picture of themselves under an umbrella. I marked out a border so that the drawings wouldn’t be chopped off. I think with hindsight I would also have drawn a square within which the children should fit their pictures as some of them were a bit small. We then taped over the pictures with masking tape and then dripped and splattered paint to make rain. The 2nd graders loved the drippy part as much as the kindergartners and some were a little over zealous.
The next day when I came back to remove the tape from the dry paintings some of them needed to be fixed because the colours from their drawings had bled.
Some I was able to fix myself by re-colouring them but some needed to be painted over with white acrylic and the children coloured them in again or in some instances re-drew the whole picture.
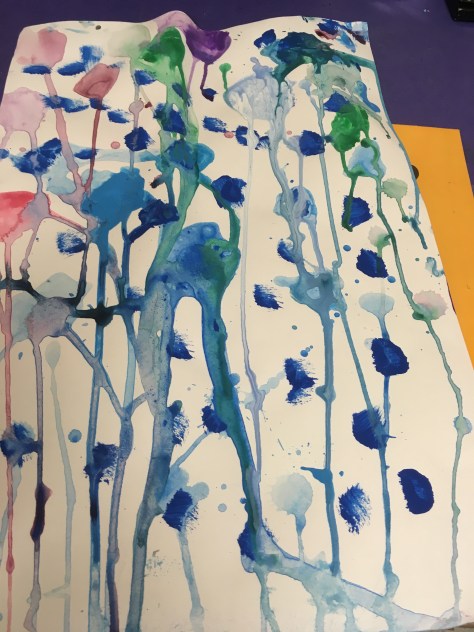
The kindergartners had already drawn their pictures on a small piece of paper. When I prepared their project, I decided to measure the pictures and then place masking tape over an area of the same size. We could then create the rain picture, remove the masking tape when dry and stick on the picture, hopefully avoiding any colour bleeding.
I showed the kindergartners some of the 2nd grade pictures to show how they had chosen to paint rain and how they might be improved. We saw that the paintings needed to have paint all around the masking tape for them to clearly show them sheltering under the umbrella. We also discovered that too much paint sometimes didn’t leave a perfectly clear area; although in some cases this left an interesting effect, like rain dripping from the umbrella.
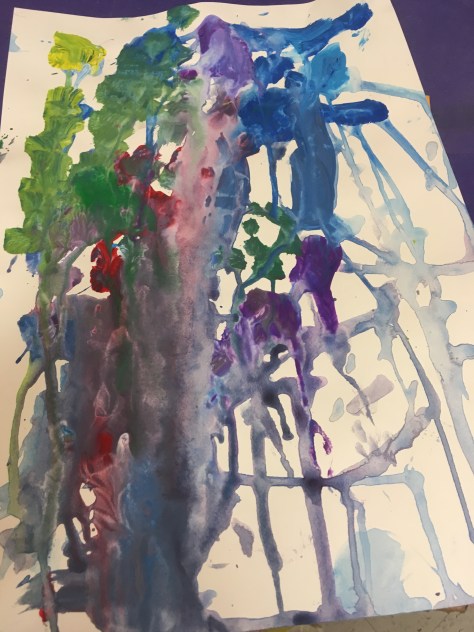
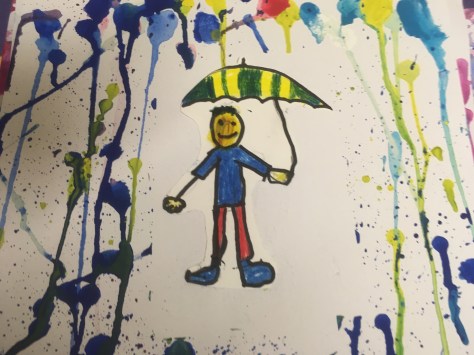
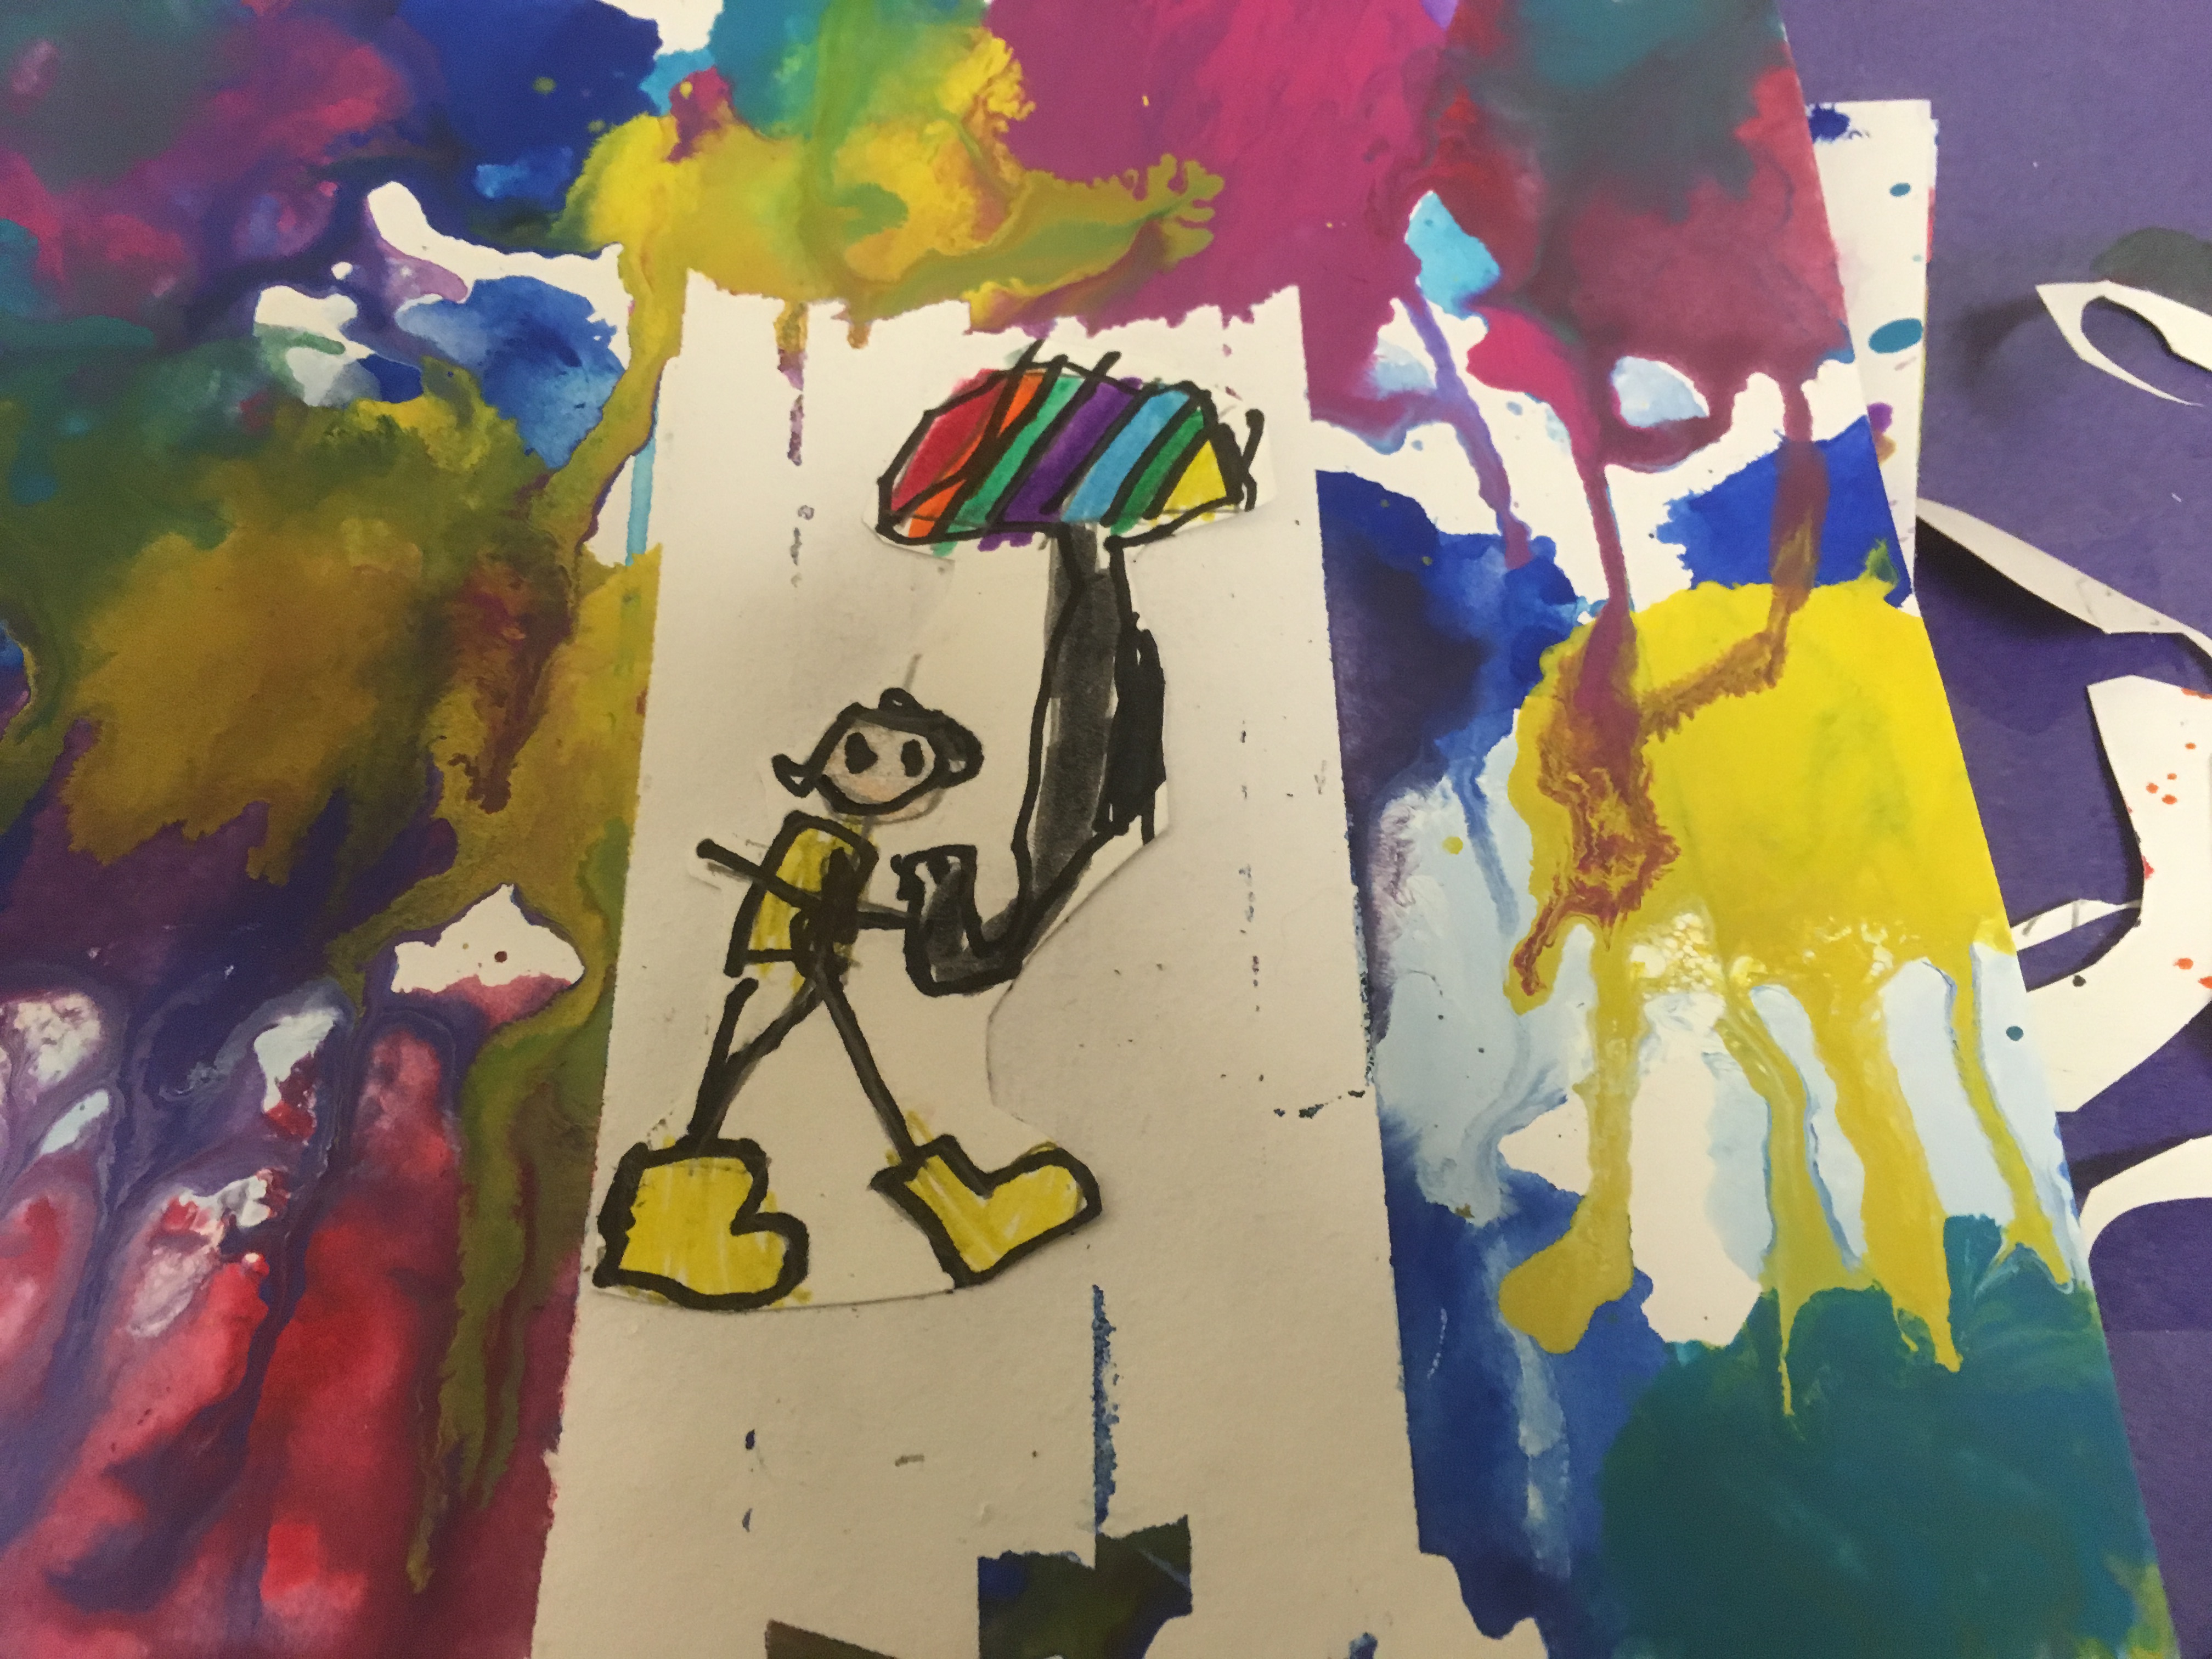
I watered down the paints and showed the children how to put the paint at the top of the paper and let it drip. It was important that they made their brushes really wet before dipping them in the paint as this helped it to drip. Having experimented with painting rain beforehand, the children had clear ideas of how they would like their rain to look. I added a yellow paint to the kindergartners colour choices, the 2nd graders had shades of red, blue and purple. Some children mixed a green shade.
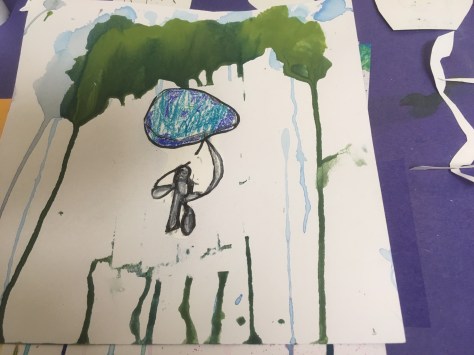
I love this one. It looks like a big gloomy rain cloud above his head.
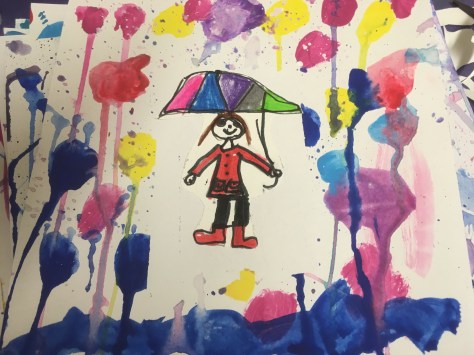
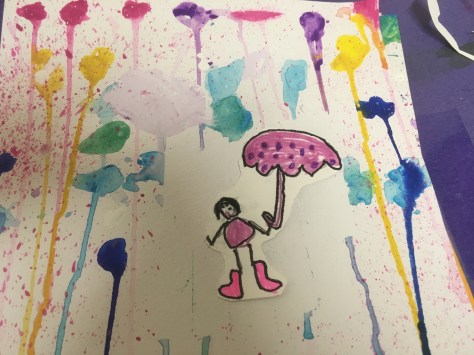
The 2nd grade rain pictures were more experimental as the children explored the materials, whereas the practice session enabled the kindergartners to be more precise and have a clearer picture of the finished product. Each child found their own way to depict rain. Some used all the colours,
Some chose their own colour scheme,
Some used individual dots dripping down,
others spread paint along the top and let it drip.
Some added lots of paint splatters by flicking the brush,
Others used a lot of water to make softer colours and spread them with the brush, creating the effect of rain blowing.
One child wanted to spread paint all over the picture and made the rain by running her finger through it to make lines.
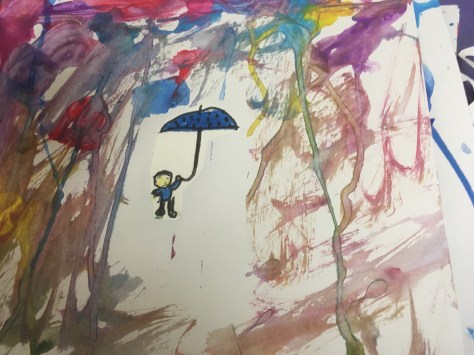
The kindergarten pictures were much brighter than the 2nd grade ones. My personal favourite is this one. I love the big splashes of colour in a heavy downpour, in contrast to the person walking in safety under his umbrella.
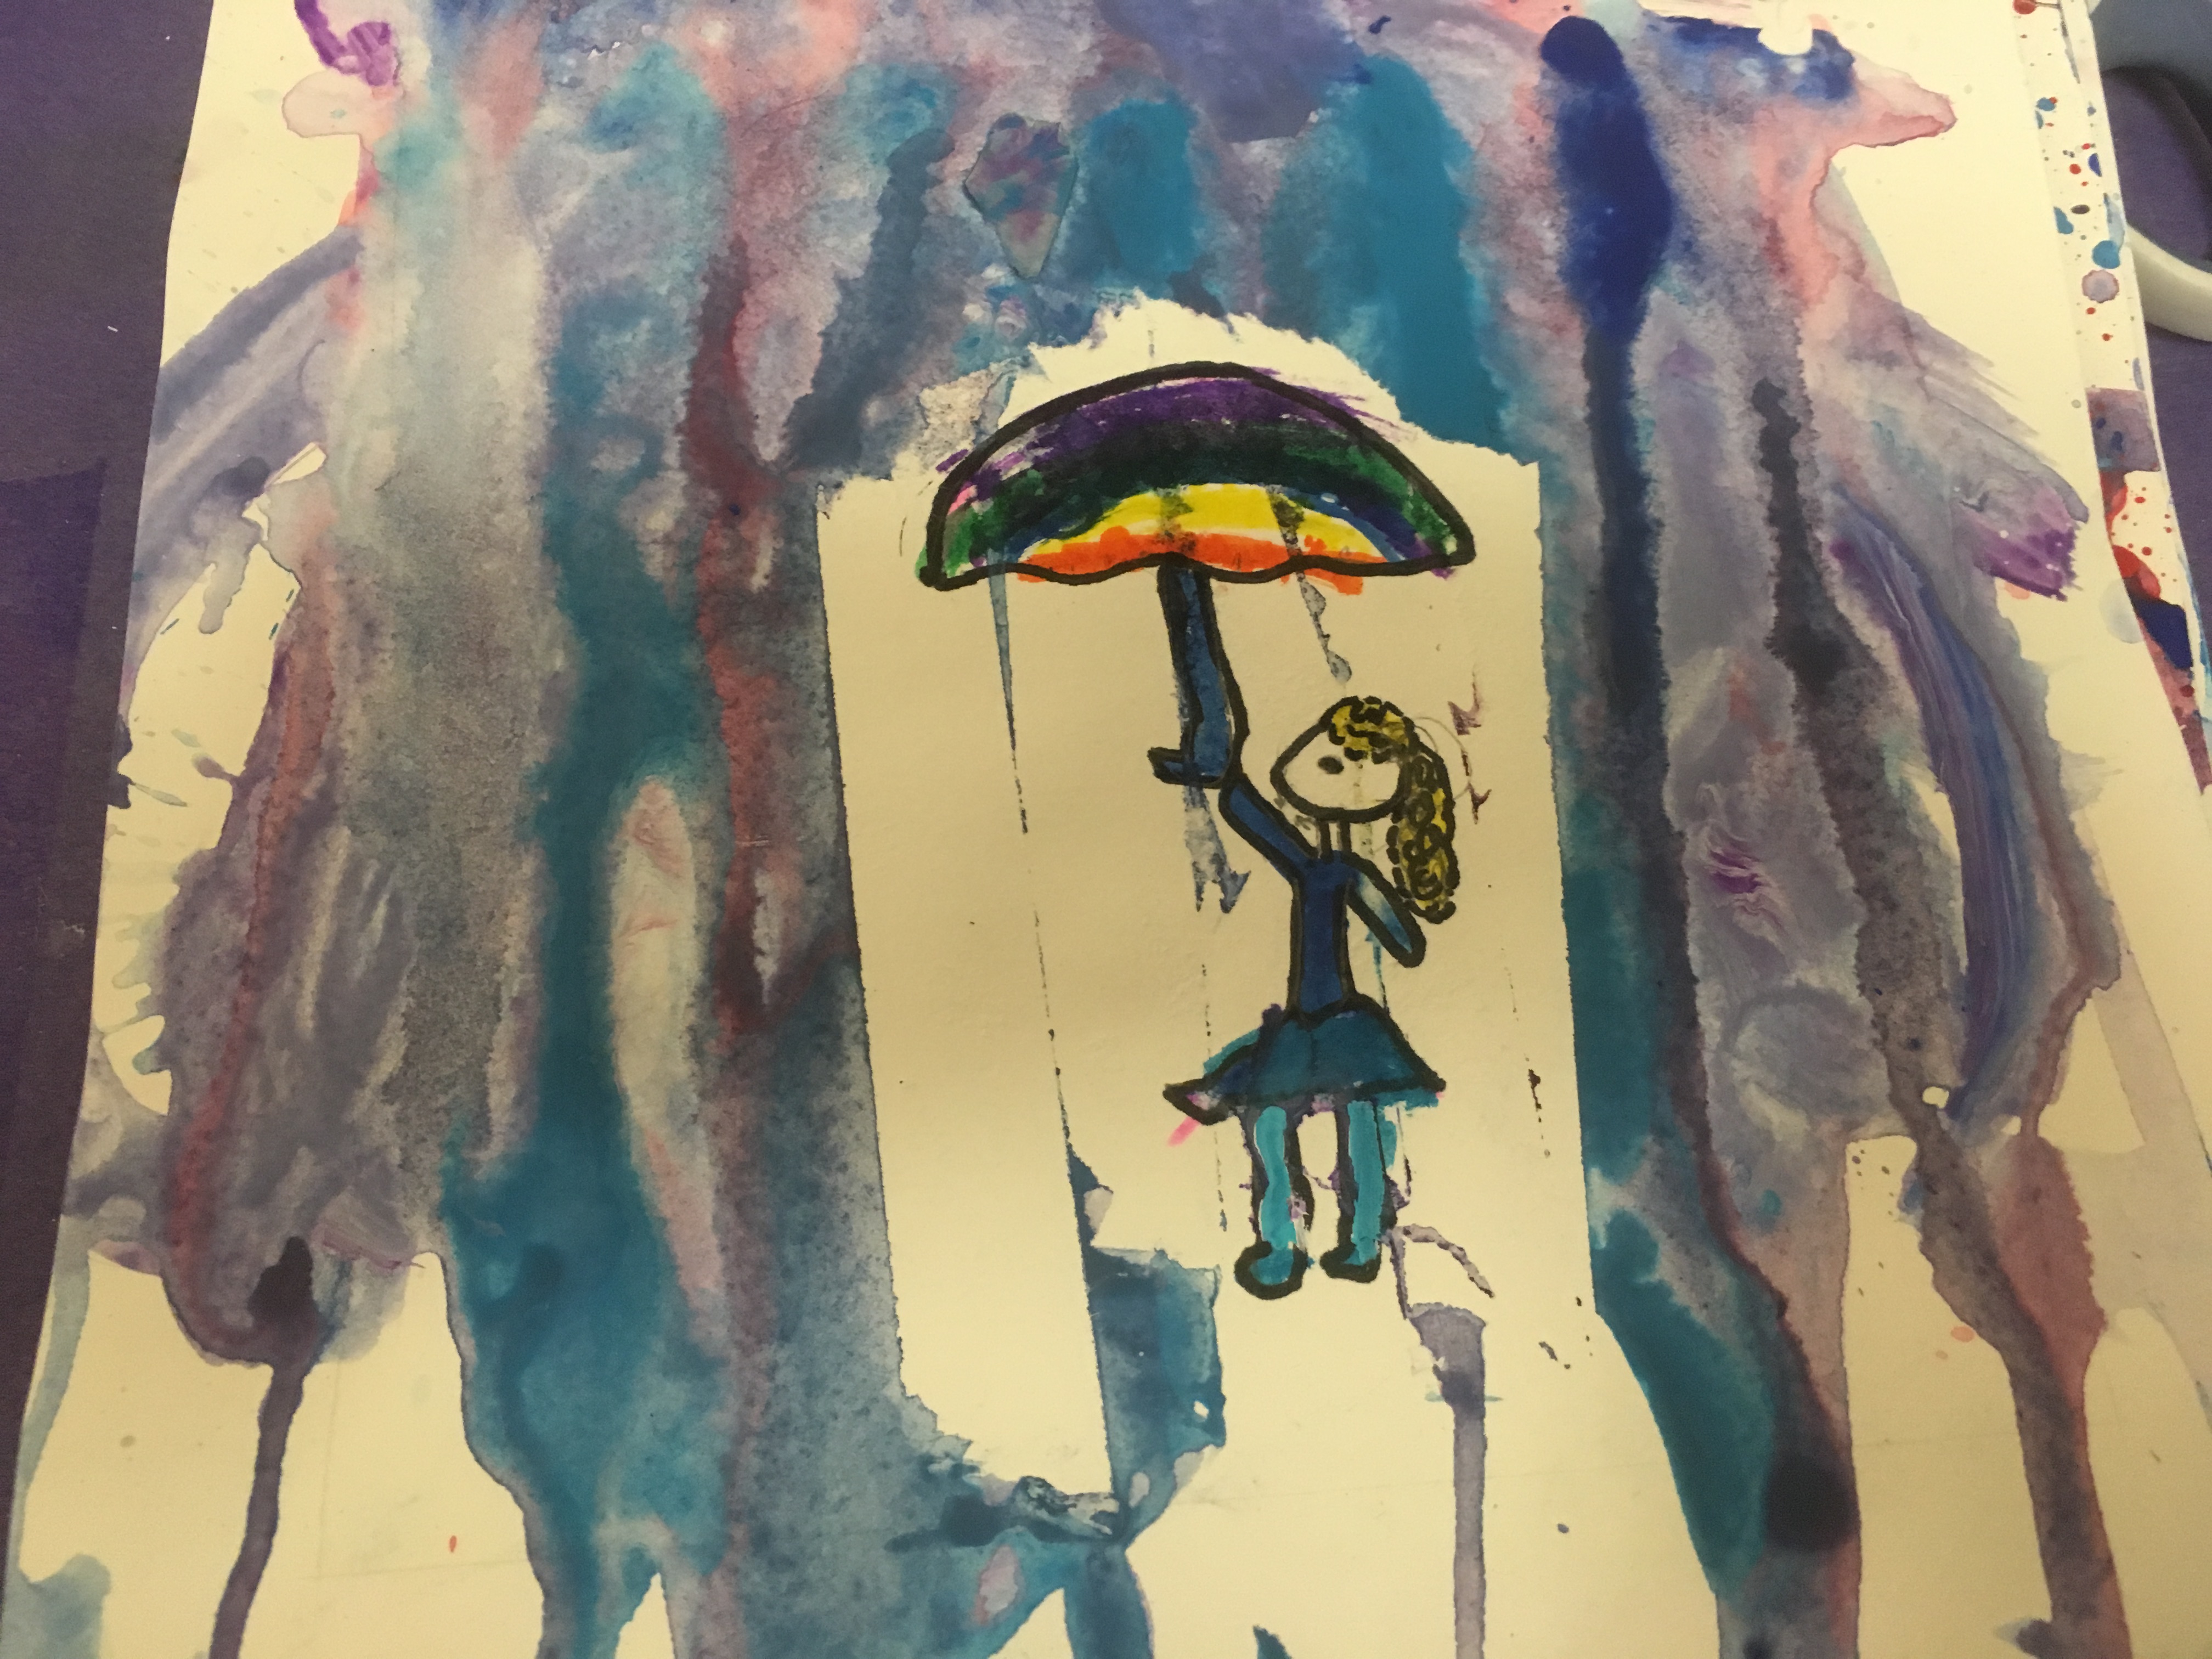
The colour choices, use of droppers and the volumes of paint make the 2nd grade pictures darker and more intense like that of a grey, winters day with heavy rain.
The Kindergartners are more akin to spring showers.
Perhaps a cool project would be to test out different techniques and colours to make a display of rain through the seasons.
I’m always frustrated by the infrequency of my art sessions. I can already see the progression and probing questions that might make this into an extended project.
How does the use of different colours change the way we see the rain?
What colours would you choose for winter rain, tropical rain or a spring rain shower? Test out your ideas.
Does the texture of the paint and how much water we add change the type of rain we paint?
How does the size of the brush alter the painting.
Try other ways of painting rain, use sponges, droppers/pippettes, cotton balls and what else can you suggest.
Make a giant collaborative painting of rain – what can you drop onto paper to make a splash?
How can we paint a heavy rainstorm?
What would happen if we tried a different type of paint?
Do you like rain? What colours would you use to show that you didn’t like rain? What colours would you use to show rain is fun?
Think about all the different types of rain you have in your area, are they the same or different? How would you paint each type to show the differences?
Make a list of rain adjectives or similes under the title ‘Rain is'(particularly after spending time in the rain) – choose one and paint a picture to illustrate the description.
Look in a large puddle. What do you see? Can you try to draw/paint it?
And that’s just the art – the possibilities for other areas of learning is endless. Perhaps you’d like to use my pictures as a springboard for an extended rain project? I’d love to see the results if you do.
December’s Art project with Kindergarten and 2nd Grade was a still life Poinsettia using oil pastel. The Kindergarteners had only used chalk pastel up until now, so our first lesson introduced them to oil pastel techniques.
The children were given a selection of oil pastels and a piece of paper and asked to try them out and think about how they might be different to the chalk pastels we used in the previous session.
Here are some of their observations.
The colours are brighter and you can press harder.
When you press hard it gets softer and easier to mix
They are like crayons
It didn’t blend across the colours like the chalk pastels but it worked when you put one colour on top of another.
You can blend chalk pastel with your finger. You can still blend with oil pastel but it is harder.
I can add white to blue to make light blue.
I showed them how to blend the pastels using baby oil and a Q-tip/cotton bud. the children practised making pictures using the blending technique.
I can colour just a little bit with oil pasteland then use the oil on my Q tip to fill in the rest – it makes a lighter color.
It looks like paint when we add oil to the pastels, it makes it smoother
You can use the Q tip like a paint brush
If you use too much oil it rubs the color away.You need just a little bit to blend.
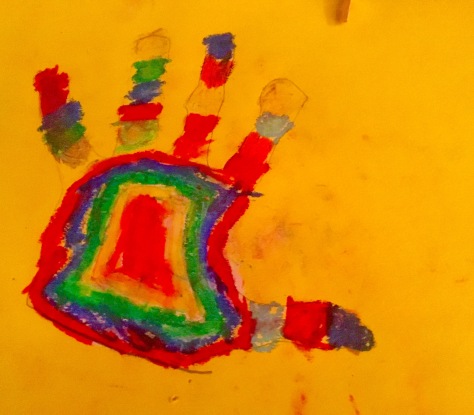
I gave them another piece of paper and they drew around their hand using pencil. They then coloured the hand in stripes using the oil pastels. The colours were blended using oil. We painted the background with liquid water-colour. They thought it was very cool that the pastels repelled the paint.
Still Life
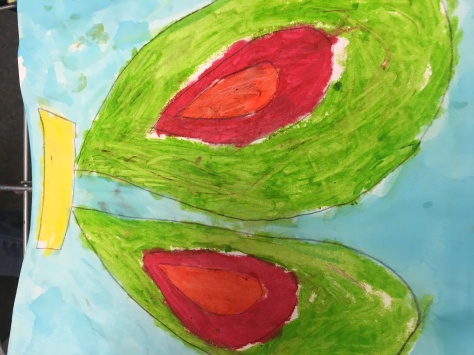
For the follow-up session and with the 2nd Graders who are familiar with oil pastels, I chose a still life drawing of a Poinsettia. The Kindergartners haven’t followed a project inspired by an artist, so I asked for suggestions of still life oil pastel artists on a Reggio-inspired Facebook group. After a bit of research, I decided upon Georgia O’Keefe. I liked the way that O’Keefe draws flowers but doesn’t always focus on the whole plant. I felt that if we looked at examples of her work as inspiration, the children could choose to zoom in on one part of the flower,if they didn’t feel confident enough to tackle the whole thing.
I limited the oil pastel colours to shades of red and green, black for shade and yellow and white for highlights. The children drew the picture with the pastels and then blended using oil. The final touch was painting the background with liquid watercolour.
Since the children hadn’t done anything like this before, I was aware that they may find it challenging. To start the lesson we read ‘Ish’ by Peter Reynolds. This is the story of a boy who gives up drawing in frustration because his pictures do not look like the real thing. His sister persuades him to look at his pictures in a new light, as tree-ish, afternoon-ish and vase-ish . I wanted the children to understand that this was not an exercise in replicating exactly the plant in front of them because each of us view it differently. My aim was for the children to study the plant and replicate it in their own way. I think we achieved that aim perfectly.
Kindergarten Class
Interestingly the Kindergartners were less anxious about the task than the 2nd graders, who found it hard to decide which part to draw and spent a lot of time considering how to make the shapes. A few children needed a lot of encouragement and support to make their own marks on the paper.
2nd Grade Class
I love how different they all are. The Kindergartners really focused on the shapes of the leaves and the 2nd graders paid more attention to the details in the leaves and petals and were more abstract with their use of colour. I’m really impressed with the finished results and it was a really valuable exercise to see how differently we all see things.
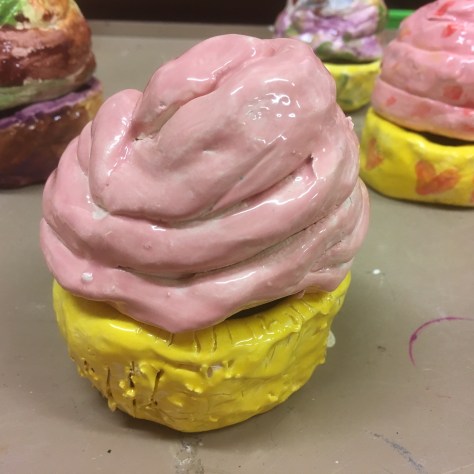
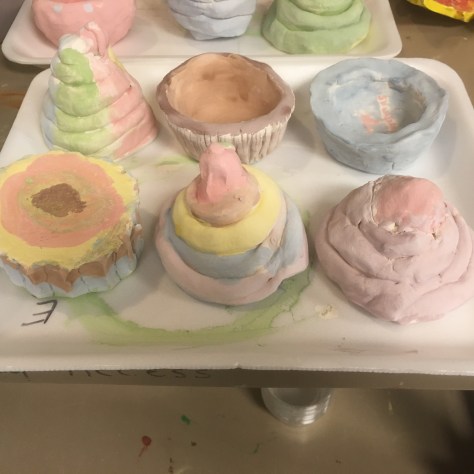
Wayne Thiebaud is an American artist, known for his paintings of everyday objects. These include many works depicting food; in particular, cakes, pies and pastries. For our second grade clay project, we used Thiebaud’s cupcake paintings as inspiration for teaching two basic techniques for making pots.
The base of the pot was a simple thumb pot and the lid a coil pot.
Preparation
Each child was given two pieces of clay, a selection of clay tools and a damp sponge in a pot, all laid on a slightly damp cloth.
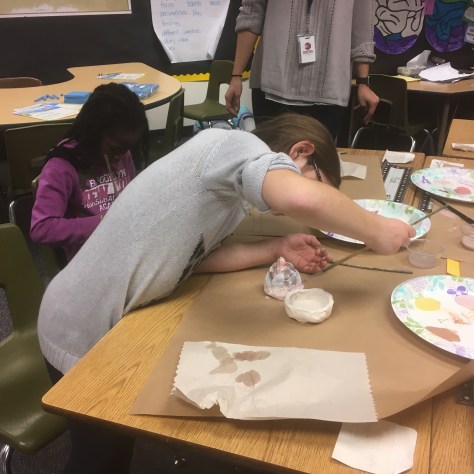
Step 1.
Take one of the balls of clay and knead it to get rid of any air bubbles. Then press thumbs into the centre to make a hole.
Step 2
Push thumbs outwards to make a pot shape.
Step 3
Smooth fingers around the top edge to make it flat and even.
Step 4
Carve patterns into the bowl. Some children made lines to make it look like a cupcake case and others chose their own designs or carved names into the sides.
The coil pot lid
The base was put to one side and the second piece of clay kneaded to make the lid. The lid was coiled to look like frosting.
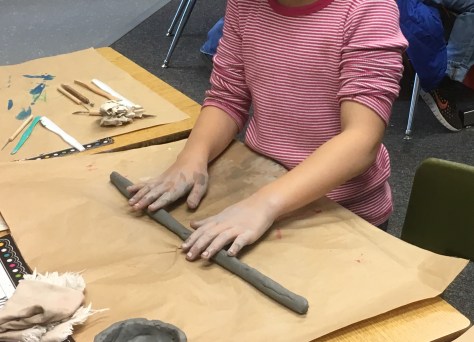
Step one
Shape the clay into a cylinder with your hands and roll it on the mat until it makes a large sausage shape to equal the length of the mat.
Keep moving hands along the length of the clay to avoid thin parts that will break off. The paper moved around a bit so it was helpful to have their partner hold their mat down whilst they rolled.
Step 2
Measure the sausage around the top of the thumb pot. Keep coiling, sloping the sides inwards until it closes at the top. Add a clay cherry, if desired.
Step 3
Dampen the inside of the coil pot with a sponge and rub your fingers over the joins on the inside, until the surface is smooth. This will stop it collapsing and falling apart.
Fire in the kiln
Session 2 :The Glaze
I showed the children pictures of Thiebaud’s cupcakes for inspiration.
The glaze colours were selected to match those used in Thiebaud’s paintings. Pastel shades, along with red for the cherries and brown for chocolate.
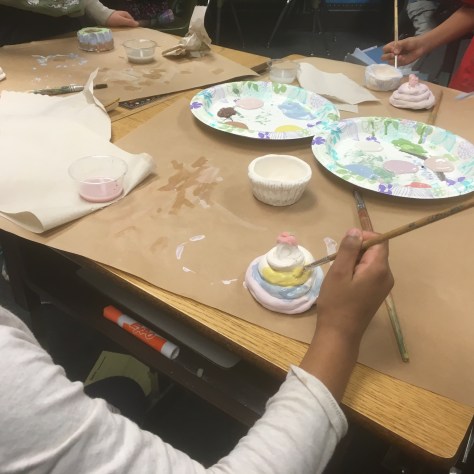
Each table had a paper plate with a selection of glaze colours on it and every child was given a fine and a thick paintbrush, a pot of water and a paper towel.
They applied two layers of glaze, being careful not to leave white spaces.
The finished results were pale and matt. I explained that the colours would become vibrant and glossy once they had been fired.
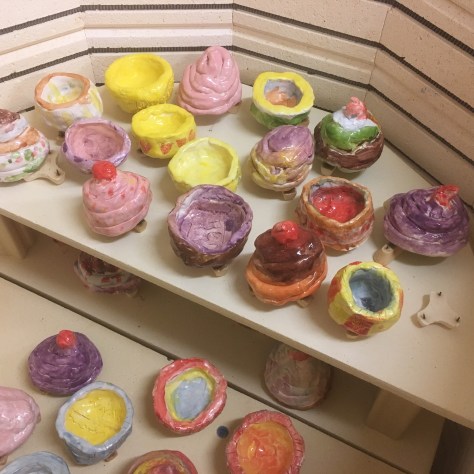
The Finished Results
The glazed pots are placed on stilts when fired in the kiln, so they don’t stick to the shelves.
I love the results. I think they will make a perfect Christmas gift.


 This week we have been painting pebbles. We used a mixture of our own designs and some that we found online. The ones that we liked we sprayed with mod podge so that the rain wouldn’t wash them away.
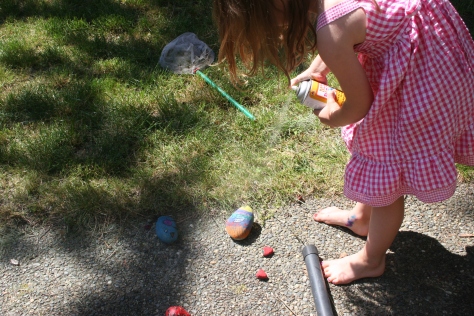


 Some I was able to fix myself by re-colouring them but some needed to be painted over with white acrylic and the children coloured them in again or in some instances re-drew the whole picture.


 December’s Art project with Kindergarten and 2nd Grade was a still life Poinsettia using oil pastel. The Kindergarteners had only used chalk pastel up until now, so our first lesson introduced them to oil pastel techniques.